
Microsoft Purview includes a Human Resources (HR) connector that ingests resignation data, enabling Insider Risk Management to automatically identify departing employees as potential insider threats.
In this technical guide, we will implement the HR data connector that feeds resignation data into Insider Risk Management. This enhances the ‘Data theft by departing users’ policy template, one of the most critical use cases for protecting against employees who resign and attempt to exfiltrate organizational data.
Table of Contents
- Understanding the Architecture
- Pre-Requisites
- Step 1: Prepare the CSV File
- Step 2: Create Microsoft Entra ID Application
- Step 3: Configure the HR Connector in Purview
- Step 4: Upload HR Data with PowerShell
- Conclusion
Disclaimer: This blog post is provided for informational purposes only. While every effort has been made to ensure accuracy, implementation of these features should be performed by qualified administrators in accordance with your organization’s security and change management policies. The author is not responsible for any issues, data loss, or security incidents that may occur from following this guidance. Always test in a non-production environment first and consult official Microsoft documentation before implementing security features in production.
Understanding the Architecture
Before diving into implementation, it is important to understand Microsoft’s architectural choice. Unlike Microsoft Entra ID provisioning, which offers direct API connectors, the Microsoft Purview HR connector operates exclusively through CSV file uploads.
This is not a limitation, it is a security design decision:
- Air-gapped security: No direct connection between production HR systems and compliance platforms
- Privacy control: Organizations maintain full control over which HR data is exported
- Universal compatibility: Any HR system can export CSV, regardless of API capabilities
The workflow is straightforward: HR system → CSV export → PowerShell upload script → Purview HR Connector.
Pre-Requisites
Before starting implementation, ensure you have:
- Licensing: Microsoft 365 E5 or Purview Suite
- Permissions: Data Connector Admin role in Microsoft Purview
- Entra ID: Application Administrator or Cloud Application Administrator role
- Network: Firewall allowlist for webhook.ingestion.office.com
- HR Access: Ability to export employee resignation data from your HR system
Step 1: Prepare the CSV File
The HR connector for employee resignations requires three critical data points: the user’s email (UPN), resignation date, and last working date. Here is what each field means:
- UserPrincipalName: The user’s Microsoft Entra ID UPN (typically their email)
- ResignationDate: When the employee formally resigned or was terminated (ISO 8601 format)
- LastWorkingDate: The employee’s final day of work (must be within 6 months prior to 1 year future)
Sample CSV format:
UserPrincipalName,ResignationDate,LastWorkingDatejohn.doe@thalpius.com,2026-02-14T09:00:00Z,2026-02-28T17:00:00Zjane.smith@thalpius.com,2026-03-10T14:30:00Z,2026-03-31T17:00:00ZSave your CSV file to a location accessible by the PowerShell script you will run in Step 4. For this guide, we will use:
C:\HRConnector\employee_resignations.csv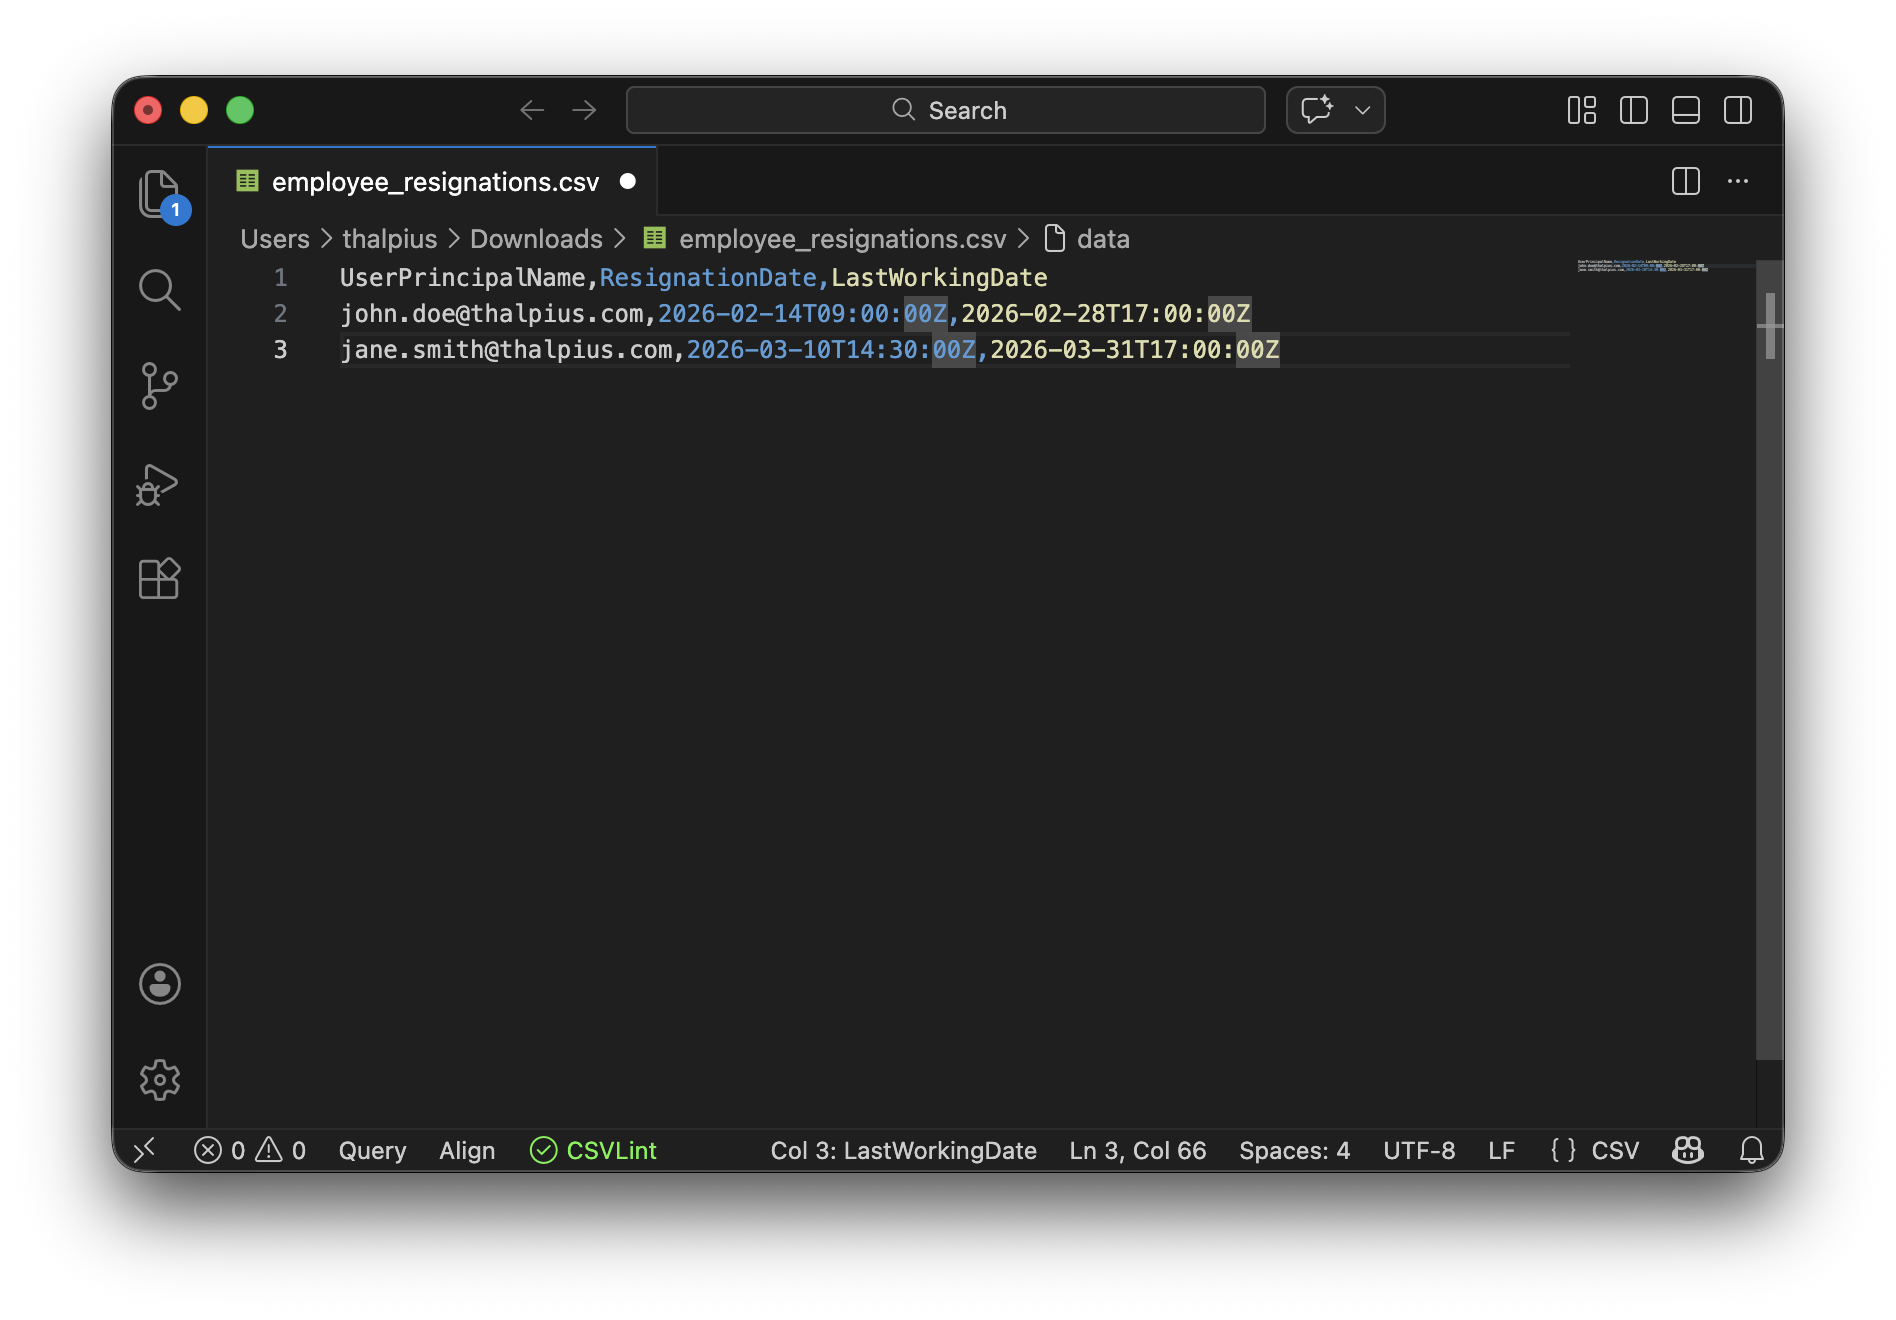
Step 2: Create Microsoft Entra ID Application
The HR connector uses a Microsoft Entra ID application for authentication. This app represents the automated script that will upload HR data, and Microsoft Entra ID uses it to verify the script’s identity when accessing your tenant.
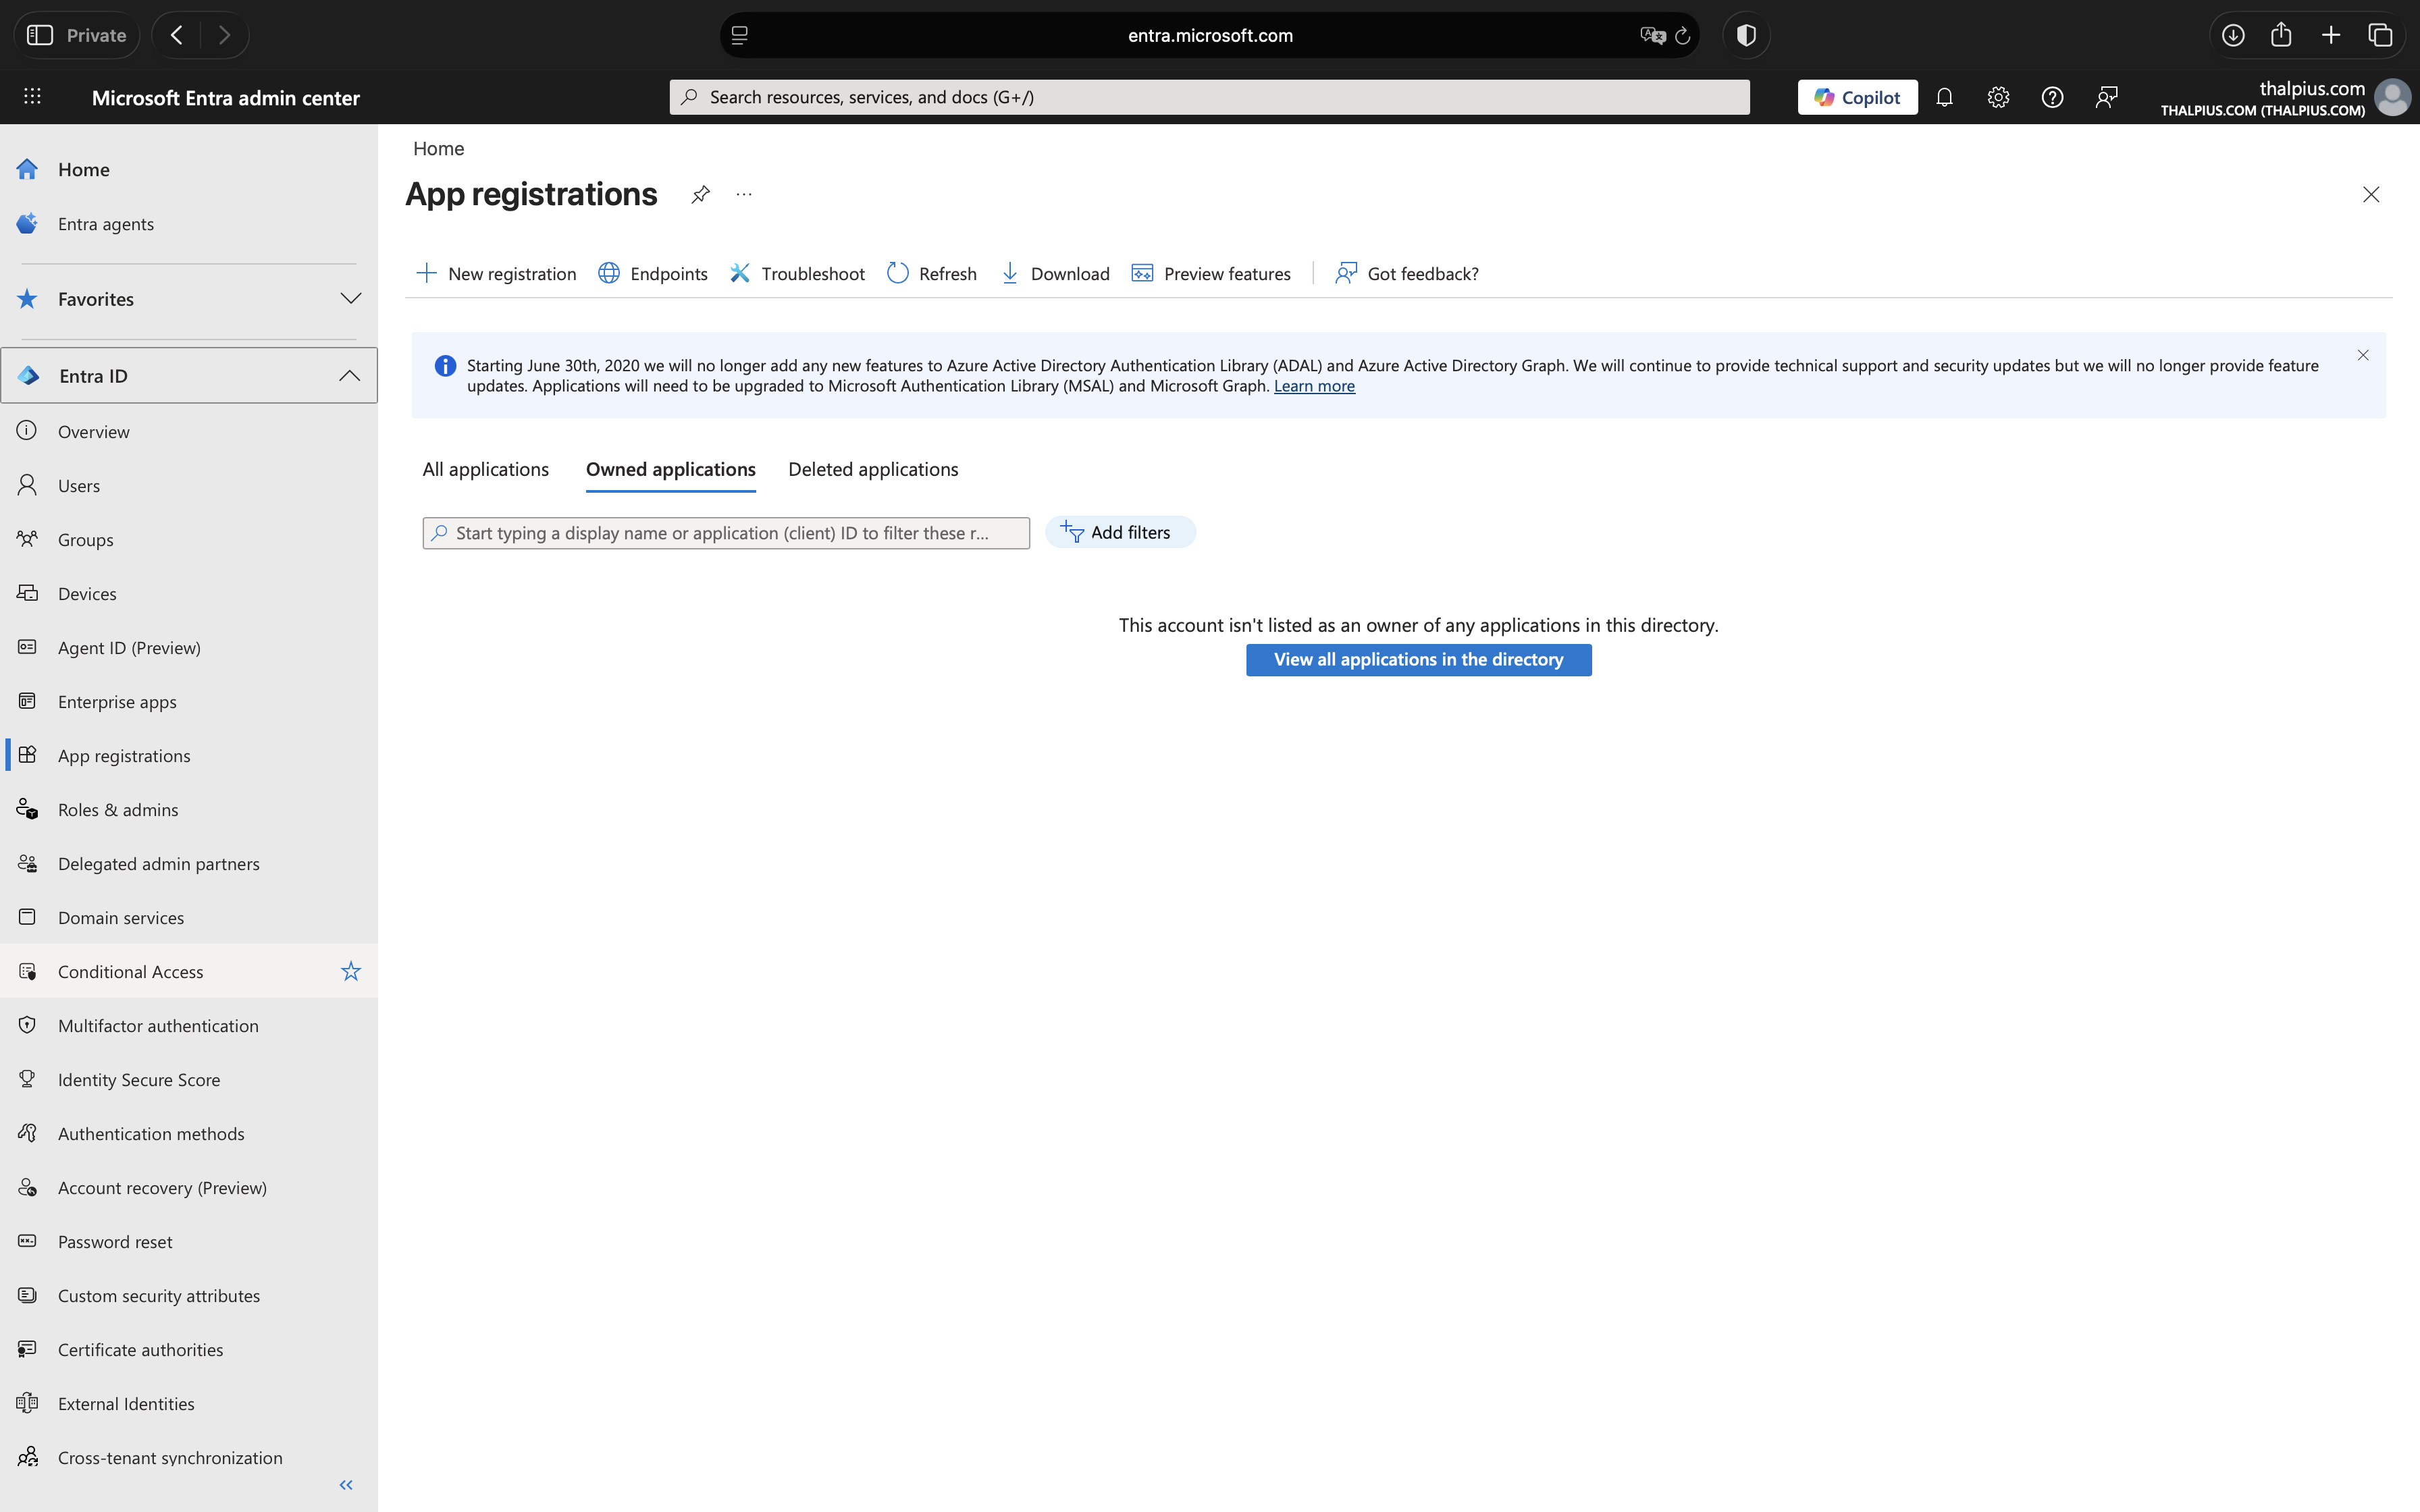
1. Navigate to Entra Admin Center
Open entra.microsoft.com and navigate to: Entra ID > App registrations
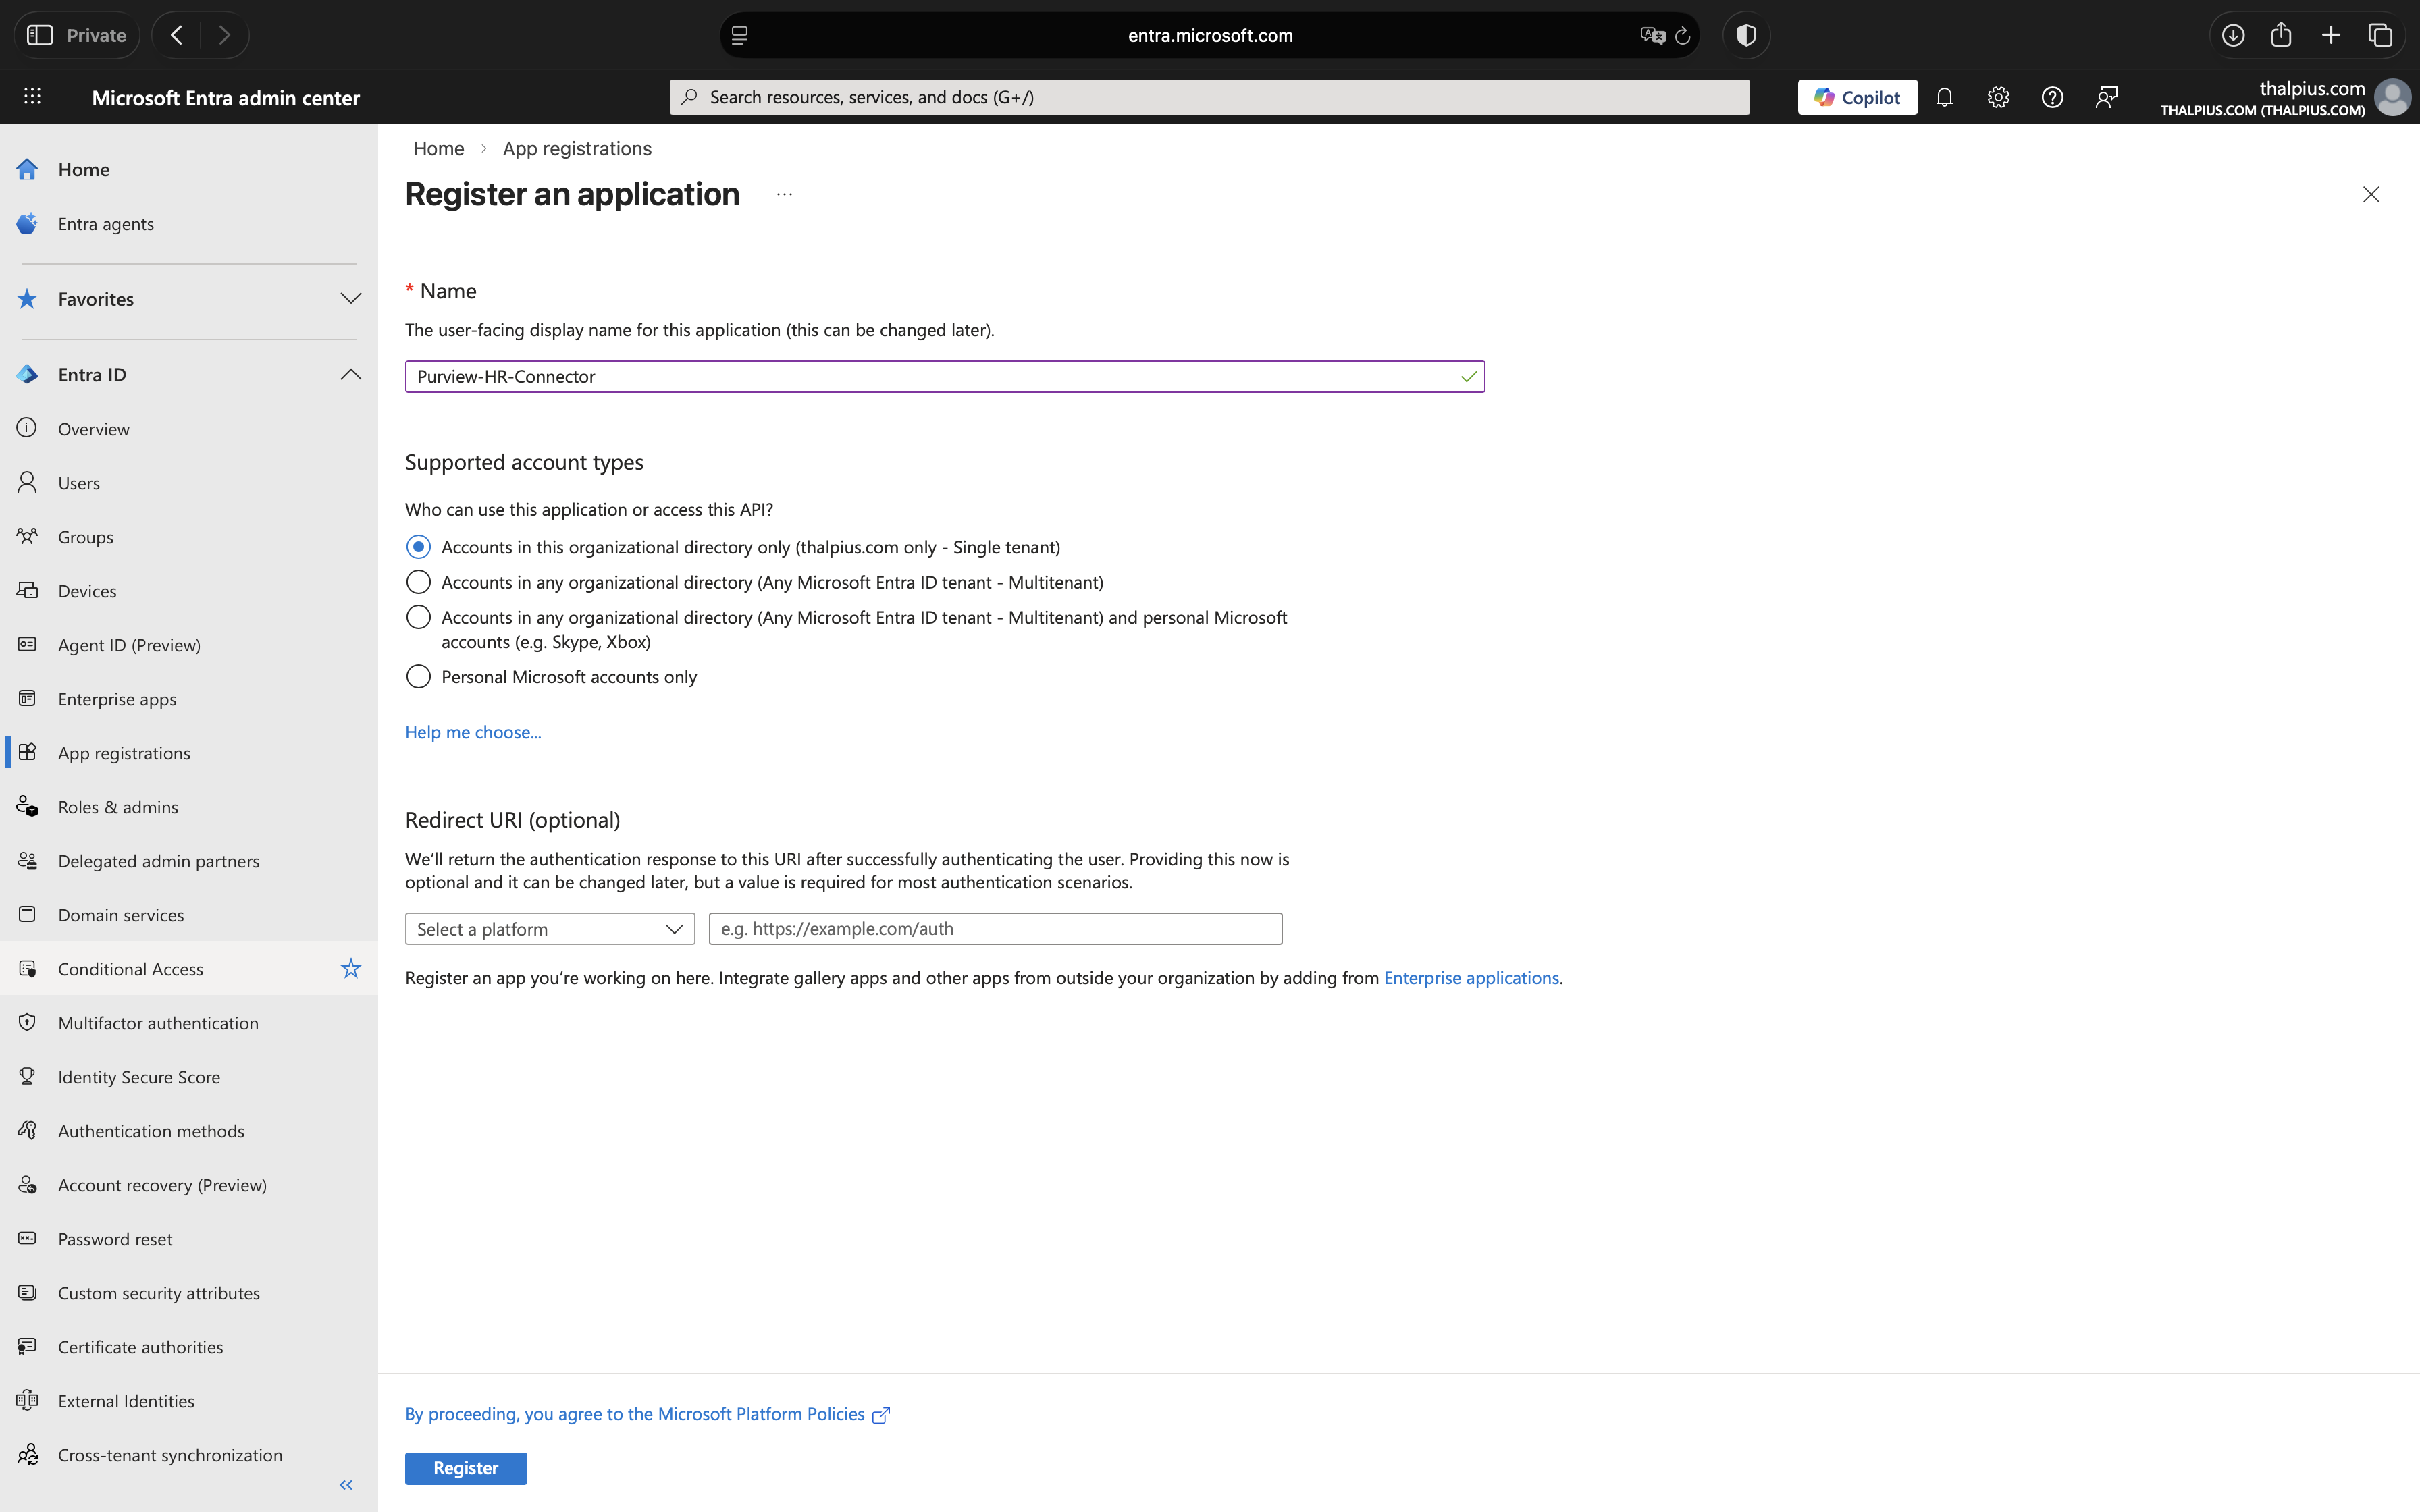
2. Register New Application
Click “New registration” and configure:
- Name: Purview-HR-Connector
- Supported account types: Accounts in this organizational directory only
- Redirect URI: Leave blank (not required for this scenario)
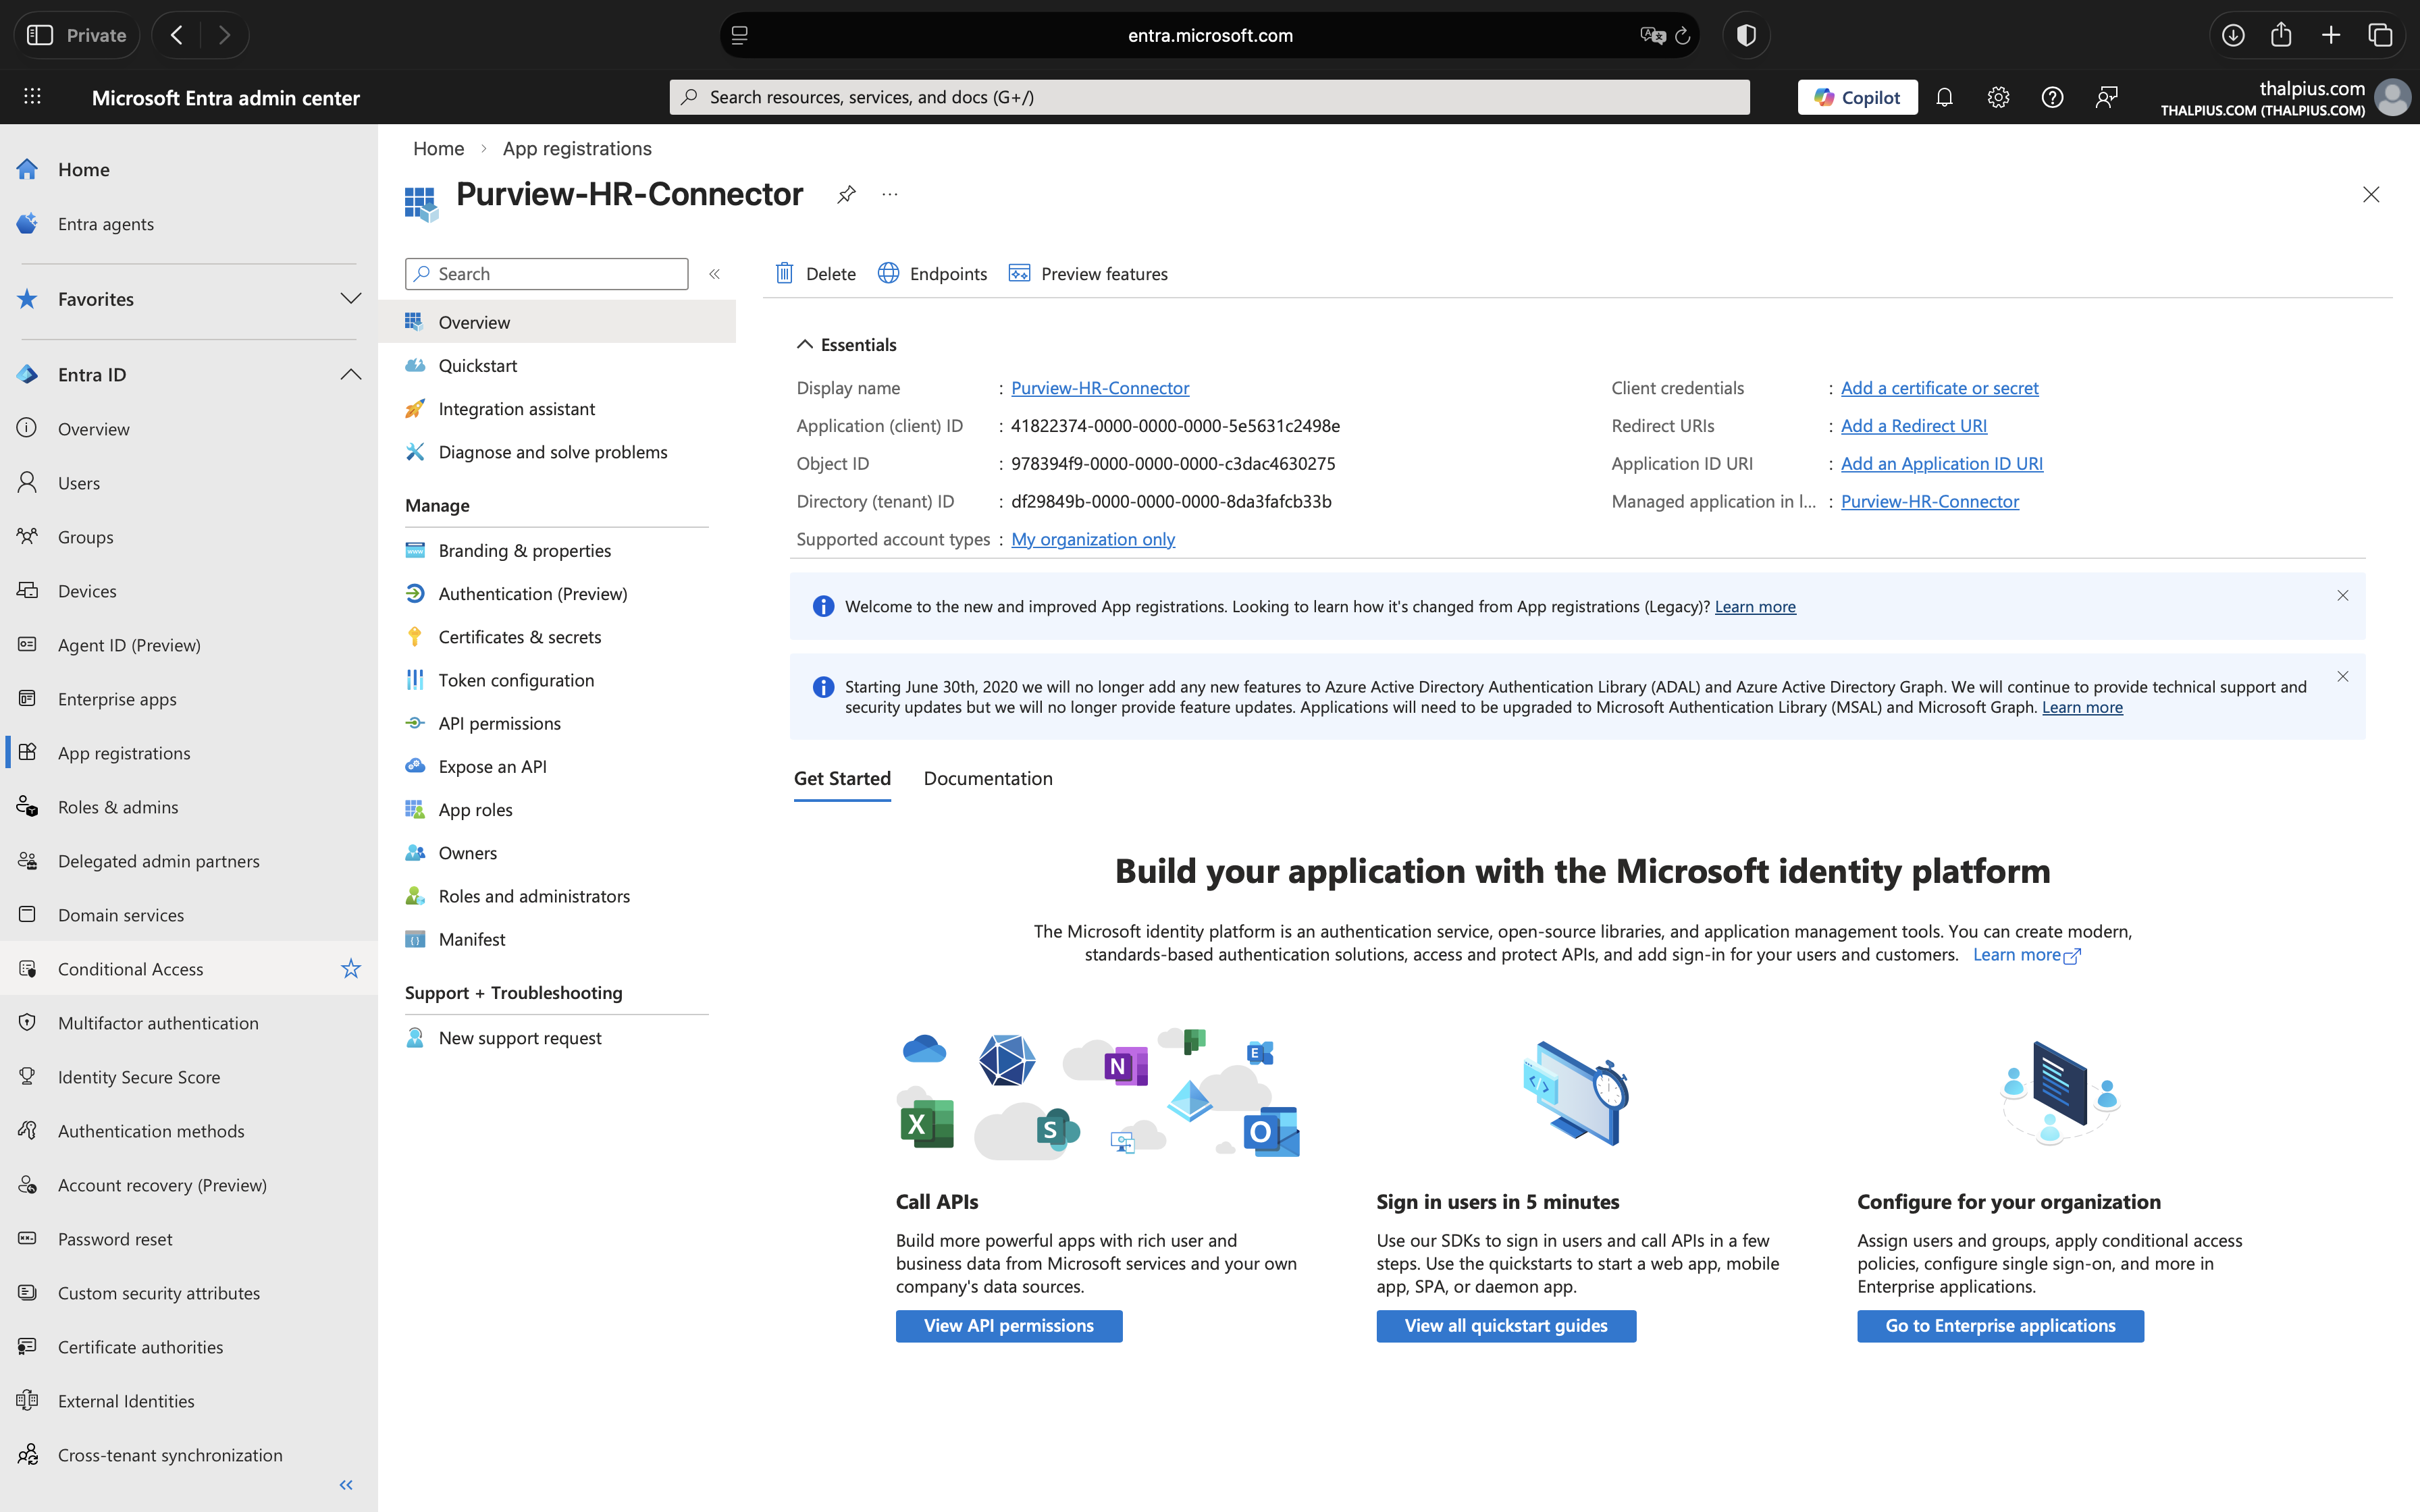
3. Copy Application (client) ID and Tenant ID
After registration, you will see the Overview page. Copy and save these values, you will need them later:
- Application (client) ID
- Directory (tenant) ID
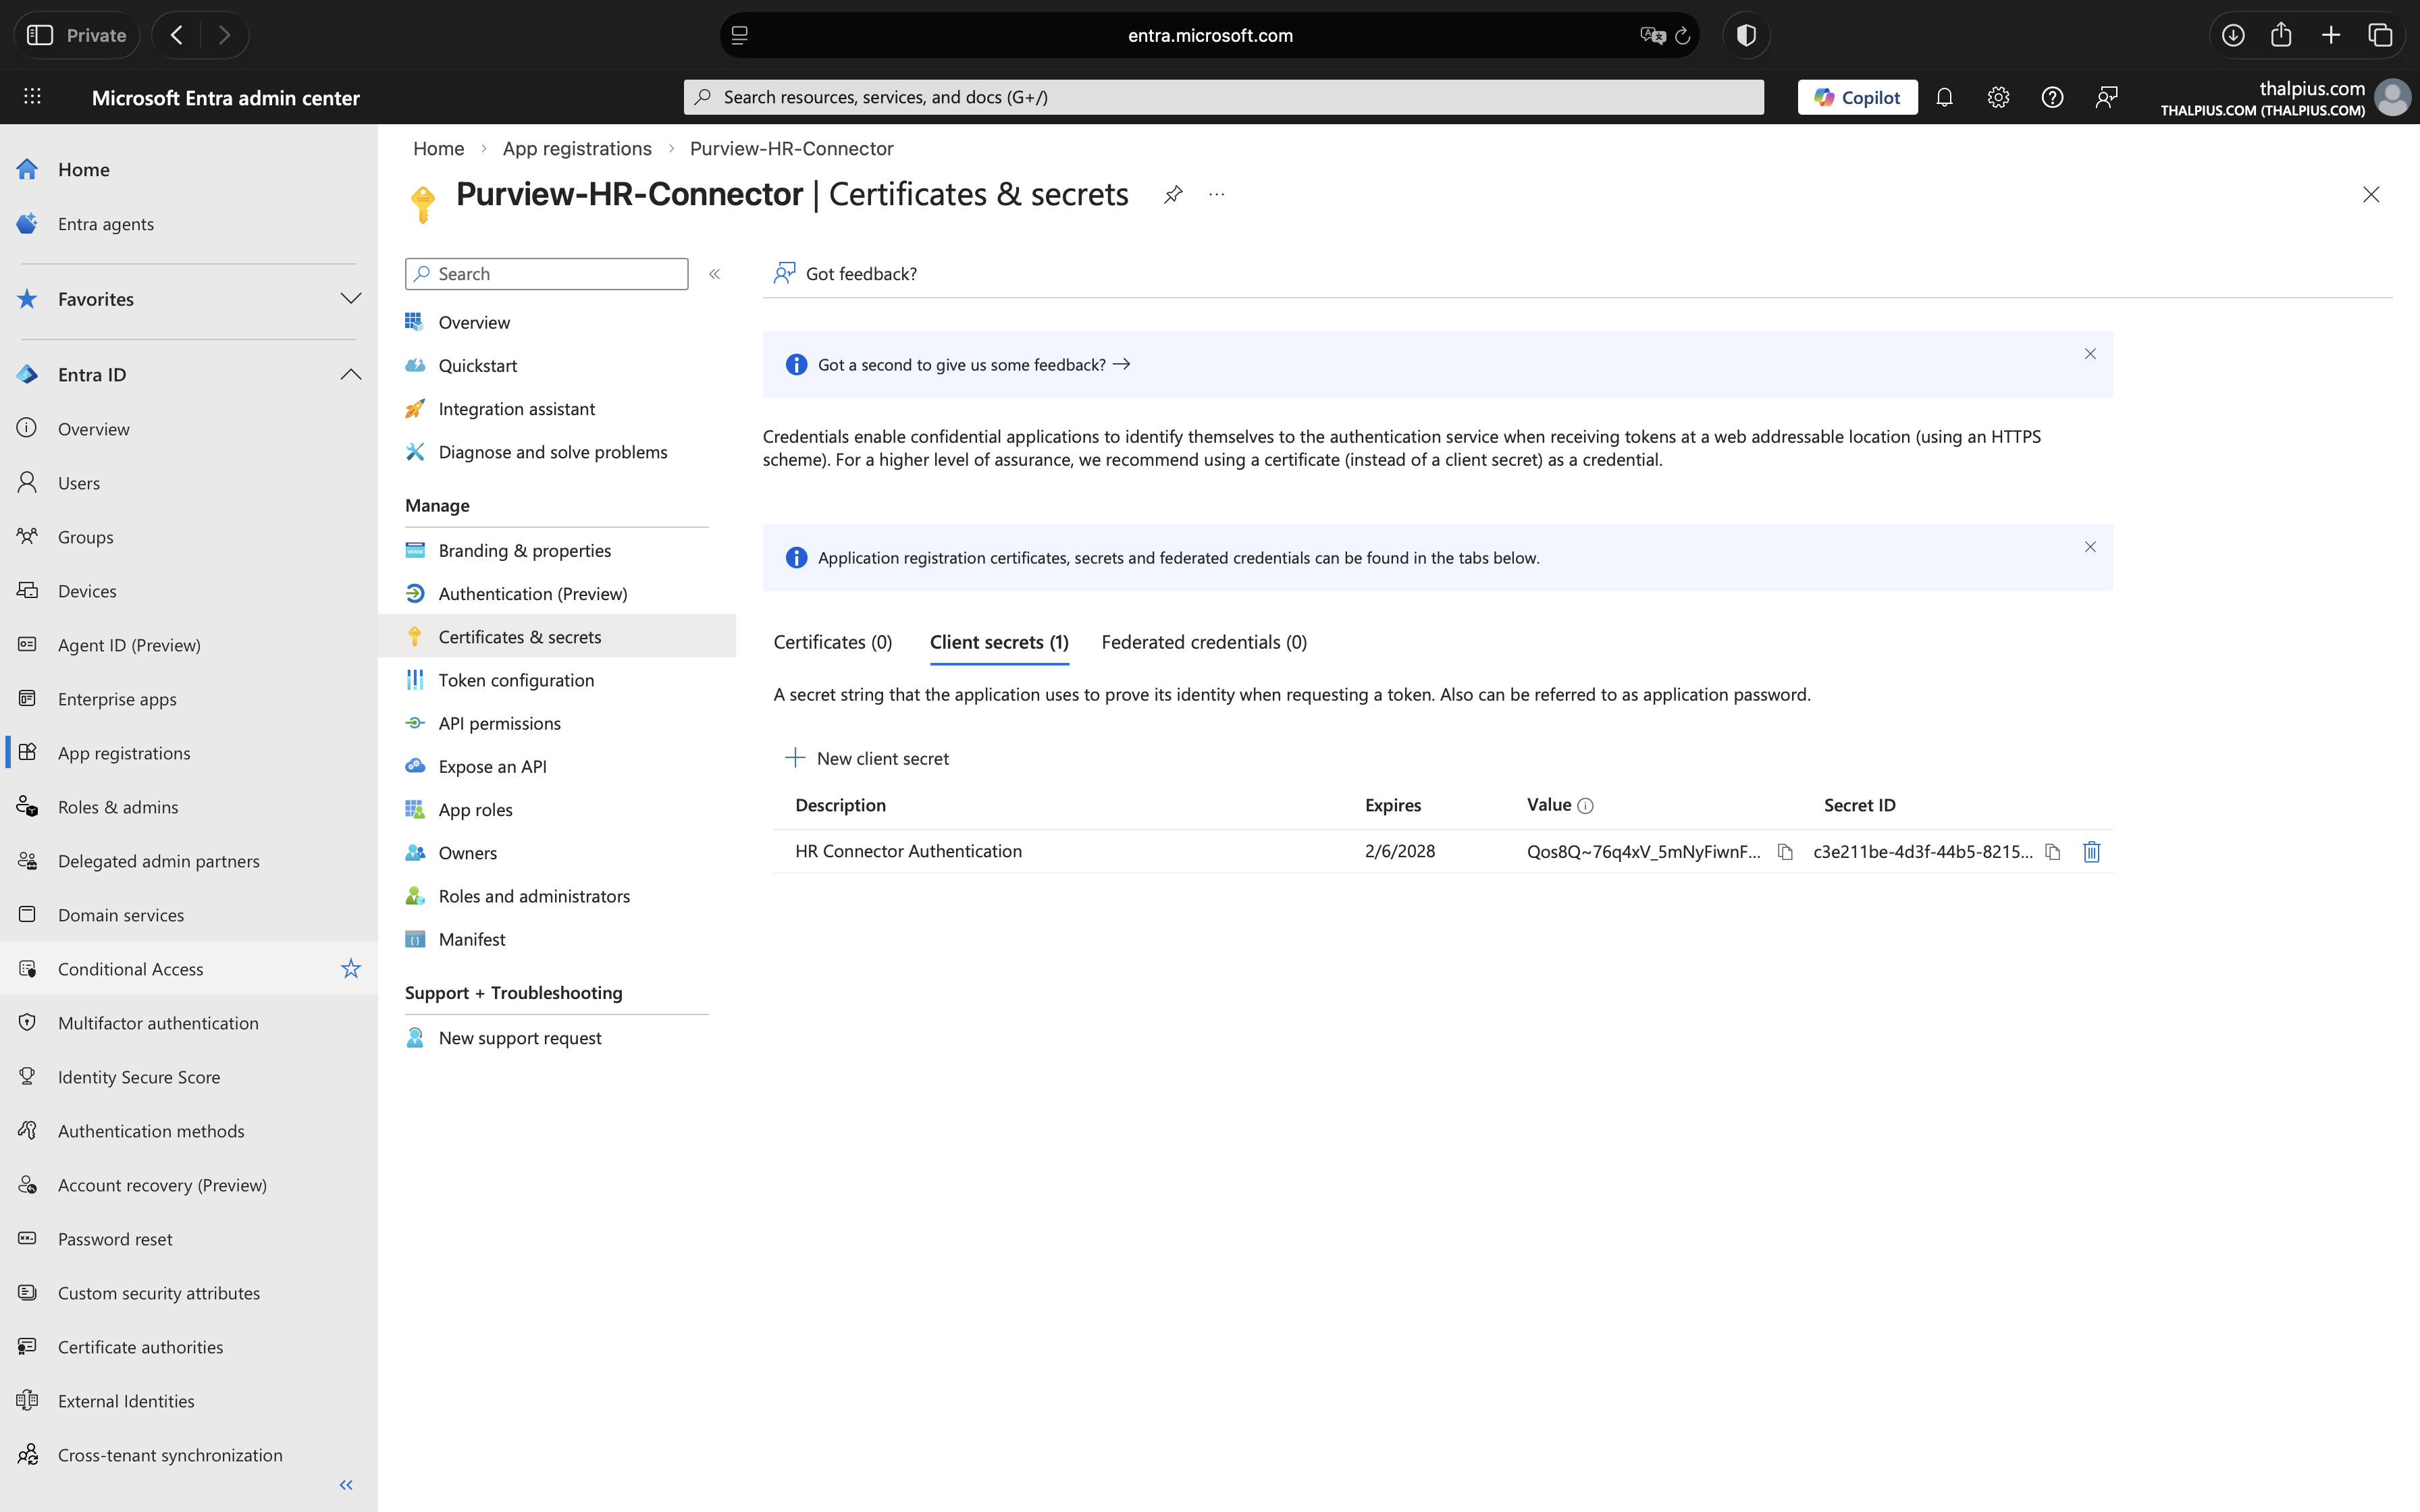
4. Create Client Secret
Navigate to “Certificates & secrets > Client secrets” and click “New client secret”:
- Description: HR Connector Authentication
- Expires: 24 months (recommended for production)
Copy the Value immediately. This is your Client Secret and it is only displayed once. Store it securely, if you lose it, you will need to create a new one.
For production environments, consider storing the client secret in Azure Key Vault and referencing it in your automation scripts rather than hardcoding it in PowerShell.
Step 3: Configure the HR Connector in Purview
Now we will create the HR connector in Microsoft Purview that will receive and process the CSV data. This connector acts as the ingestion endpoint for your HR signals.
1. Access Data Connectors
Navigate to purview.microsoft.com and go to: Settings > Data connectors
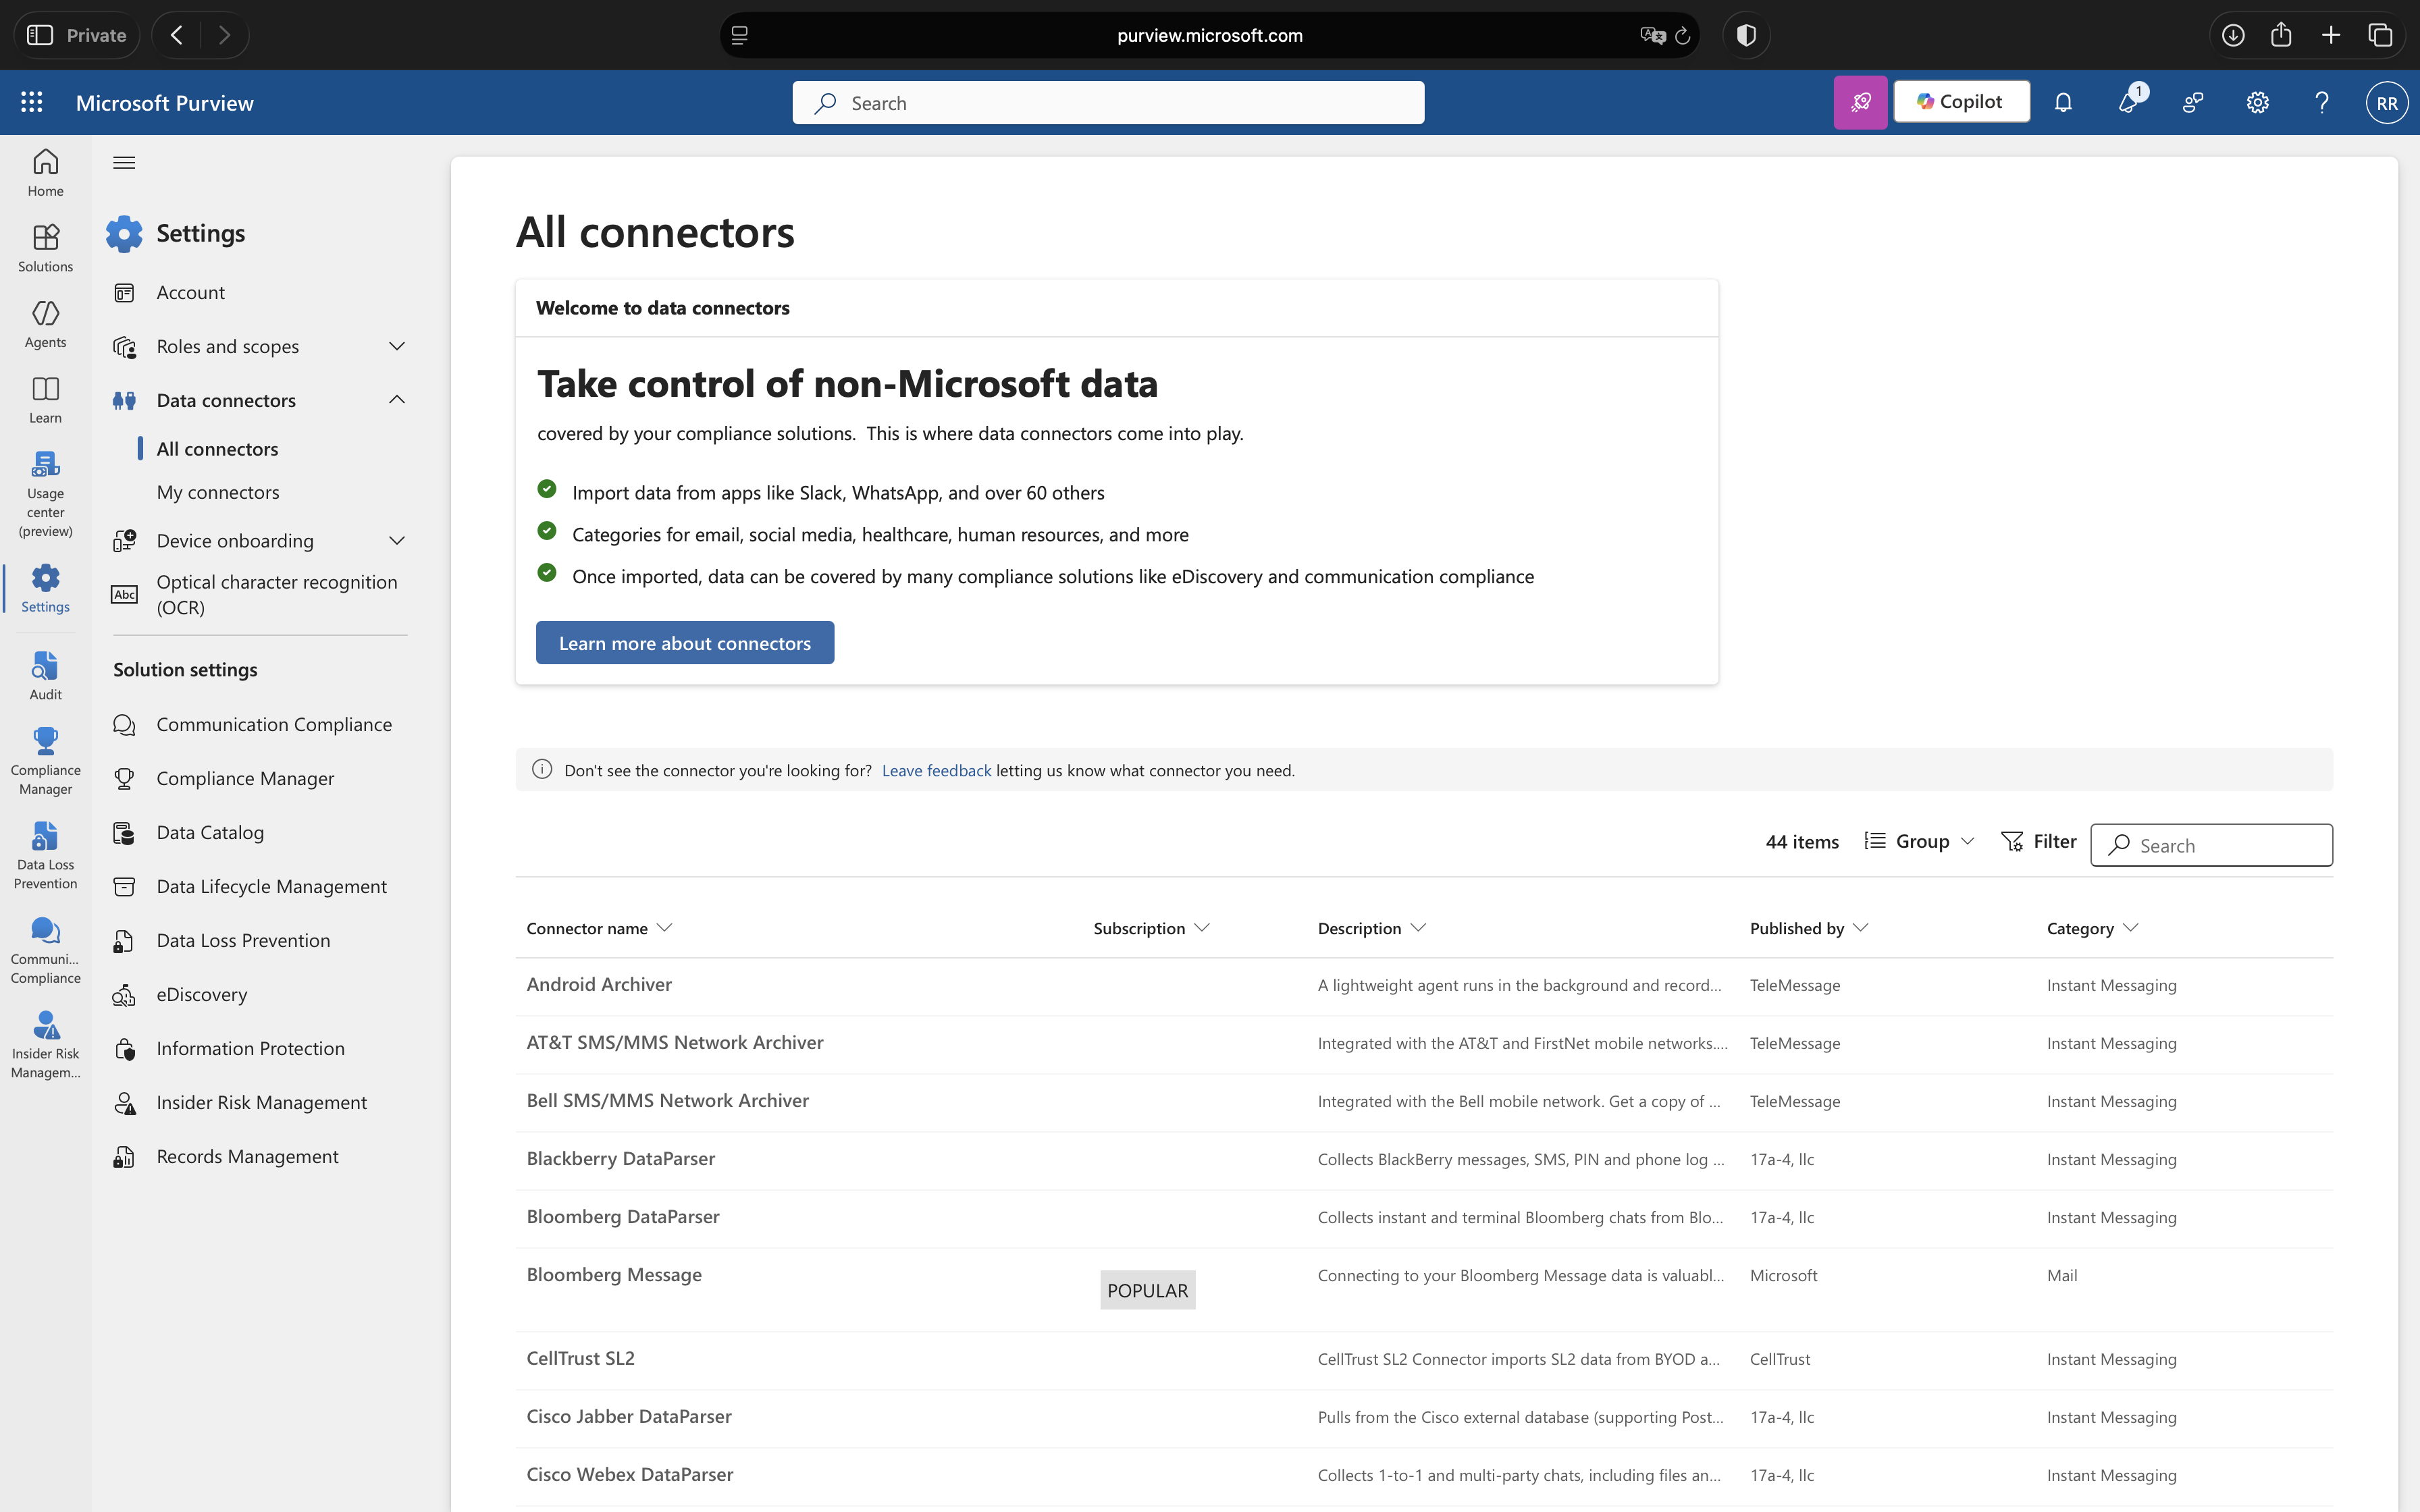
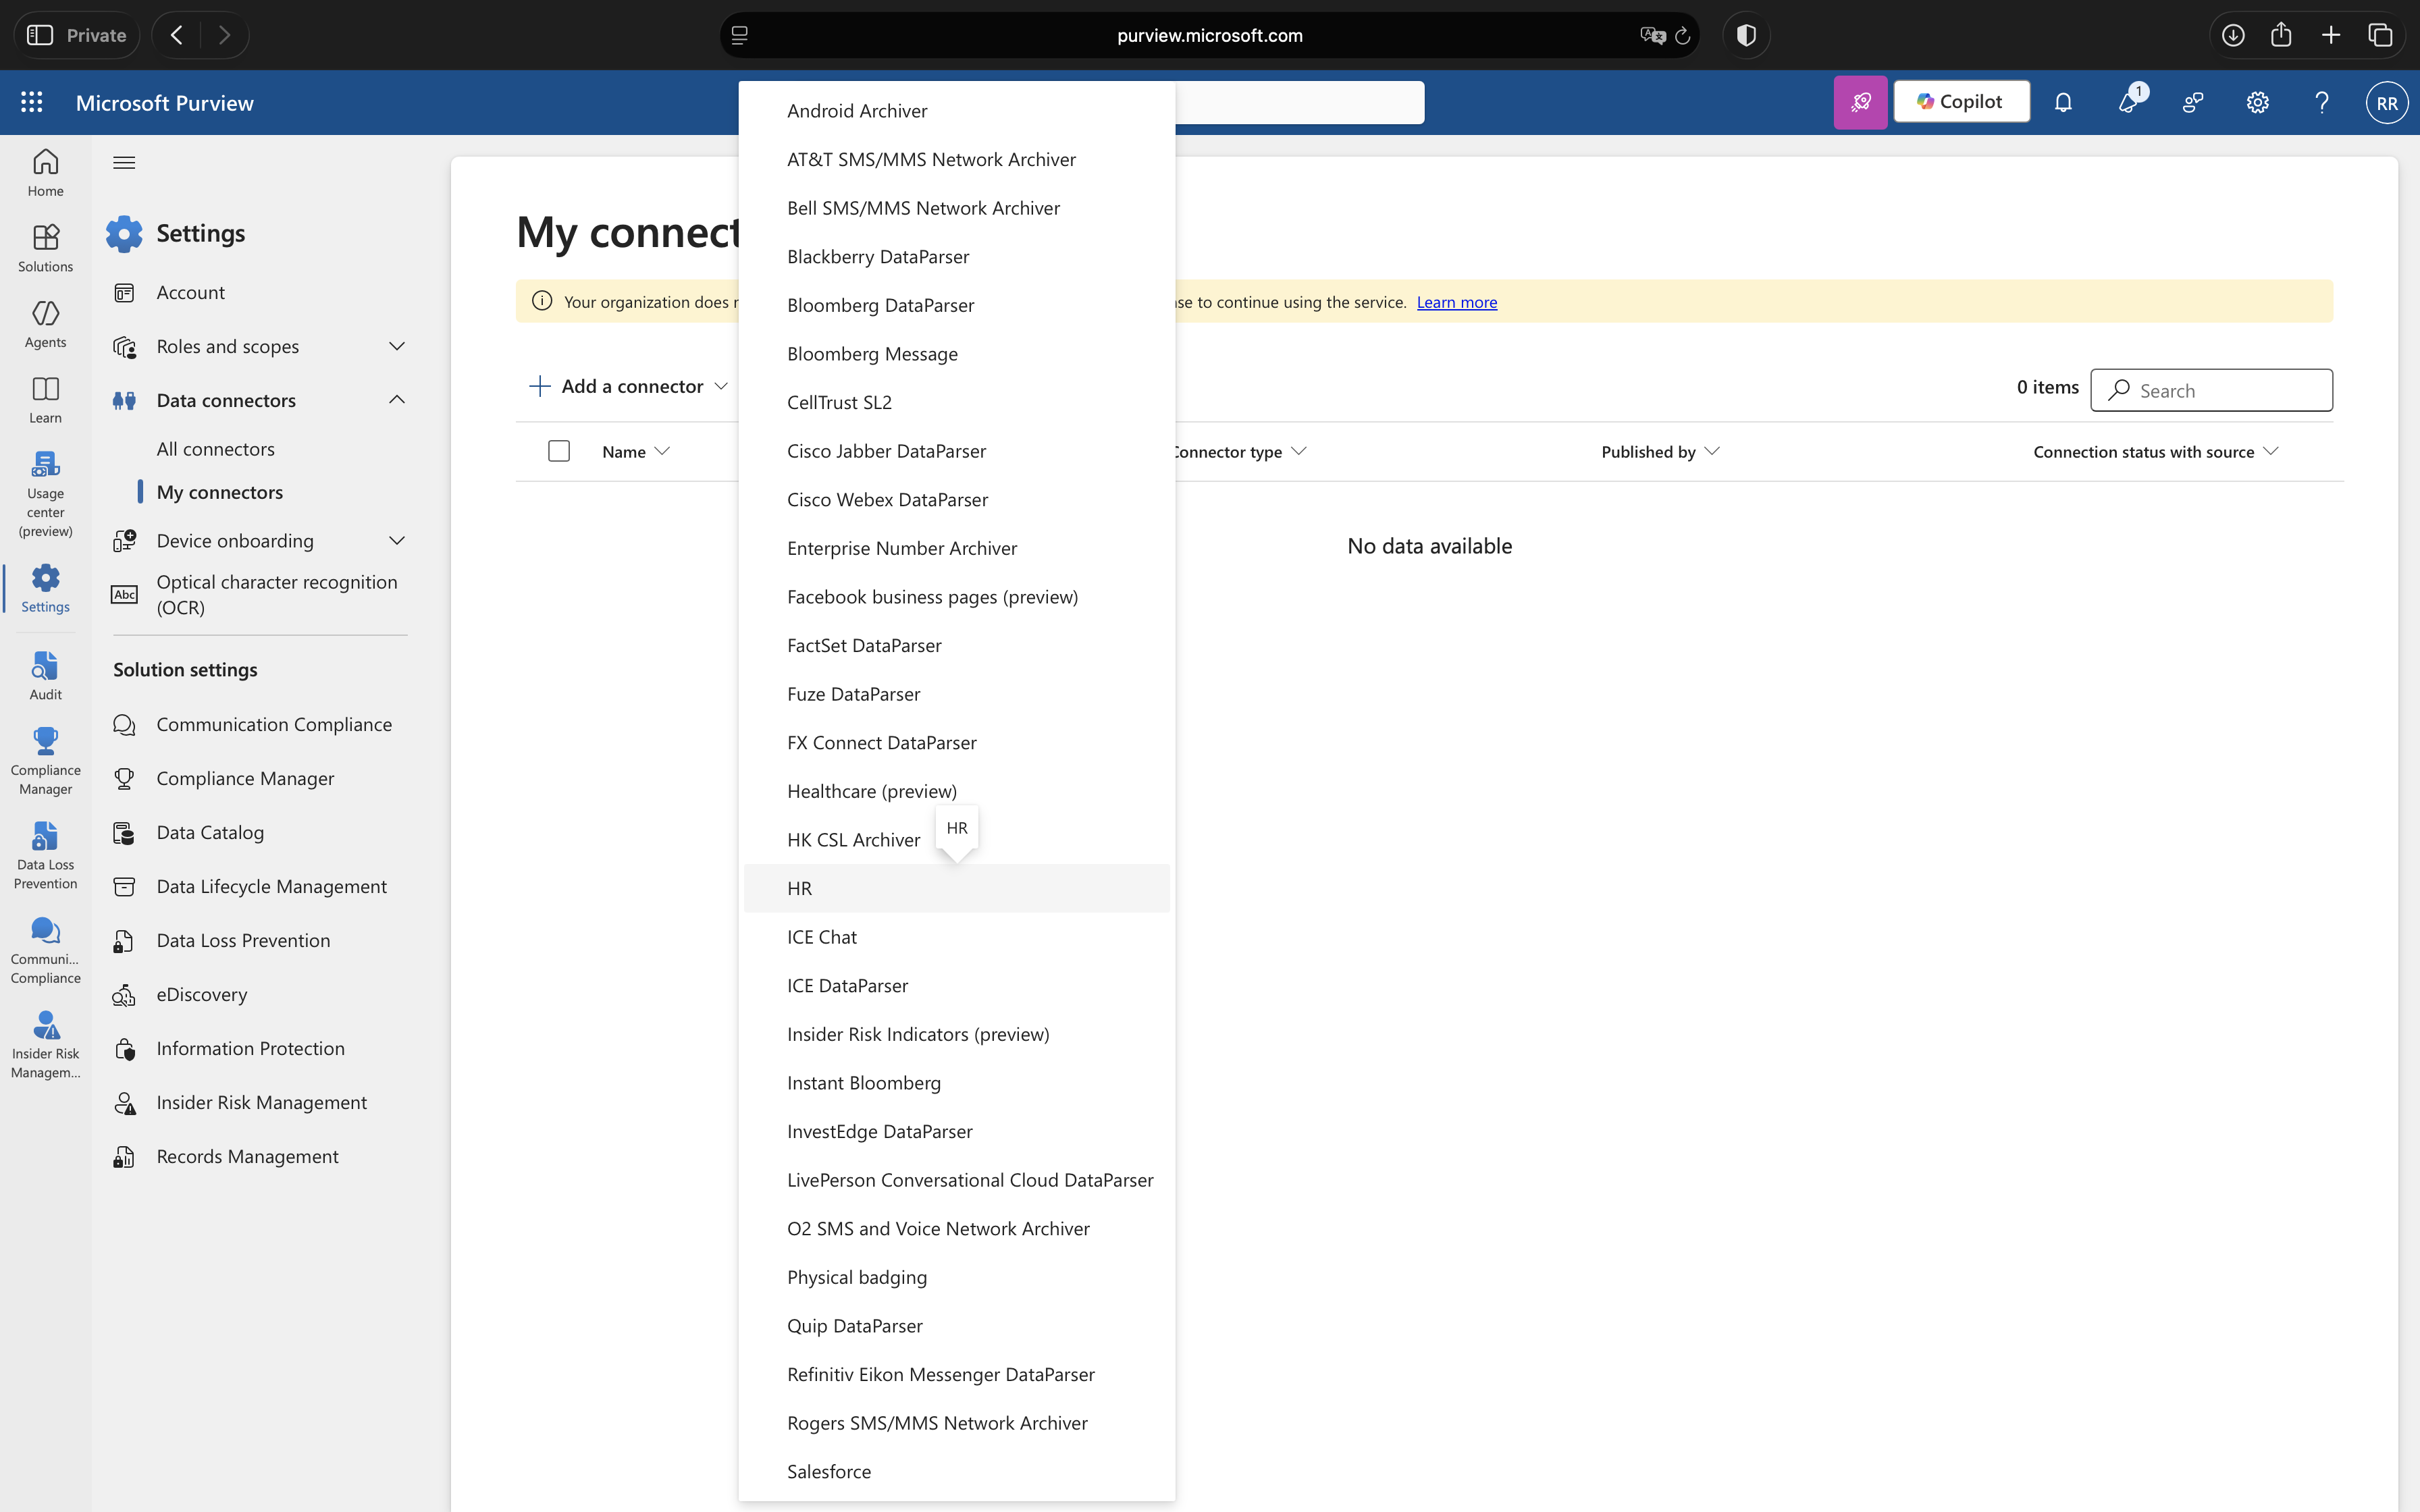
2. Create HR Connector
Click “My connectors” tab, then “Add a connector”. Select “HR” from the list.
3. Setup Connection
On the Setup the connection page:
- Microsoft Entra application ID: Paste the Application (client) ID from Step 2
- Connector name: Employee-Resignations-Connector

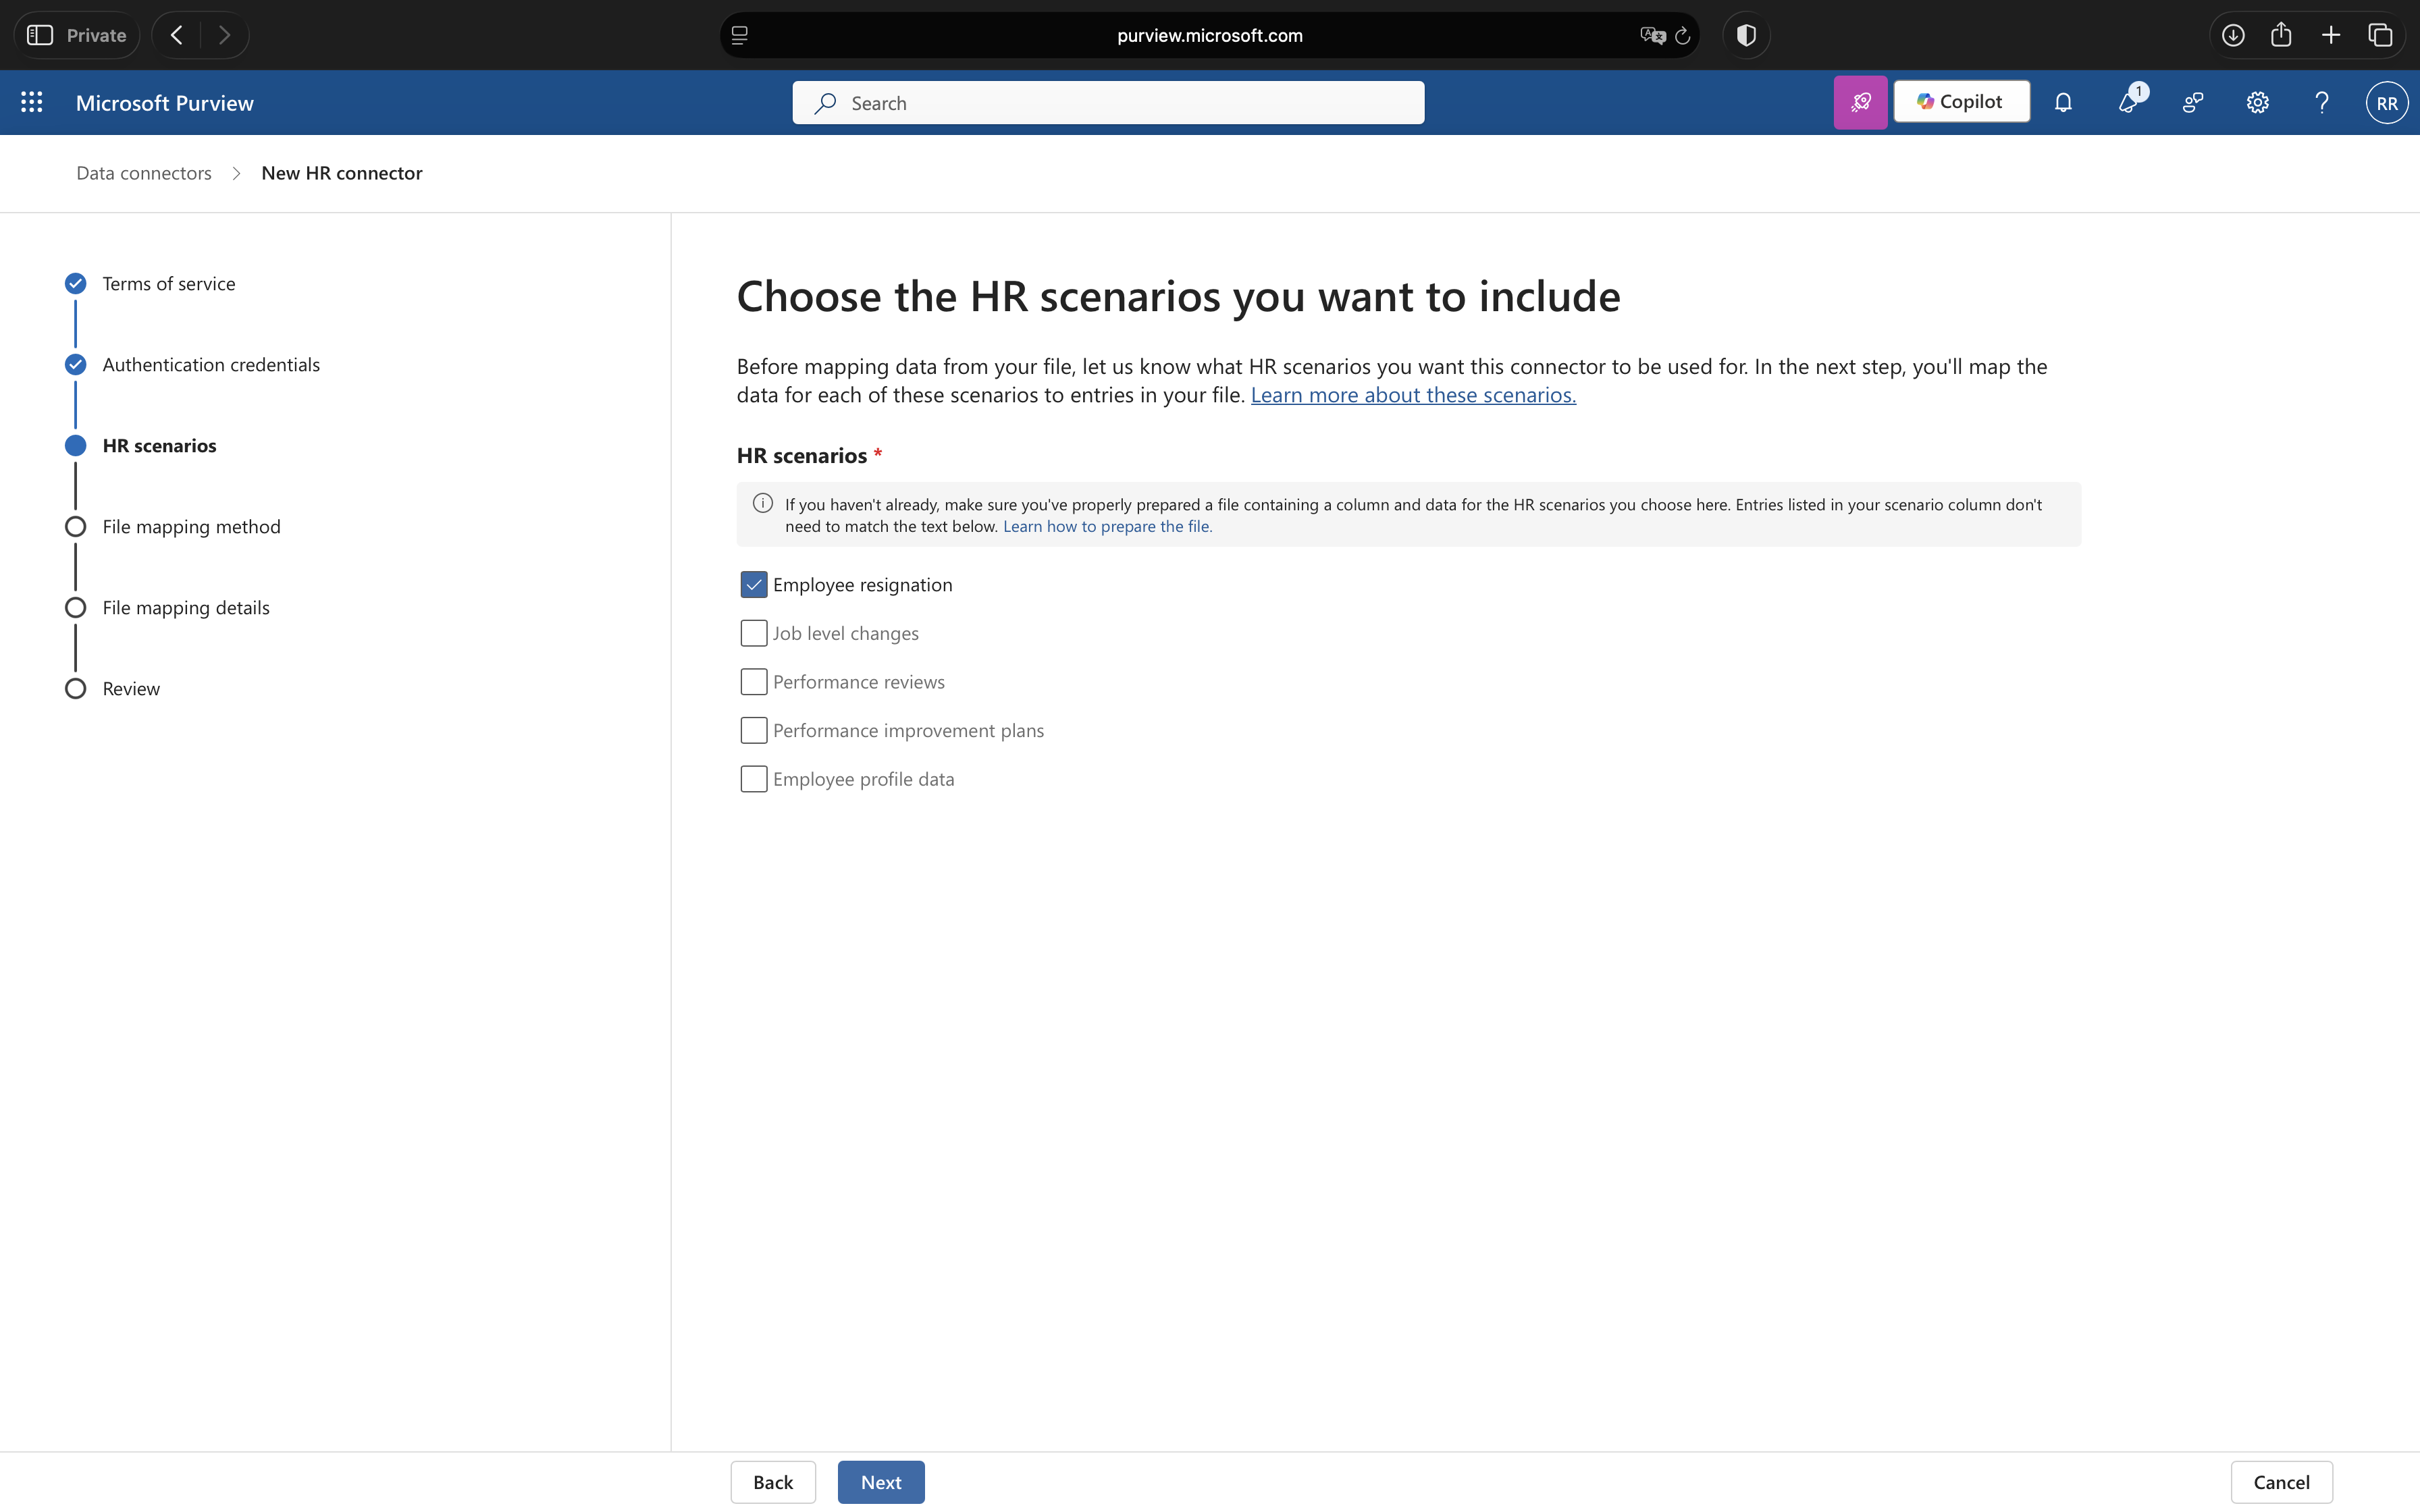
4. Select HR Scenario
On the HR scenarios page, select “Employee resignations” and click “Next”.
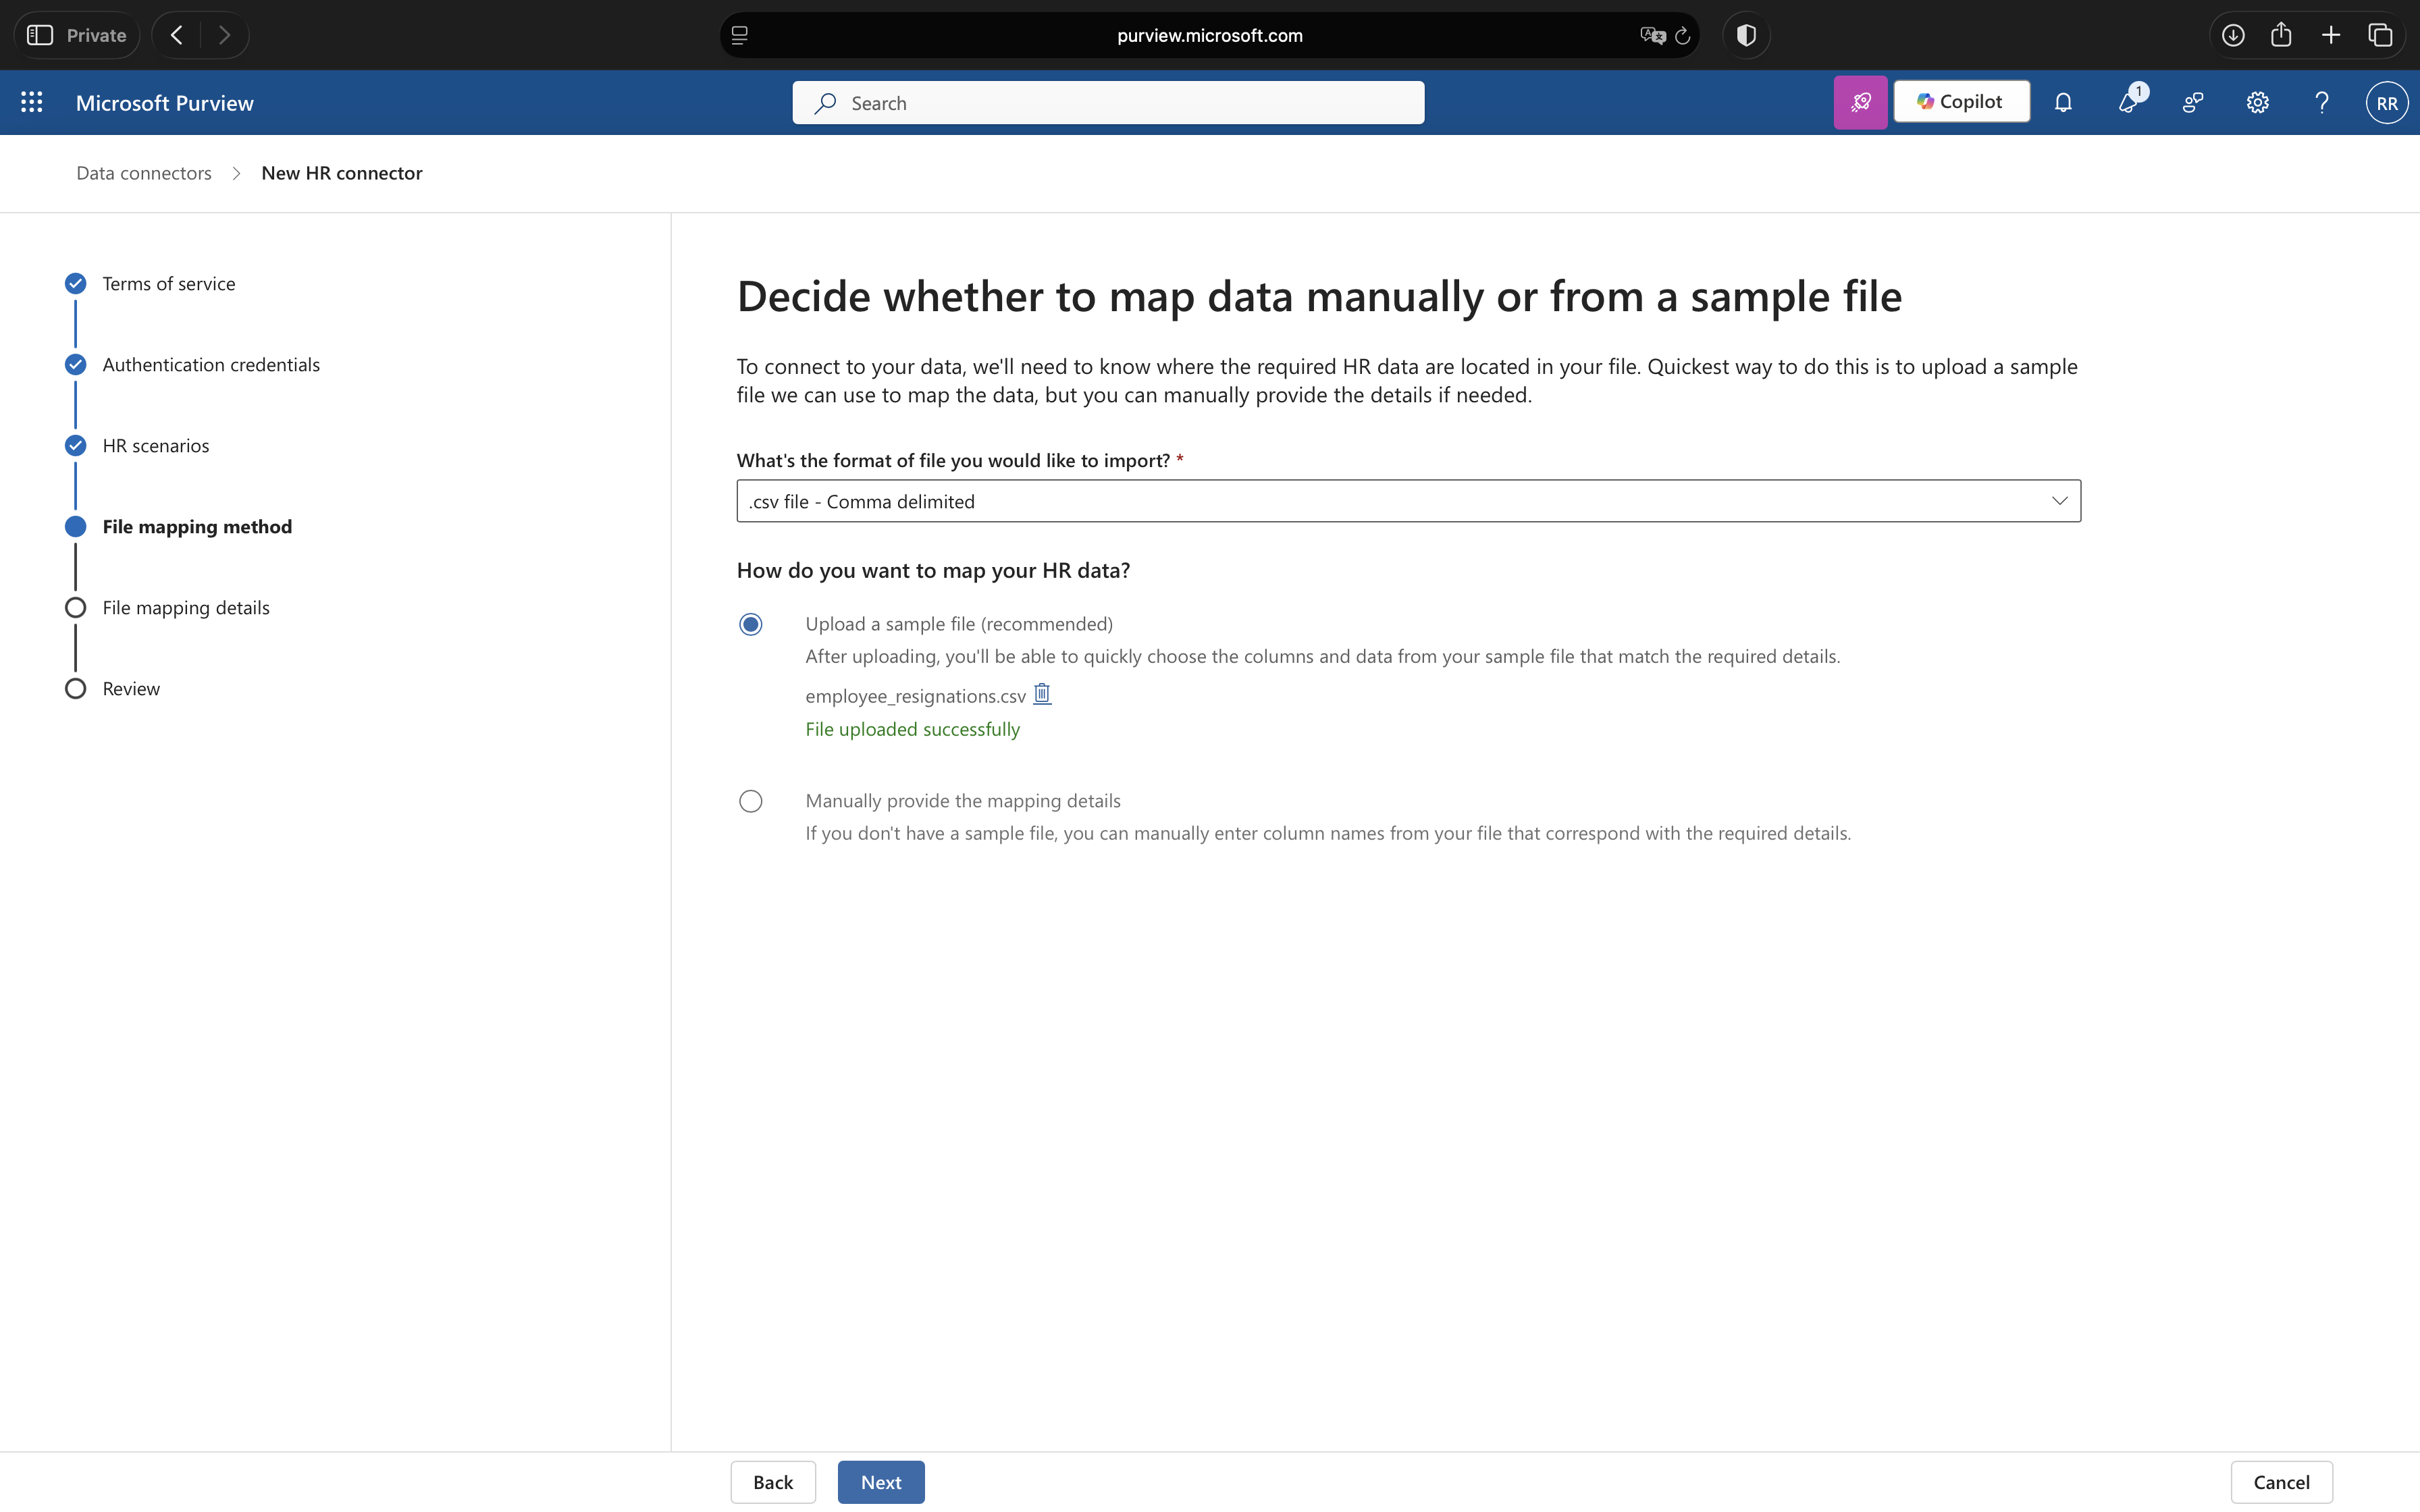
5. Configure File Mapping
You have two options for mapping your CSV columns. I recommend uploading a sample CSV file as it is faster and less error-prone:
- Select “Upload a sample file”
- Click “Upload sample file” and select your CSV from Step 1
- The wizard will automatically detect your column names
6. Map Columns
On the File mapping details page, use the dropdown menus to map your CSV columns to the required fields:
- Email address: UserPrincipalName
- Resignation date: ResignationDate
- Last working date: LastWorkingDate

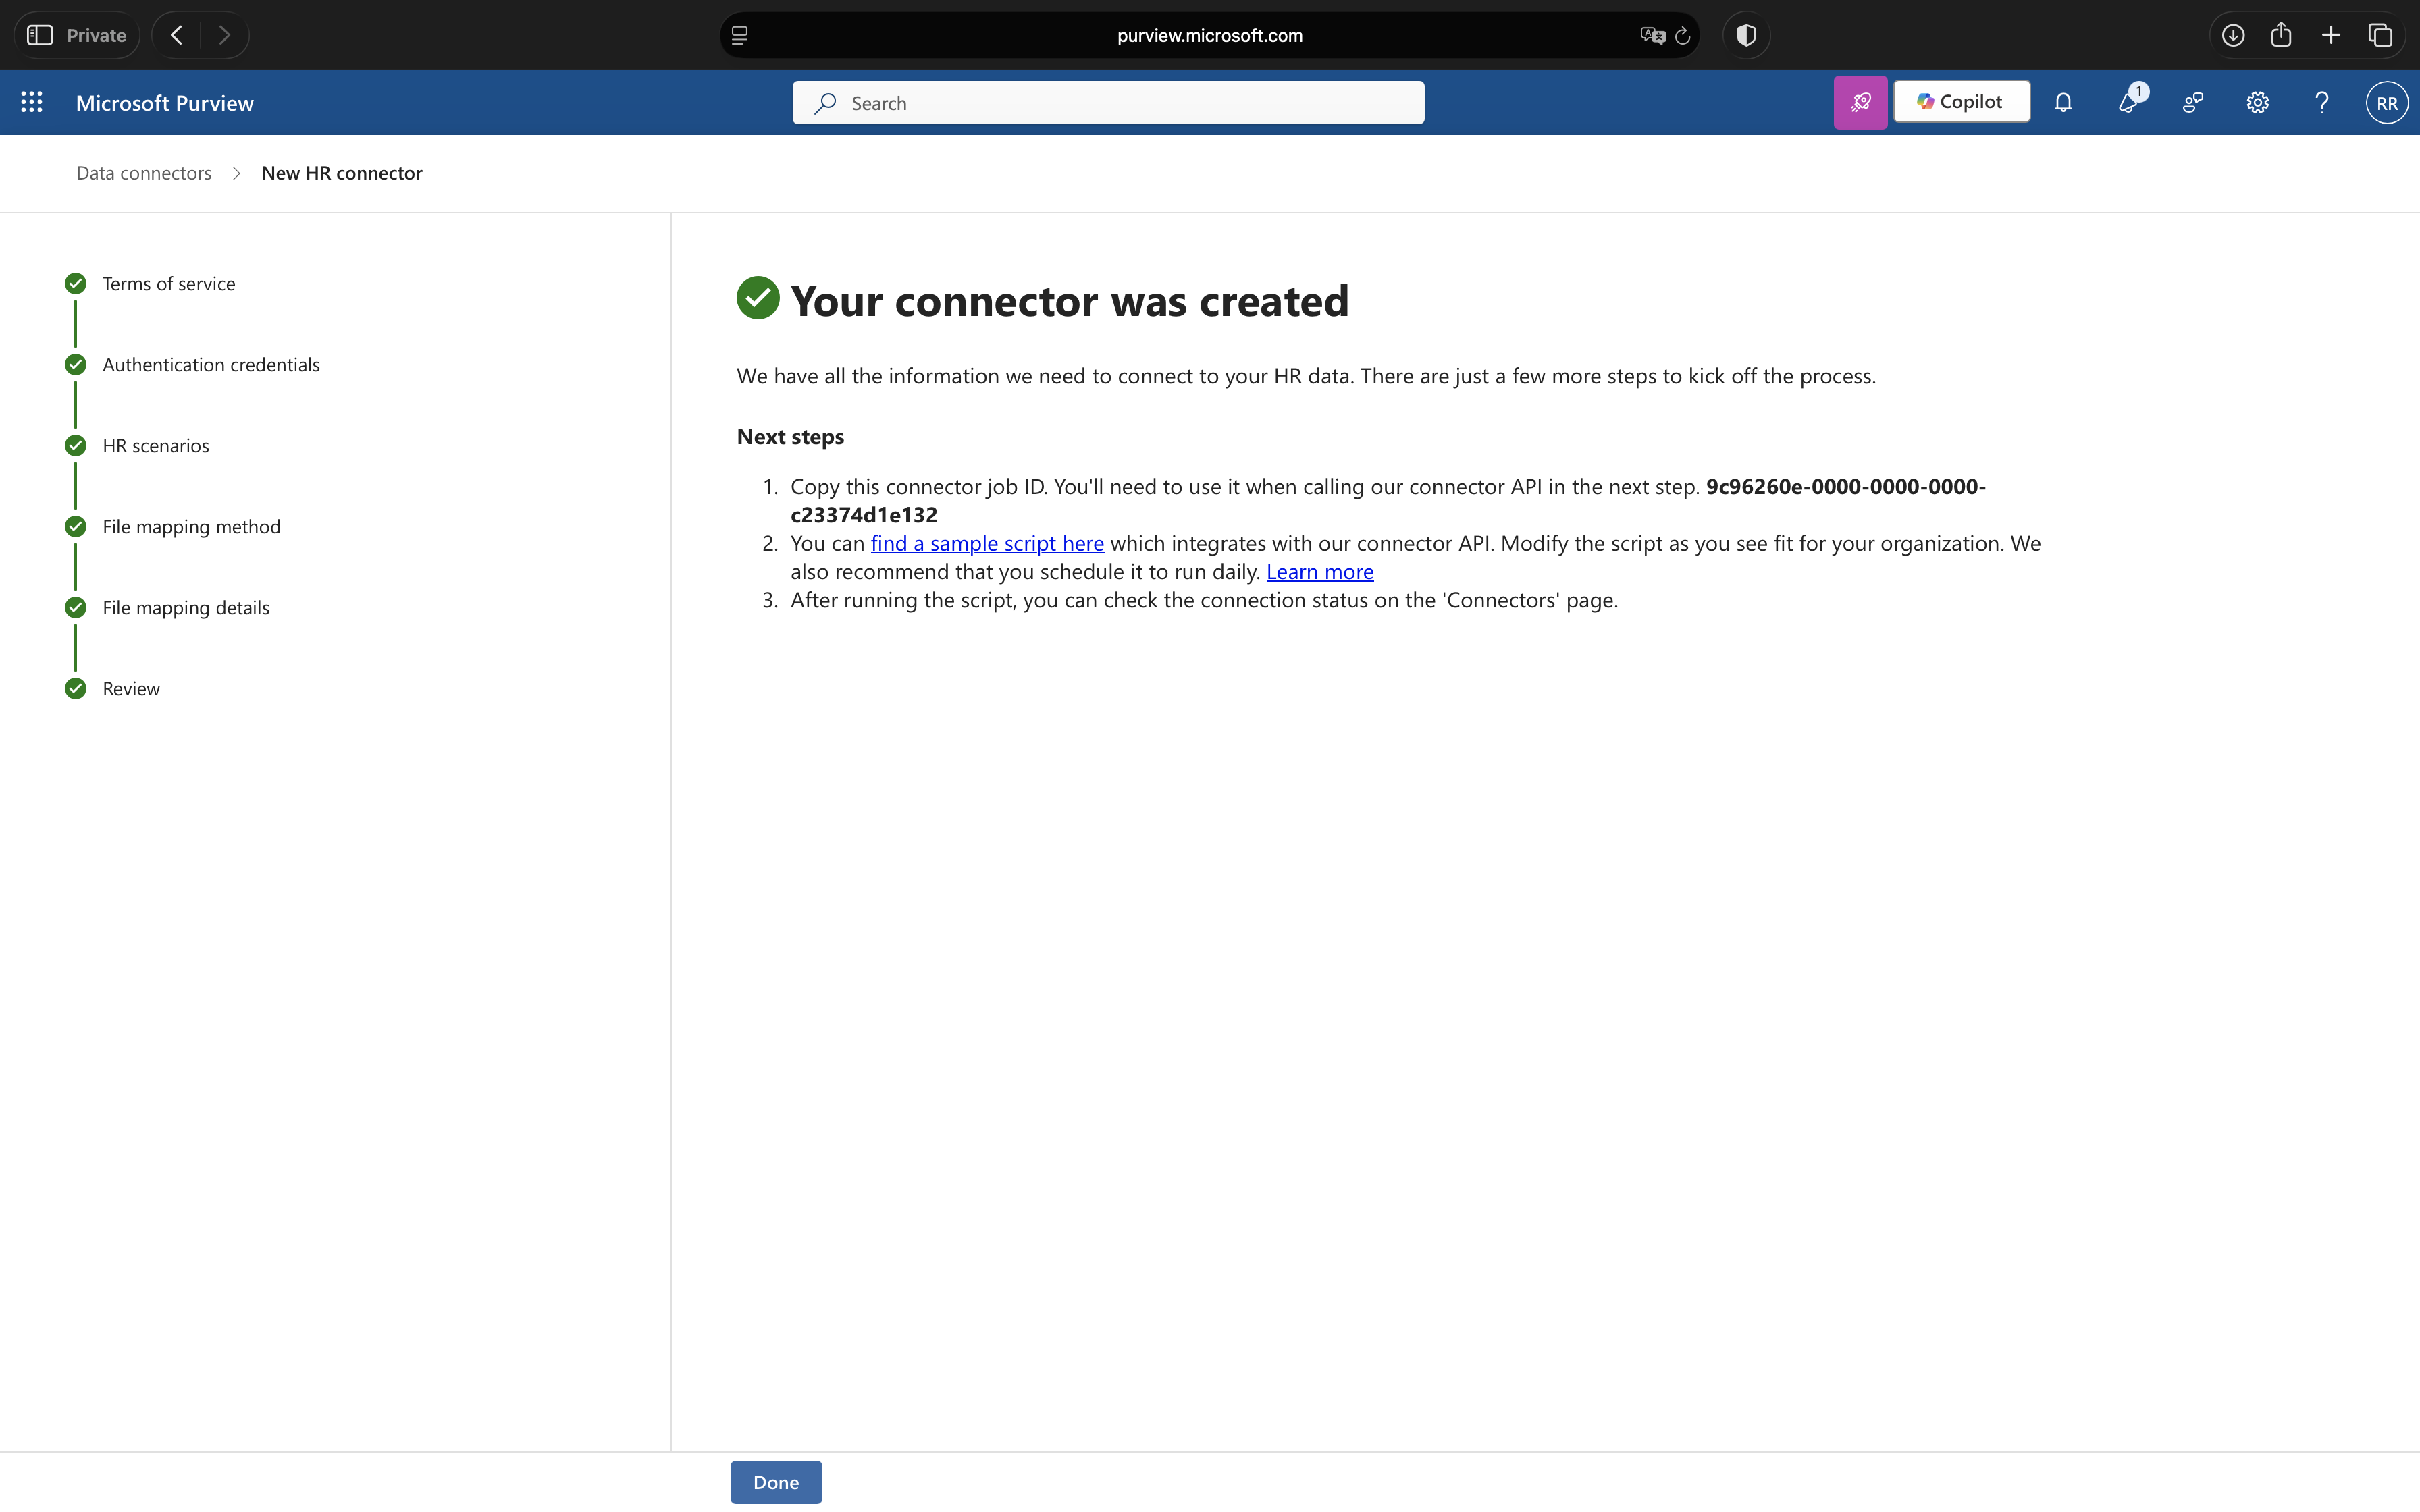
7. Complete Setup and Copy Job ID
Review your configuration and click Finish. The confirmation page displays two critical values:
- Job ID: Copy this GUID, you will need it for the PowerShell script
- Sample script link: Download or bookmark the PowerShell script link
Step 4: Upload HR Data with PowerShell
Now we will run the PowerShell script that uploads your CSV data to the HR connector. This script authenticates using the Entra ID application and posts the data to Microsoft’s ingestion endpoint.
1. Download the Script
Download the official script from Microsoft’s GitHub: sample_script.ps1
Save it as “Upload-HRData.ps1” in C:\HRConnector\.
2. Prepare Credentials
Gather the values you copied in the previous steps:
- tenantId: Directory (tenant) ID from Step 2
- appId: Application (client) ID from Step 2
- appSecret: Client secret value from Step 2
- jobId: Job ID from Step 3
- filePath: C:\HRConnector\employee_resignations.csv
3. Run the Script
Open PowerShell as Administrator and run:
.\Upload-HRData.ps1 ` -tenantId "df29849b-0000-0000-0000-8da3fafcb33b" ` -appId "87654321-00000-0000-0000-abcdef123456" ` -appSecret "your-client-secret-value" ` -jobId "abcdef12-0000-0000-0000-abcdef123456" ` -filePath 'C:\HRConnector\employee_resignations.csv'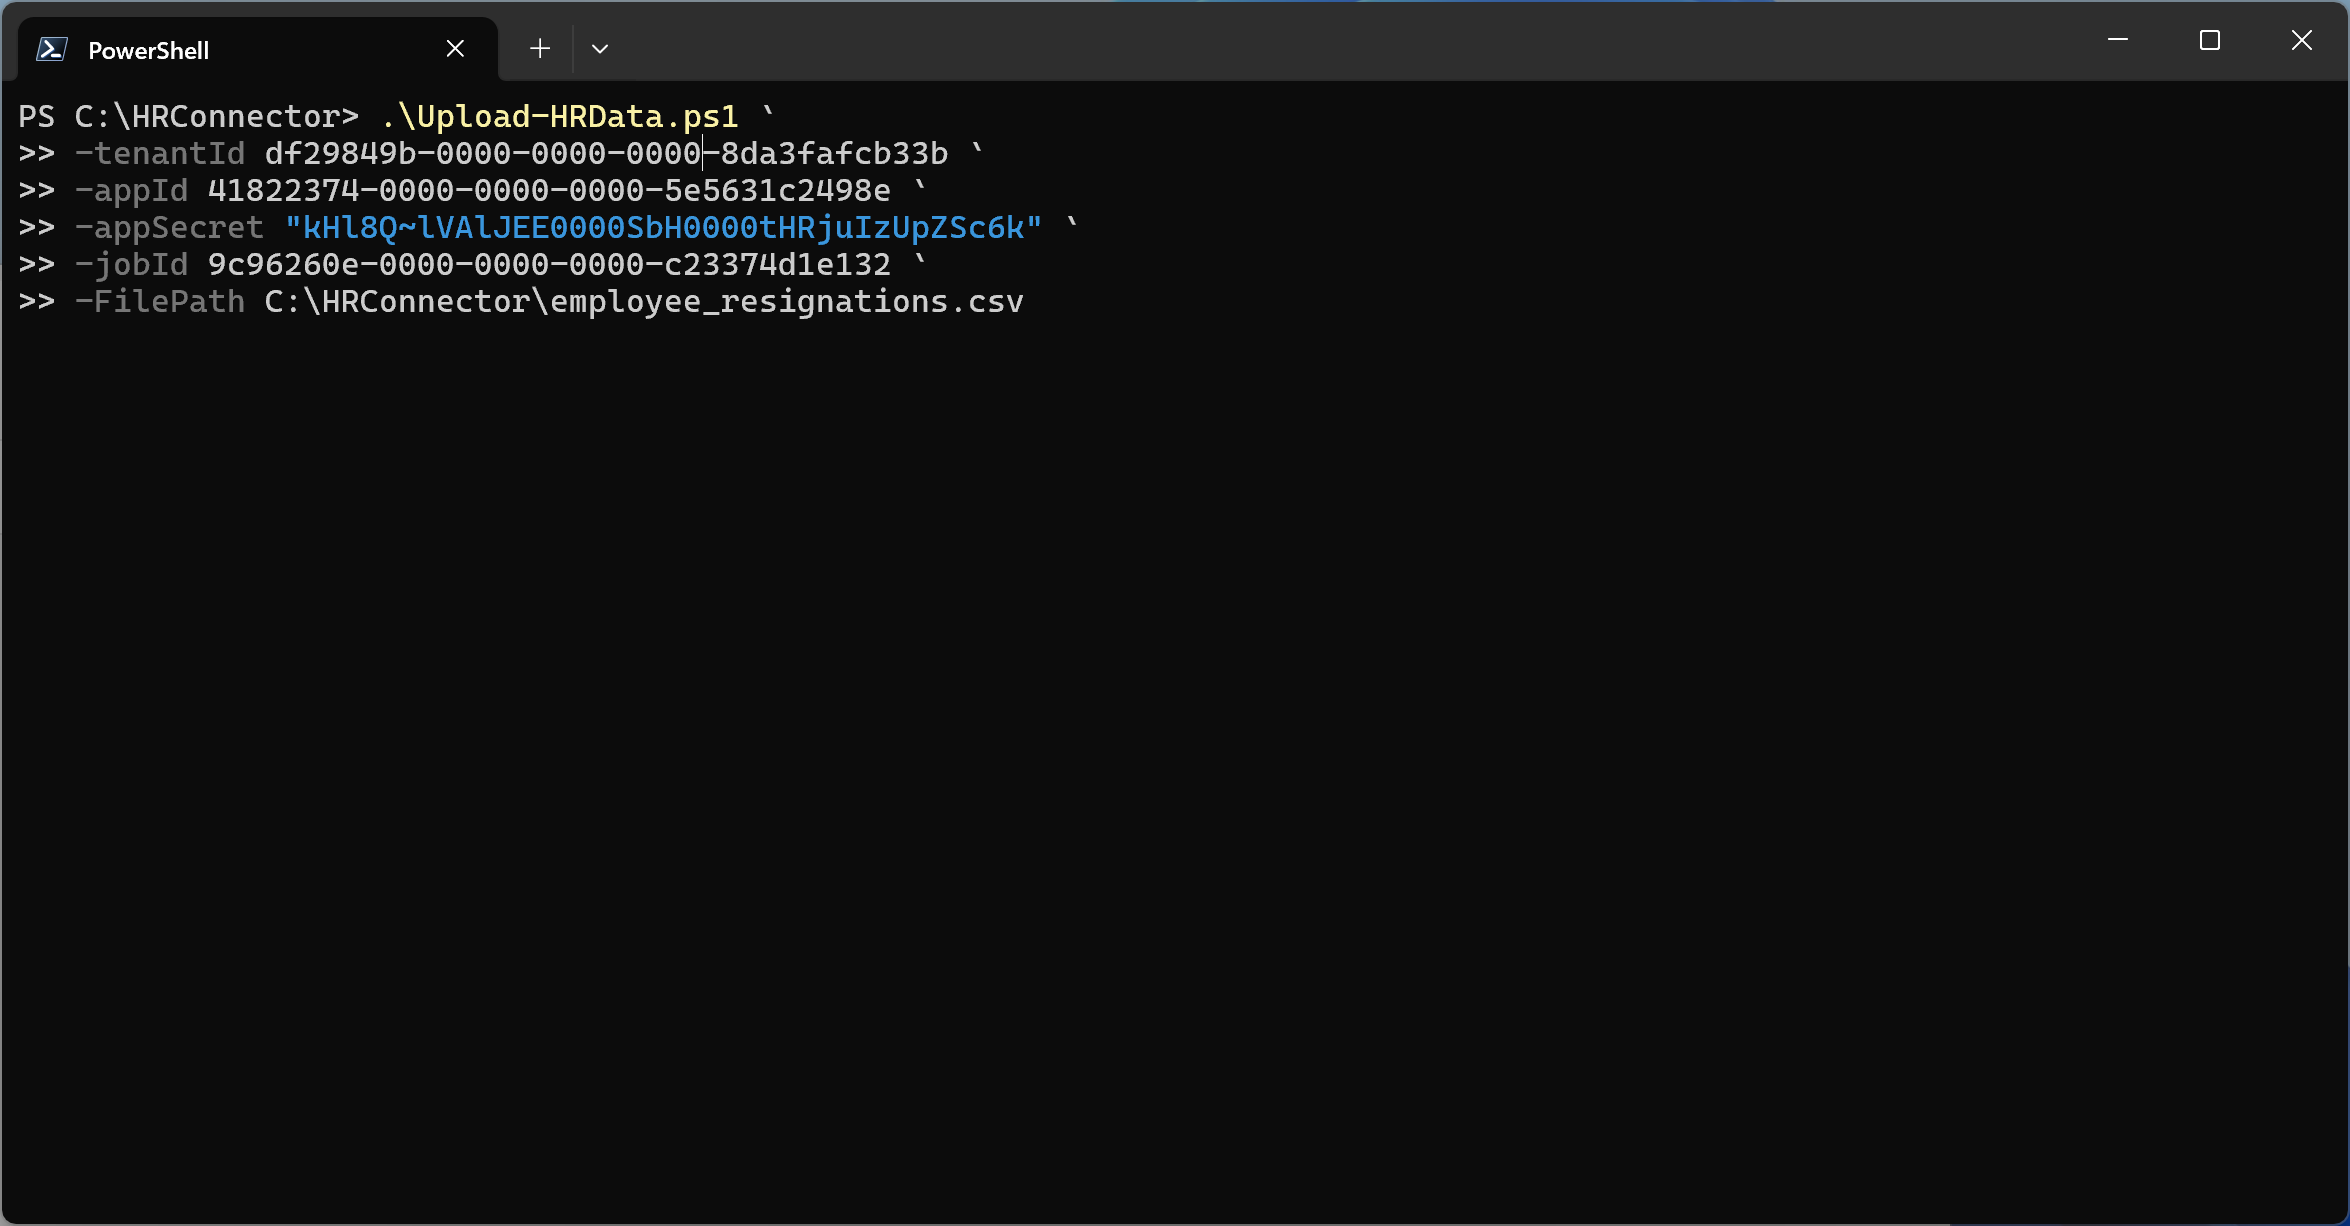
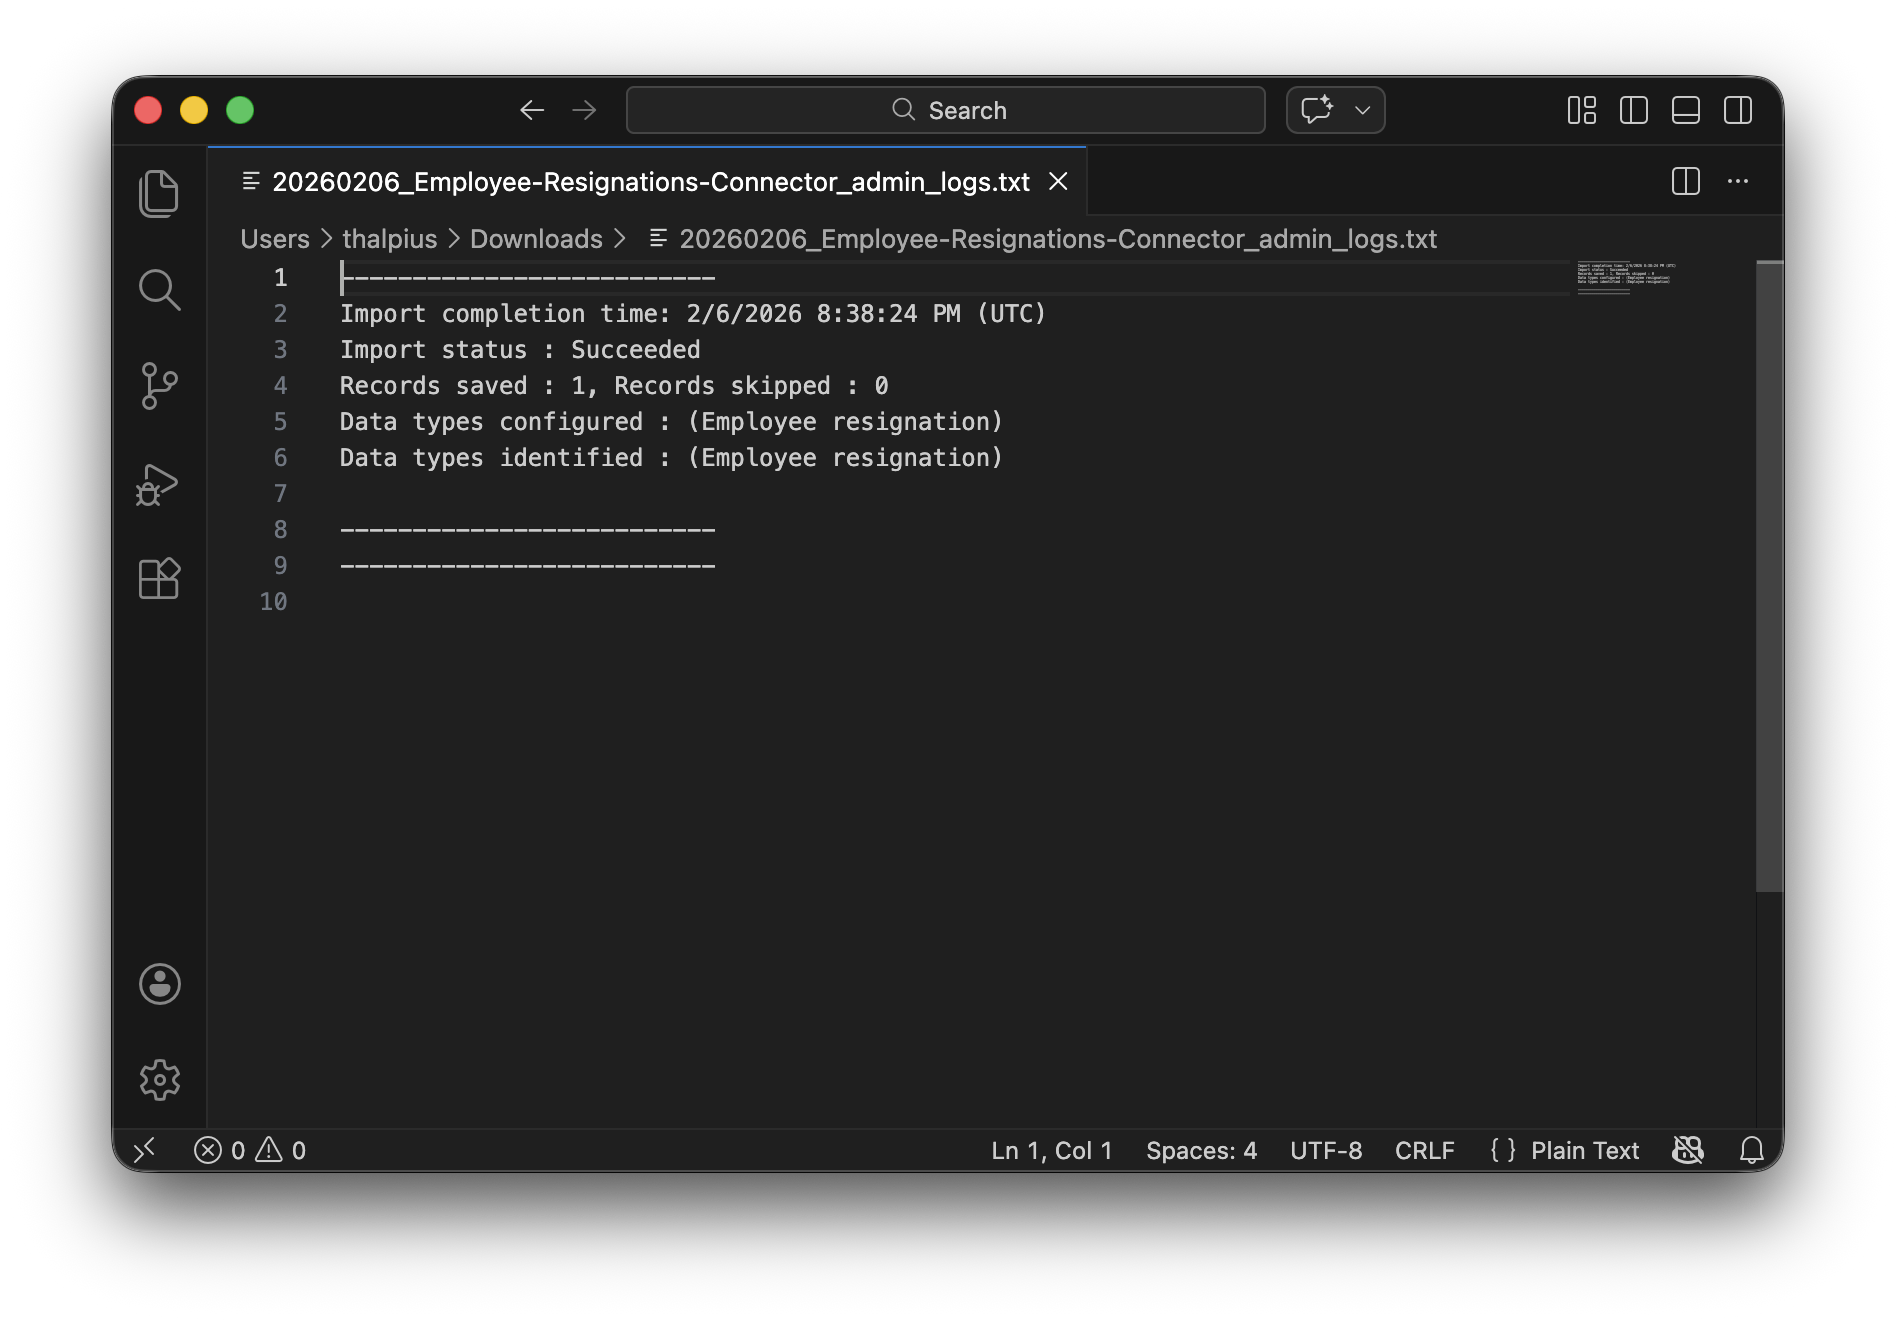
4. Verify Upload
If successful, you will see: Upload Successful
Return to the Purview portal and navigate to your HR connector. Under Progress, click “Download log” to see the ingestion details. The RecordsSaved field should match the number of rows in your CSV.
Recommended: Automating HR Data Uploads
For production environments, manual PowerShell execution is not sustainable. Microsoft recommends automating uploads using Power Automate to trigger when new CSV files appear in SharePoint or OneDrive for Business.
The workflow is straightforward:
- HR system exports CSV to SharePoint/OneDrive
- Power Automate detects new file
- Flow authenticates using credentials from Azure Key Vault
- HR data uploads automatically to Purview
Microsoft provides a pre-built Power Automate template (ImportHRDataforIRM.zip) specifically for this purpose, available at: github.com/microsoft/m365-compliance-connector-sample-scripts
This approach eliminates manual intervention while maintaining security through Key Vault integration for credential management.
Conclusion
The HR data connector is a critical component for automatically detecting data theft by departing employees in Microsoft Purview. While the CSV-based architecture might seem simplistic compared to real-time API integrations, it reflects Microsoft’s deliberate security-first design: maintaining an air-gap between sensitive HR systems and compliance platforms while ensuring universal compatibility. By implementing this connector, you have enabled Microsoft Purview to make intelligent, context-aware security decisions. These HR signals become powerful risk indicators that automatically adjust security controls.
The key takeaway: behavioral analytics alone cannot identify every insider risk scenario. By enriching Insider Risk Management with HR data, you have added a crucial detection layer for one of the highest-risk insider threat, the departing employee with access to years of organizational data.
