In the previous post, encrypting an email containing a BSN turned out to be the easy part: a DLP policy, a sensitive information type, and a Do Not Forward action got the job done in an afternoon. This post covers the harder half of the promise, controlling what happens to that email after it has already been sent. Can it expire on its own? Can it be pulled back if it was sent to the wrong person? That is Microsoft Purview Advanced Message Encryption, and testing it surfaced more undocumented behavior than expected.
Table of Contents
- What Advanced Message Encryption Adds
- Setting Up the Branding Action
- Testing Revocation
- Testing Expiration
- Conclusion
Disclaimer: This blog post is provided for informational purposes only. While every effort has been made to ensure accuracy, implementation of these features should be performed by qualified administrators in accordance with your organization’s security and change management policies. Several values and behaviors described in this post fall outside Microsoft’s documented ranges and were only confirmed through direct testing in a single tenant; they are not guaranteed to behave the same way in every environment, and Microsoft support was not consulted before publishing. The author is not responsible for any issues, data loss, or security incidents that may occur from following this guidance. Always test in a non-production environment first.
What Advanced Message Encryption Adds
Advanced Message Encryption (AME) sits on top of the Purview Message Encryption covered in the previous post. It requires a Microsoft 365 E5, E5 Compliance, or E5 Information Protection & Governance license, on top of the base encryption capability that already comes with E3. Without one of those licenses, the cmdlets in this post either fail outright or simply have no effect.
AME adds three things: multiple branding templates, message expiration, and message revocation. All three depend on the recipient reading the message through the OME web portal rather than natively inline. That is a detail worth repeating from the previous post’s “What the Recipient Actually Sees” section: a Microsoft-account recipient normally gets a native, login-free reading experience, and native messages cannot be revoked or expired, regardless of licensing. To guarantee every external recipient goes through the portal, a separate Exchange transport rule is needed:
New-TransportRule -Name "Force Portal - BSN" -FromScope "InOrganization" -ApplyRightsProtectionTemplate "Do Not Forward" -ApplyRightsProtectionCustomizationTemplate "BSN-Template"

This rule is separate from, and runs alongside, the DLP policy from the previous post. Both can trigger encryption independently.
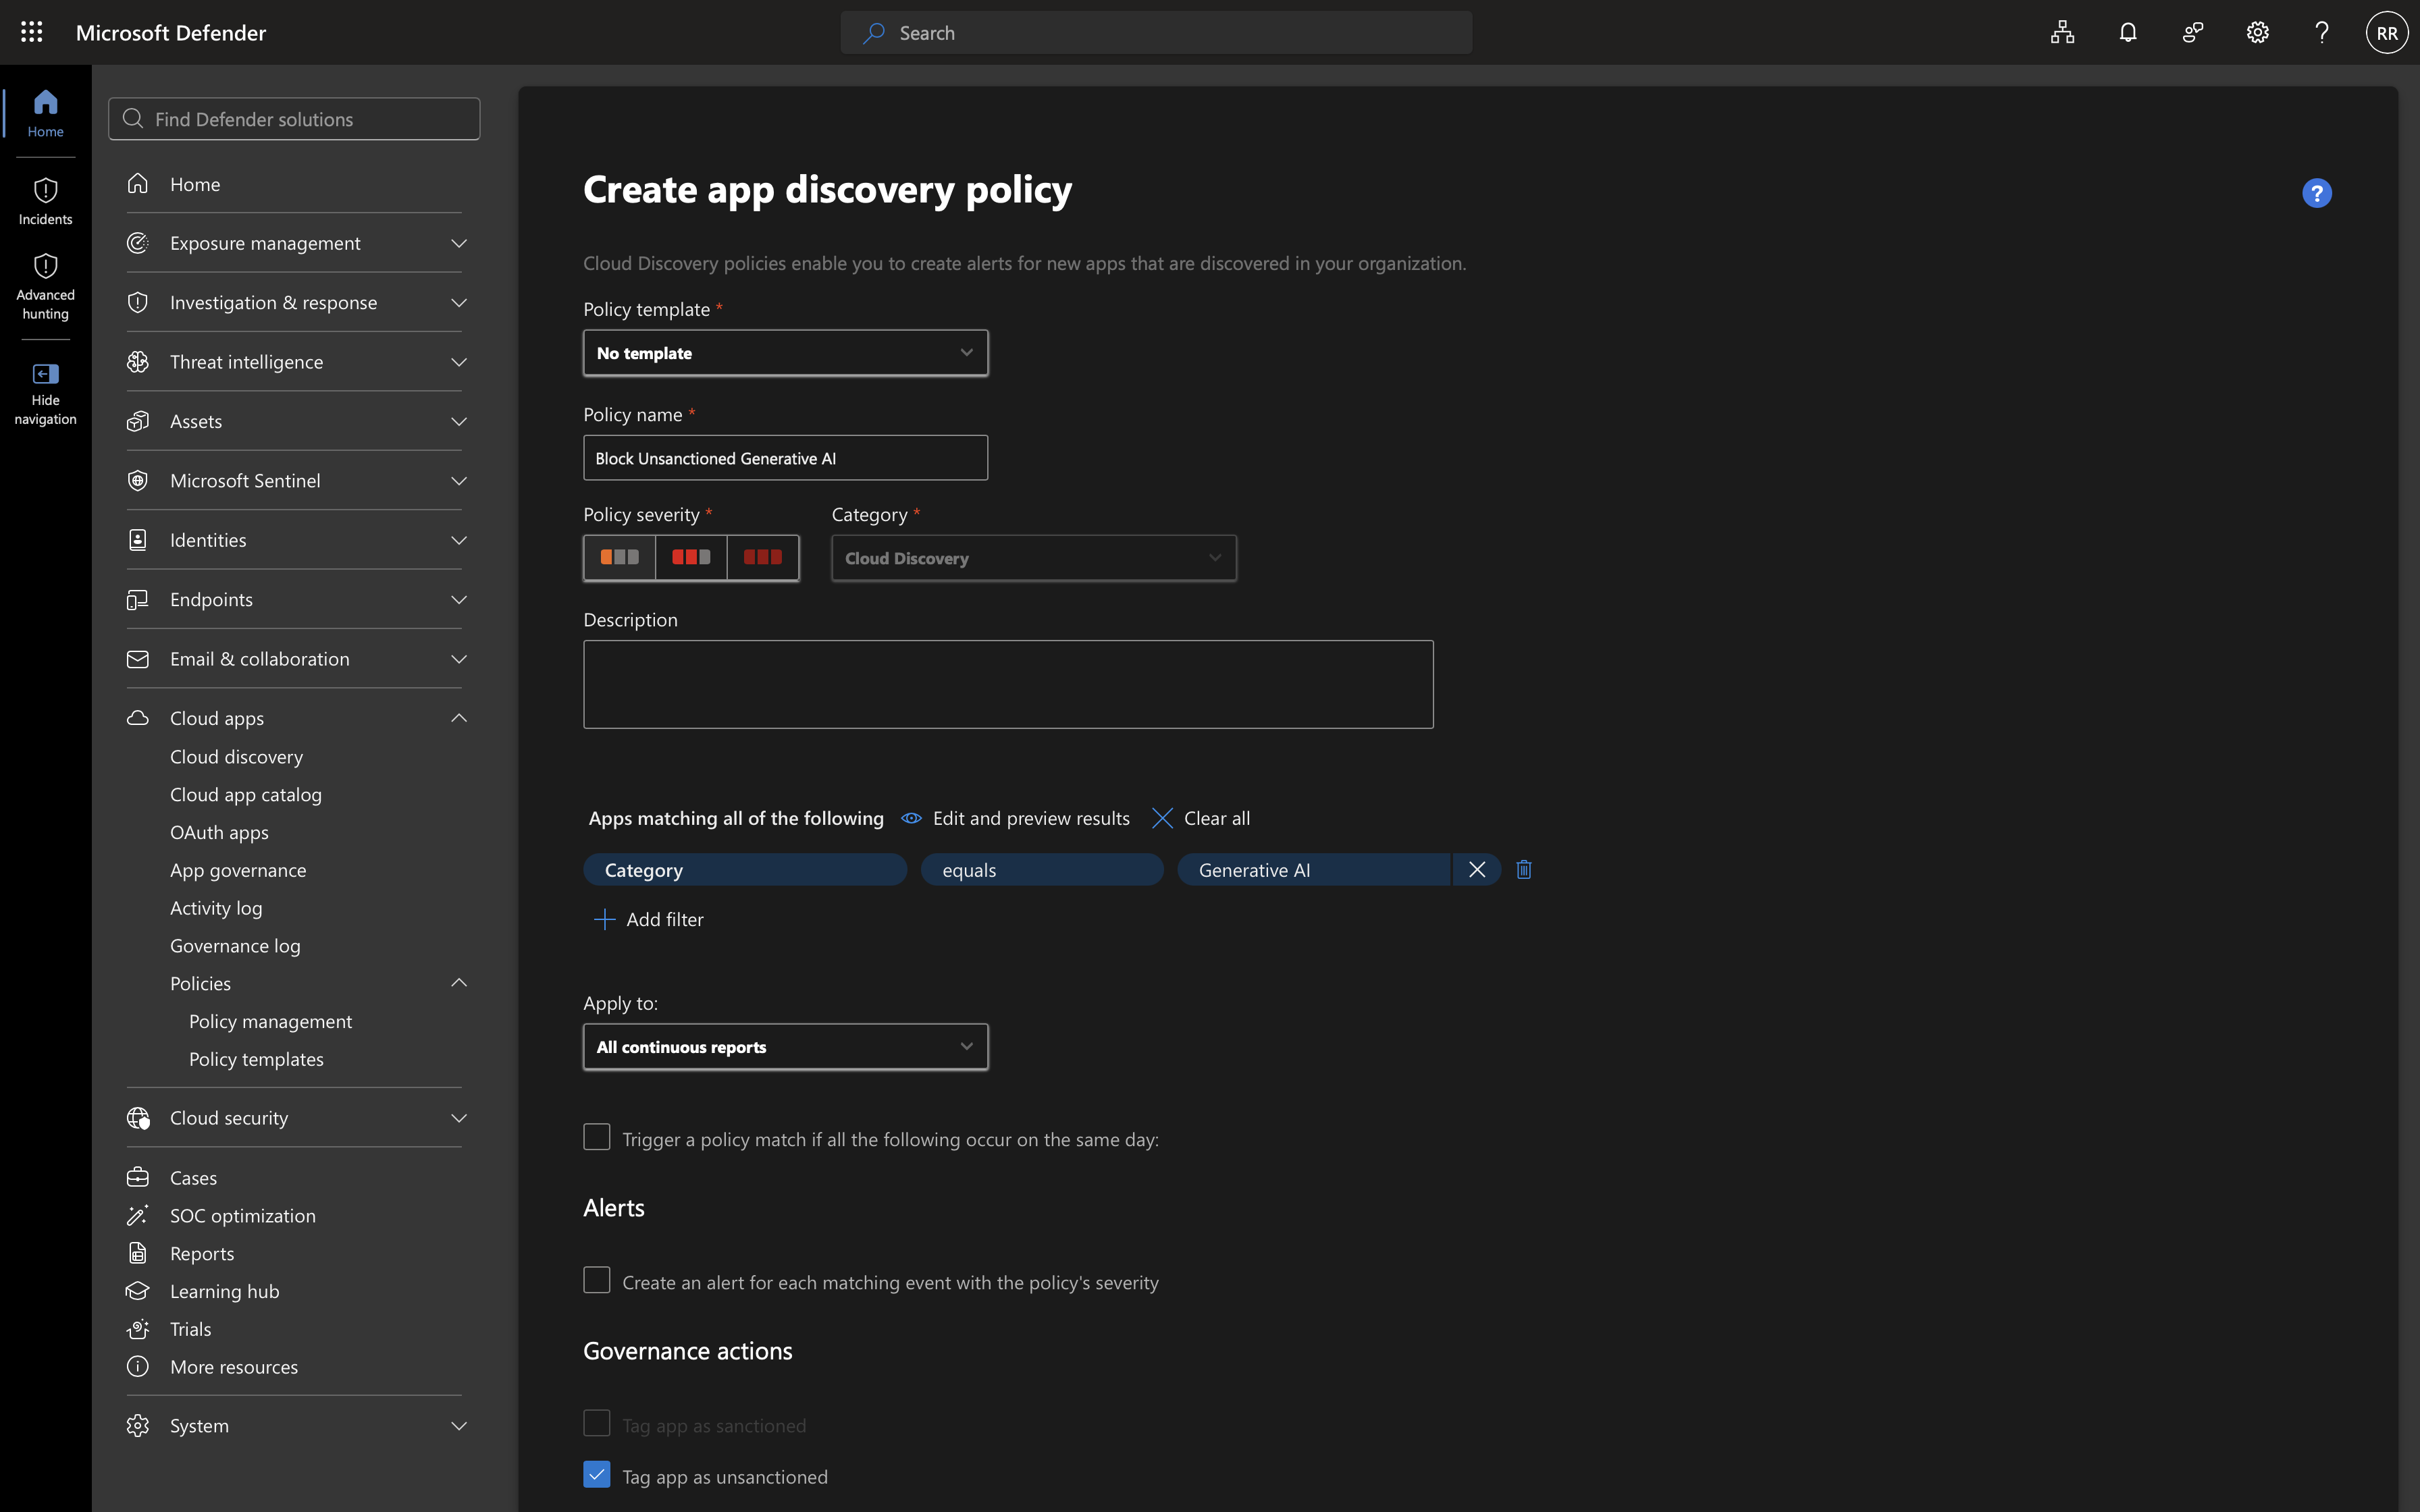
Setting Up the Branding Action
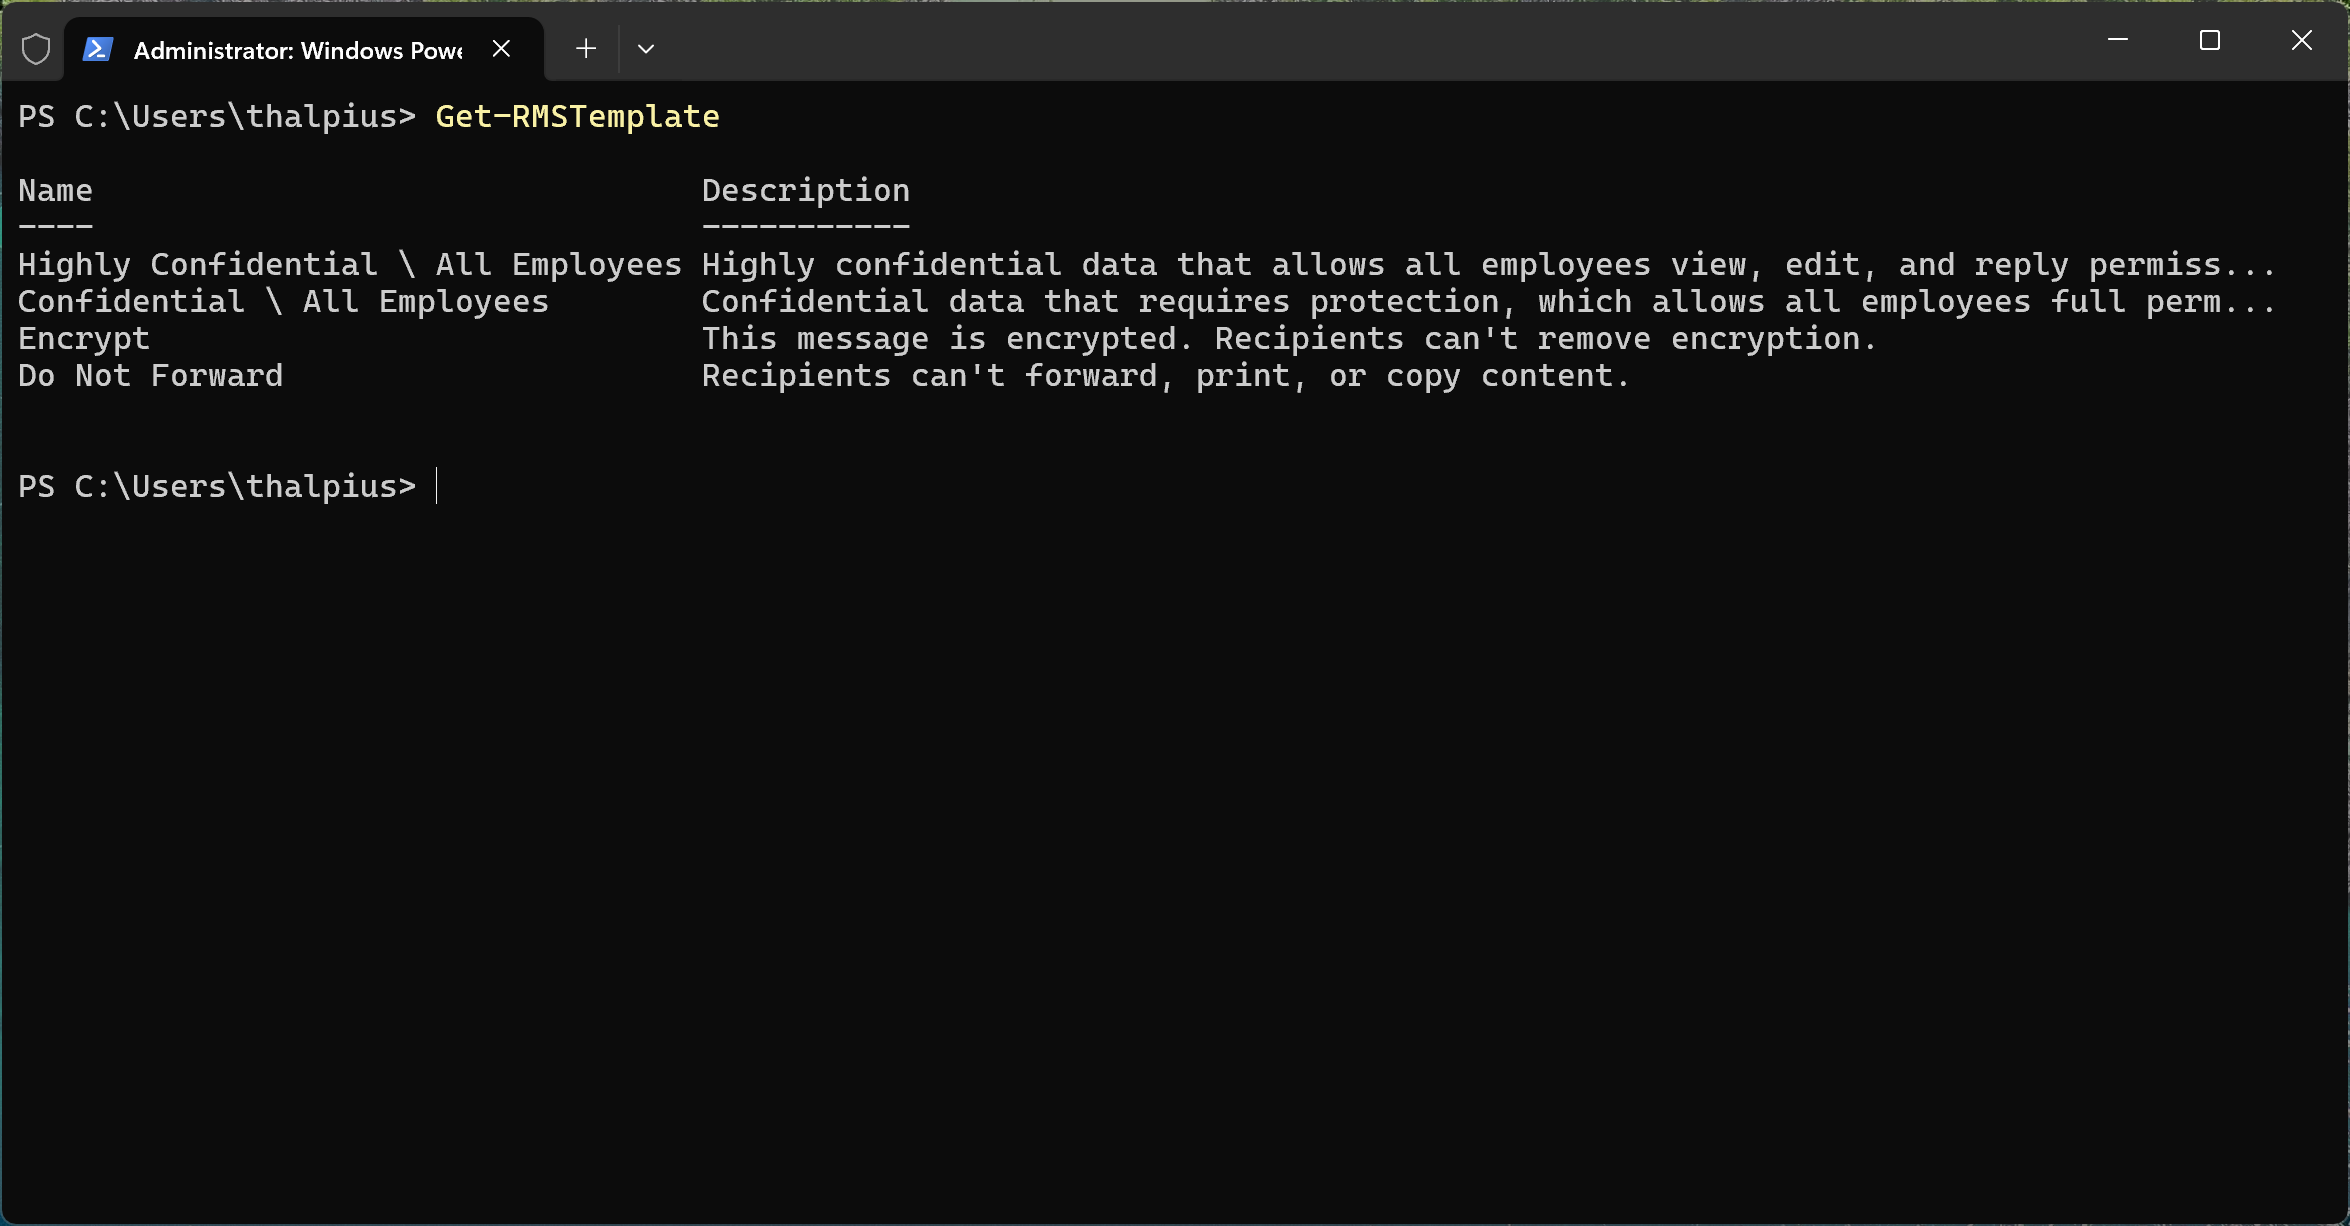
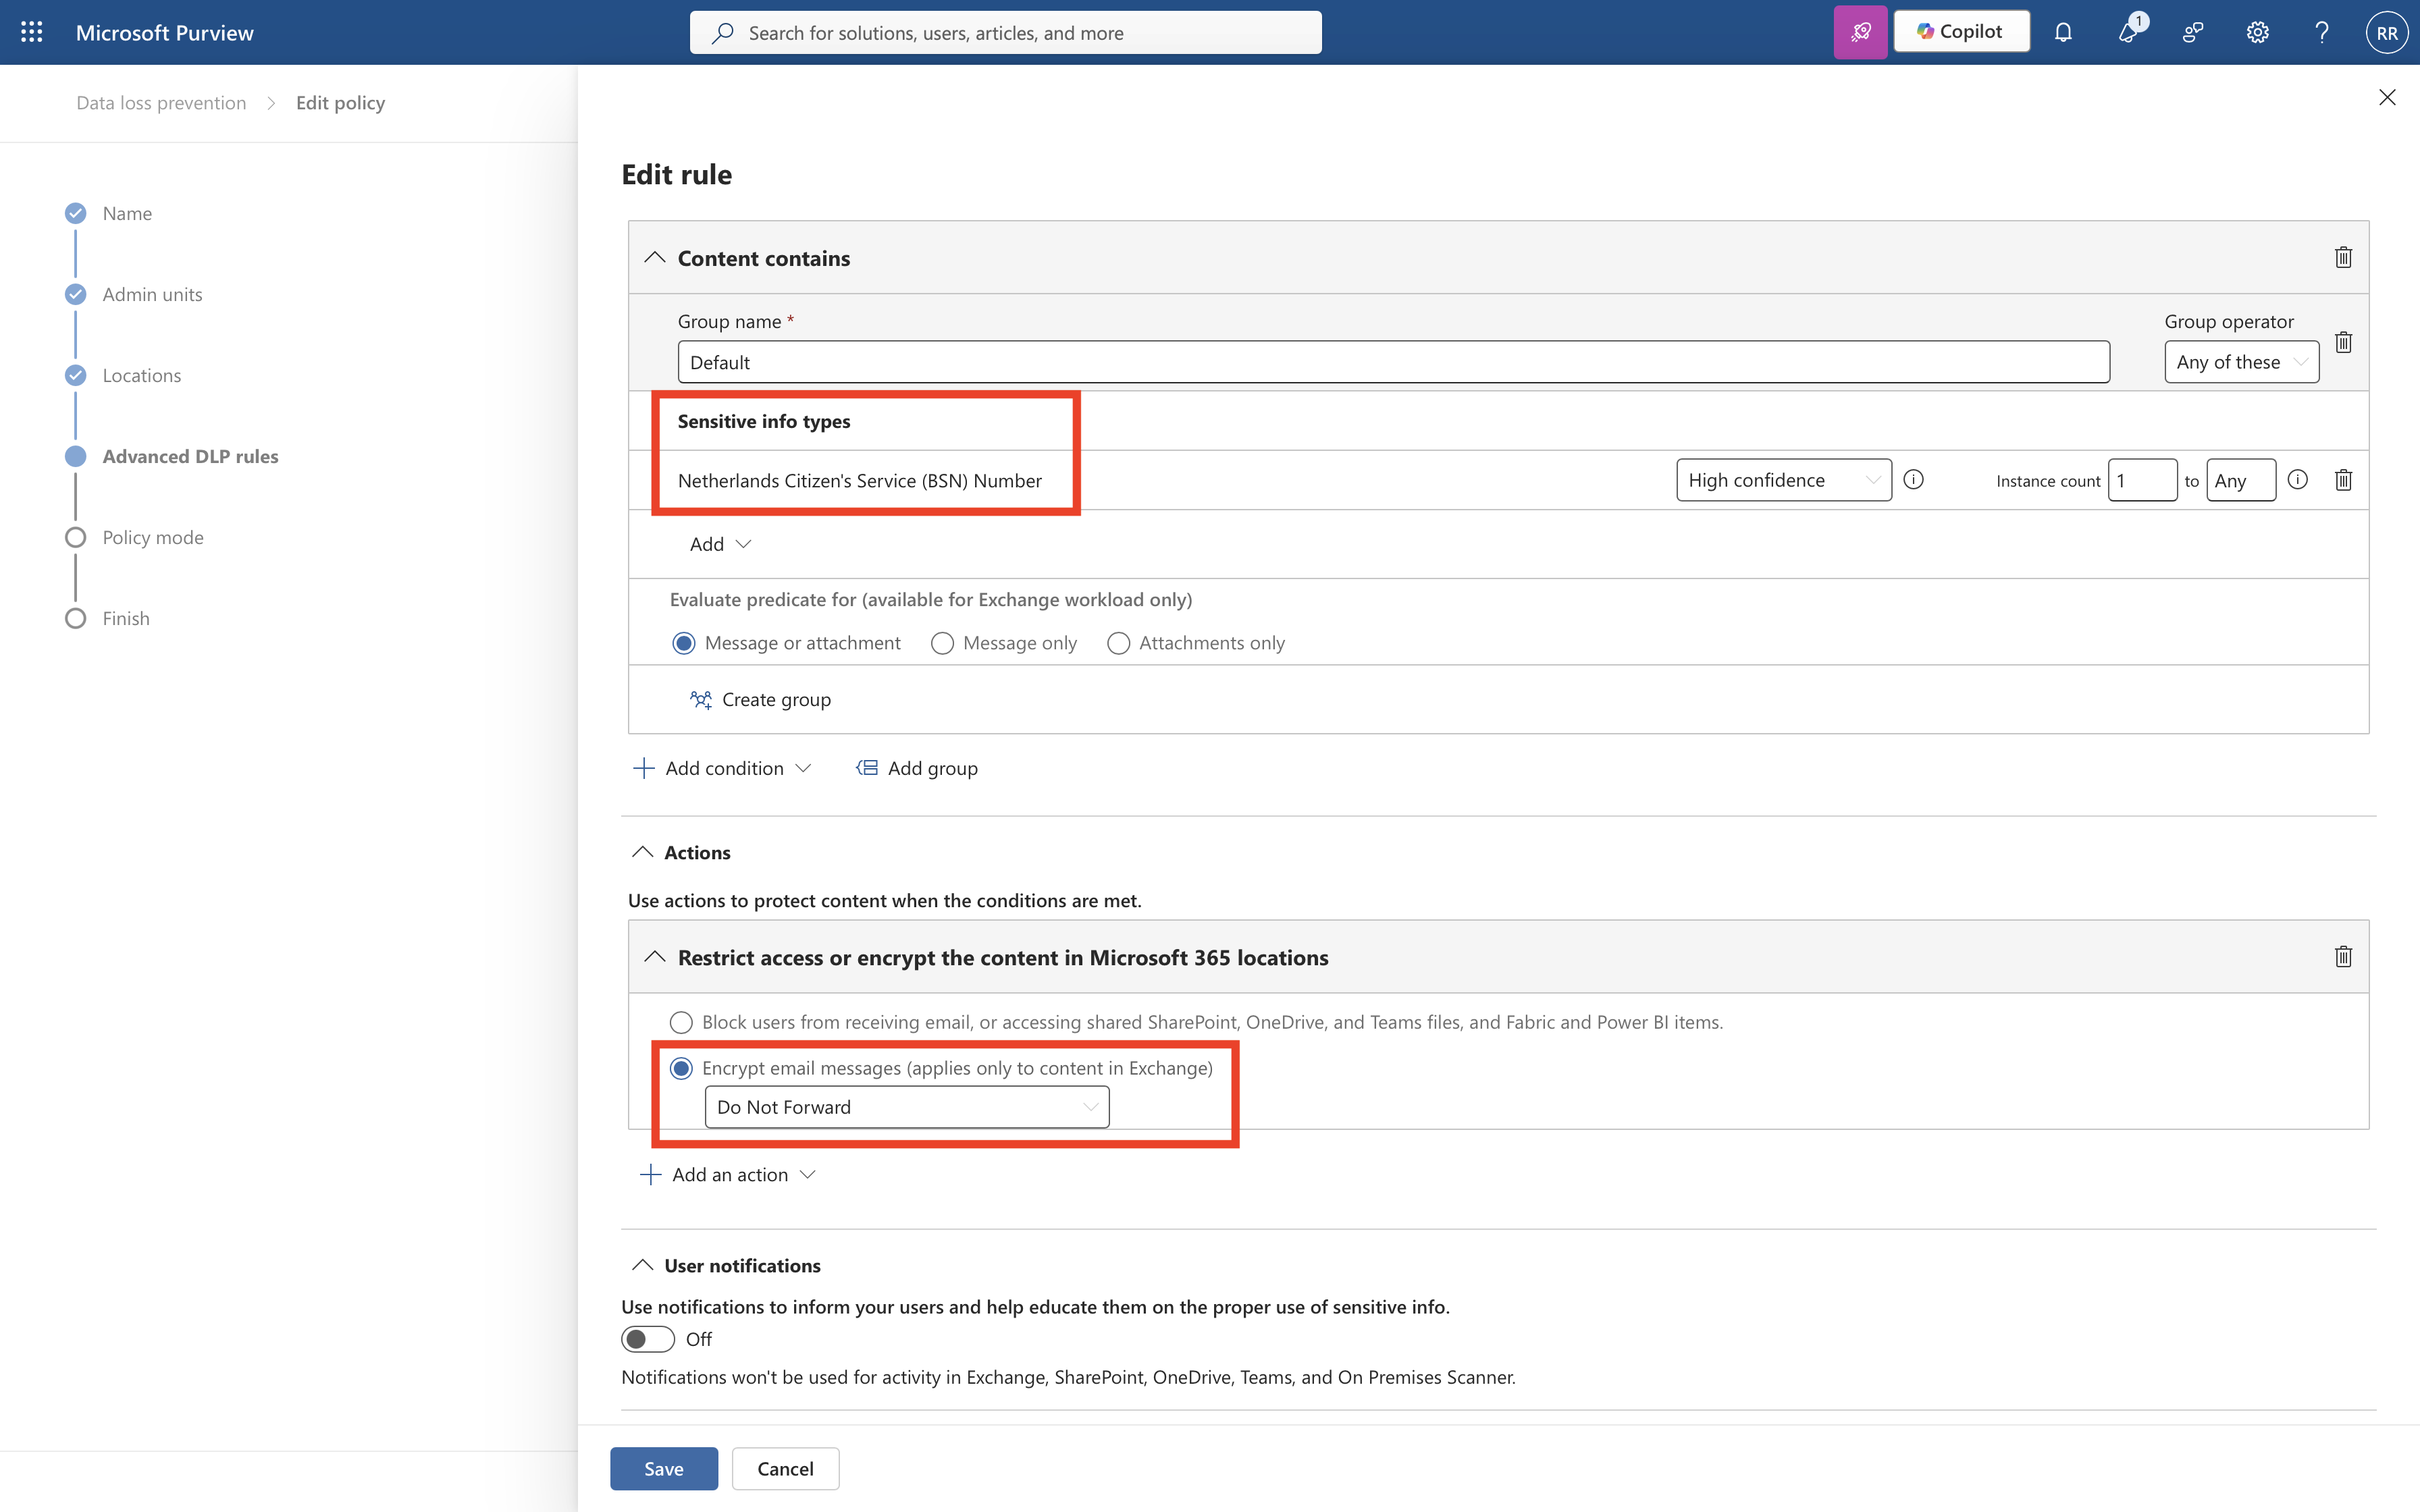
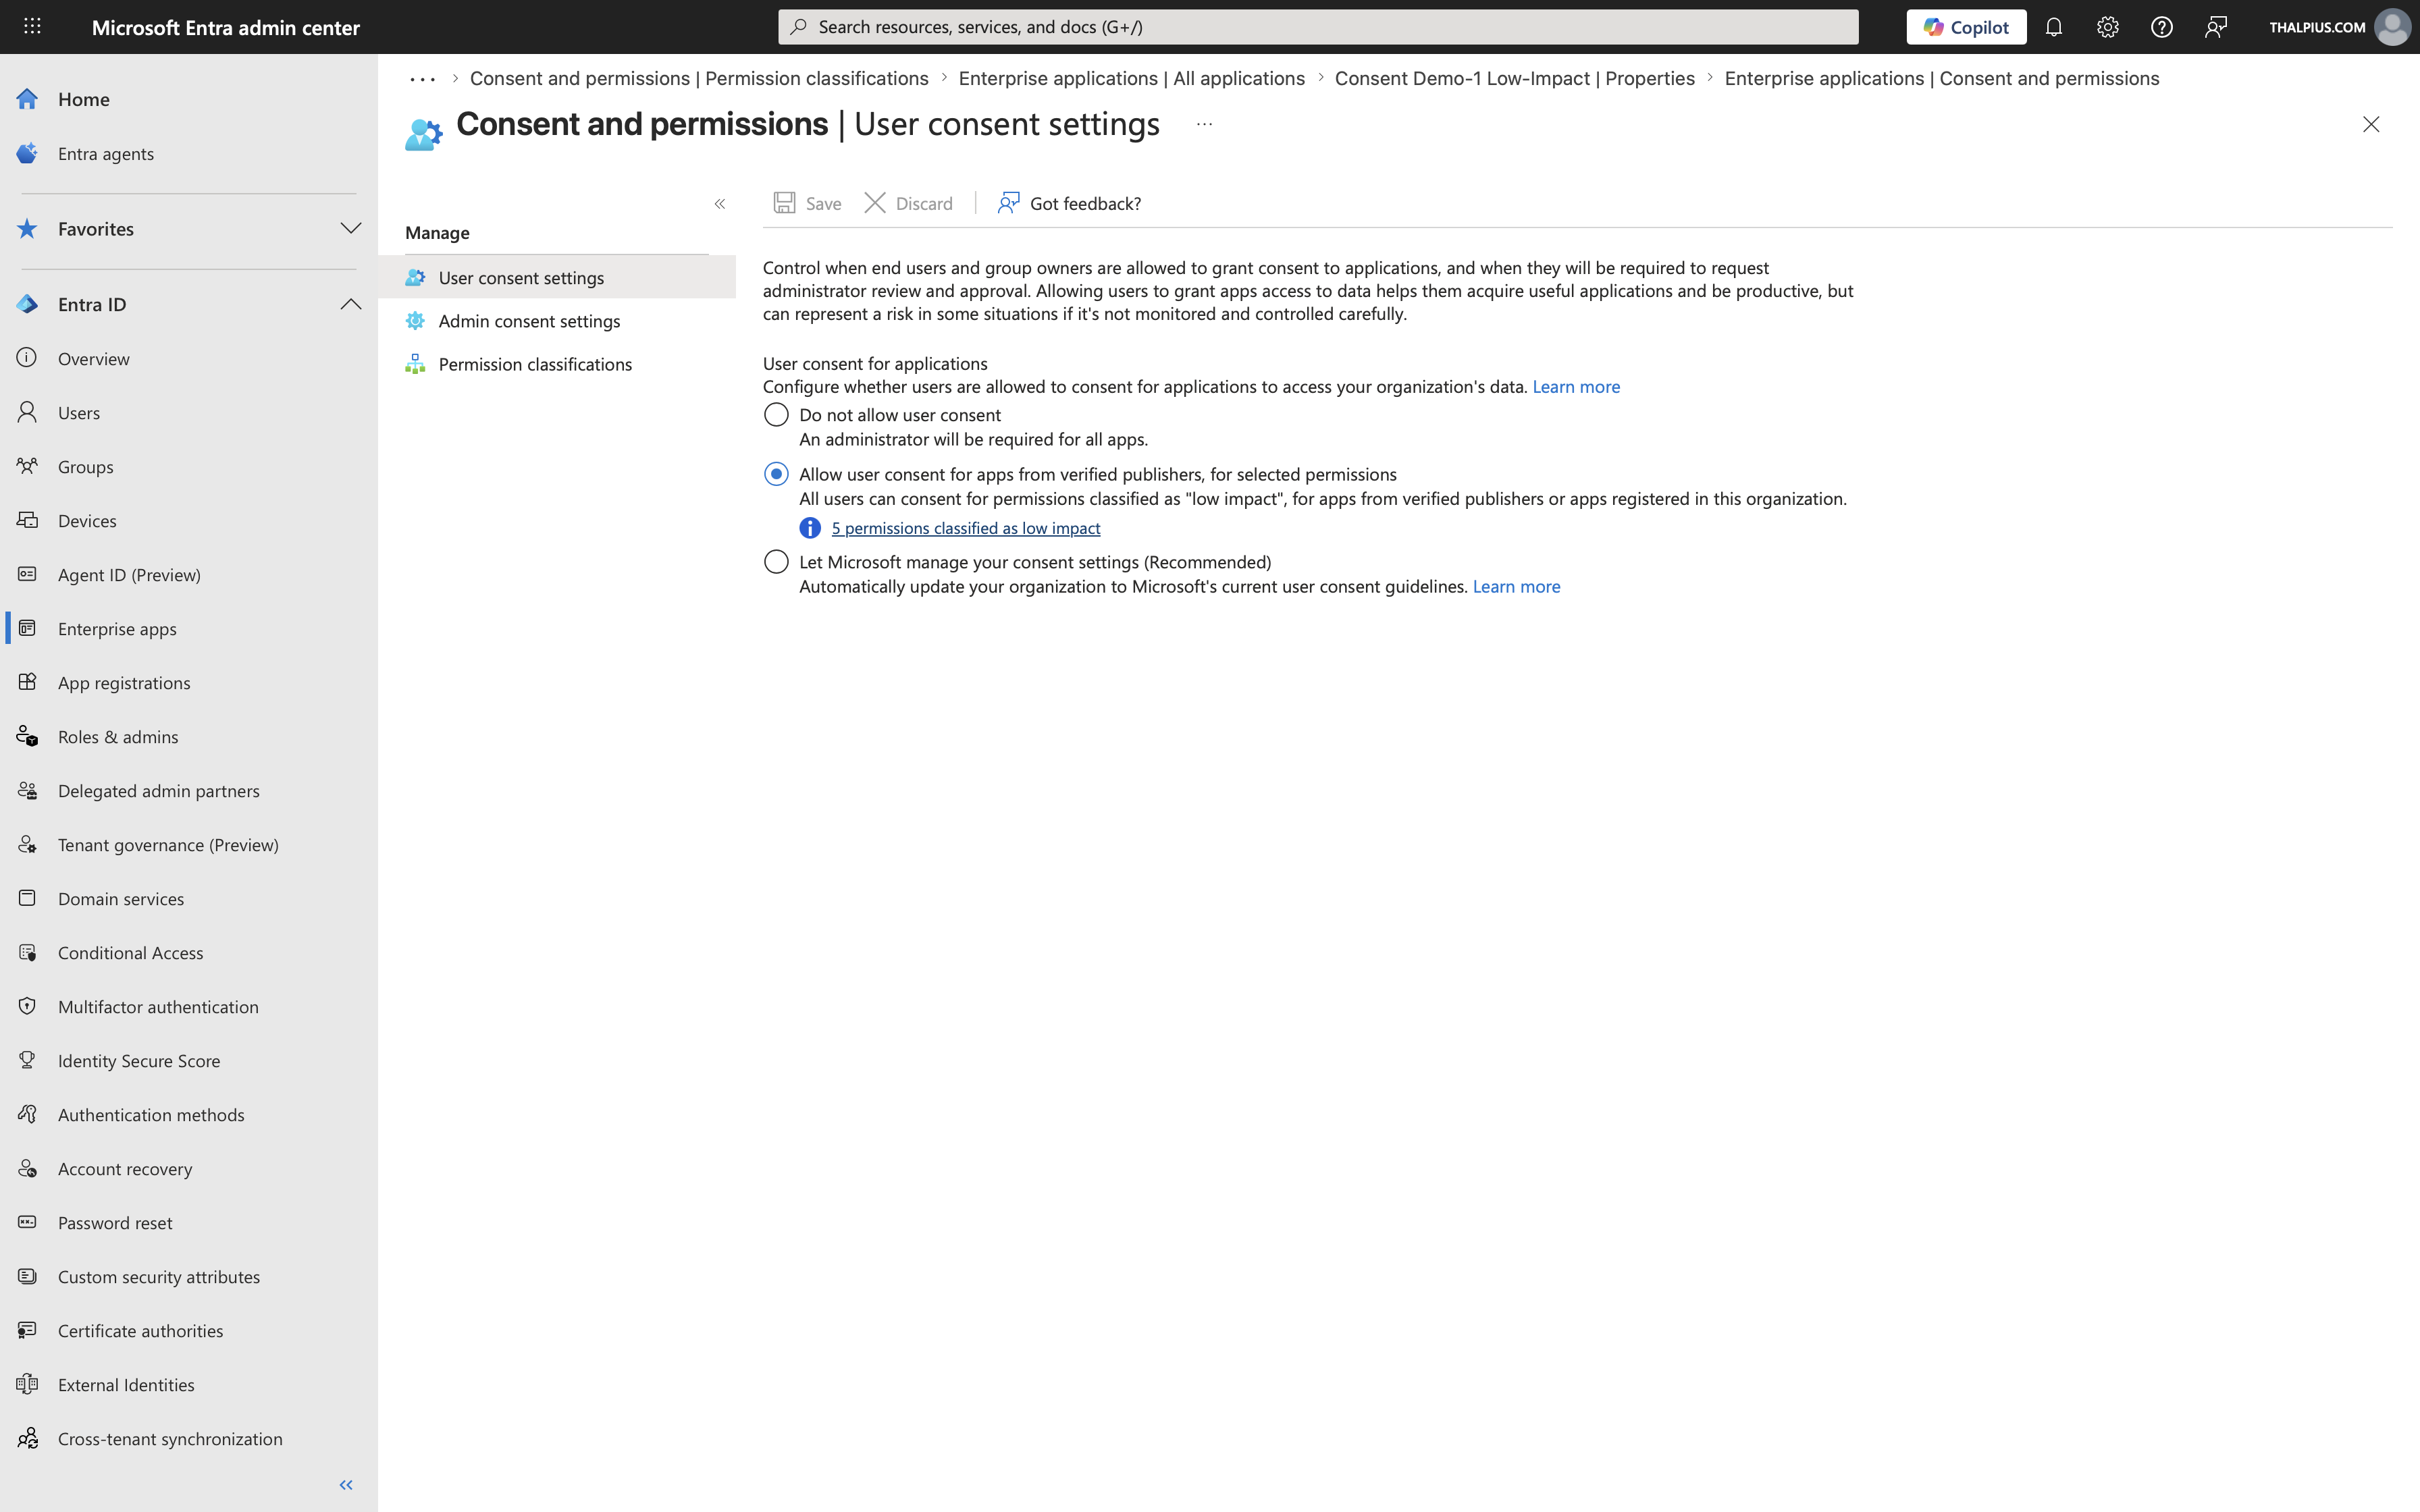
A custom branding template only guarantees revocation and expiration support once it is actually applied through a mail flow rule. If a custom branding template is needed, it is worth knowing that it does not appear as a protection option in the same dropdown as Encrypt and Do Not Forward. It requires a second, separate DLP action called Apply branding to encrypted messages, added alongside the encryption action rather than instead of it.
The template itself is created and modified through PowerShell:
New-OMEConfiguration -Identity "BSN-Template" -ExternalMailExpiryInDays 7
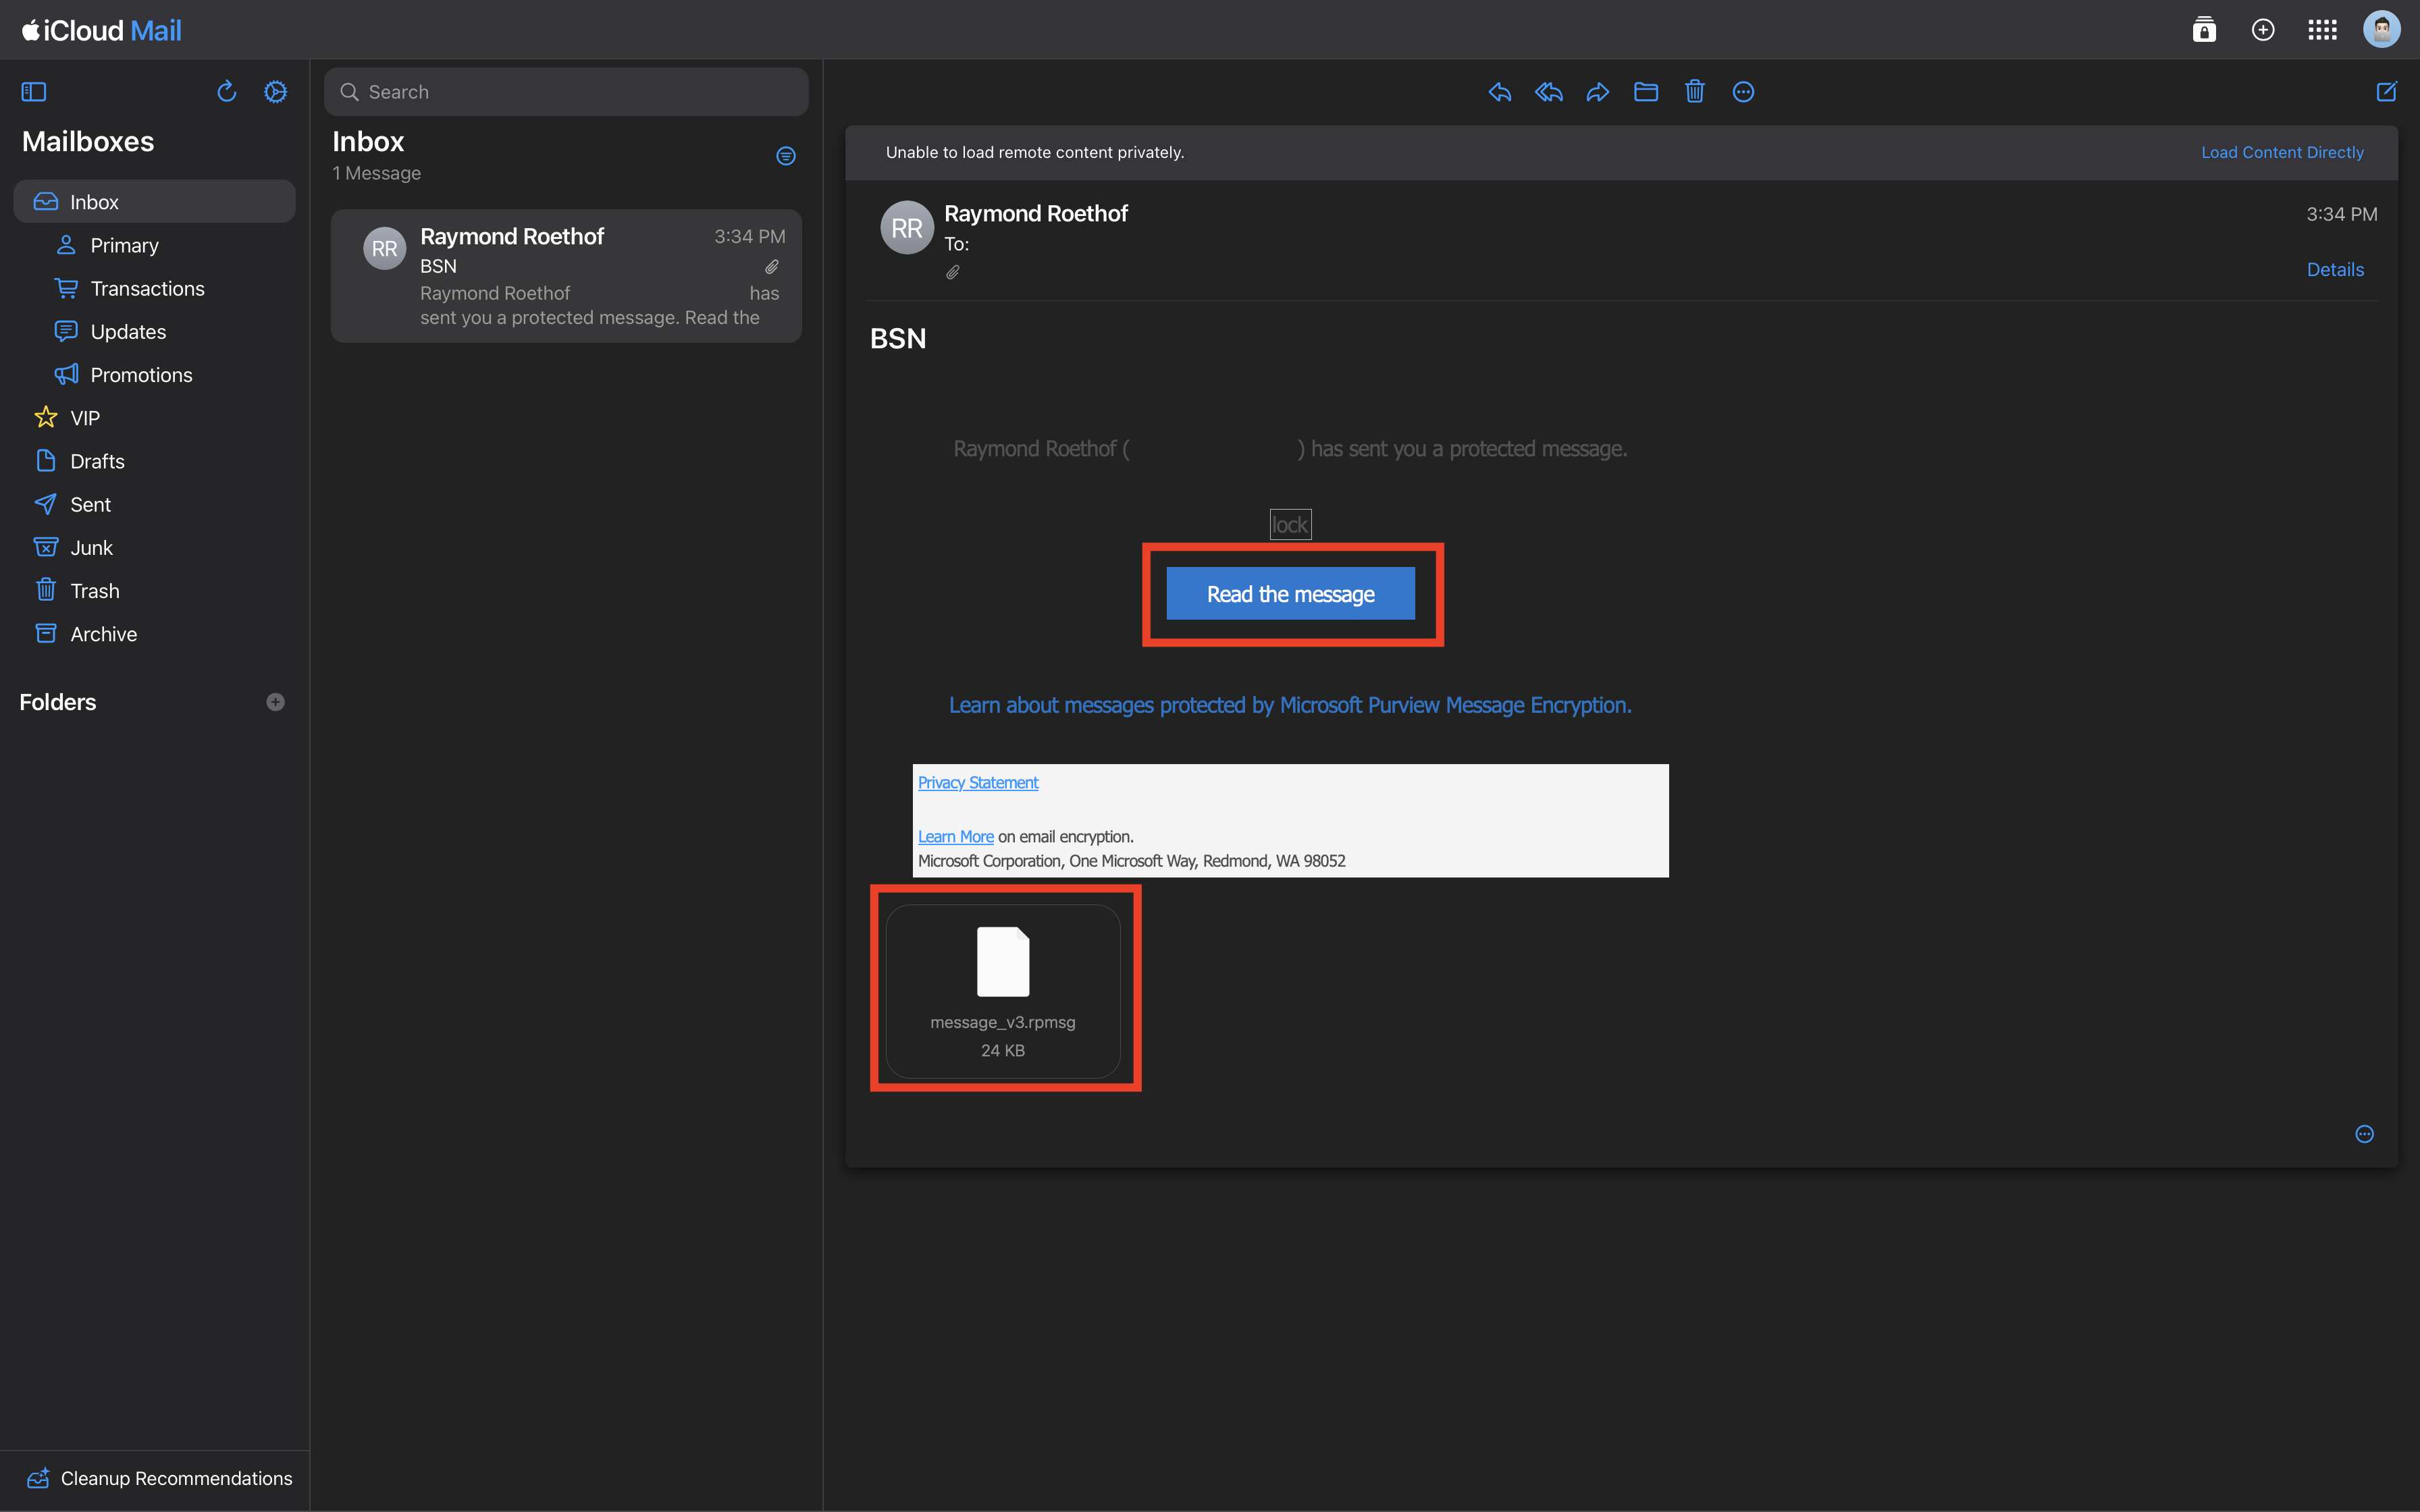
With the transport rule from the previous section referencing this template directly, every external recipient, including Microsoft account holders who would otherwise get the native experience, is forced through the portal.
Testing Revocation
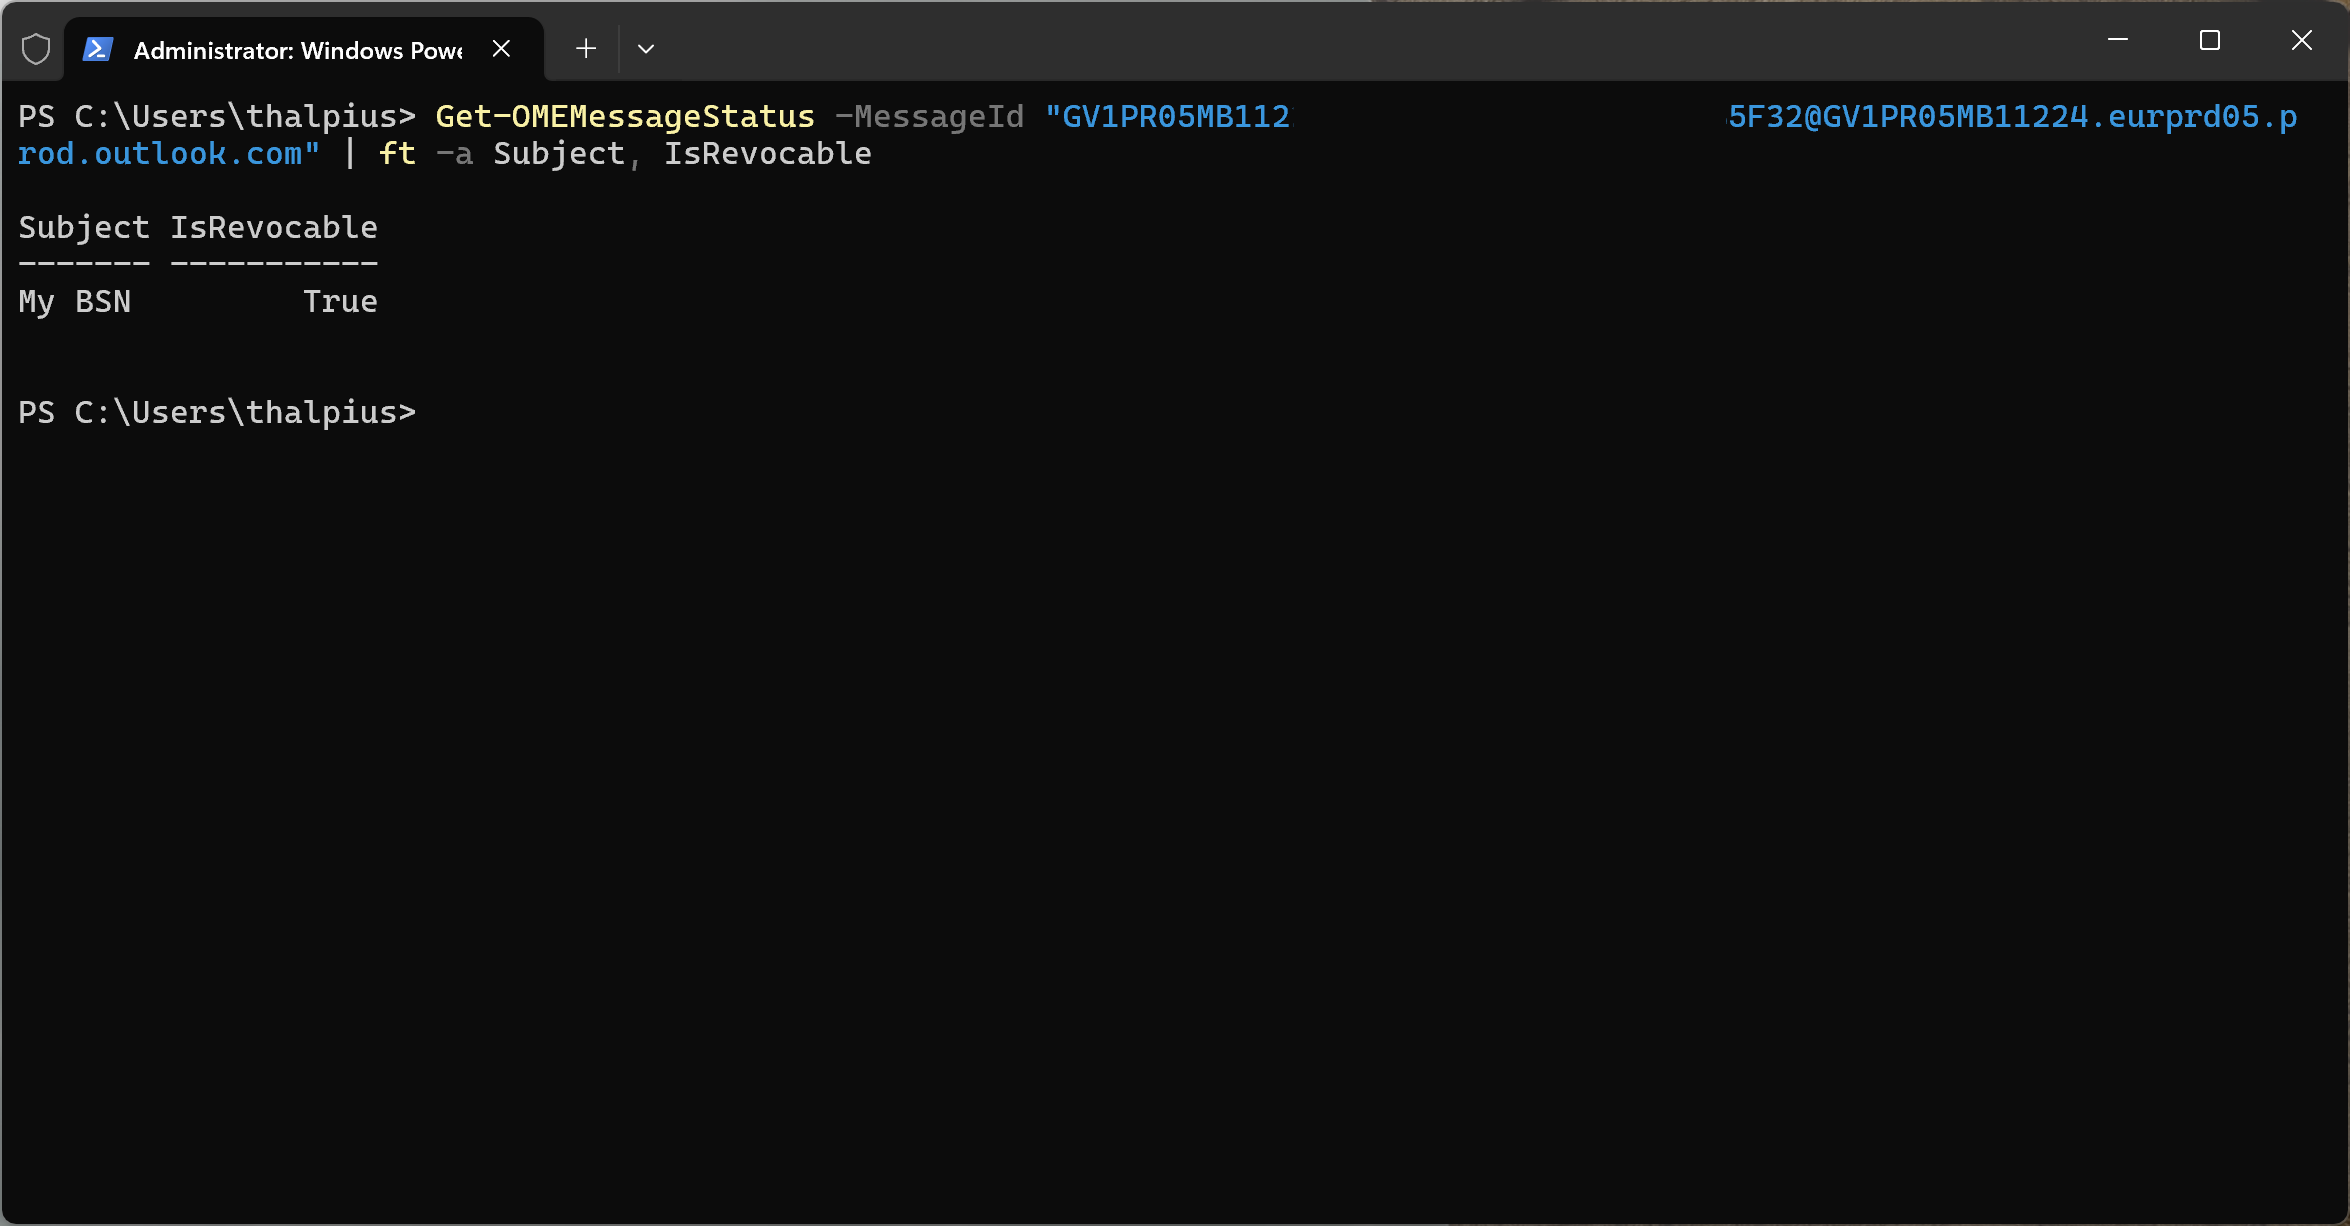
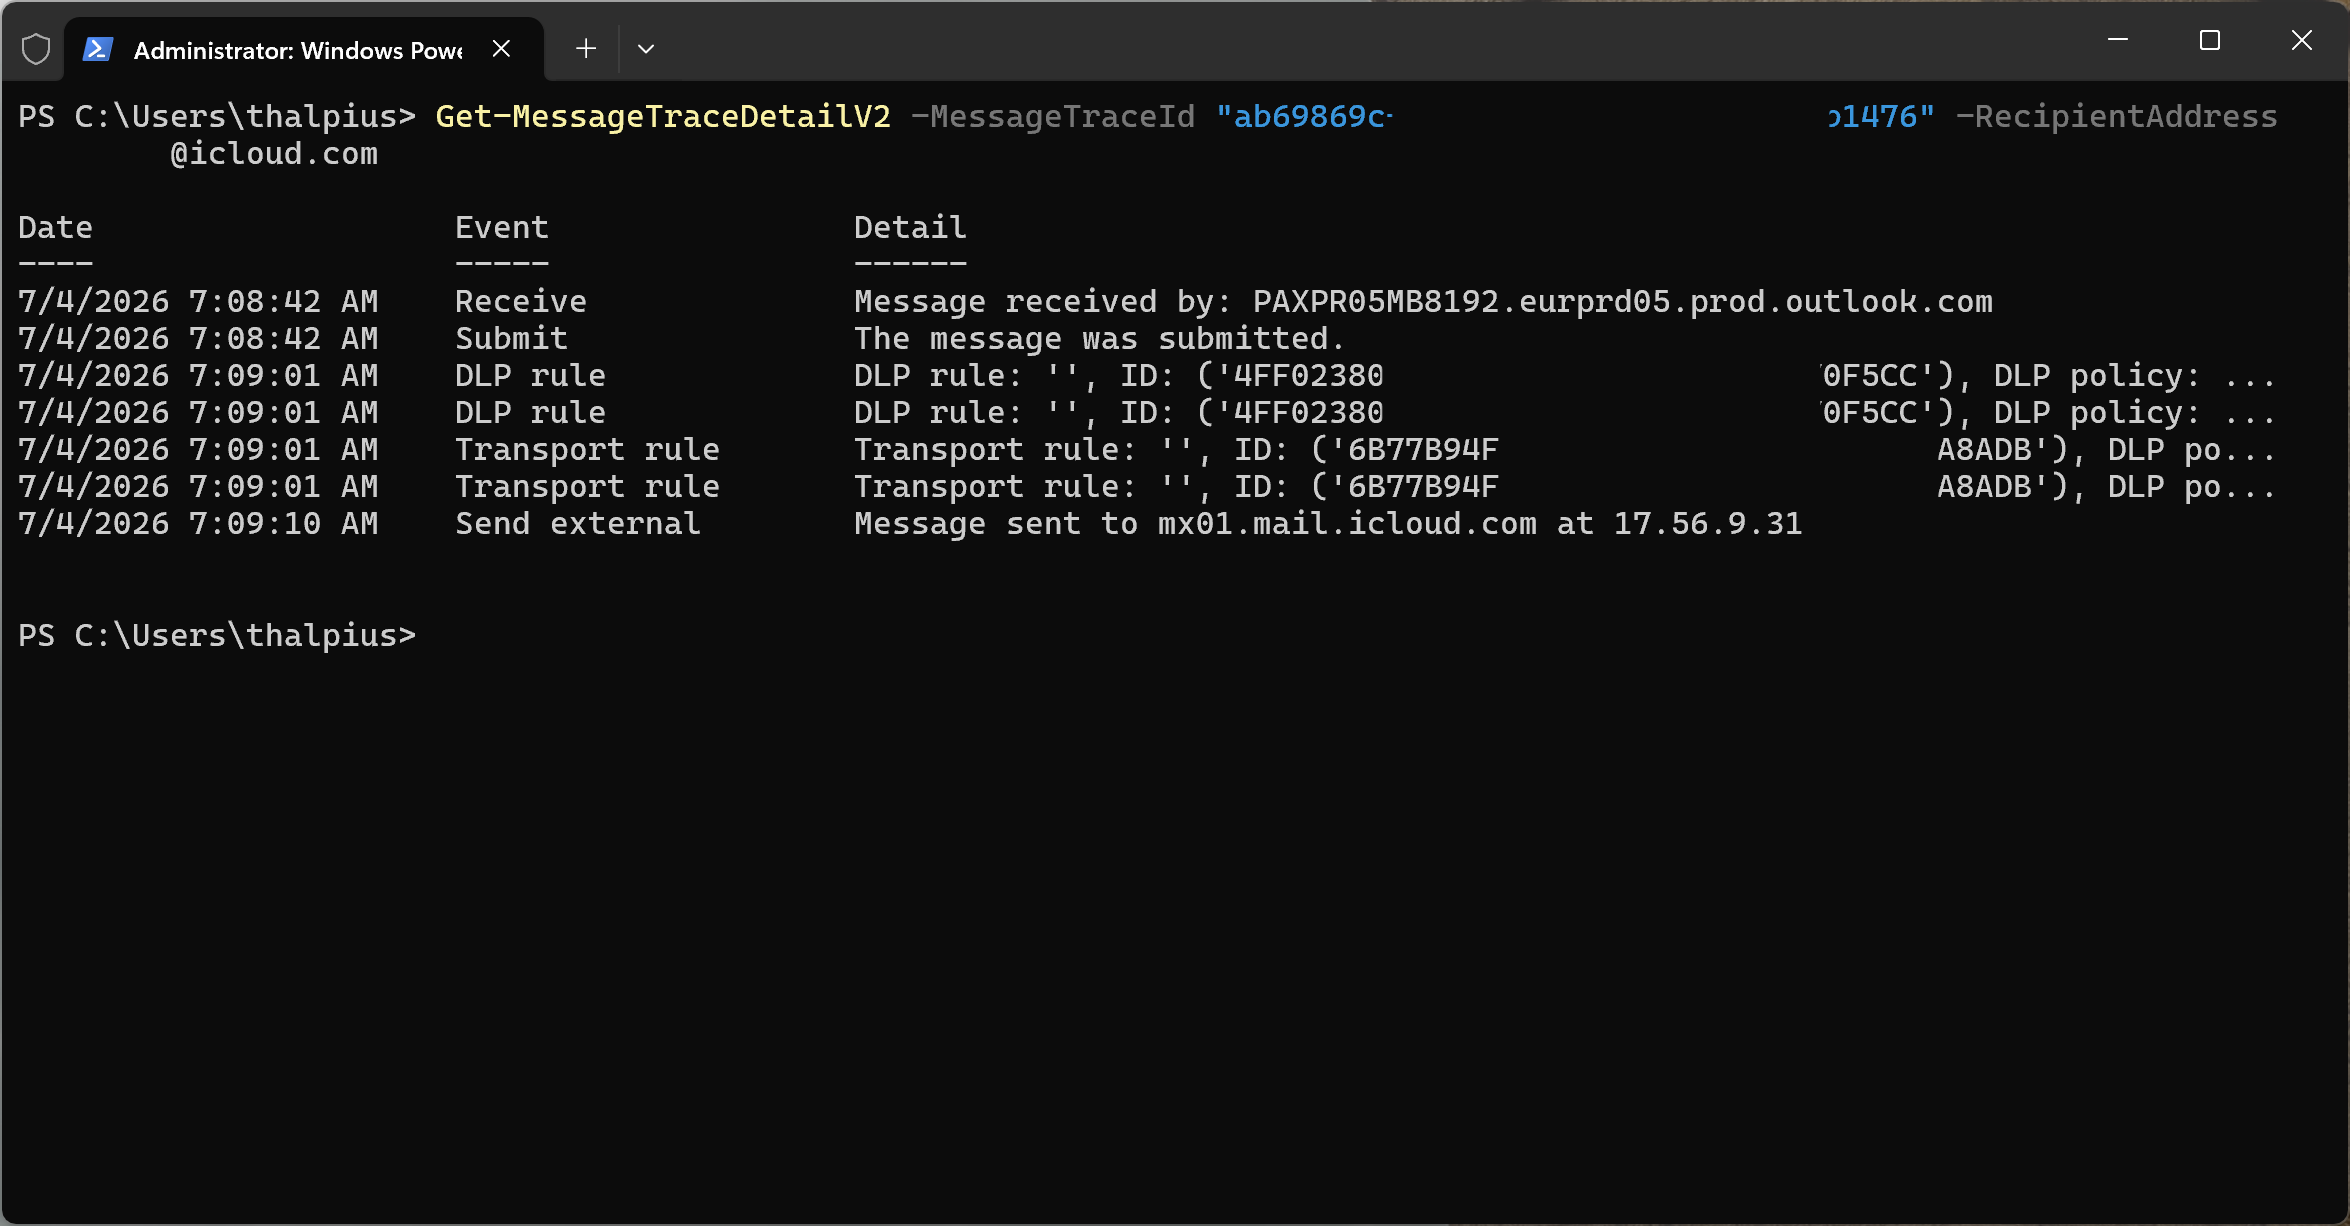
Checking whether a message is revocable does not require sending anything new. Given a Message ID (found through Message Trace), the status can be queried directly:
Get-OMEMessageStatus -MessageId "<message-id>" | ft -a Subject, IsRevocable
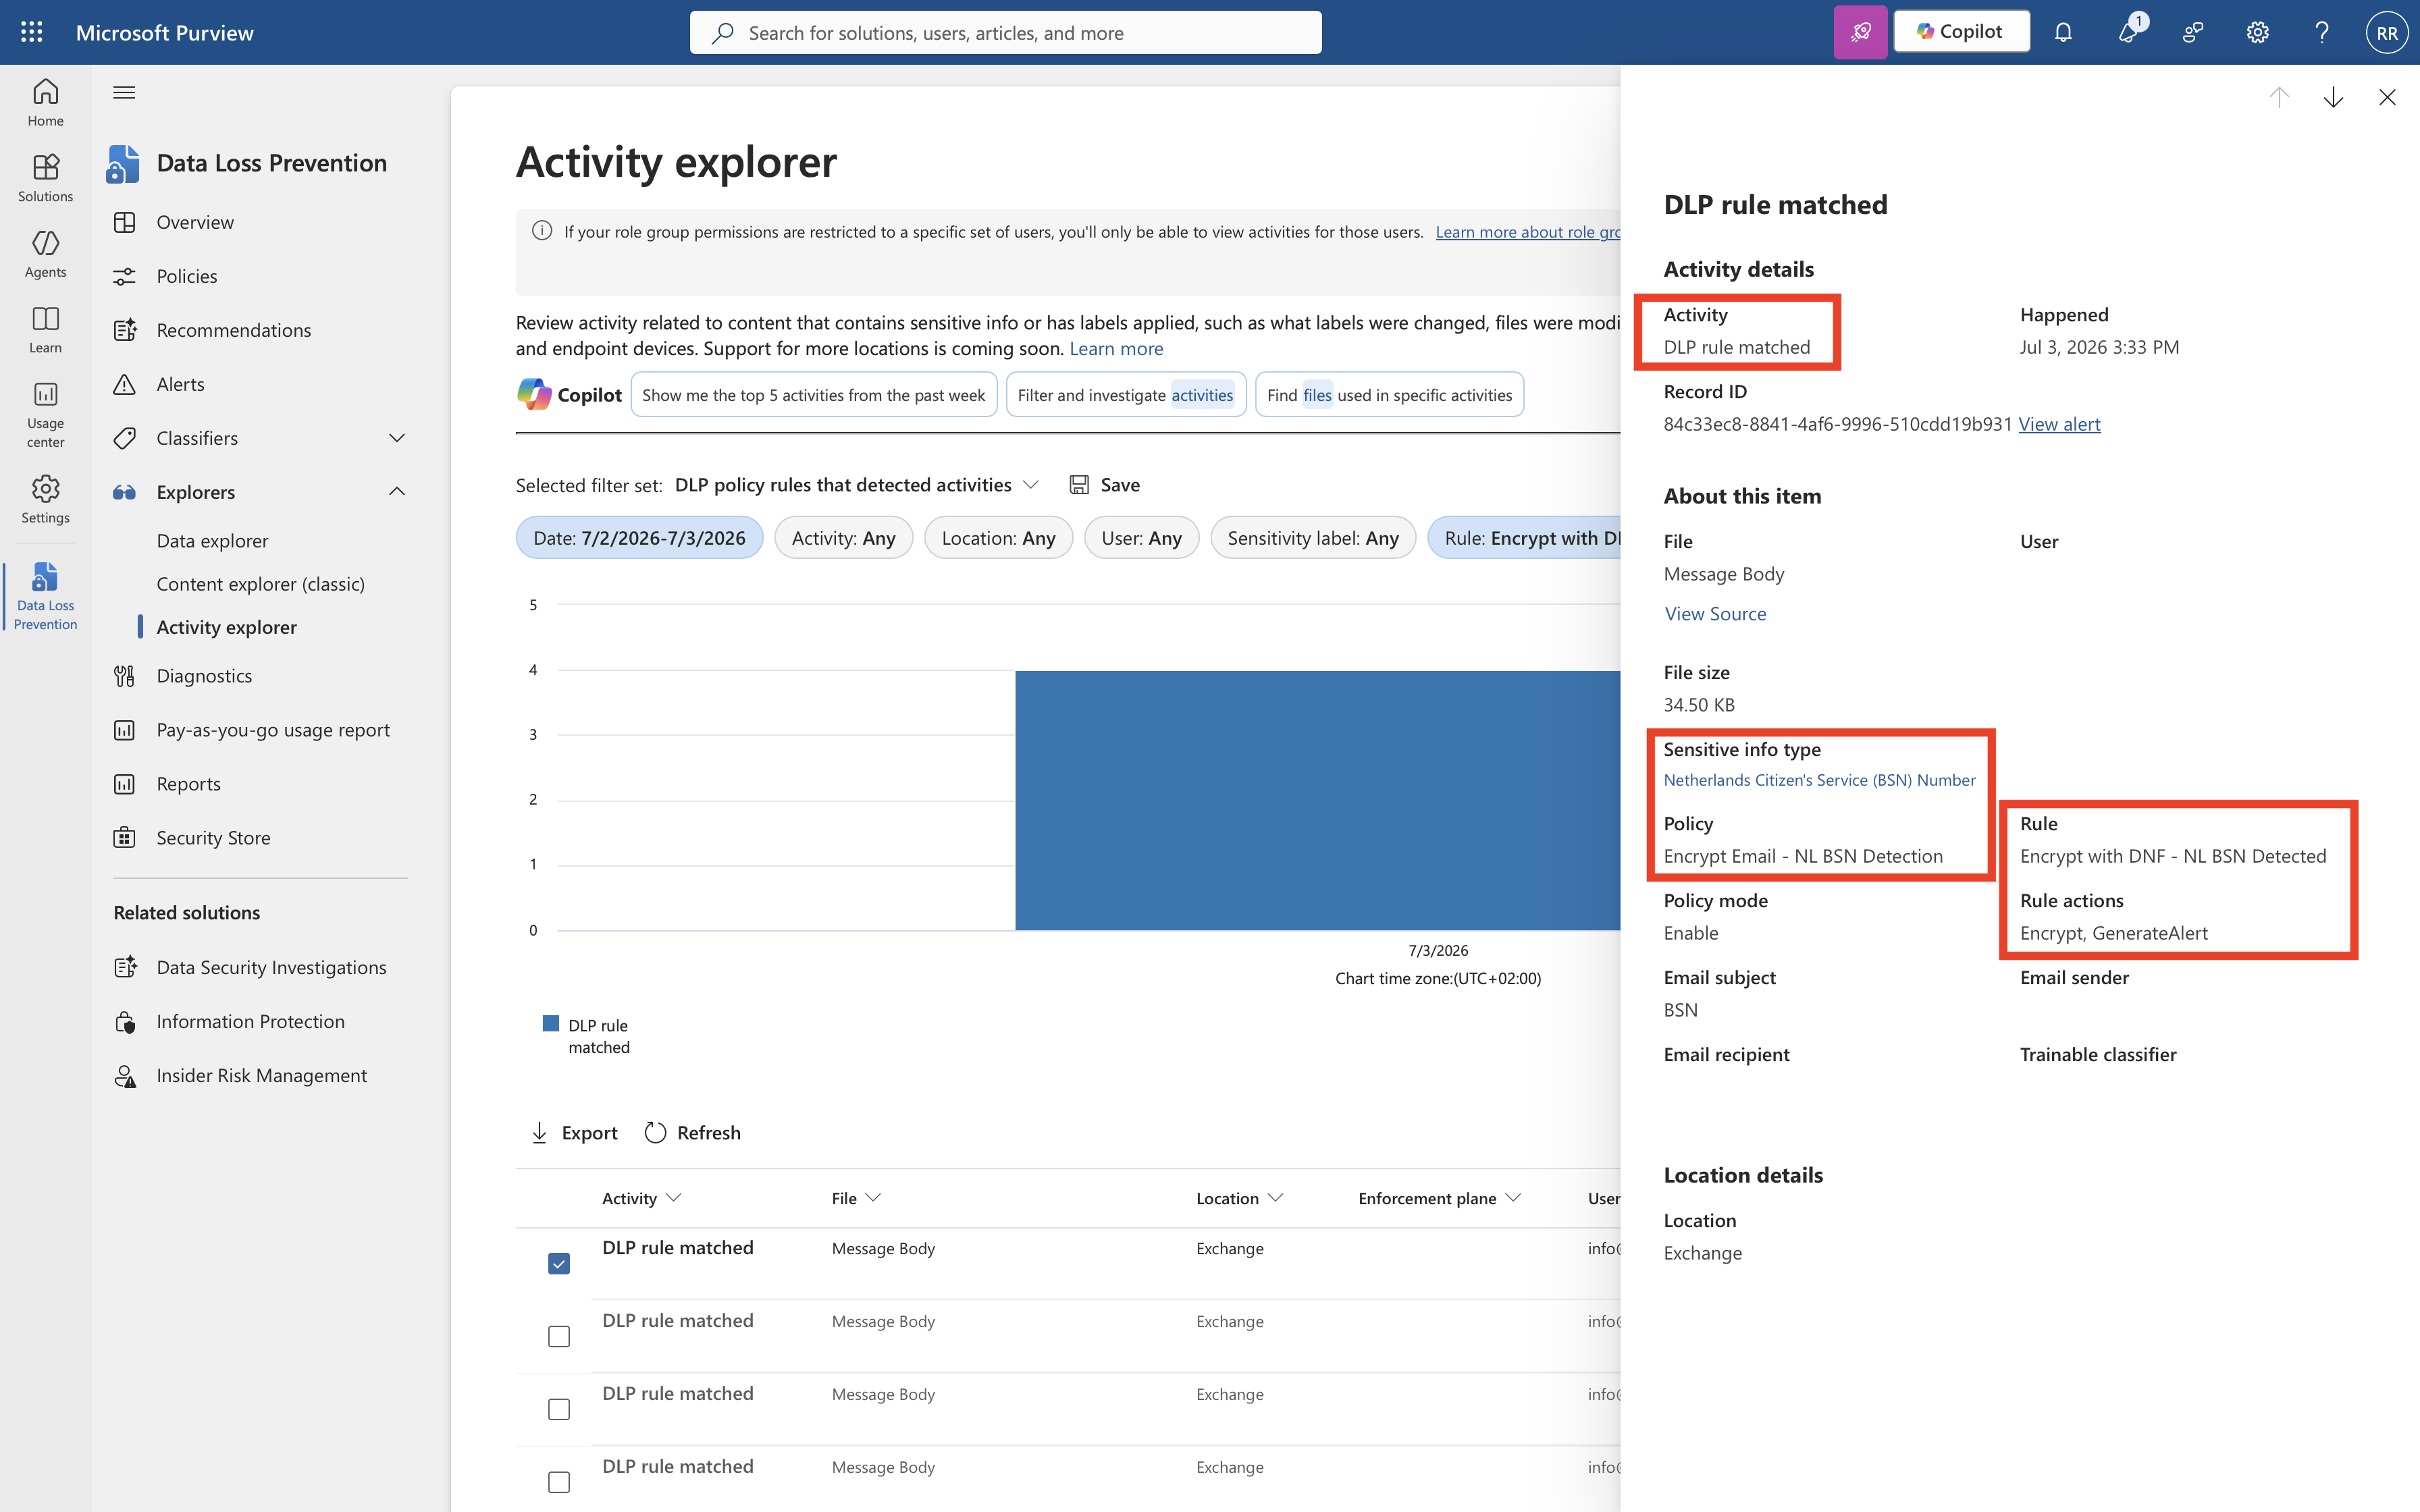
This returned IsRevocable: True without issues, confirming the setup (DLP policy, branding template, and transport rule) was correctly forcing portal-based delivery.
Actually revoking the message was a different story:
Set-OMEMessageRevocation -Revoke $true -MessageId "<message-id>"
This consistently failed with a 401 error, reproducible across multiple messages and after a fresh PowerShell session:
Write-ErrorMessage : StatusCode: 401, ReasonPhrase: 'Auth Failed. For details, use the Token Validation Servicecorrelation ID to get more details from Core Auth telemetry. OAuthEvent currTvsCorrId: [correlation-id]'
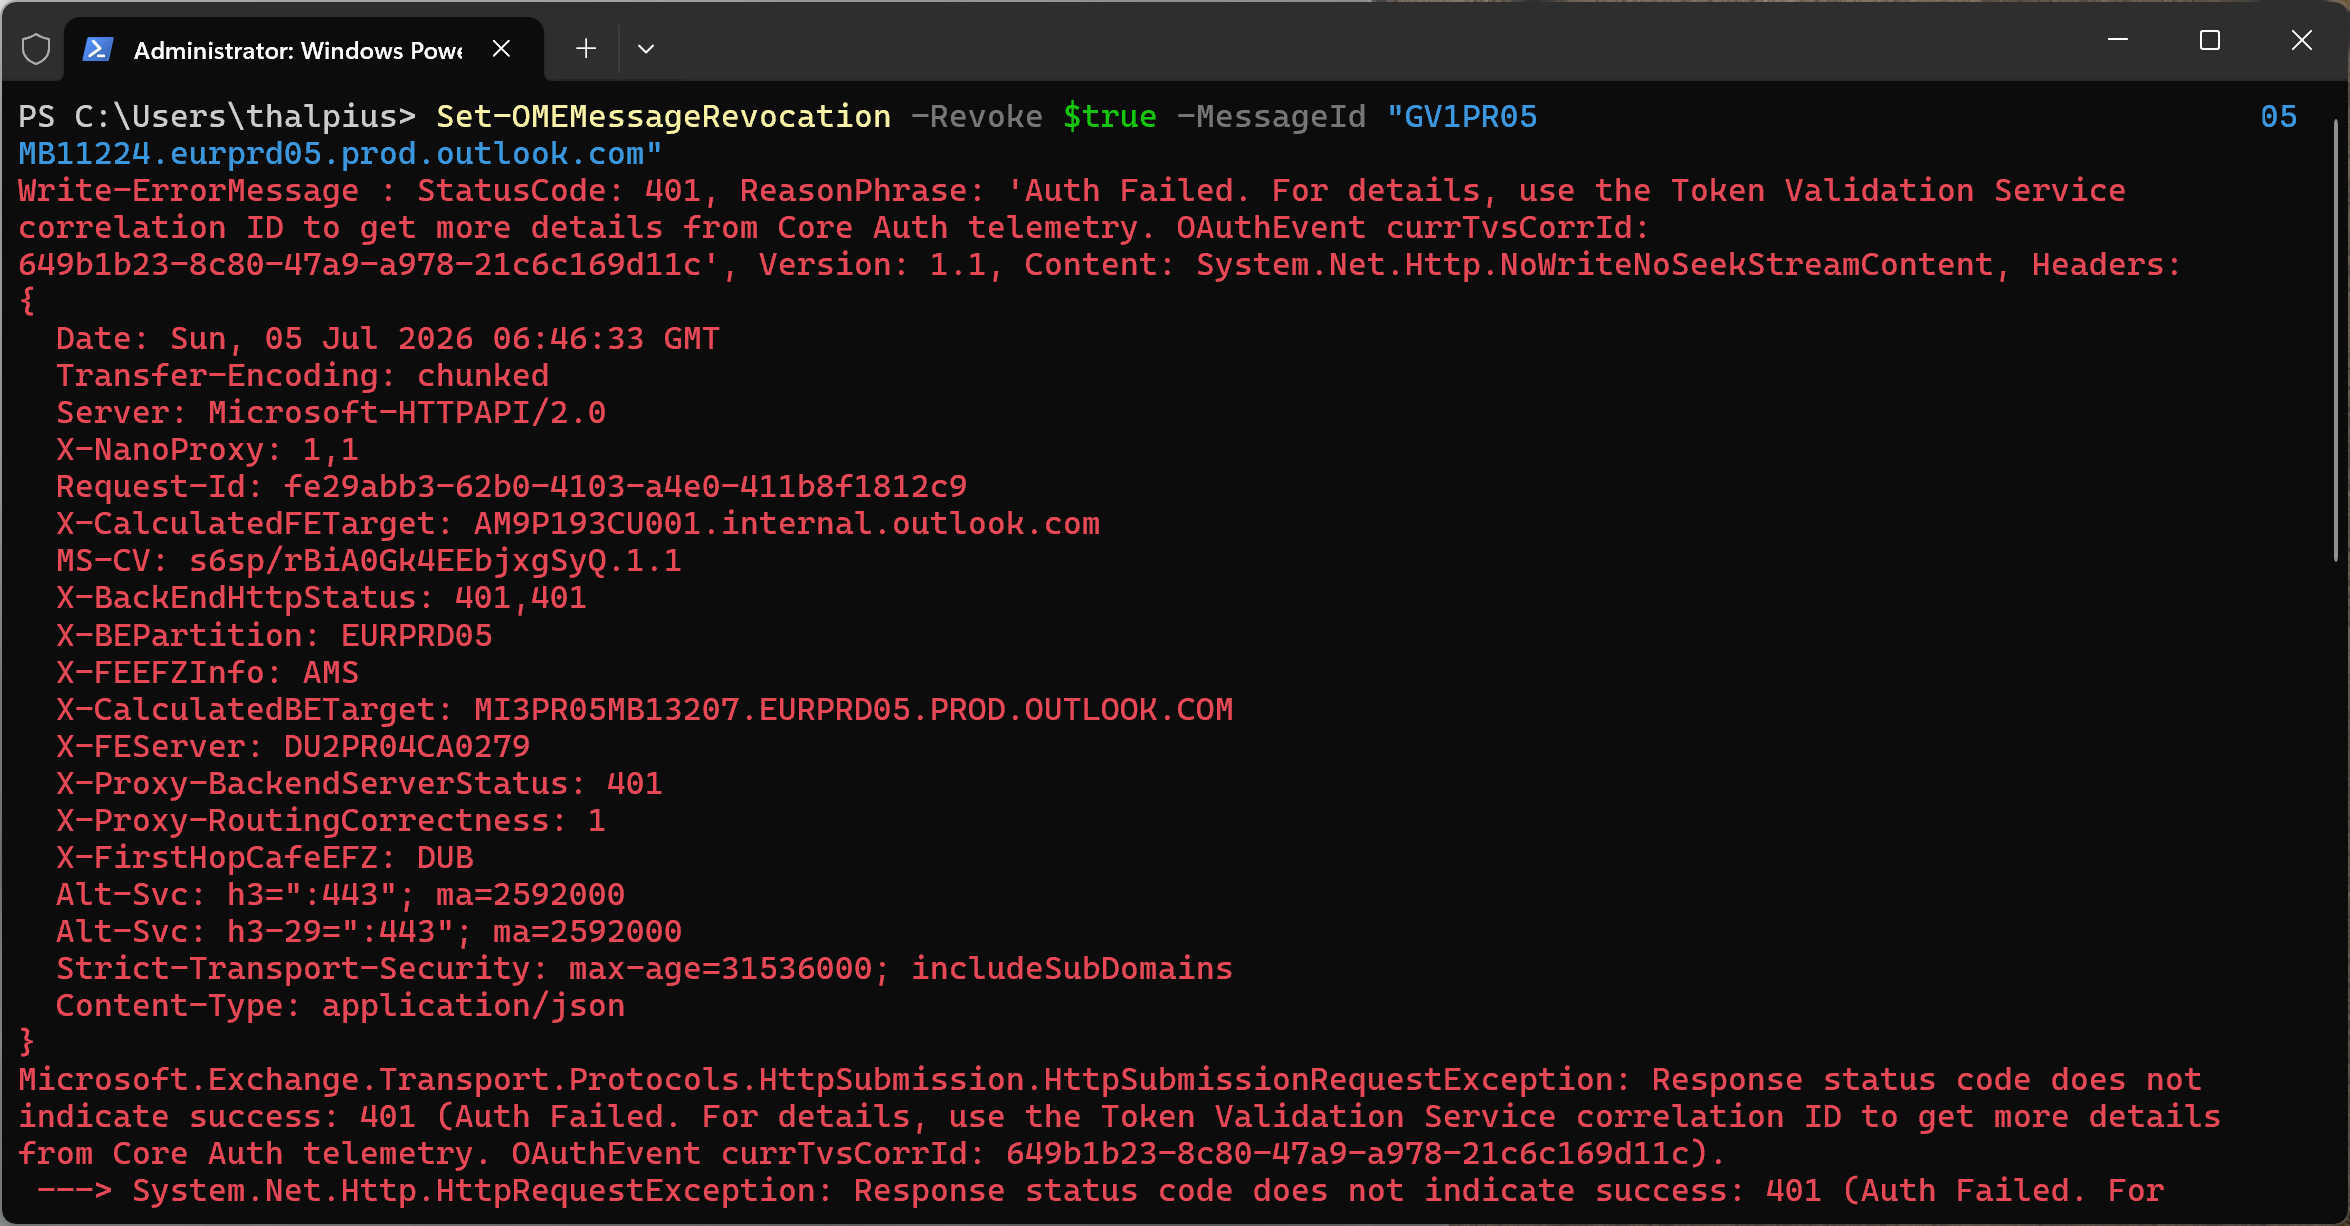
The stack trace pointed to an internal service-to-service call, Exchange’s OMEMessageHelper submitting a revocation confirmation to Microsoft’s internal Substrate Bus service, failing its own authentication. That is not something a tenant admin, even with Global Administrator and Compliance Administrator roles assigned, can fix through configuration. It is a backend issue, and the correlation ID in the error is meant for a Microsoft support ticket, not for tenant-side troubleshooting.
The sender-side alternative, “Remove external access” in Outlook on the web’s Sent Items, turned out not to apply here either. That option appears to be reserved for messages manually encrypted by a user through Outlook’s own Encrypt button, not messages encrypted automatically by a DLP policy or transport rule.
Revocation, in this tenant, remains an open issue pending a Microsoft support ticket.
Testing Expiration
Expiration looked more promising, and testing it surfaced a chain of undocumented behavior worth walking through.
The only documented parameter is -ExternalMailExpiryInDays, an integer from 1 to 730. Waiting a full day to confirm a test felt impractical, so the boundaries of that restriction got tested directly.
Passing a TimeSpan-formatted string failed immediately, revealing that the parameter is parsed as a number, not a duration:
Set-OMEConfiguration -Identity "BSN-Template" -ExternalMailExpiryInDays "0.00:05:00"Cannot convert value "0.00:05:00" to type "System.Double"
That error was more informative than expected: the parameter is documented as an Int32, but the actual conversion target is System.Double. Decimal values are apparently accepted despite the documented 1-730 integer range:
Set-OMEConfiguration -Identity "BSN-Template" -ExternalMailExpiryInDays 0.1
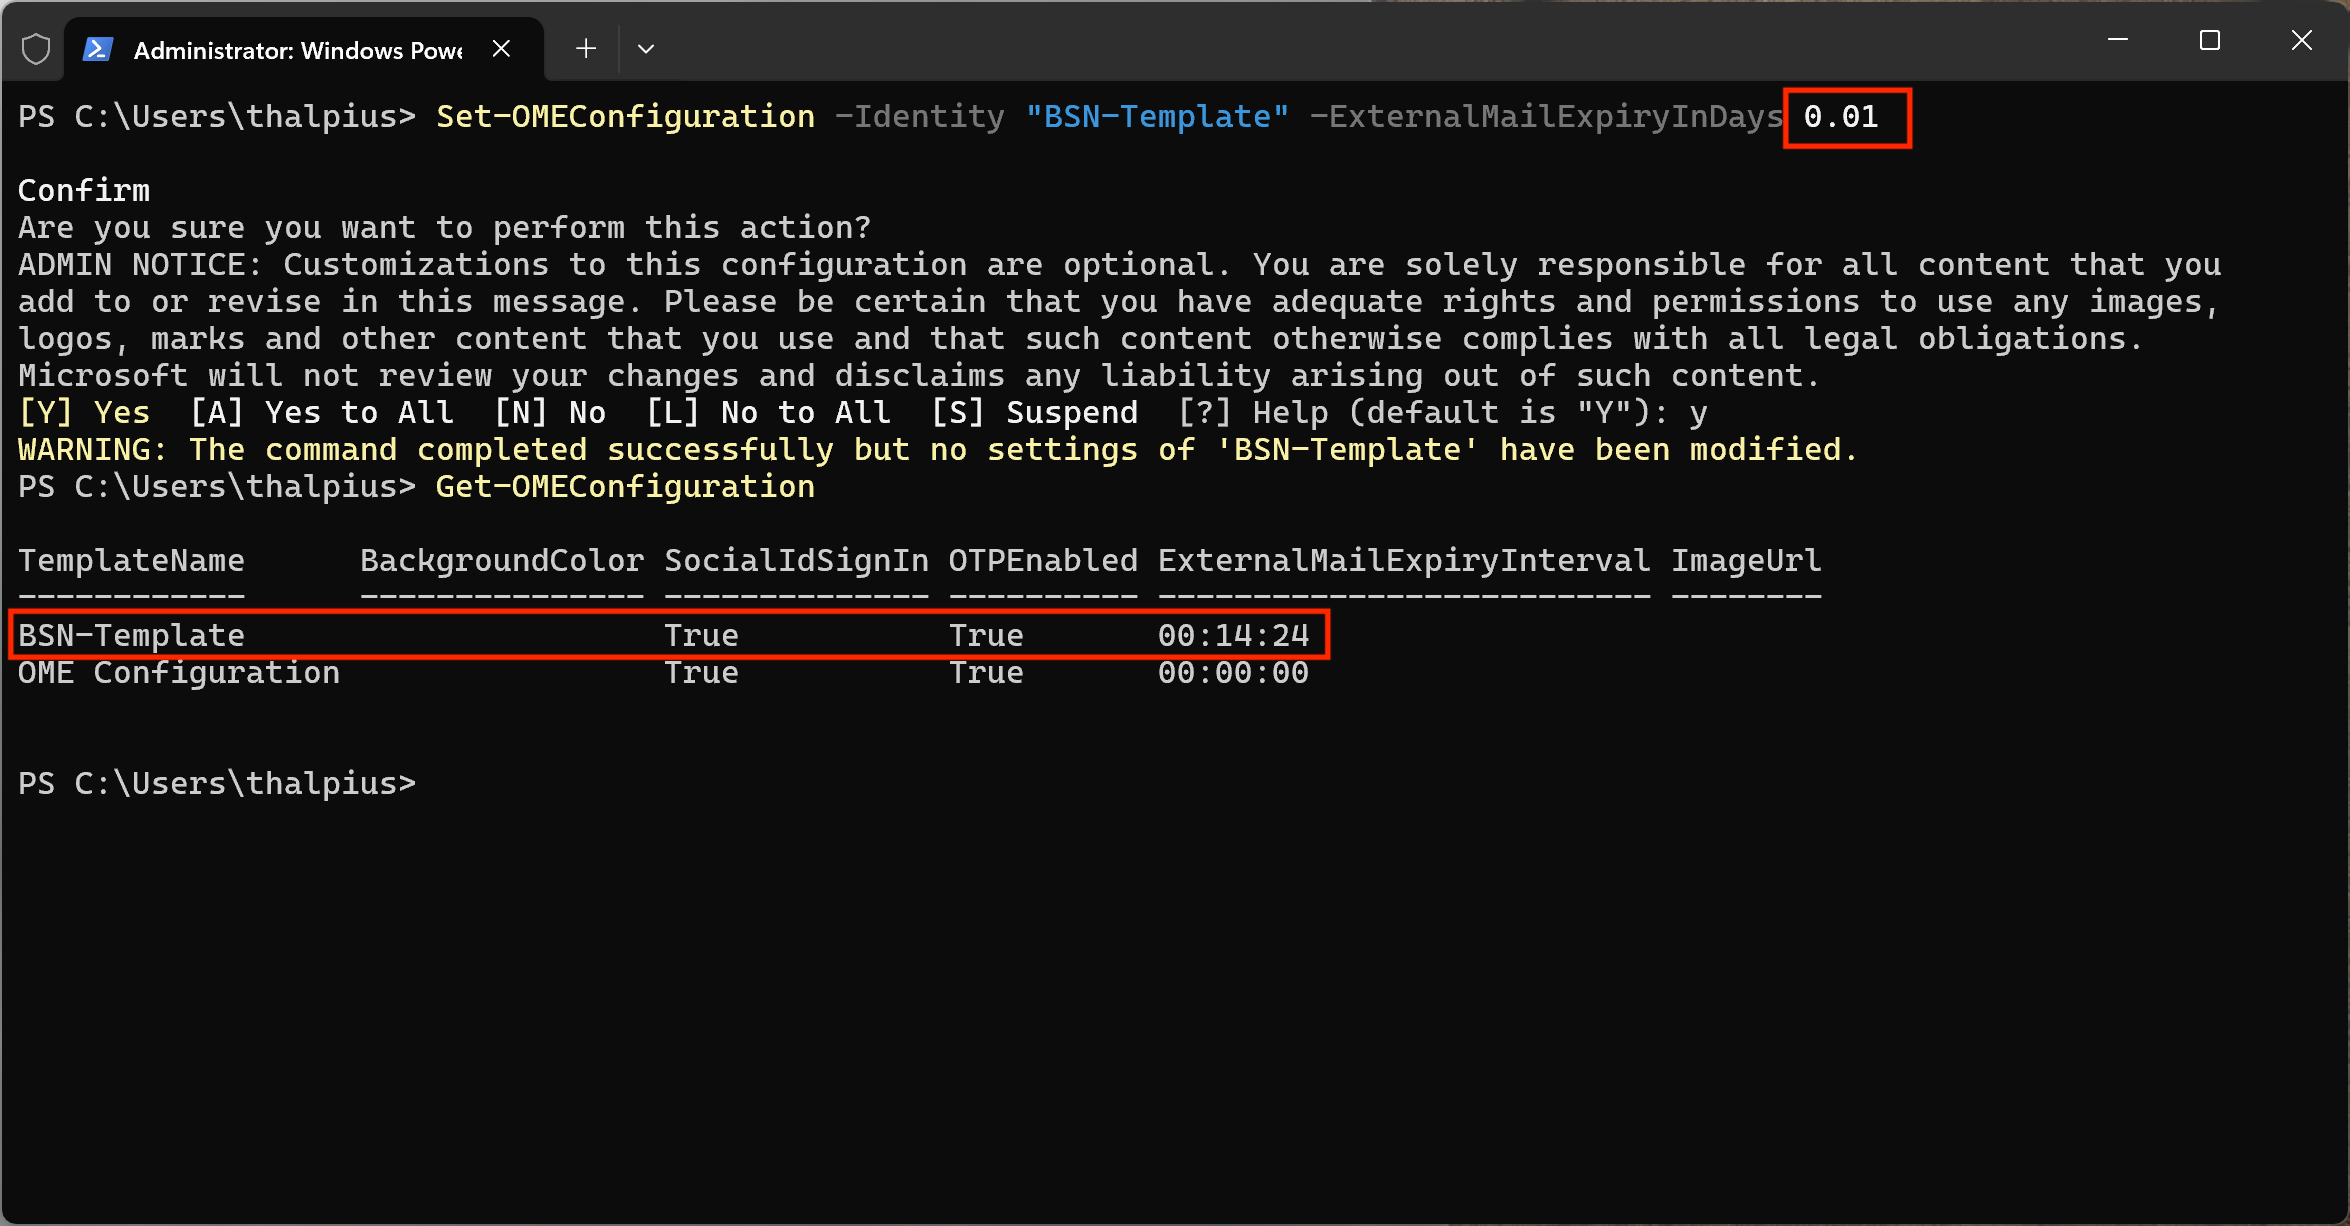
This succeeded, and reading the configuration back confirmed it was stored precisely, as a genuine TimeSpan rather than being rounded up to a full day:
ExternalMailExpiryInterval : 00:14:24
0.1 days is 2.4 hours, and a smaller test, 0.01 days, also went through cleanly and stored as 14 minutes and 24 seconds exactly, no rounding, no rejected value, despite being two orders of magnitude below the documented minimum.
Sending a fresh test message confirmed via Message Trace details that both the DLP policy and the transport rule were applied as expected.
But after the 14-minute-24-second window passed, the message remained fully readable, with no expiration notice in the wrapper email at all.
Re-authenticating into the portal made no difference.
The likely explanation: the configuration is stored correctly regardless of how small the value is, but the enforcement layer, the background process that actually checks “has this expired”, appears to be built around the documented whole-day granularity, and silently treats sub-day values as no expiration at all rather than a short one.
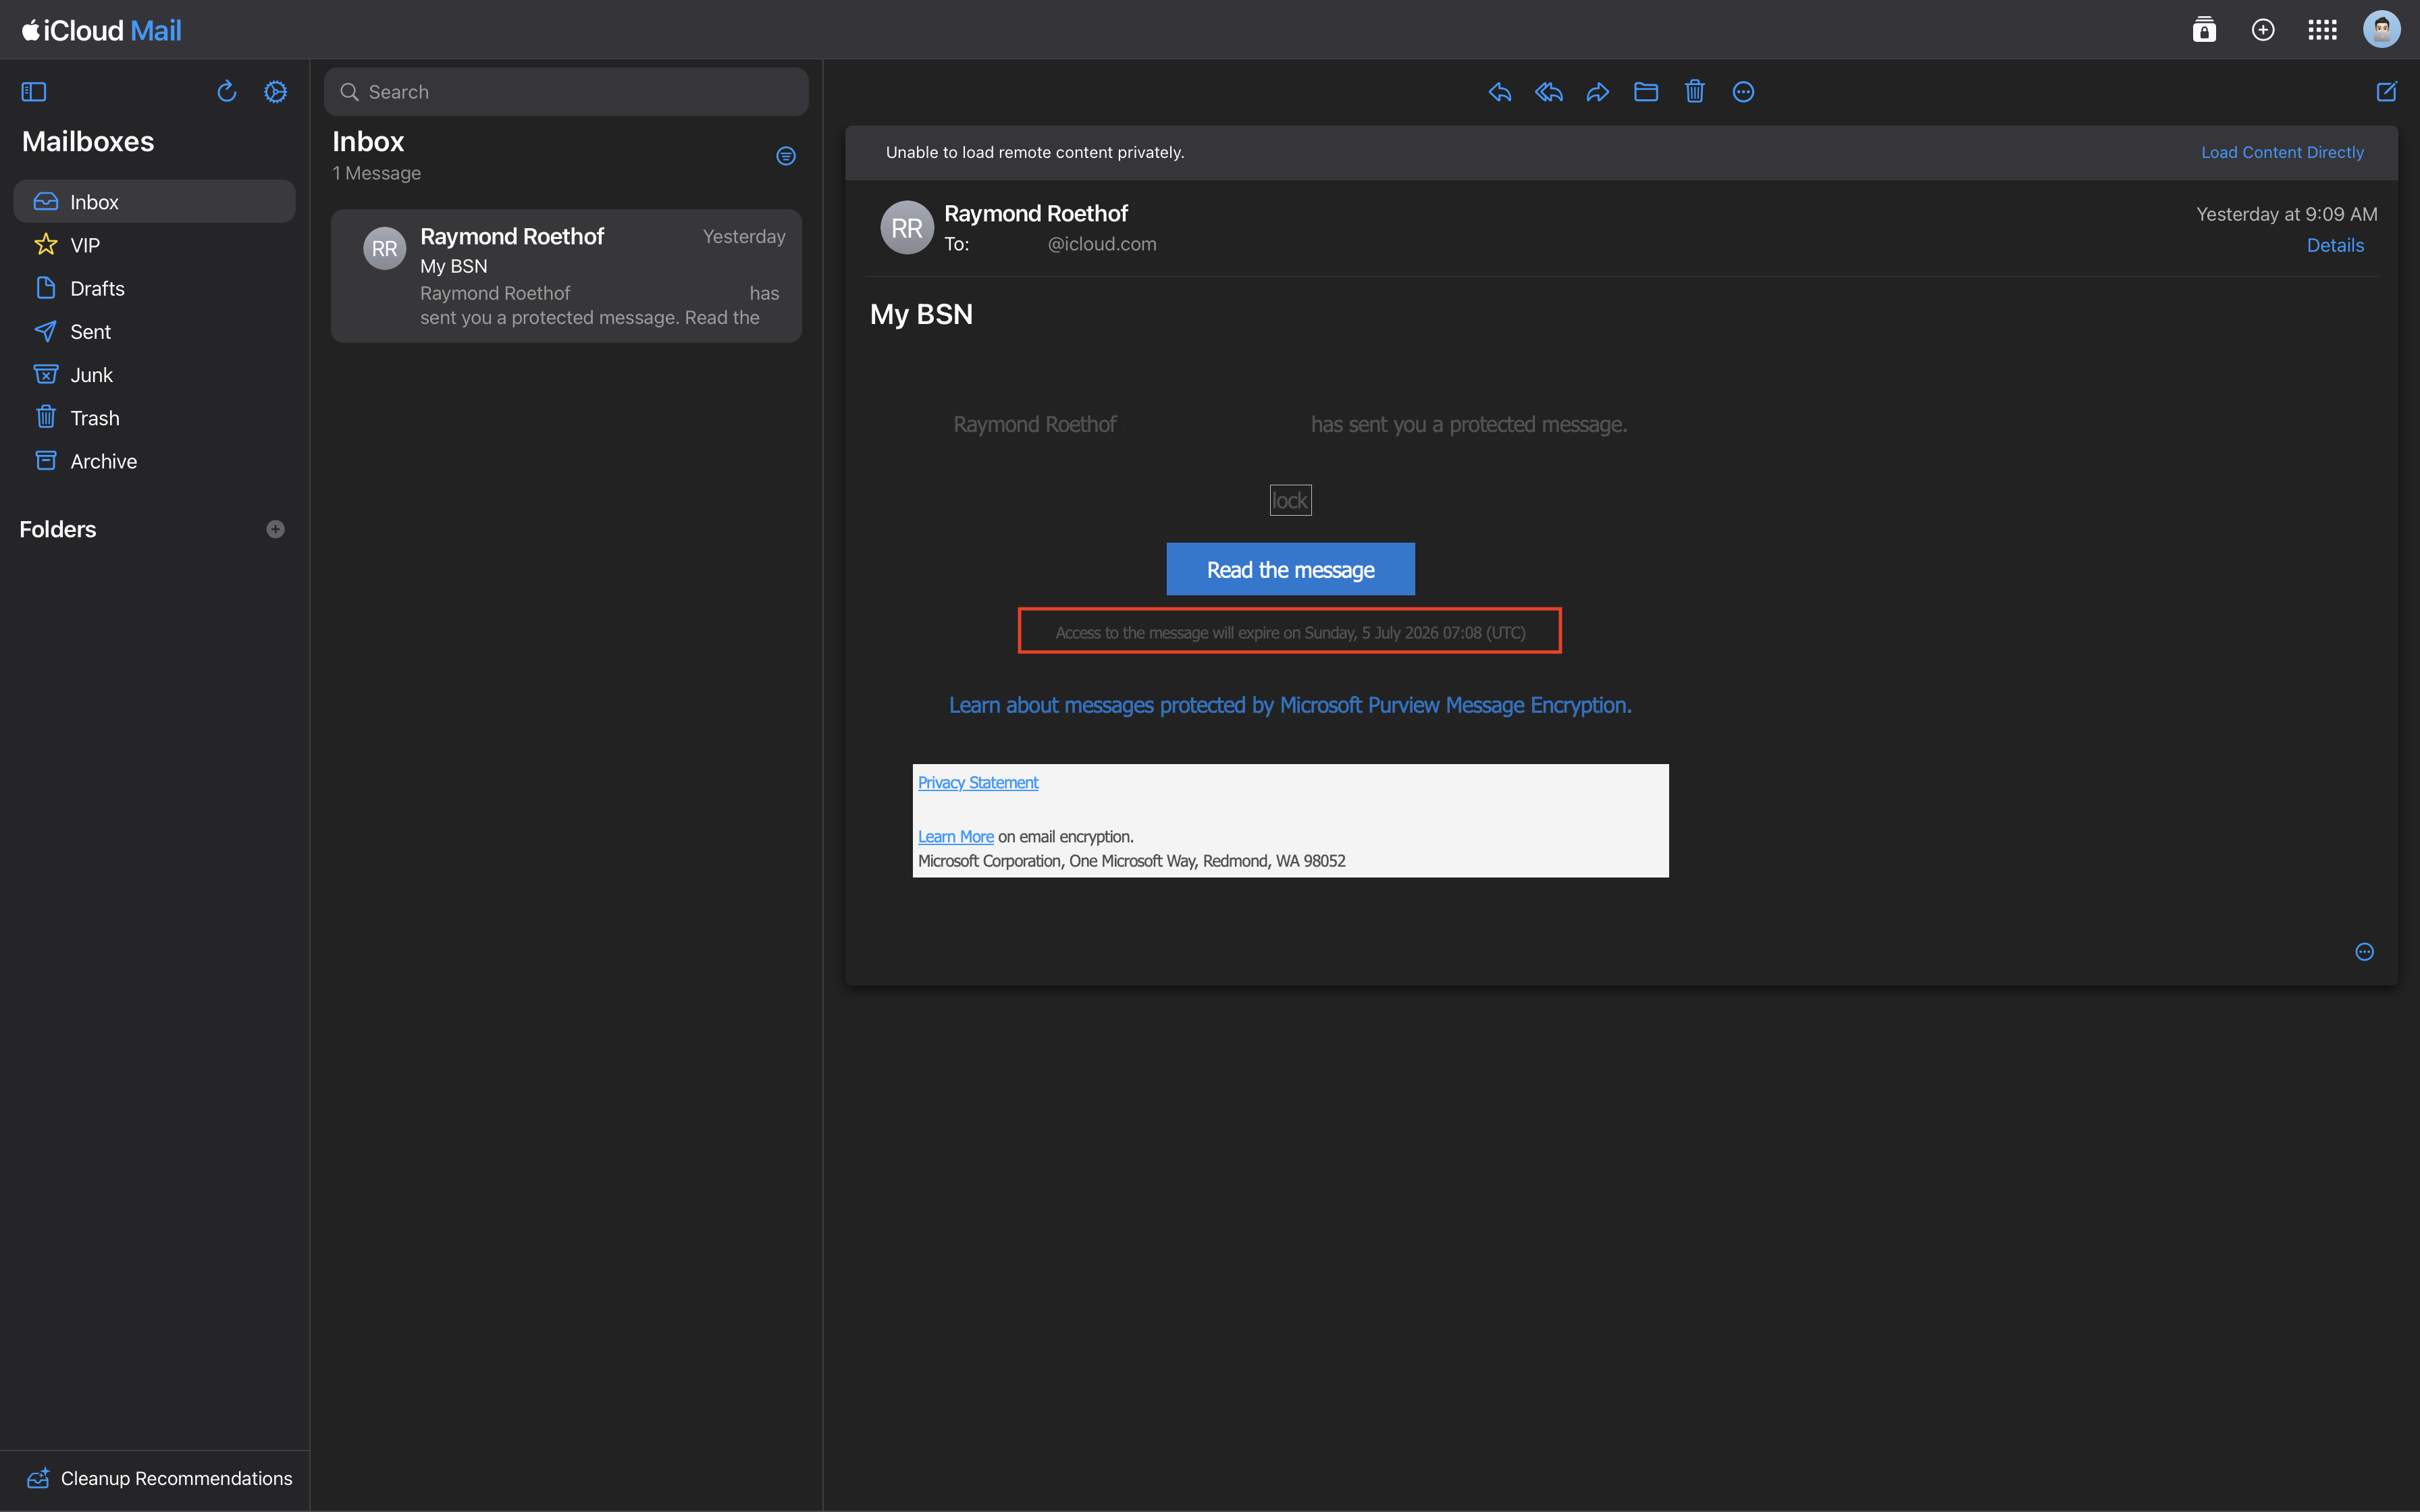
Reverting to the officially supported minimum confirmed this. With the value set back to a full day:
Set-OMEConfiguration -Identity "BSN-Template" -ExternalMailExpiryInDays 1
the wrapper email for a fresh test message displayed an explicit expiration notice, “Access to the message will expire on [date] (UTC)”, which never appeared with the fractional values. Storage accepts fractional days; enforcement and the user-facing expiration notice apparently do not.
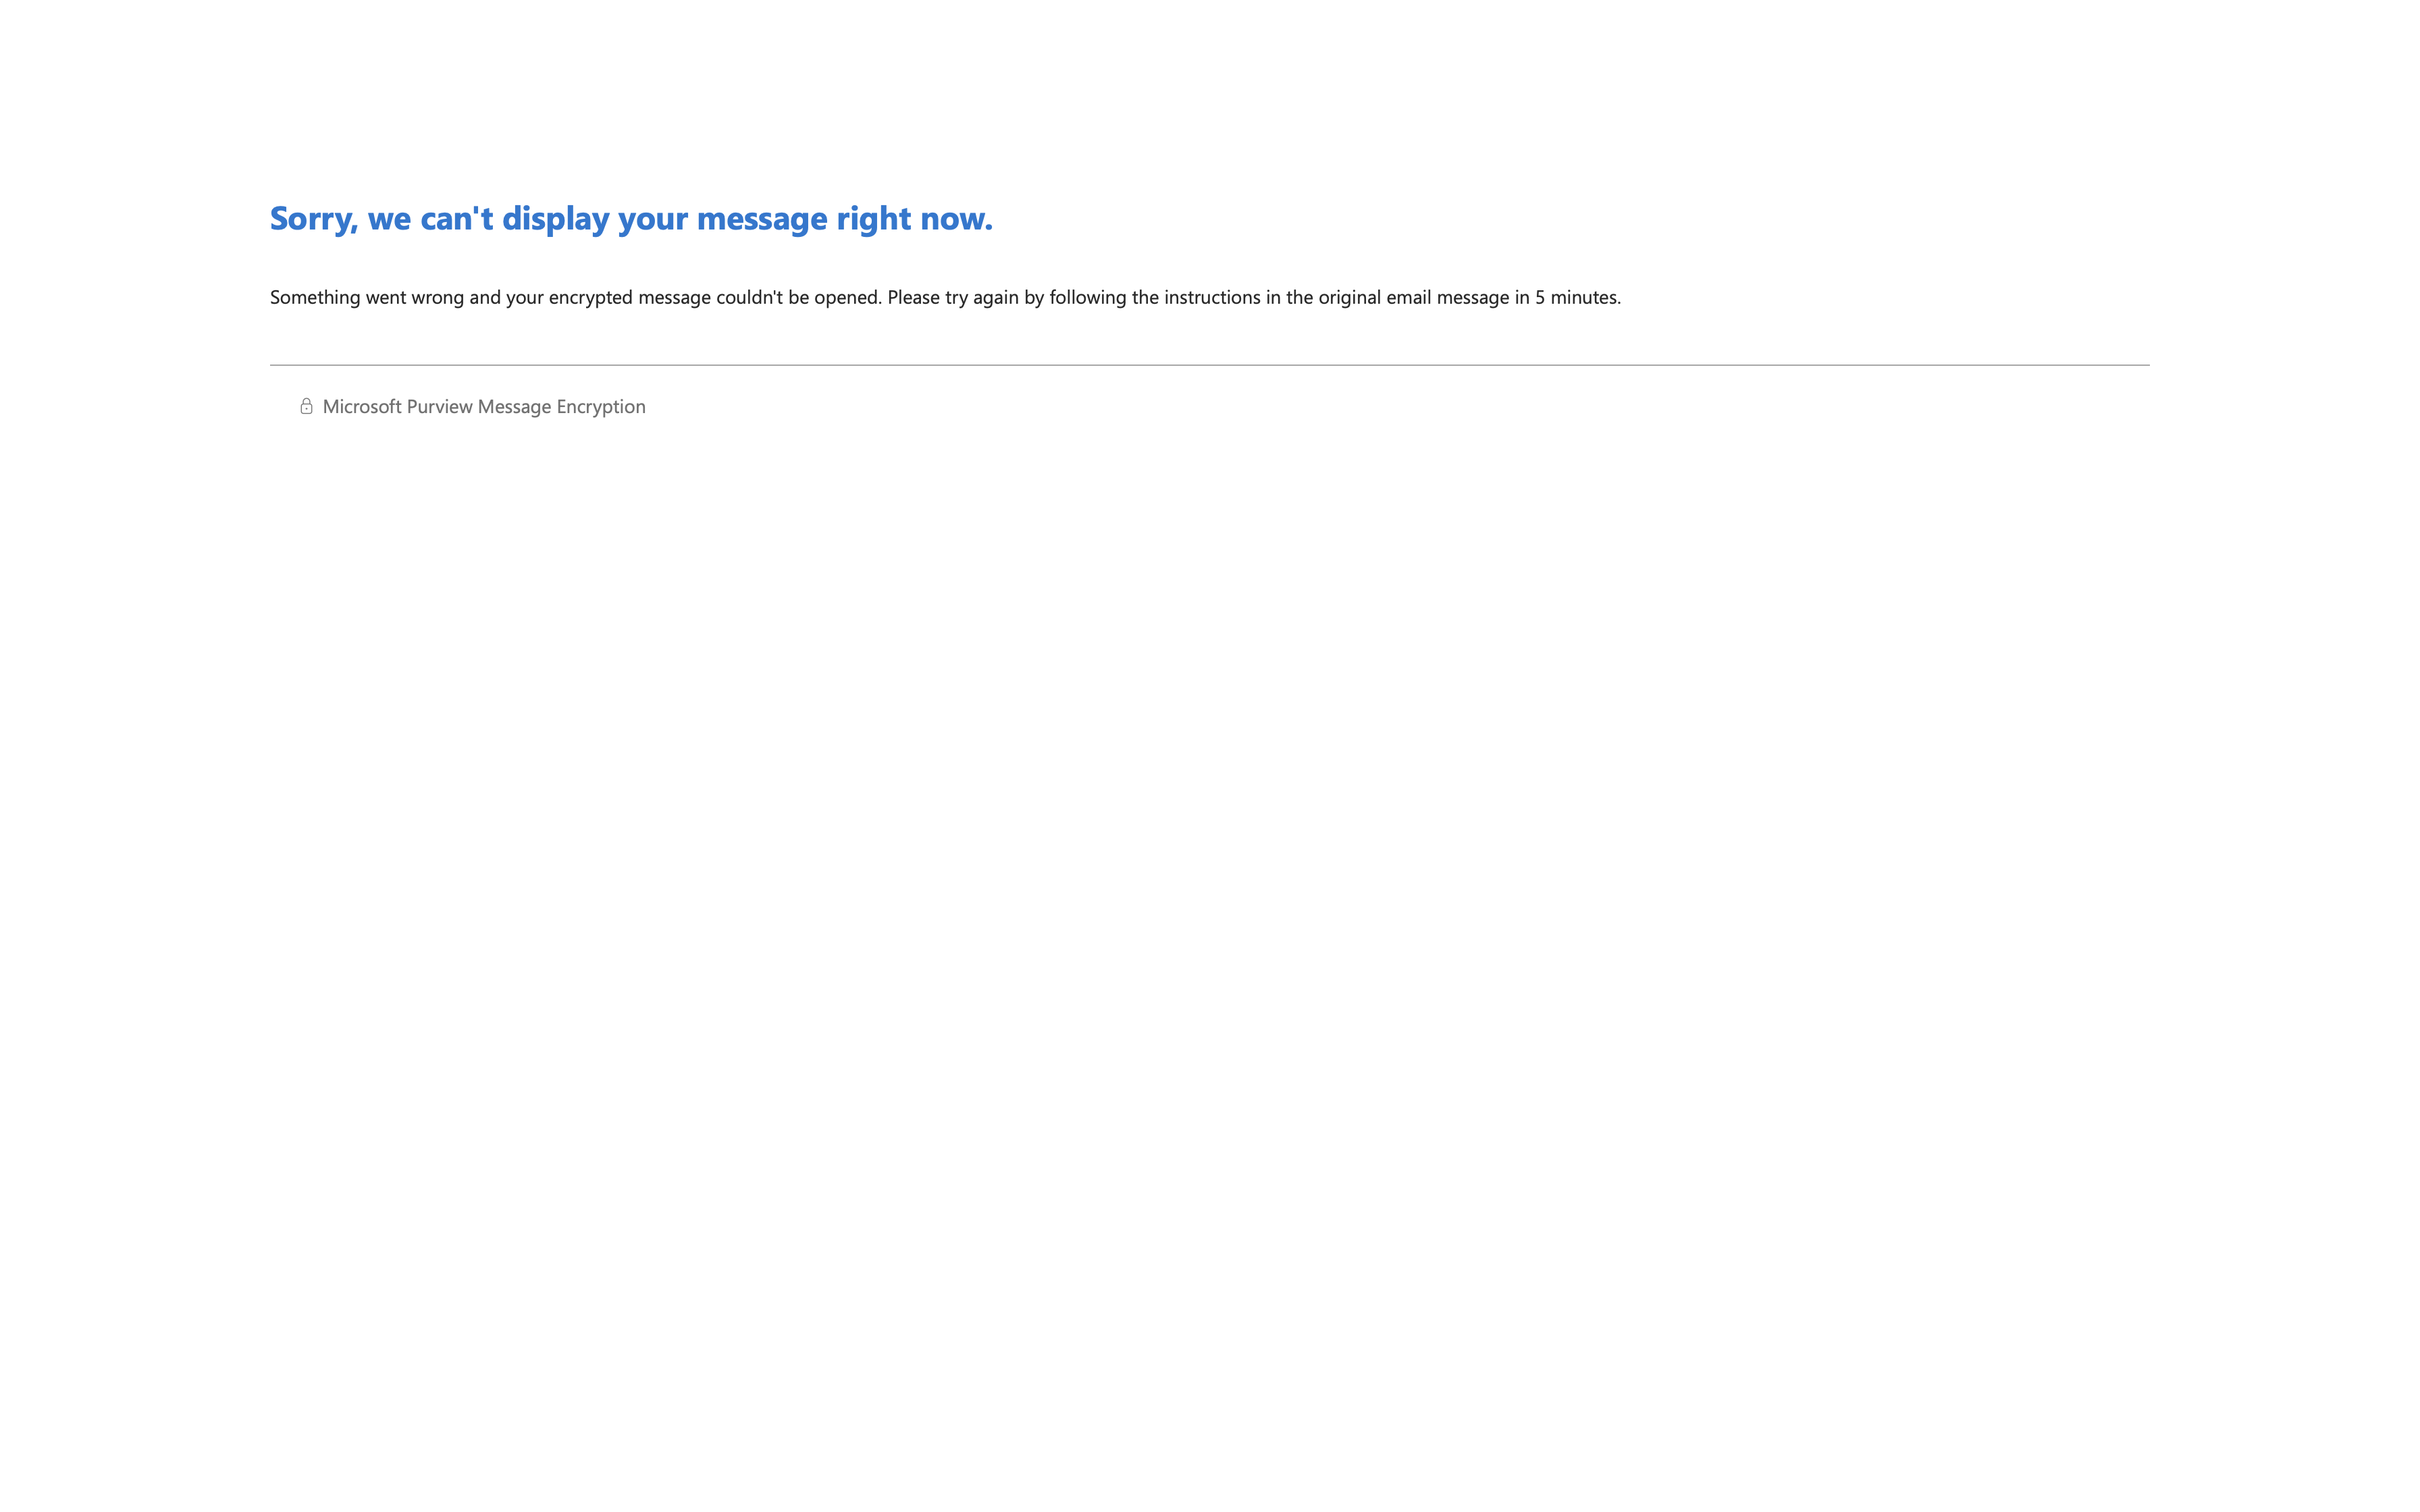
After the expiration window passed, opening the same link consistently returned a generic error, “Sorry, we can’t display your message right now, Something went wrong and your encrypted message couldn’t be opened”, rather than a specific “this message has expired” notice. Sending a brand new test message immediately afterward opened without issue, confirming the failure was tied specifically to the expired message rather than a broader service outage. Expiration works as intended; Microsoft’s error messaging around it, however, doesn’t make that obvious.
Conclusion
- Advanced Message Encryption is a licensing gate, not just a feature toggle: without Microsoft 365 E5 or an equivalent add-on, expiration and revocation are not available regardless of how the rest of the configuration is set up.
- Branding is a separate action, and a prerequisite: revocation and expiration only apply to messages that go through the OME portal, which itself depends on a custom branding template applied through a mail flow rule, not the DLP encryption action alone.
- A documented range is not always an enforced one:
Set-OMEConfigurationaccepted values far below the documented 1-730 day minimum forExternalMailExpiryInDays, storing them precisely, without the enforcement layer honoring them the same way. - Revocation failed on a backend authentication error unrelated to tenant configuration or permissions, a reminder that not every failure in these tools is something an admin can resolve alone.
Between this post and the previous one, the practical takeaway is the same: Microsoft Purview’s encryption capabilities work largely as documented for the core scenario, detecting and encrypting sensitive data automatically, but the more advanced controls are worth testing directly in a non-production tenant before relying on them, rather than assuming the documentation’s stated limits are the actual behavior.