Identity leverages Secure Score with twenty-seven recommended actions. In a series of blog posts, I will go through all twenty-seven recommended actions and what they mean, a plan of approach, their impact, and my security recommendations, hopefully helping others. The twenty-fourth one in the series is the “Built-in Active Directory Guest account is enabled” recommended action.
Introduction
You have twenty-seven recommendations if you filter the Secure Score recommended actions for Microsoft Defender for Identity.
- Resolve unsecure domain configurations
- Resolve unsecure account attributes
- Remove dormant accounts from sensitive groups
- Protect and manage local admin passwords with Microsoft LAPS
- Configure VPN integration
- Reduce lateral movement path risk to sensitive entities
- Stop clear text credentials exposure
- Disable Print spooler service on domain controllers
- Stop weak cipher usage
- Remove unsecure SID history attributes from entities
- Modify unsecure Kerberos delegations to prevent impersonation
- Install Defender for Identity Sensor on all Domain Controllers
- Set a honeytoken account
- Start your Defender for Identity deployment, installing Sensors on DC’s and other eligible servers
- Accounts with non-default Primary Group ID
- Change Domain Controller computer account old password
- Reversible passwords found in GPOs
- Unsafe permissions on the DnsAdmins group
- GPO assigns unprivileged identities to local groups with elevated privileges
- Remove access rights on suspicious accounts with the Admin SDHolder permission
- Remove local admins on identity assets
- Remove non-admin accounts with DCSync permissions
- GPO can be modified by unprivileged accounts
- Built-in Active Directory Guest account is enabled
- Change password for krbtgt account
- Change password of built-in domain Administrator account
- Ensure that all privileged accounts have the configuration flag
Some recommended actions are easy to configure, but others require time, proper planning, auditing, and expertise. This blog post will review the recommended action of “Built-in Active Directory Guest account is enabled.”
Update: Microsoft keeps updating the recommended actions list. I will do my best to keep the list up-to-date.
Active Directory Guest Account
The Guest account is a built-in, non-nominative account present in every Active Directory environment. Originally designed to provide temporary, anonymous access to domain resources, this account serves a seemingly helpful purpose: allowing users without formal credentials to access the domain. However, this convenience comes at a significant security cost.
What makes the Guest account particularly concerning from a security perspective is its ability to permit access to Active Directory without requiring a password. This fundamental characteristic transforms what appears to be a minor administrative feature into a potential security vulnerability that Microsoft Defender for Identity actively monitors and flags.
By default, Microsoft disables the Guest account in modern Active Directory deployments, and for good reason. When enabled, it essentially creates an open door to your domain, allowing anonymous access that bypasses standard authentication controls. This presents an attractive target for attackers seeking the easiest path into your environment.
Microsoft Defender for Identity’s security posture assessment specifically identifies enabled Guest accounts as a critical security finding. The recommendation is straightforward: ensure that the Guest account remains disabled across your domain. This assessment helps organizations maintain visibility into this often-overlooked security configuration and provides clear guidance on remediation.
In this post, we will explore why Microsoft Defender for Identity flags enabled Guest accounts, the security risks they introduce, and the steps you need to take to remediate this finding and strengthen your Active Directory security posture.
Real-World Attack Scenario: The Anonymous Intruder
Let us walk through a realistic attack scenario that demonstrates why an enabled Guest account poses a serious security risk to your Active Directory environment.
An attacker compromises a web server in yoshis.island’s DMZ through an unpatched vulnerability. The server has local administrator access but no domain credentials. From this position, the attacker runs a network scan and discovers they can reach the internal domain controllers.
They attempt to connect to Active Directory but hit a wall, anonymous LDAP queries are blocked, and they have no valid credentials to authenticate. The DMZ server is isolated from the rest of the DMZ network by design.
During reconnaissance, the attacker runs a simple check and discovers the domain’s Guest account is enabled with no password required. Within seconds, they authenticate to the domain without stealing a single credential.
Now authenticated as a domain user, the attacker enumerates the entire Active Directory structure. They map out users, computers, domain administrators, and service accounts. They discover internal file shares and applications that trust any authenticated domain user, including the Guest account.
One of these shares contains PowerShell deployment scripts. Inside the scripts, the attacker finds hardcoded credentials for a service account with elevated privileges across the network. They pivot from the Guest account to this service account, moving laterally from the DMZ into the core network.
Within hours, what started as a compromised DMZ server with no domain access becomes a full domain compromise. The Guest account transformed an isolated breach into an authenticated foothold, giving the attacker everything they needed to escalate privileges and achieve their objectives.
The Guest account did not just make the attack easier, it made it possible. Without it, the attacker would have remained trapped on a single DMZ server, unable to authenticate to the domain or move laterally into the internal network.
Mitigation
Disabling the Guest account is straightforward and should be done immediately across all domains in your Active Directory forest.
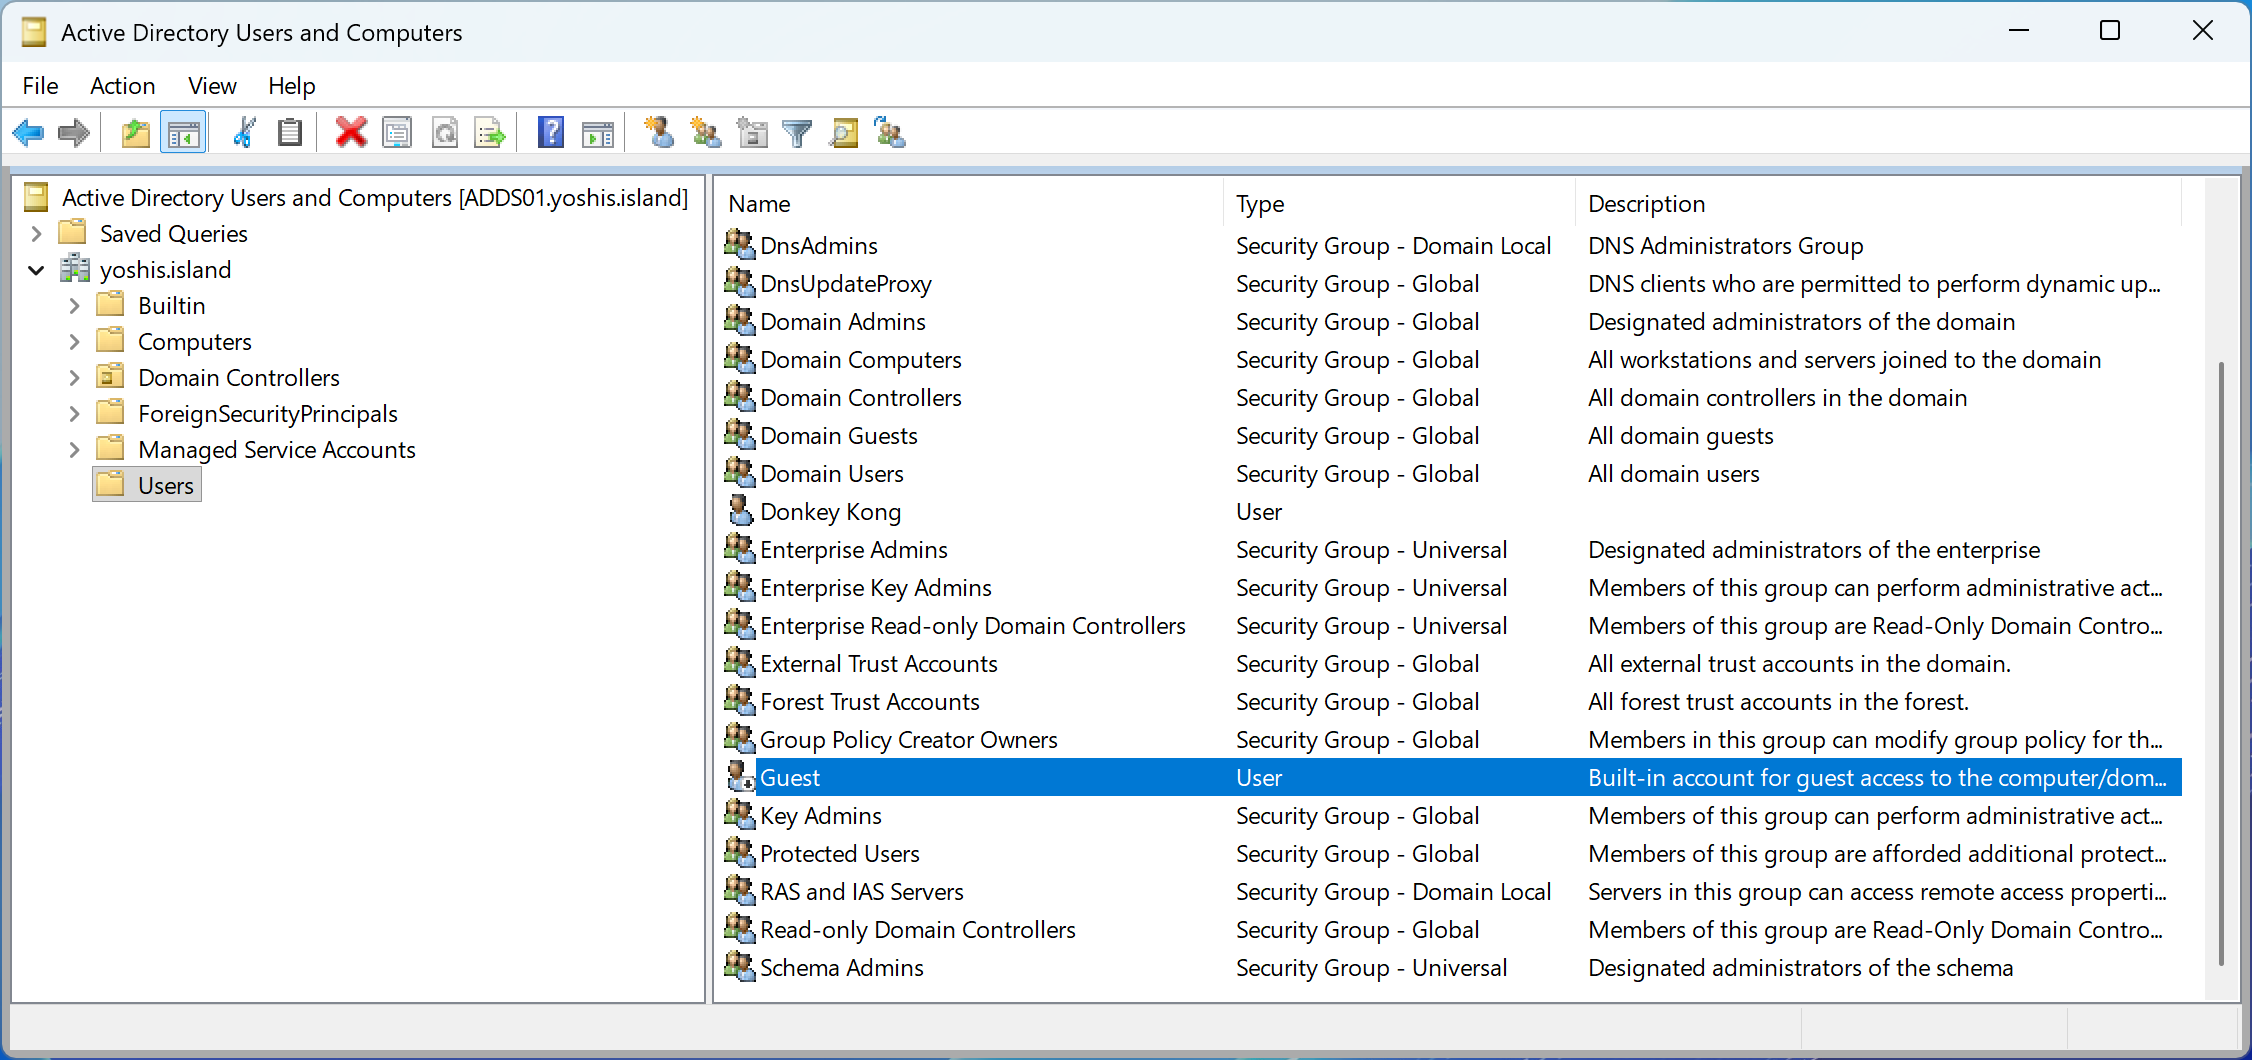
Using Active Directory Users and Computers
Open Active Directory Users and Computers, navigate to the Built-in container, right-click the Guest account, and select “Disable Account.” Repeat this process for every domain in your forest.
Using PowerShell
For a single domain, run the following command from a domain controller or a workstation with the Active Directory module installed:
Disable-ADAccount -Identity "CN=Guest,CN=Users,DC=yoshis,DC=island"To disable the Guest account across all domains in your forest, use this script:
$Forest = Get-ADForest
foreach ($Domain in $Forest.Domains) {
    try {
        $GuestAccount = Get-ADUser -Filter {SamAccountName -eq "Guest"} -Server $Domain
        if ($GuestAccount.Enabled) {
            Disable-ADAccount -Identity $GuestAccount -Server $Domain
            Write-Host "Disabled Guest account in domain: $Domain" -ForegroundColor Green
        } else {
            Write-Host "Guest account already disabled in domain: $Domain" -ForegroundColor Yellow
        }
    } catch {
        Write-Host "Error processing domain ${Domain}: $_" -ForegroundColor Red
    }
}
Verification
After disabling the Guest account, verify the change by running:
Get-ADUser -Filter {SamAccountName -eq "Guest"} -Properties Enabled | Select-Object Name, Enabled, DistinguishedNameThe output should show Enabled: False.
Microsoft Defender for Identity
Once you have disabled the Guest account, Microsoft Defender for Identity will update the security posture assessment. The recommendation status typically updates within a few minutes, though the overall security score may take up to 24 hours to reflect the change. You can monitor the status in the Microsoft Defender portal under the security posture assessments section.
Conclusion
The Active Directory Guest account represents a fundamental security weakness that transforms unauthenticated network access into authenticated domain access. As demonstrated in our scenario, an attacker confined to a compromised DMZ server with no credentials can leverage an enabled Guest account to gain immediate domain authentication, enumerate Active Directory, and ultimately escalate privileges to compromise the entire network.
Microsoft Defender for Identity flags enabled Guest accounts as a critical security finding because this misconfiguration eliminates the most basic security control: authentication. There is no acceptable use case for enabling the Guest account in modern Active Directory environments. The convenience it once provided has been replaced by better alternatives like time-limited user accounts with proper expiration dates and appropriate permissions.
Remediating this finding is simple—disable the Guest account across all domains in your forest using PowerShell or Active Directory Users and Computers. The security benefit is immediate and substantial. You eliminate an anonymous entry point into your domain, remove a persistence mechanism for attackers, and close a path that bypasses user behavioral analytics and attribution.
Take the time today to verify the Guest account is disabled in your environment. If Microsoft Defender for Identity has flagged this recommendation, don’t delay remediation. Every day the Guest account remains enabled is another day an attacker can gain authenticated domain access without stealing a single credential.
Secure your Active Directory foundation. Disable the Guest account.