
Recently, Anthropic released a Microsoft 365 connector for Claude, their AI assistant. This connector allows Claude to interact with Microsoft 365 services on behalf of users and organizations. As part of deploying and testing this connector, I started looking more carefully at how OAuth app consent works in Microsoft Entra ID, and I noticed several misconceptions circulating online about how consent actually works, what it means when an admin grants consent, and how to properly scope access afterward.
In this blog post, I want to clarify how app consent works in Microsoft Entra ID, walk through the relevant configuration settings, and demonstrate this using a Microsoft App Consent Demo application I built for this purpose: https://consent.thalpius.com.
Table of Contents
- App Registration vs. Enterprise Application
- Consent and Permissions: User Consent Settings
- Consent and Permissions: Admin Consent Settings
- Consent and Permissions: Permission Classifications
- Admin Consent Scope: A Common Misconception
- Testing with consent.thalpius.com
- Conclusion
Disclaimer: This blog post is provided for informational purposes only. While every effort has been made to ensure accuracy, implementation of these features should be performed by qualified administrators in accordance with your organization’s security and change management policies. The author is not responsible for any issues, data loss, or security incidents that may occur from following this guidance. Always test in a non-production environment first and consult official Microsoft documentation before implementing security features in production.
App Registration vs. Enterprise Application
Before diving into consent settings, it is important to understand the distinction between an App Registration and an Enterprise Application in Microsoft Entra ID.
An App Registration is where you define your application. It is the developer-side object. Here you configure things like the application name, redirect URIs, API permissions the application requests, certificates and secrets, and the application manifest. The App Registration lives in the tenant where the application was created. Think of it as the blueprint or definition of the application.
An Enterprise Application, also called a Service Principal, is the tenant-side representation of an application. When an application is consented to, either by a user or an administrator, or manually added by an administrator, an Enterprise Application object is created in your tenant. This is where you manage access control, user assignments, single sign-on settings, and provisioning. Crucially, this is also where the consent granted to the application is recorded.
The relationship is straightforward: one App Registration can have many corresponding Enterprise Applications across different tenants. When a user successfully consents to a third-party application, or when an administrator grants consent or manually adds the application, an Enterprise Application object is created in your tenant to represent that application.
This distinction matters for consent. Consent is recorded on the Enterprise Application, not the App Registration.
Consent and Permissions: User Consent Settings
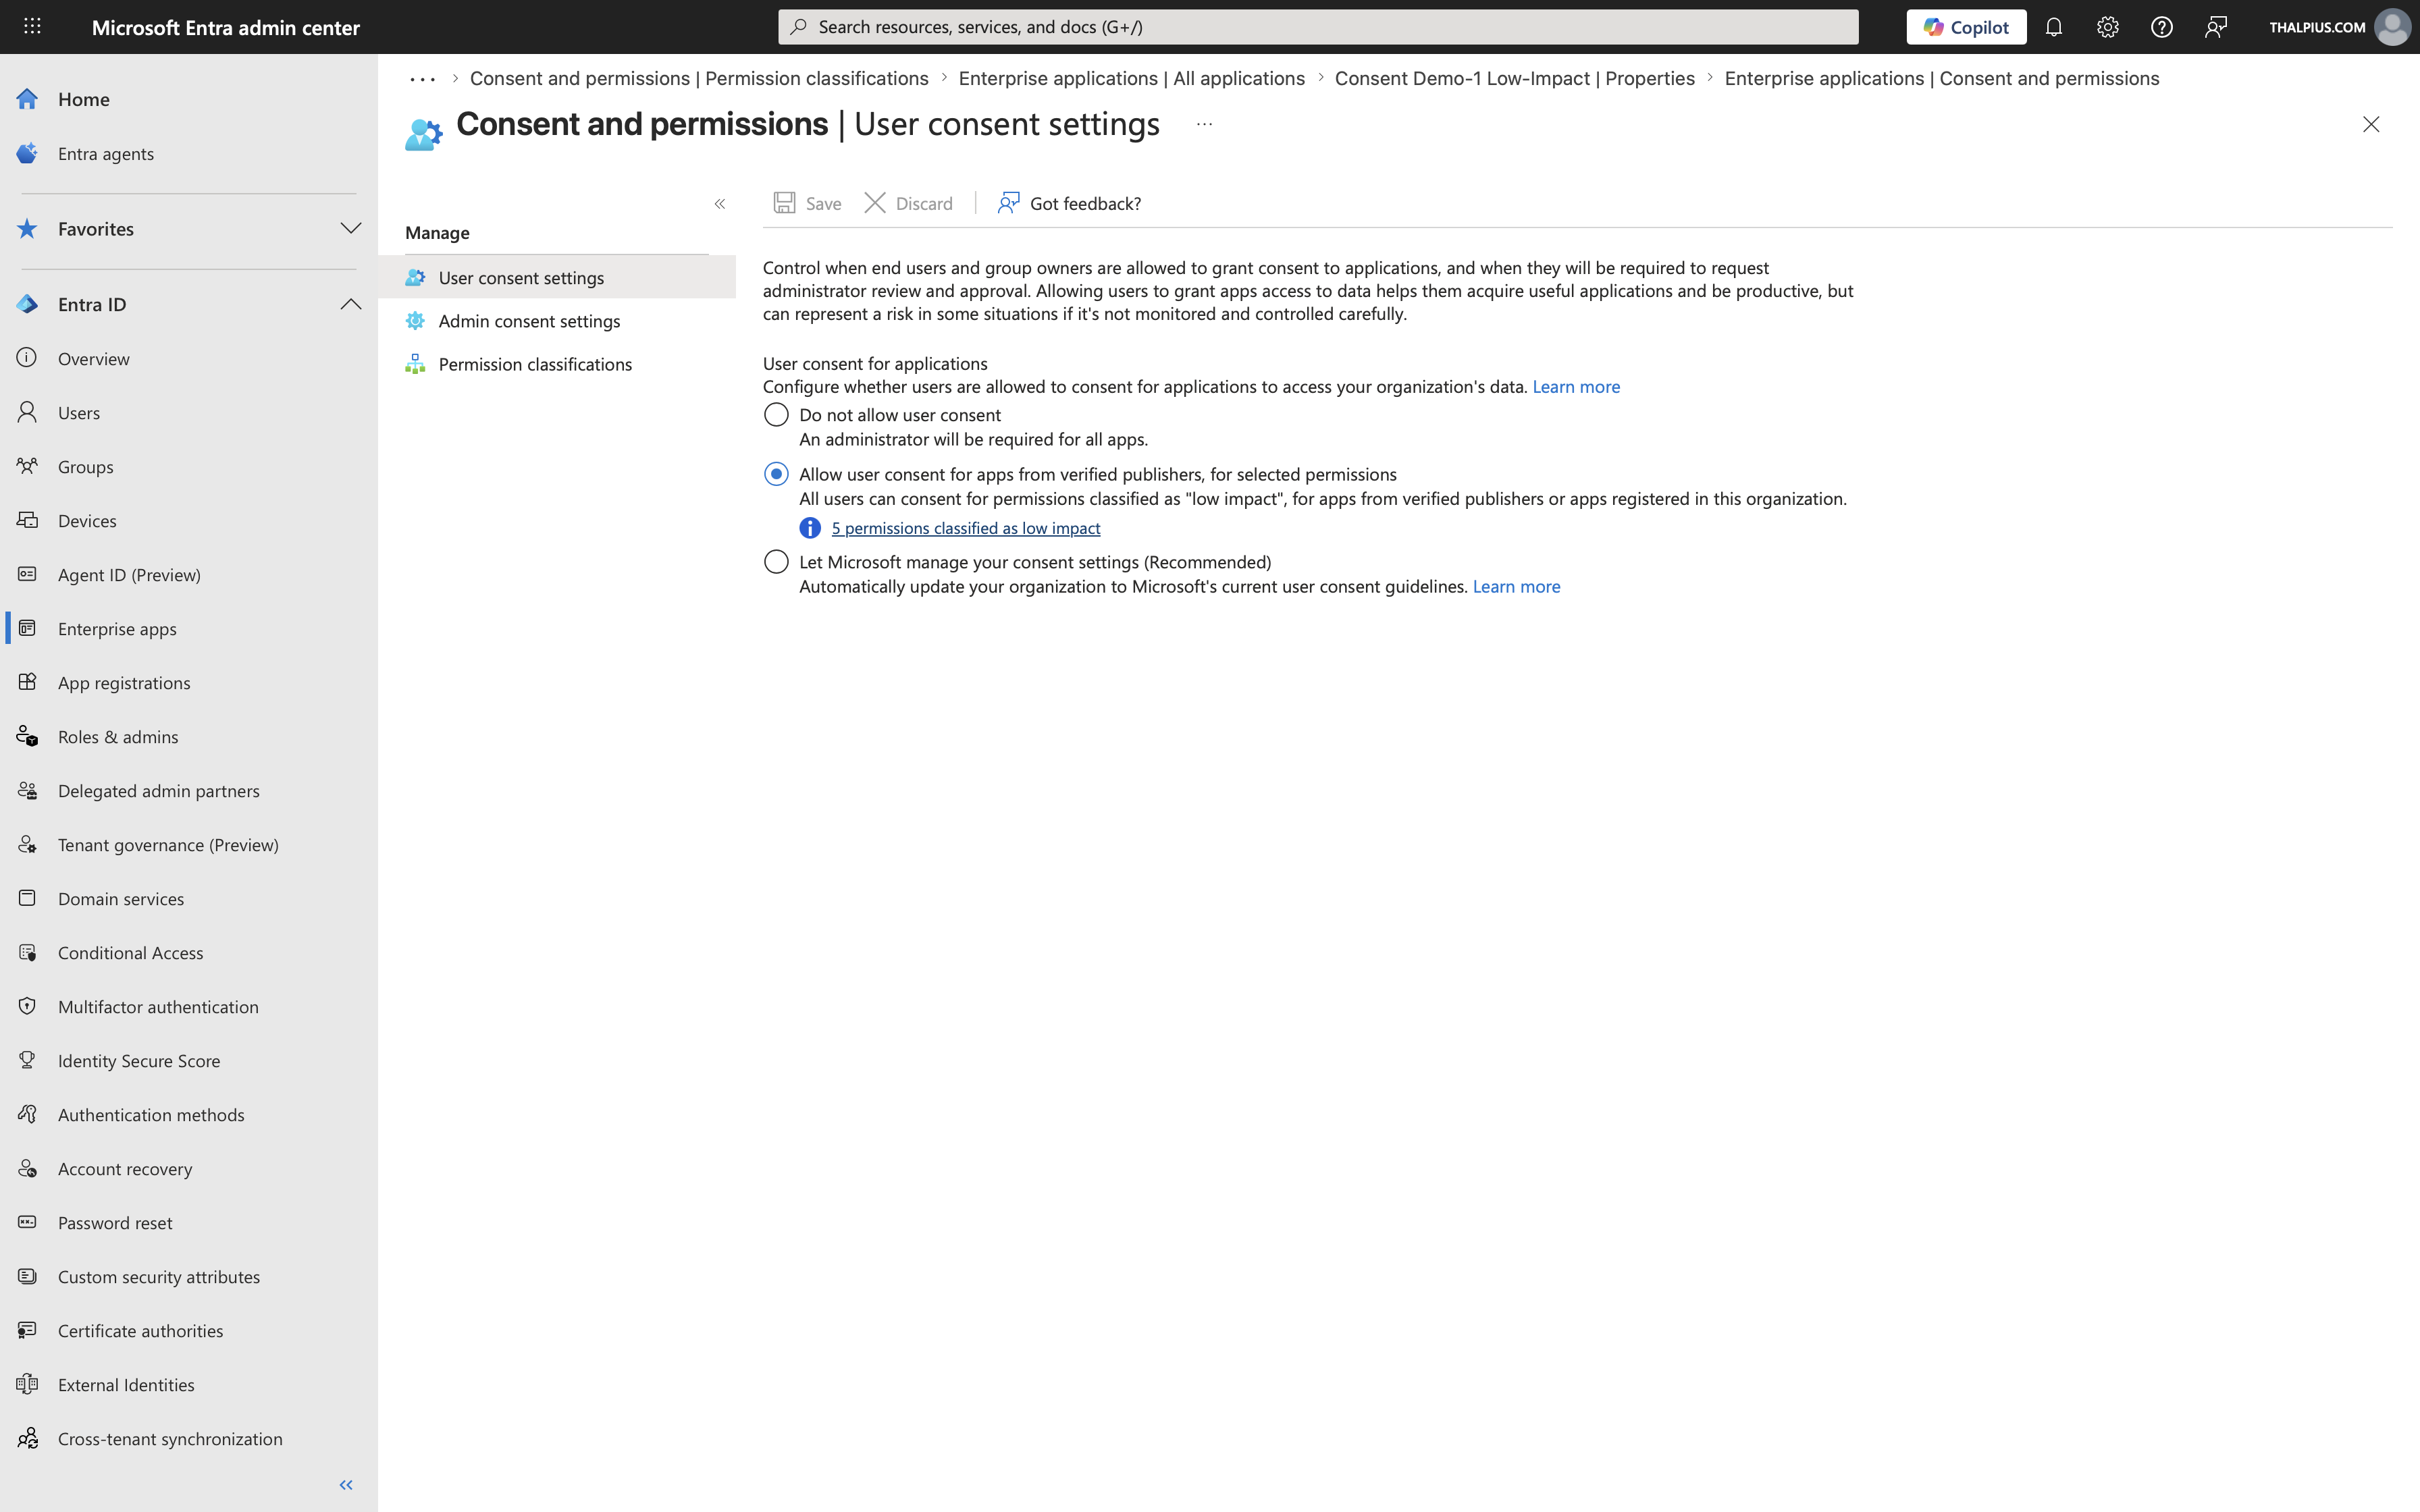
The User Consent Settings page in the Microsoft Entra admin center controls whether end users are allowed to grant consent to applications on their own, without involving an administrator. You can find these settings under Enterprise apps > Consent and permissions > User consent settings.
There are three options available:
Do not allow user consent: All application consent requests require administrator approval. Users who attempt to sign into an application that requests permissions will be blocked and will see a prompt asking them to request admin approval. This is the most restrictive and most controlled option.
Allow user consent for apps from verified publishers, for selected permissions, Users can consent to applications, but only if two conditions are met: the requested permissions must be classified as low impact, and the application must either come from a verified publisher or be registered within your own organization. This option provides a balance between usability and security control.
Let Microsoft manage your consent settings (Recommended): Microsoft automatically applies its current recommended consent settings to your tenant, and updates them as its recommendations evolve. Under the current settings, users can consent to any user-consentable delegated permission, except for a specific set of sensitive permissions that Microsoft has explicitly excluded, such as Mail.Read, Files.ReadWrite.All, Calendars.ReadWrite, and similar high-impact scopes. This is also the default for newly created tenants.
The screenshot below shows these three options as they appear in the Microsoft Entra admin center, with the verified publishers option currently selected.
Choosing the right option depends on your organization’s risk appetite. In high-security environments, disabling user consent entirely and requiring administrator approval for all applications is the appropriate choice. For most organizations, restricting user consent to verified publishers with low-impact permissions provides a good default.
Consent and Permissions: Admin Consent Settings
The Admin Consent Settings page controls how users can request administrator review and approval for applications they want to use but cannot consent to themselves. You can find these settings under Enterprise Apps > Consent and permissions > Admin consent settings.
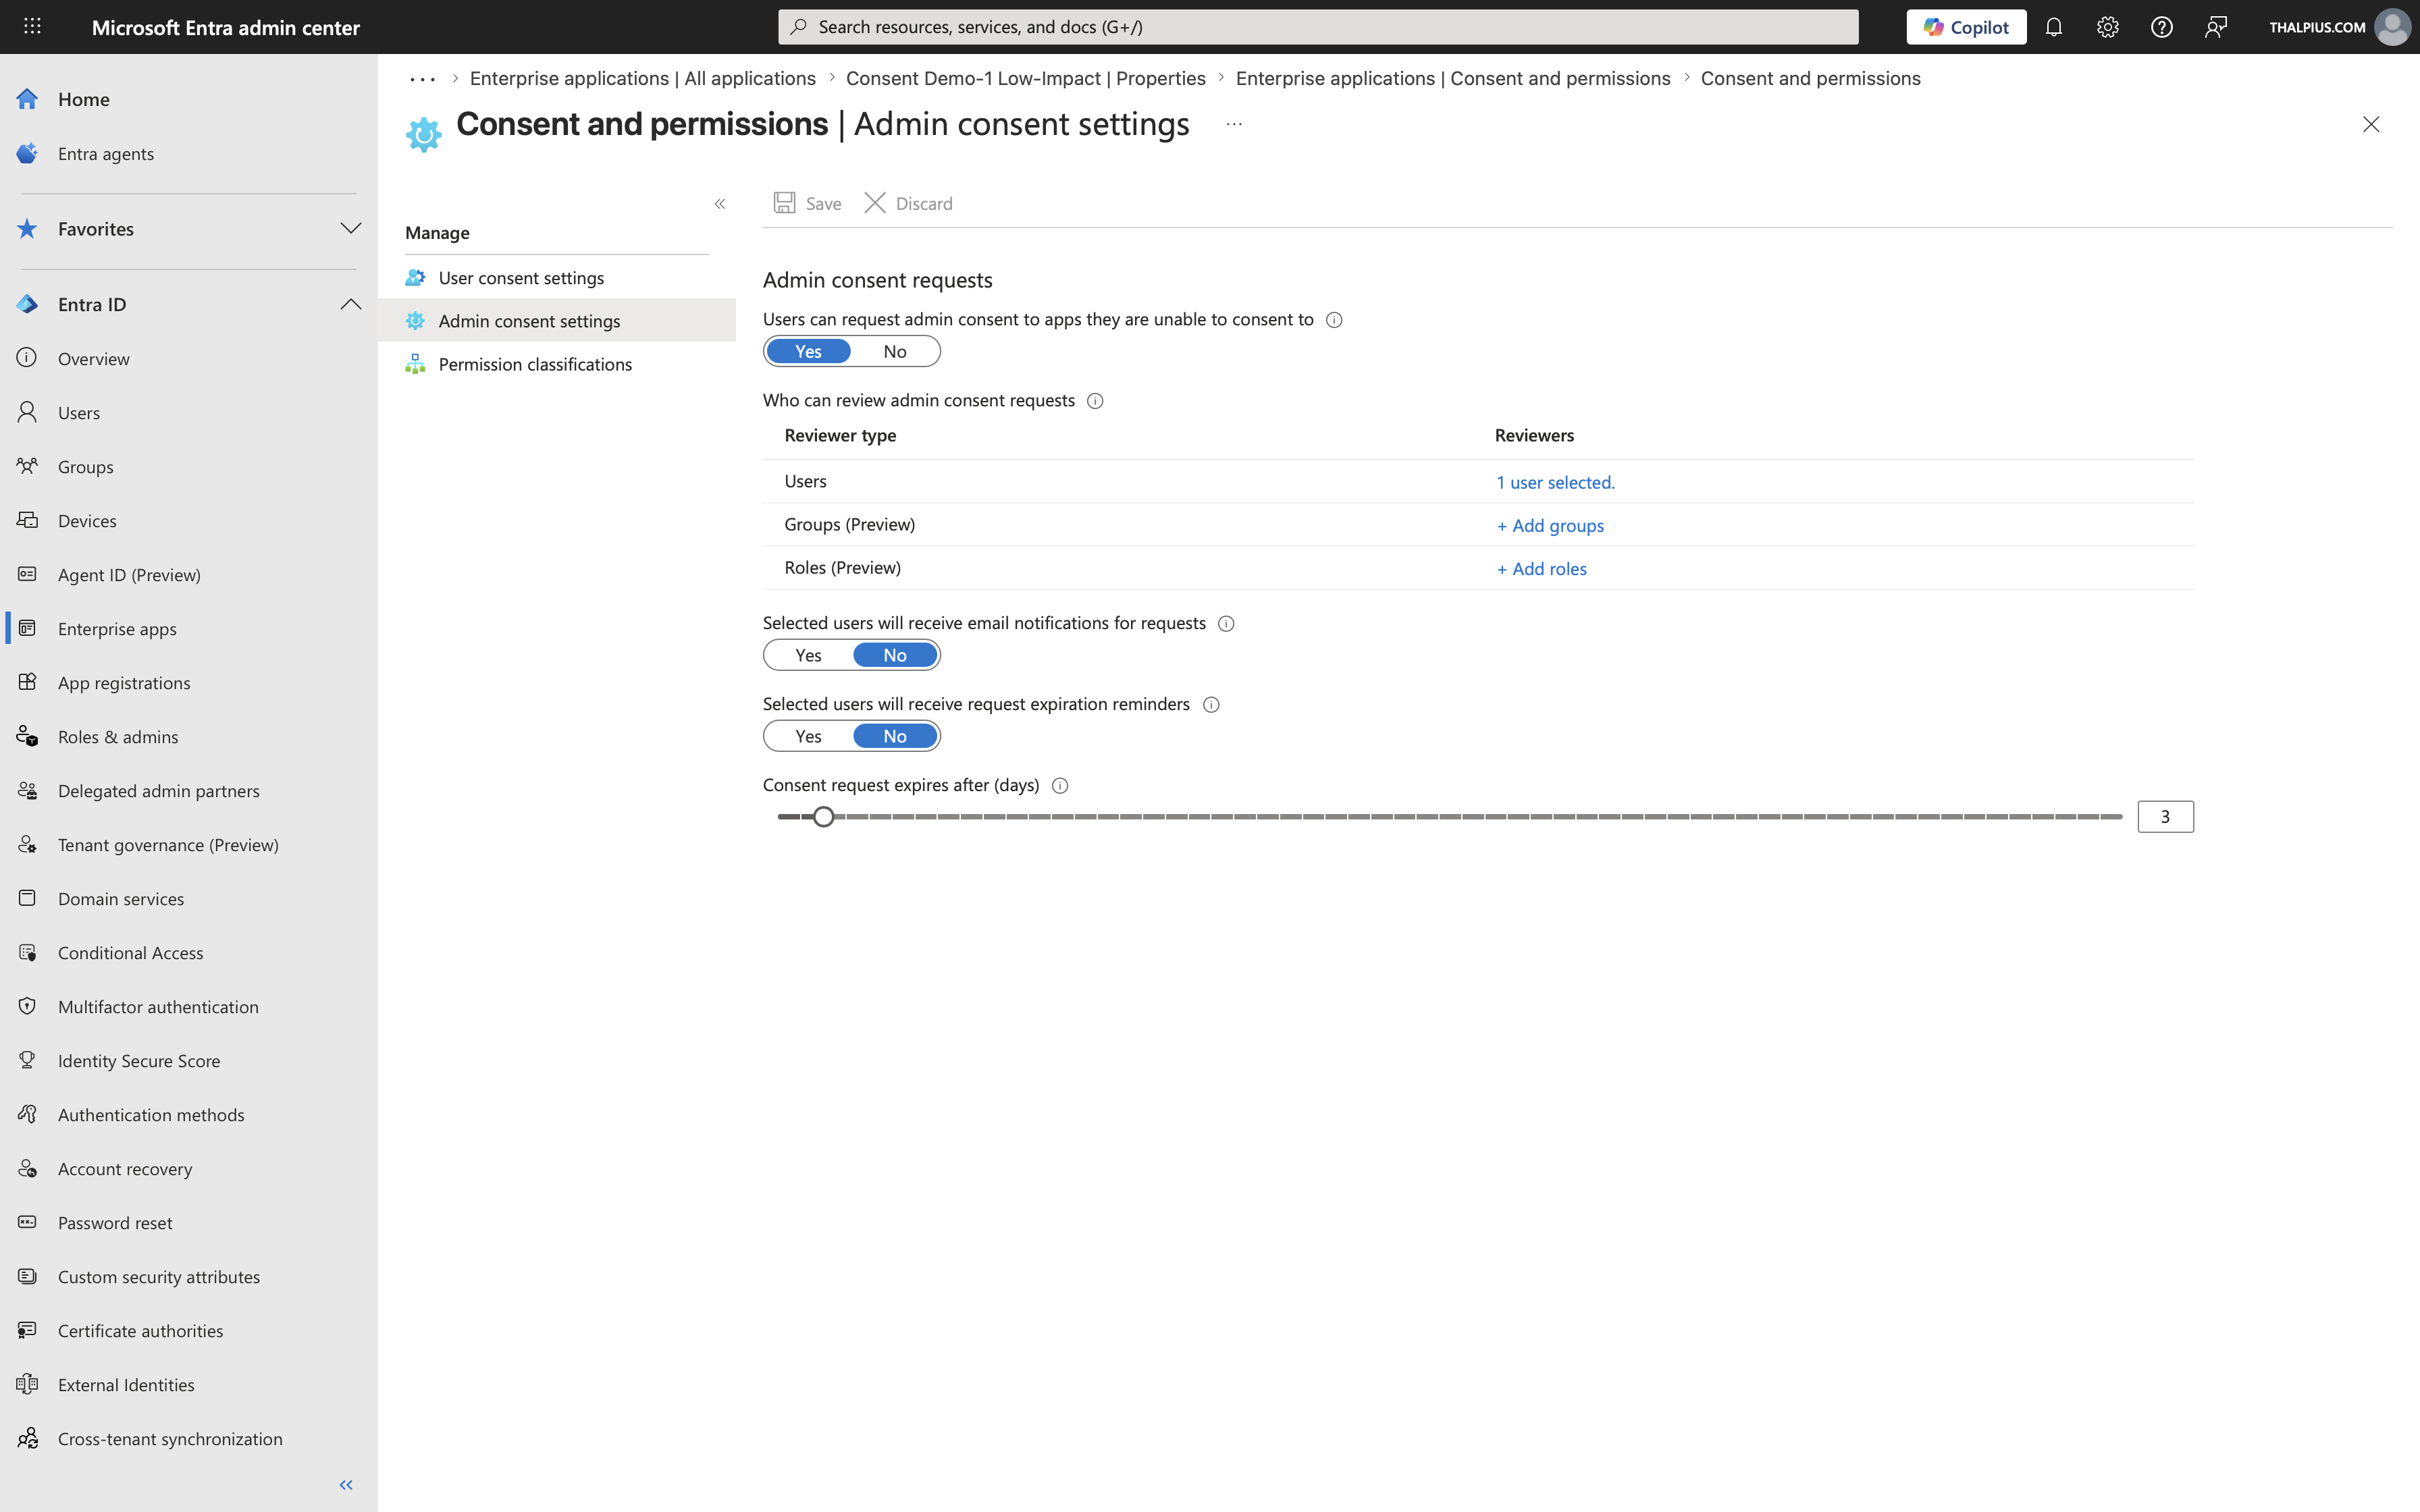
The key feature here is the Admin Consent Workflow. When this is enabled, users who are blocked from consenting to an application are given an option to submit a request for admin approval rather than simply seeing an error. Administrators designated as reviewers are notified and can approve or deny the request from within the Microsoft Entra admin center.
Configuring this workflow is an important companion to restricting user consent. If you restrict user consent without enabling the workflow, users are simply blocked with no path forward. With the workflow enabled, the experience is significantly better: users can explain why they need the application, and administrators have a managed queue to review.
The Admin Consent Workflow settings allow you to:
- Enable or disable the workflow entirely
- Designate which users or groups act as admin consent reviewers
- Configure whether reviewers receive email notifications when new requests are submitted
- Set a reminder interval for pending requests
Recommended practice: Enable the Admin Consent Workflow and designate at least two reviewers to avoid a single point of failure. Reviewers should have sufficient technical knowledge to evaluate the permissions an application is requesting, not just the ability to approve requests. A helpdesk employee or manager is rarely the right choice. Configure the reminder interval to ensure requests do not go unnoticed.
The Admin Consent Workflow is only effective when combined with restricted user consent settings. If users can consent freely, they will simply bypass the workflow by consenting themselves. The workflow should be treated as the controlled path for application access requests, not an optional addition on top of an already permissive consent configuration.
Consent and Permissions: Permission Classifications
The Permission classifications page allows you to classify specific API permissions as low, medium, or high impact. You can find this under Enterprise Applications > Consent and permissions > Permission classifications.
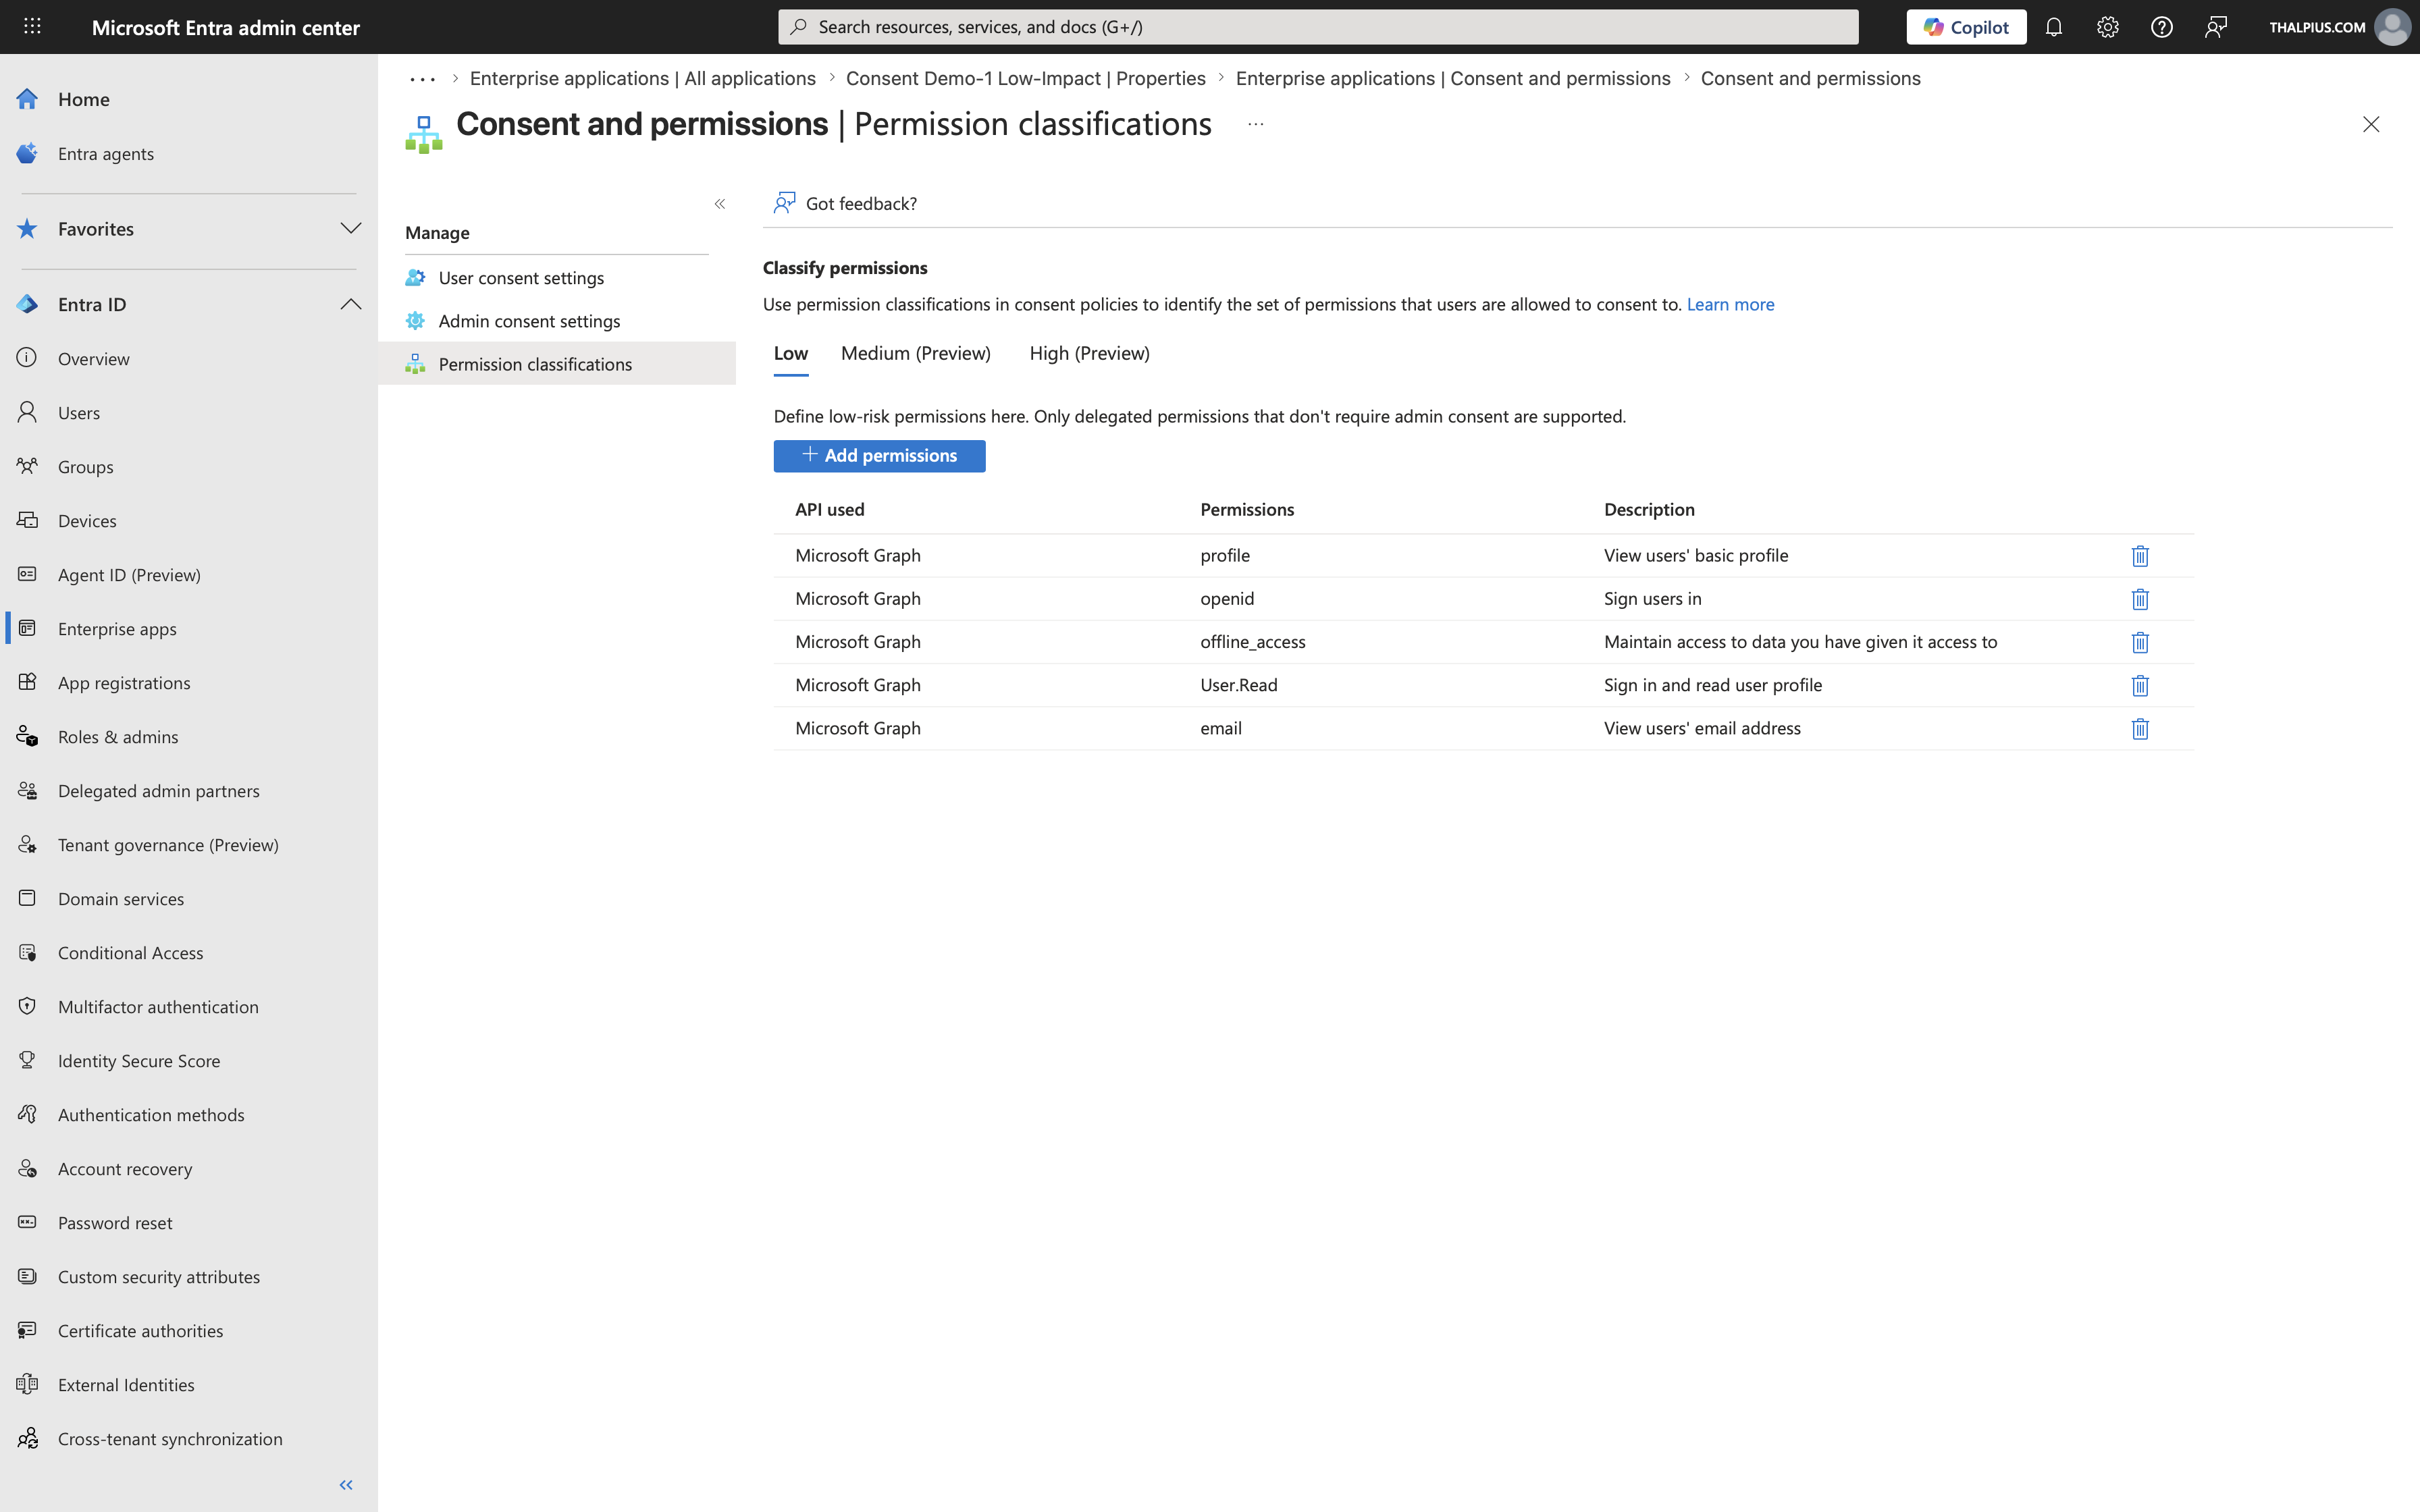
Permission classifications work hand in hand with the User Consent Settings. When you configure user consent to allow consent for verified publishers with selected permissions, the “selected permissions” refers specifically to the permissions you have classified as low impact.
By default, Microsoft pre-classifies a small set of permissions as low impact, typically OpenID Connect scopes like `openid`, `profile`, `email`, `offline_access`, and `User.Read`. These are the five permissions that appear when you click the link labeled “5 permissions classified as low impact” on the User Consent Settings page.
You can extend this list by classifying additional permissions as low impact, which expands what users are allowed to consent to without admin involvement. Equally important, you can use medium and high classifications to signal to administrators which permissions in the consent workflow deserve extra scrutiny.
Use permission classifications thoughtfully. A permission like `Mail.Read` or `Files.ReadWrite.All` should not be classified as low impact, as these provide significant access to organizational data. Stick to authentication and basic profile scopes for low-impact classification.
Admin Consent Scope: A Common Misconception
This is the misconception I see most frequently, and it is an important one to address.
When an administrator grants consent to an application in Microsoft Entra ID, they grant consent for the entire organization. This means every user in the tenant can potentially use the application with the consented permissions. The admin consent is tenant-wide, not scoped to specific users or groups.
Many administrators assume that granting admin consent inherently limits access to themselves or to a small group. It does not. After admin consent is granted, any user who can reach the application’s sign-in URL can authenticate and the application will have the consented permissions for that user’s data.
The correct way to scope access after granting admin consent is through the Enterprise Application’s assignment settings.
To properly scope access:
1. Navigate to the Enterprise Application in the Microsoft Entra admin center.
2. Go to Properties and set “Assignment required?” to Yes. This ensures that only users, or members of groups, explicitly assigned to the application can sign in. Without this, any user in your tenant can access the application.
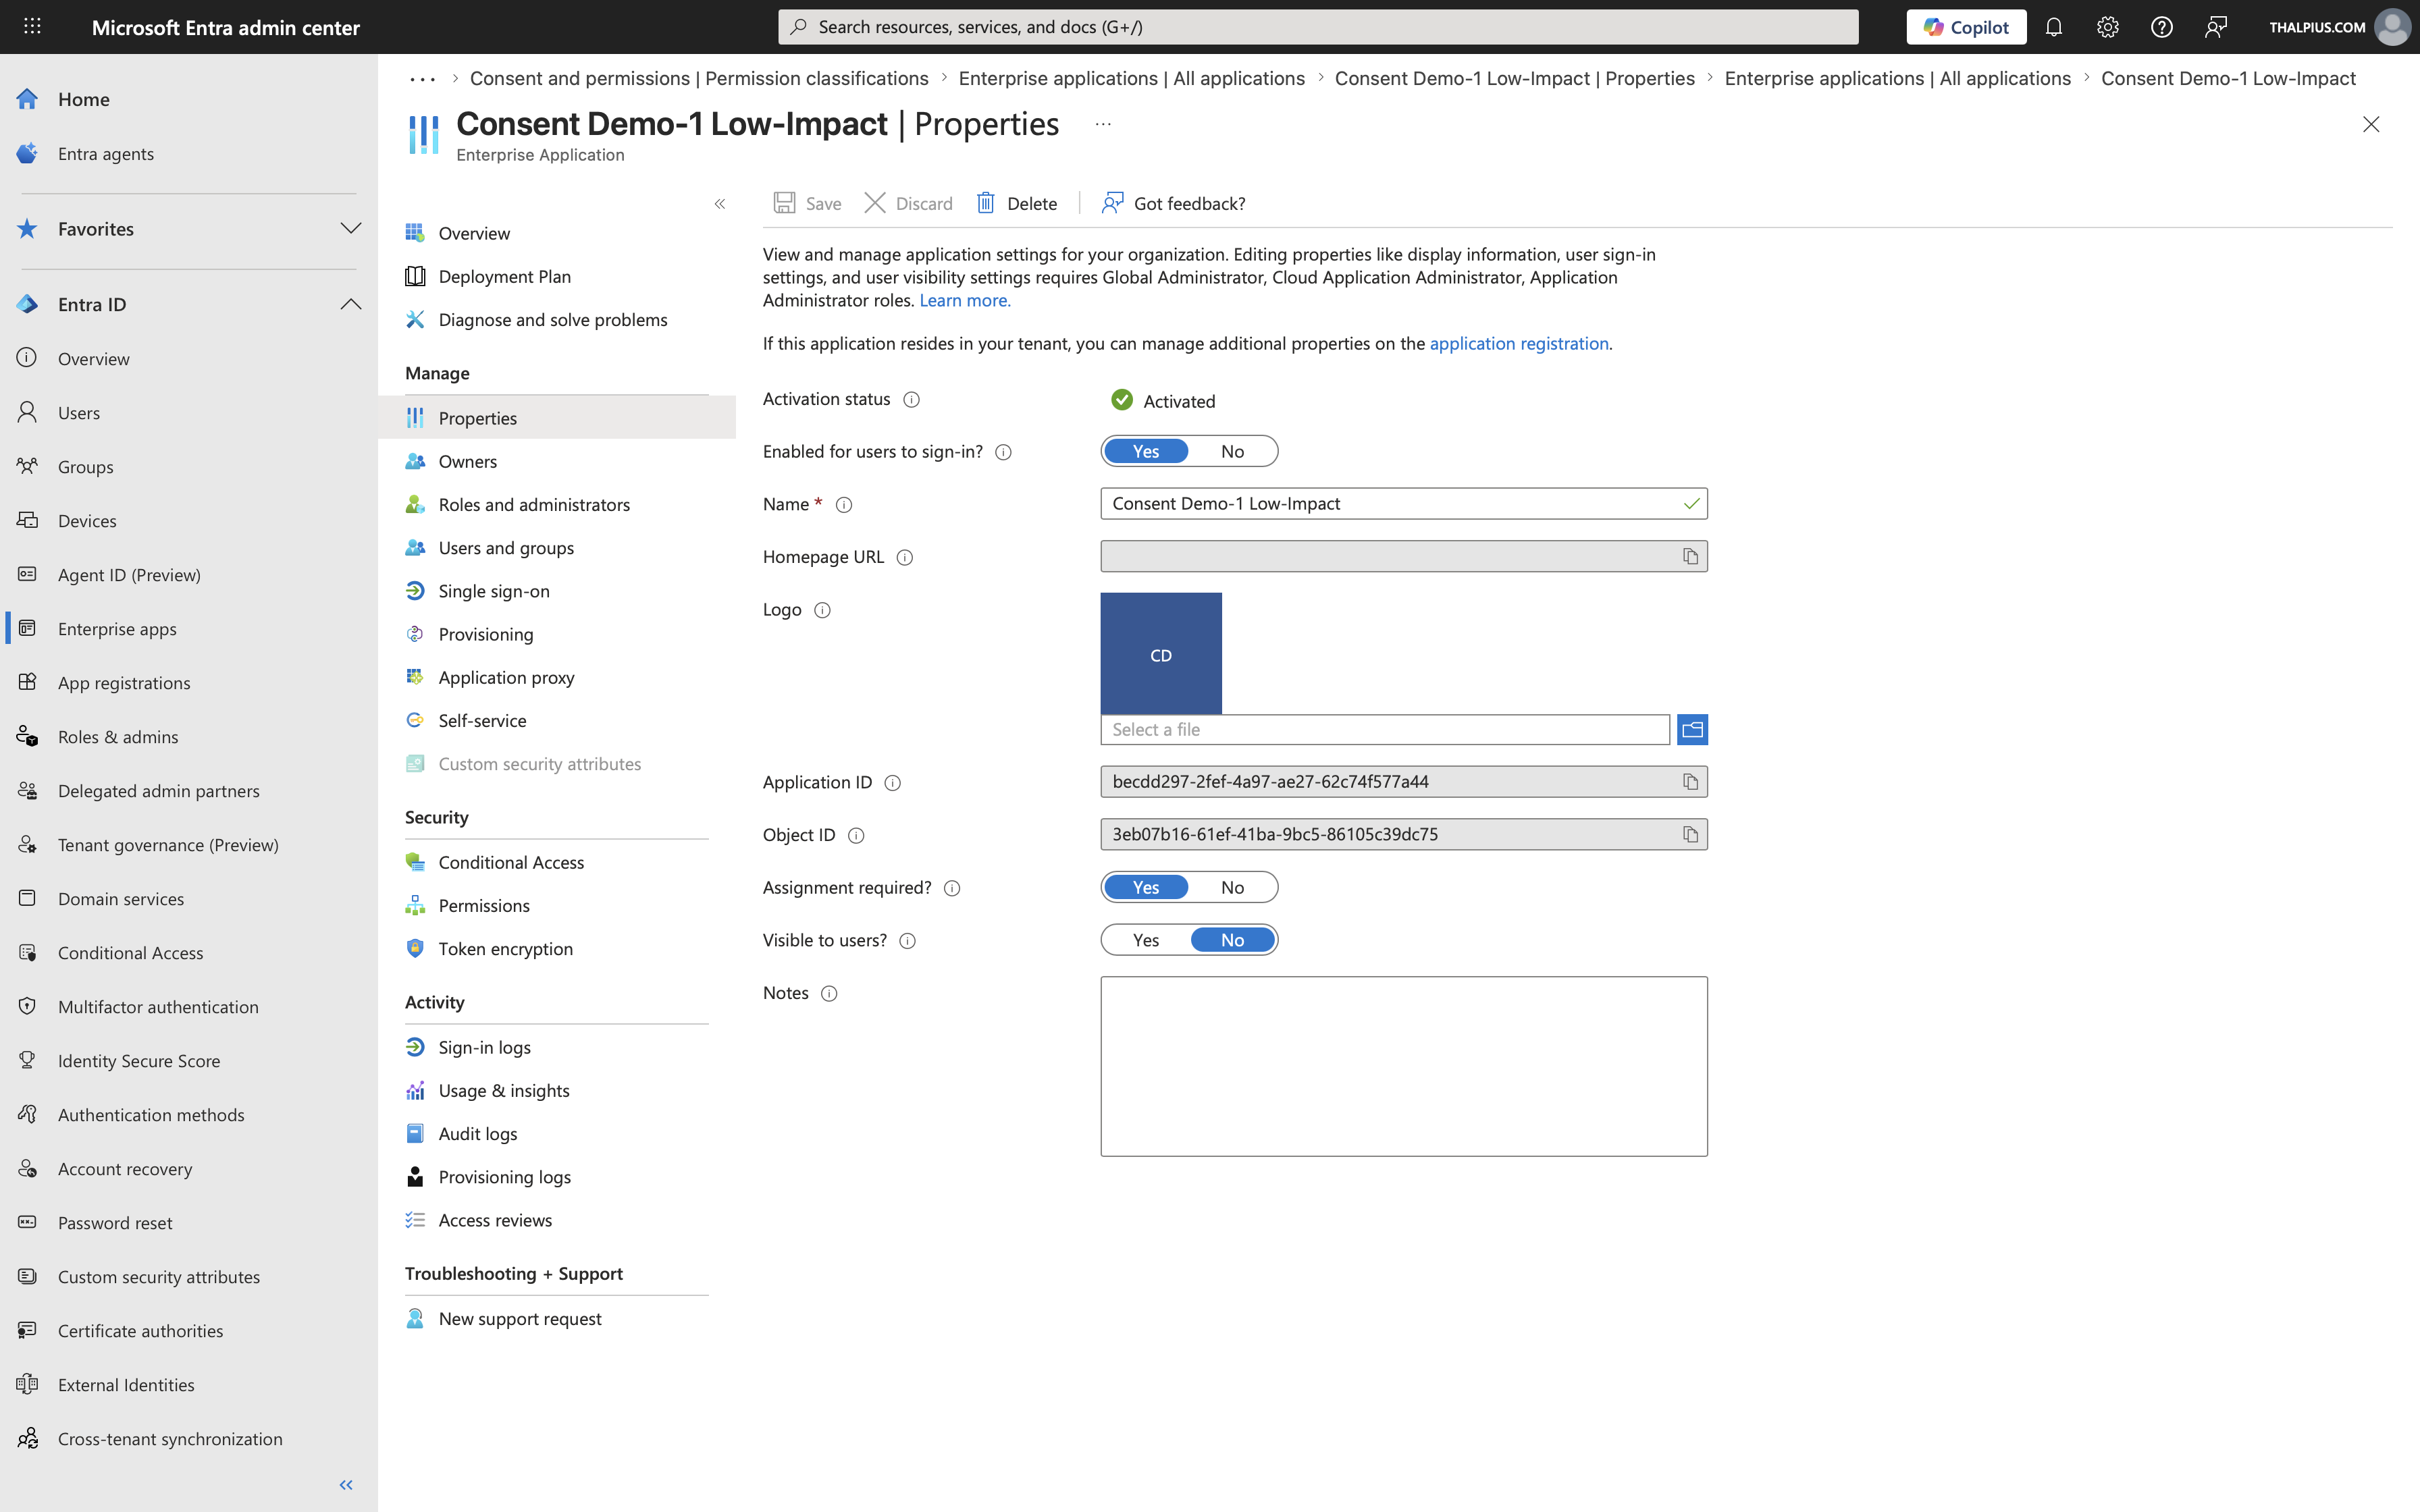
3. Navigate to Users and groups on the Enterprise Application and add the specific users or groups who should have access.

This combination, admin consent at the tenant level plus assignment-required scoping at the Enterprise Application level, gives you the correct security model. Admin consent covers the permission grant, and the assignment covers who can actually use those permissions.
Skipping the assignment step is a common mistake. An administrator grants consent thinking they have done the necessary security work, but the application remains accessible to the entire organization.
Testing with consent.thalpius.com
To make these concepts easier to explore hands-on, I have built a test application available at https://consent.thalpius.com.

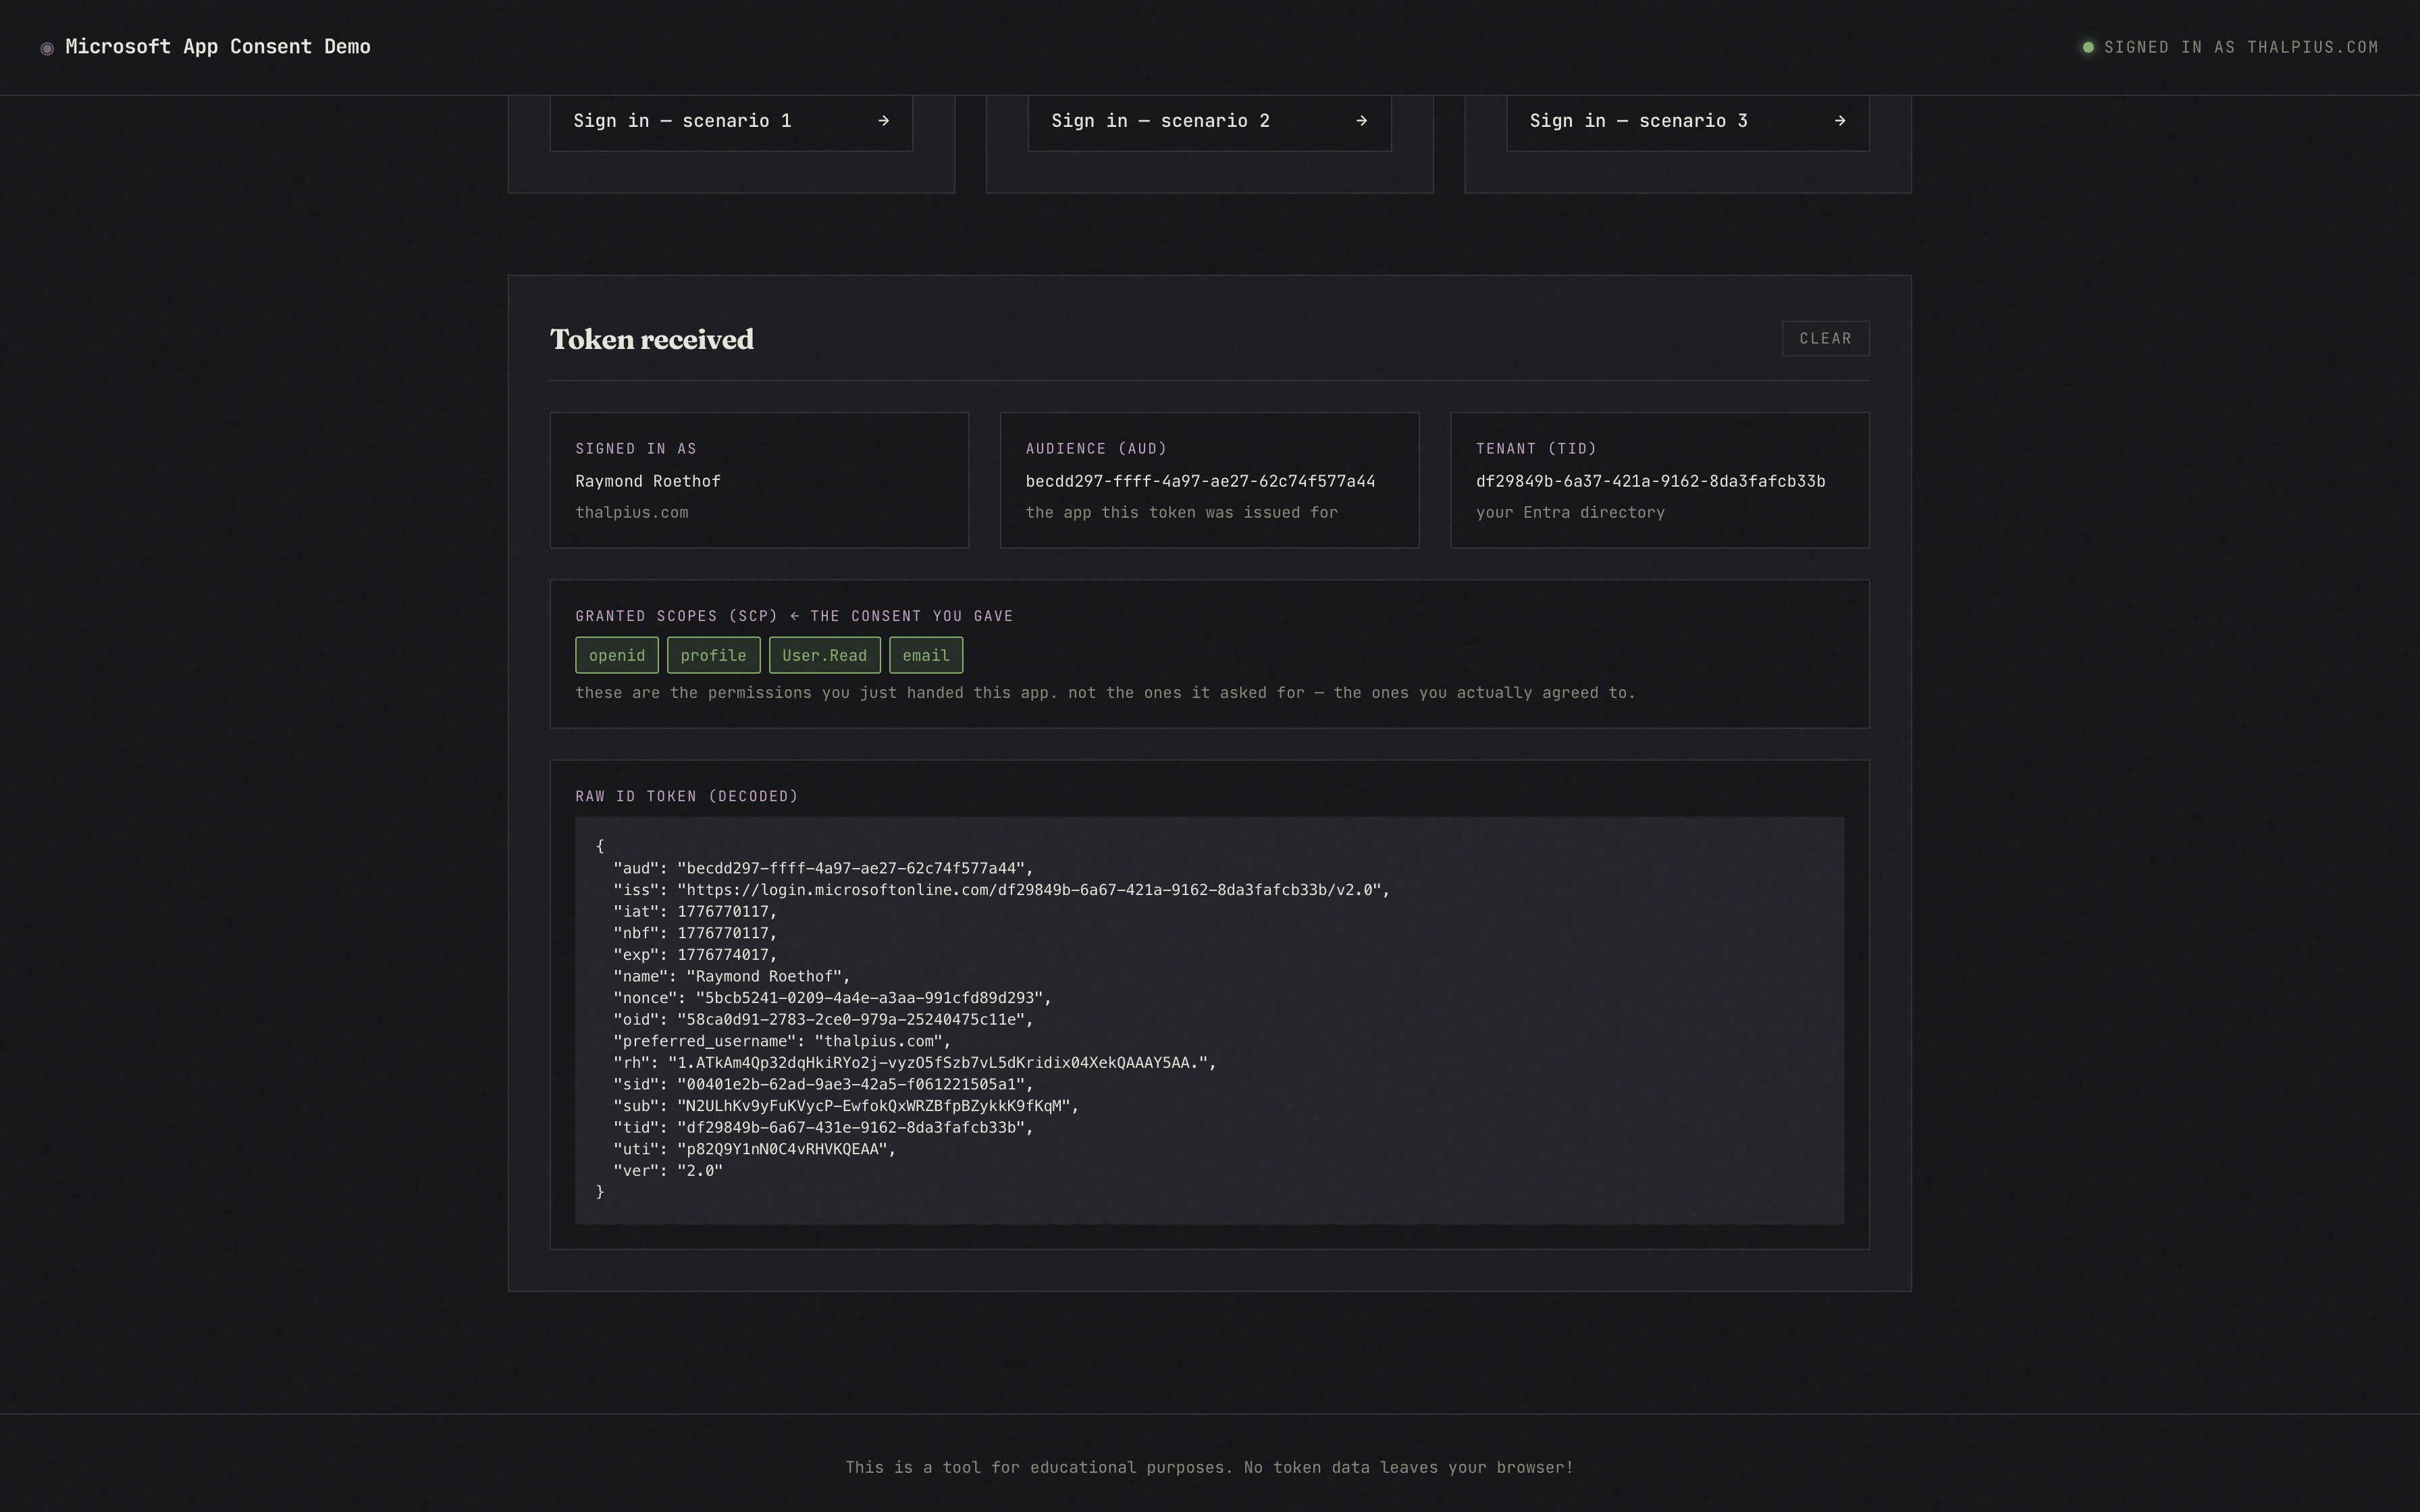
This application lets you walk through the OAuth consent flow against Microsoft Entra ID and observe exactly what happens at each stage, from the initial authorization request, through the consent prompt, to the resulting token. You can test the behavior under different user consent settings, observe what the consent prompt looks like for verified versus unverified publishers, and see how permission classifications affect what users are allowed to consent to.
I recommend testing this application in a non-production tenant or a dedicated test tenant where you can freely modify the consent settings described in this post without impacting your organization’s users.
Conclusion
Understanding OAuth app consent in Microsoft Entra ID is fundamental to securing your organization’s identity environment. As applications like the Anthropic Microsoft 365 connector become more common, having a clear understanding of how consent is granted, what it means at the organizational level, and how to properly scope access afterward is essential knowledge for every identity administrator.
The settings described in this post, user consent settings, admin consent workflow, permission classifications, and enterprise application assignment, work together as a complete control framework. Each layer addresses a different aspect of the problem, and skipping any one of them leaves a gap.
