Microsoft Is Forcing Passkeys: How the Cryptography Actually Works

Microsoft Is Forcing Passkeys: How the Cryptography Actually Works

Starting September 1, 2026, Microsoft Entra ID will start pushing users toward passkeys instead of SMS and voice codes for MFA. People who still use Microsoft’s SMS or voice verification will be prompted to set up a passkey, and Microsoft plans to stop providing those codes altogether by February 1, 2027.

The reason is pretty straightforward. SMS and voice codes are increasingly vulnerable to phishing and social-engineering attacks, particularly as those attacks become easier to automate with AI.

That makes this a pretty significant change for organizations that still depend on phone-based MFA. It’s also a good reason to look at what a passkey actually does. Most people encounter one as a fingerprint prompt on a laptop or phone, but there’s quite a bit more happening underneath.

Table of Contents

Disclaimer: This blog post is provided for informational purposes only. While every effort has been made to ensure accuracy, implementation of these features should be performed by qualified administrators in accordance with your organization’s security and change management policies. Several values and behaviors described in this post fall outside Microsoft’s documented ranges and were only confirmed through direct testing in a single tenant; they are not guaranteed to behave the same way in every environment, and Microsoft support was not consulted before publishing. The author is not responsible for any issues, data loss, or security incidents that may occur from following this guidance. Always test in a non-production environment first.

Key dates

DateMilestone
September 1, 2026Passkeys become the default authentication method in Entra ID. SMS/voice users are nudged to register one.
September 18, 2026Microsoft publishes pricing and a list of supported telecom providers for organizations that still need SMS/voice.
October 30, 2026Organizations still using SMS/voice must configure their own telecom provider through the Microsoft Security Store.
February 1, 2027Microsoft’s own SMS/voice delivery is retired. SMS/voice still works, but only through a self-configured provider.

The problem passkeys are solving

Passwords have one structural flaw: they’re a shared secret. You know it, and the server knows it, or a hash of it. Every login sends that secret, or a proof of it, somewhere. That means it can be phished with a fake login page, leaked in a database breach, reused across sites, or intercepted.

Passkeys throw out the “shared secret” model entirely and replace it with public-key cryptography. Instead of a secret you type in, you have a mathematical key pair: a private key that never leaves your device, and a public key that you hand over freely to whatever service you’re signing up with.

The core idea: prove you have a key, without showing it

In public-key cryptography, a private key can produce a digital signature over a piece of data, and anyone holding the matching public key can verify that the signature is genuine, without ever seeing the private key itself.

A passkey login is essentially this: the server sends a random challenge, your device signs it with a private key only it has, and the server checks that signature against the public key it stored when you registered. No secret ever crosses the wire. There’s nothing to steal in transit, and nothing meaningful to steal from the server’s database either, since a leaked public key is useless to an attacker who can’t use it to sign anything.

This whole mechanism is standardized as WebAuthn (Web Authentication API), a W3C standard built on the FIDO2 framework from the FIDO Alliance. When people say “passkey,” they mean a WebAuthn credential used in a passwordless flow.

Registration: creating a passkey

When you first set up a passkey with a service (the “relying party” in WebAuthn terminology, think microsoft.com, github.com, your bank), roughly this happens:

  1. The browser or OS asks the relying party’s server for a registration challenge: a random, single-use value plus some metadata about the account.
  2. Your device’s authenticator (a secure enclave, TPM, hardware key like a YubiKey, or your phone’s biometric hardware) generates a brand-new public/private key pair, specific to that one website.
  3. The private key is sealed inside secure hardware, generated in a way that’s designed to never be exportable in plaintext.
  4. The public key, a credential ID, and an attestation statement (proof about what kind of authenticator created it) are sent back to the server and stored, tied to your account.

Crucially, this key pair is scoped to the origin (the domain) it was created for. A passkey minted for login.microsoft.com is cryptographically bound to that origin and simply will not produce a valid signature for login-micros0ft.com. This is where passkeys get their built-in phishing resistance: it’s not that users are more careful, it’s that the browser refuses to even attempt a signature against the wrong domain.

Authentication: logging in

Once a passkey is registered, signing in looks like this:

  1. You tell the relying party who you are, or it looks you up by the credential ID it already has for this device.
  2. The server sends a fresh random challenge.
  3. Your device asks you to unlock the authenticator, using Face ID, a fingerprint, Windows Hello, or a PIN, but this unlock step is purely local. It never touches the network. It just authorizes the device to use the private key for one operation.
  4. The authenticator signs the challenge, plus some context like the origin, with the private key.
  5. The signed response goes back to the server, which verifies it against the stored public key.

If it checks out, you’re in. Notice what never happened: no password was typed, no OTP was read off a text message, and no secret was transmitted anywhere. The biometric or PIN isn’t sent to the server either, it only ever unlocks local hardware.

Image 1: The WebAuthn registration and authentication flows, and why the private key never has to leave the device.

Where does the private key actually live?

This is where implementations diverge, and it matters for security posture, which is exactly what Microsoft’s Entra ID rollout forces admins to decide on via a setting called passkeyType.

Device-bound passkeys are generated inside a specific piece of hardware, such as a TPM, a secure enclave, or a dedicated security key like a YubiKey, and physically cannot leave it. Lose the device, lose the passkey (you’d need a backup authenticator registered). This is the highest-assurance option, and it’s the only kind that can be attested: the authenticator can cryptographically prove “I am specifically a YubiKey 5 NFC” or “I am a genuine Windows Hello TPM,” which matters for organizations that need hardware-level guarantees.

Synced passkeys are the newer, more convenient model. The private key is generated on one device but then encrypted and synced across your other devices through a cloud provider’s keychain, such as Apple’s iCloud Keychain, Google Password Manager, or Microsoft Authenticator. The sync itself is end-to-end encrypted, so the cloud provider can’t read the raw private key. This solves the single biggest usability complaint with hardware-bound credentials, namely getting a new phone and losing all your logins, at the cost of a slightly larger trust boundary: you’re now also trusting the sync provider’s encryption implementation, and synced passkeys generally can’t produce the same hardware attestation, since the key isn’t tied to one physical chip.

Enterprises can require attestation, forcing device-bound keys and blocking synced ones, for high-privilege accounts, while allowing synced passkeys for general staff who just want painless logins across their phone and laptop. That’s precisely the granularity Microsoft added to Entra ID this year, replacing what used to be a blunt, tenant-wide on/off switch for FIDO2.

Image 2: Configuring device-bound vs. synced passkeys in the Entra admin center.

Why this stops AITM phishing specifically

The phishing technique that’s made SMS and push-based MFA obsolete is the adversary-in-the-middle (AITM) attack. An attacker stands up a proxy site that looks identical to the real login page, sitting transparently between you and the real service. You type your password into it, the proxy relays it to the real site, the real site asks for your OTP, the proxy relays that prompt to you, you type the code, and the proxy relays it onward and captures the resulting session cookie. From your perspective everything looked normal. This works against passwords, SMS codes, authenticator app codes and even push approvals, because all of those are just values a human can be tricked into typing or approving on the wrong page.

Passkeys break this specific attack at the protocol level rather than relying on the user noticing anything is wrong. When the browser negotiates a WebAuthn signature, it binds the signed challenge to the actual origin the browser is talking to. If that origin is the attacker’s proxy domain rather than the real relying party, the authenticator either won’t offer the passkey at all or will sign for the wrong origin, and the real server will reject the result. There’s no code or value for the proxy to relay in between, so there’s nothing for an AITM setup to steal in transit. This is why “phishing-resistant” has become the specific industry term for passkeys, rather than just “more secure MFA.”

This protection assumes the browser itself is trustworthy. If an attacker gets a user to install a malicious or compromised browser, that browser controls what gets reported to the authenticator as the origin, since it’s the one constructing the clientDataJSON that gets signed. It still can’t extract the private key, that stays sealed in hardware, but it can act as a live, on-device relay: request a genuine signature for the real site the moment the user logs in, then hijack the resulting session. The cryptography isn’t broken here. The trusted component just isn’t trustworthy anymore. And the attacker needs the malware installed and needs to be present during the actual login.

Passkeys neutralize AITM and credential-relay phishing. They don’t make the device invulnerable. Malware with enough privileges, a hijacked session, or physical access paired with a stolen unlock method can all still get an attacker to a live passkey. A device-bound passkey on stolen hardware is still usable. So is a synced passkey pulled from a compromised cloud account. What passkeys actually do is move the attack surface: away from tricking a user into typing a secret on a fake page, toward compromising the endpoint or the account that holds the key. Smaller target. Harder to hit. Not zero risk.

The trade-offs, briefly

Device-bound passkeys can’t be moved between devices at all, they’re sealed to the hardware they were created on. Cross-device sign-in works between an iPhone and a Windows PC, scanning a QR code on your phone over the CTAP2 hybrid-transport protocol, but that’s borrowing the phone as an authenticator for one login, not migrating the credential itself, and both devices need Bluetooth enabled. Sync ecosystems from different vendors don’t fully interoperate yet either, though the FIDO Alliance’s credential-exchange work is closing that gap: CXF is already an approved standard, and CXP is rolling out at providers like Bitwarden and Dashlane.

Synced passkeys shift the risk somewhere else rather than removing it. A passkey synced through iCloud Keychain or Google Password Manager is only as safe as the account it lives in. Compromise that account, through account-recovery social engineering rather than phishing the login itself, and every synced passkey in it is potentially exposed at once. Device-bound passkeys don’t have that concentration risk, but they come with the opposite problem: lose the device without a backup authenticator registered, and you lose access. Either way, a passkey-only setup needs a real recovery path that doesn’t quietly reintroduce a phishable fallback.

Entra ID adds a couple of its own wrinkles. During the transition window between September 2026 and February 2027, SMS and voice often stay enabled alongside passkeys, which means an AITM attack can still try to downgrade a sign-in to the weaker method unless an organization has explicitly blocked it through Conditional Access or an authentication strength policy. And on the provisioning side, Windows Hello for Business, the usual way to get a device-bound passkey onto a Windows machine, currently requires the device to be Entra Joined or Hybrid Joined. Unmanaged BYOD devices can’t use it, so organizations with a lot of those still have to lean on FIDO2 keys or the Authenticator app instead, which is more rollout and support work than a fully managed fleet would need.

Passkeys are a structural fix, not a bolt-on mitigation. That’s the real reason an entire ecosystem, not just Microsoft, is converging on them as the default.

Conclusion

Microsoft forcing this shift doesn’t make passkeys perfect, but it does make them the default most people will end up with whether they dig into the mechanics or not. Understanding what’s actually happening under the hood, the key pair, the origin binding, the difference between device-bound and synced, makes it easier to configure Entra ID sensibly instead of just accepting whatever passkeyType default gets rolled out to your tenant.

The AITM resistance is real and it’s the main reason this migration is happening now. The trade-offs are real too: portability is still clunky, recovery needs a proper plan, and Entra ID’s own rollout has a few rough edges during the transition. None of that changes the direction of travel. September 1, 2026 is coming either way, worth setting up passkeys properly before Microsoft nudges your users into it for you.
Microsoft Entra ID: Understanding OAuth App Consent and Permissions

Microsoft Entra ID: Understanding OAuth App Consent and Permissions

Recently, Anthropic released a Microsoft 365 connector for Claude, their AI assistant. This connector allows Claude to interact with Microsoft 365 services on behalf of users and organizations. As part of deploying and testing this connector, I started looking more carefully at how OAuth app consent works in Microsoft Entra ID, and I noticed several misconceptions circulating online about how consent actually works, what it means when an admin grants consent, and how to properly scope access afterward.

In this blog post, I want to clarify how app consent works in Microsoft Entra ID, walk through the relevant configuration settings, and demonstrate this using a Microsoft App Consent Demo application I built for this purpose: https://consent.thalpius.com.

Table of Contents

Disclaimer: This blog post is provided for informational purposes only. While every effort has been made to ensure accuracy, implementation of these features should be performed by qualified administrators in accordance with your organization’s security and change management policies. The author is not responsible for any issues, data loss, or security incidents that may occur from following this guidance. Always test in a non-production environment first and consult official Microsoft documentation before implementing security features in production.

App Registration vs. Enterprise Application

Before diving into consent settings, it is important to understand the distinction between an App Registration and an Enterprise Application in Microsoft Entra ID.

An App Registration is where you define your application. It is the developer-side object. Here you configure things like the application name, redirect URIs, API permissions the application requests, certificates and secrets, and the application manifest. The App Registration lives in the tenant where the application was created. Think of it as the blueprint or definition of the application.

An Enterprise Application, also called a Service Principal, is the tenant-side representation of an application. When an application is consented to, either by a user or an administrator, or manually added by an administrator, an Enterprise Application object is created in your tenant. This is where you manage access control, user assignments, single sign-on settings, and provisioning. Crucially, this is also where the consent granted to the application is recorded.

The relationship is straightforward: one App Registration can have many corresponding Enterprise Applications across different tenants. When a user successfully consents to a third-party application, or when an administrator grants consent or manually adds the application, an Enterprise Application object is created in your tenant to represent that application.

This distinction matters for consent. Consent is recorded on the Enterprise Application, not the App Registration.

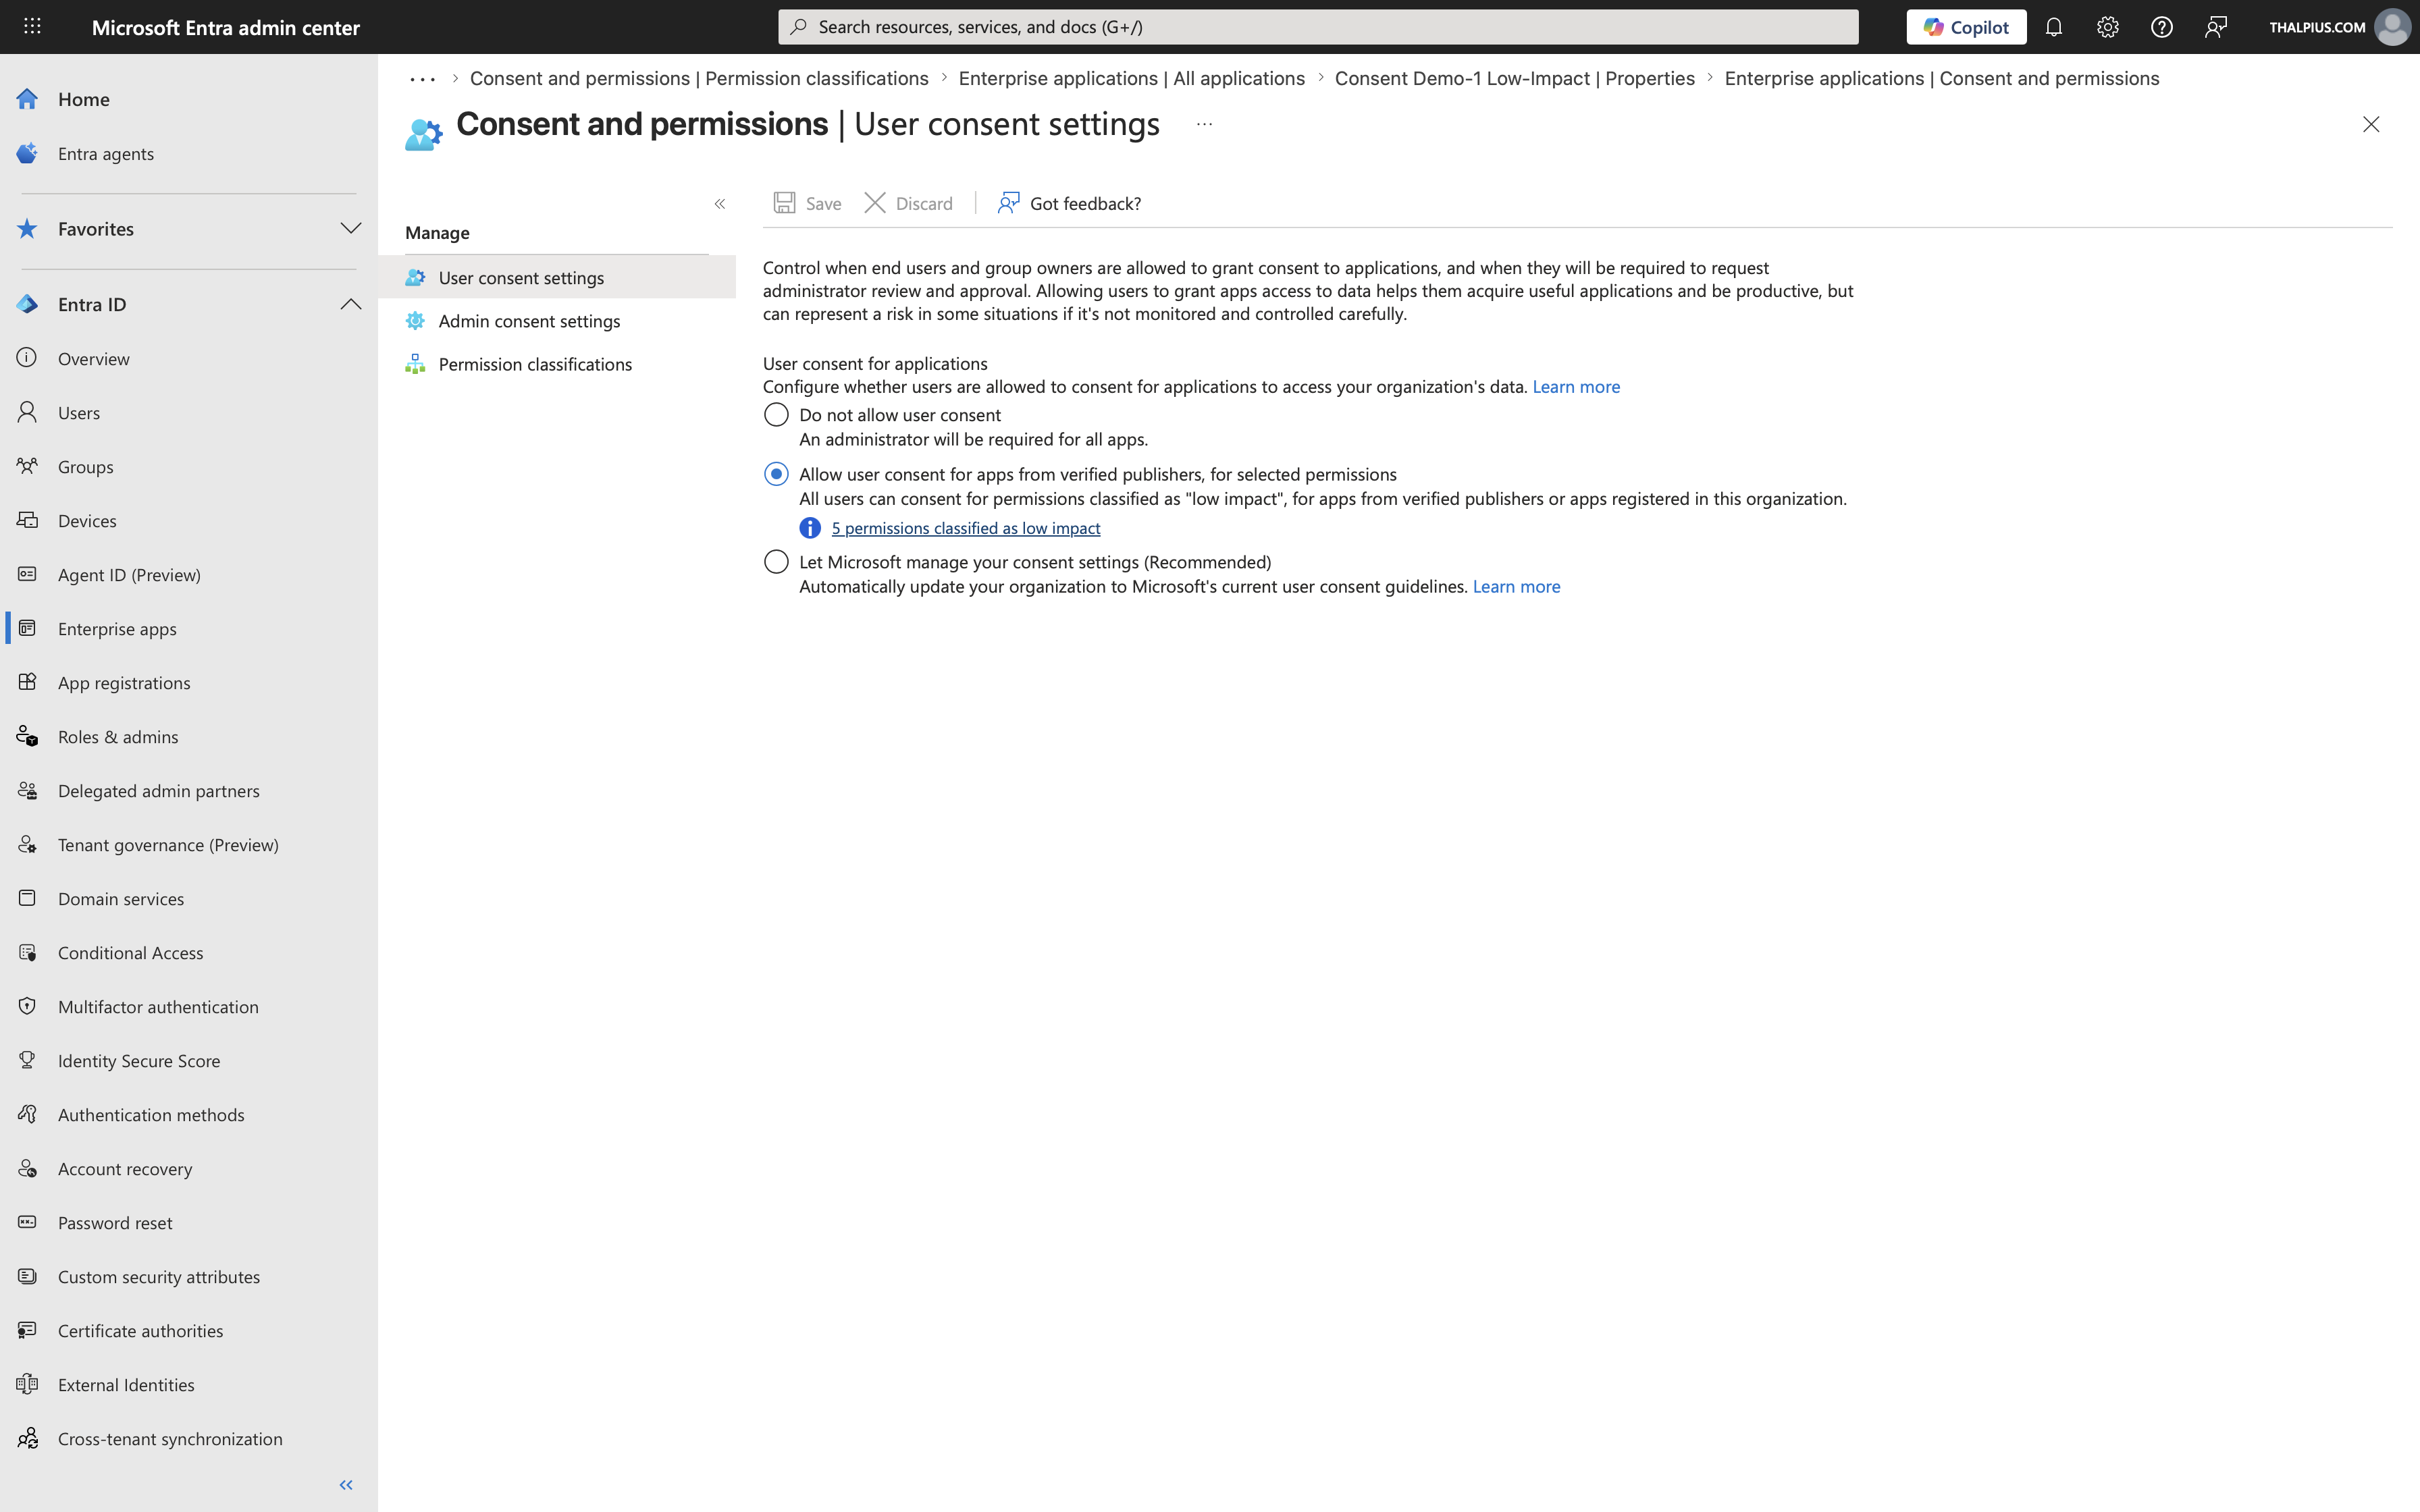
The User Consent Settings page in the Microsoft Entra admin center controls whether end users are allowed to grant consent to applications on their own, without involving an administrator. You can find these settings under Enterprise apps > Consent and permissions > User consent settings.

There are three options available:

Do not allow user consent: All application consent requests require administrator approval. Users who attempt to sign into an application that requests permissions will be blocked and will see a prompt asking them to request admin approval. This is the most restrictive and most controlled option.

Allow user consent for apps from verified publishers, for selected permissions, Users can consent to applications, but only if two conditions are met: the requested permissions must be classified as low impact, and the application must either come from a verified publisher or be registered within your own organization. This option provides a balance between usability and security control.

Let Microsoft manage your consent settings (Recommended): Microsoft automatically applies its current recommended consent settings to your tenant, and updates them as its recommendations evolve. Under the current settings, users can consent to any user-consentable delegated permission, except for a specific set of sensitive permissions that Microsoft has explicitly excluded, such as Mail.Read, Files.ReadWrite.All, Calendars.ReadWrite, and similar high-impact scopes. This is also the default for newly created tenants.

The screenshot below shows these three options as they appear in the Microsoft Entra admin center, with the verified publishers option currently selected.

Image 1: The User Consent Settings page in the Microsoft Entra admin center, showing the three available options for controlling end-user consent behavior. The second option, allowing consent for apps from verified publishers or apps registered in this organization for low-impact permissions, is currently selected.

Choosing the right option depends on your organization’s risk appetite. In high-security environments, disabling user consent entirely and requiring administrator approval for all applications is the appropriate choice. For most organizations, restricting user consent to verified publishers with low-impact permissions provides a good default.

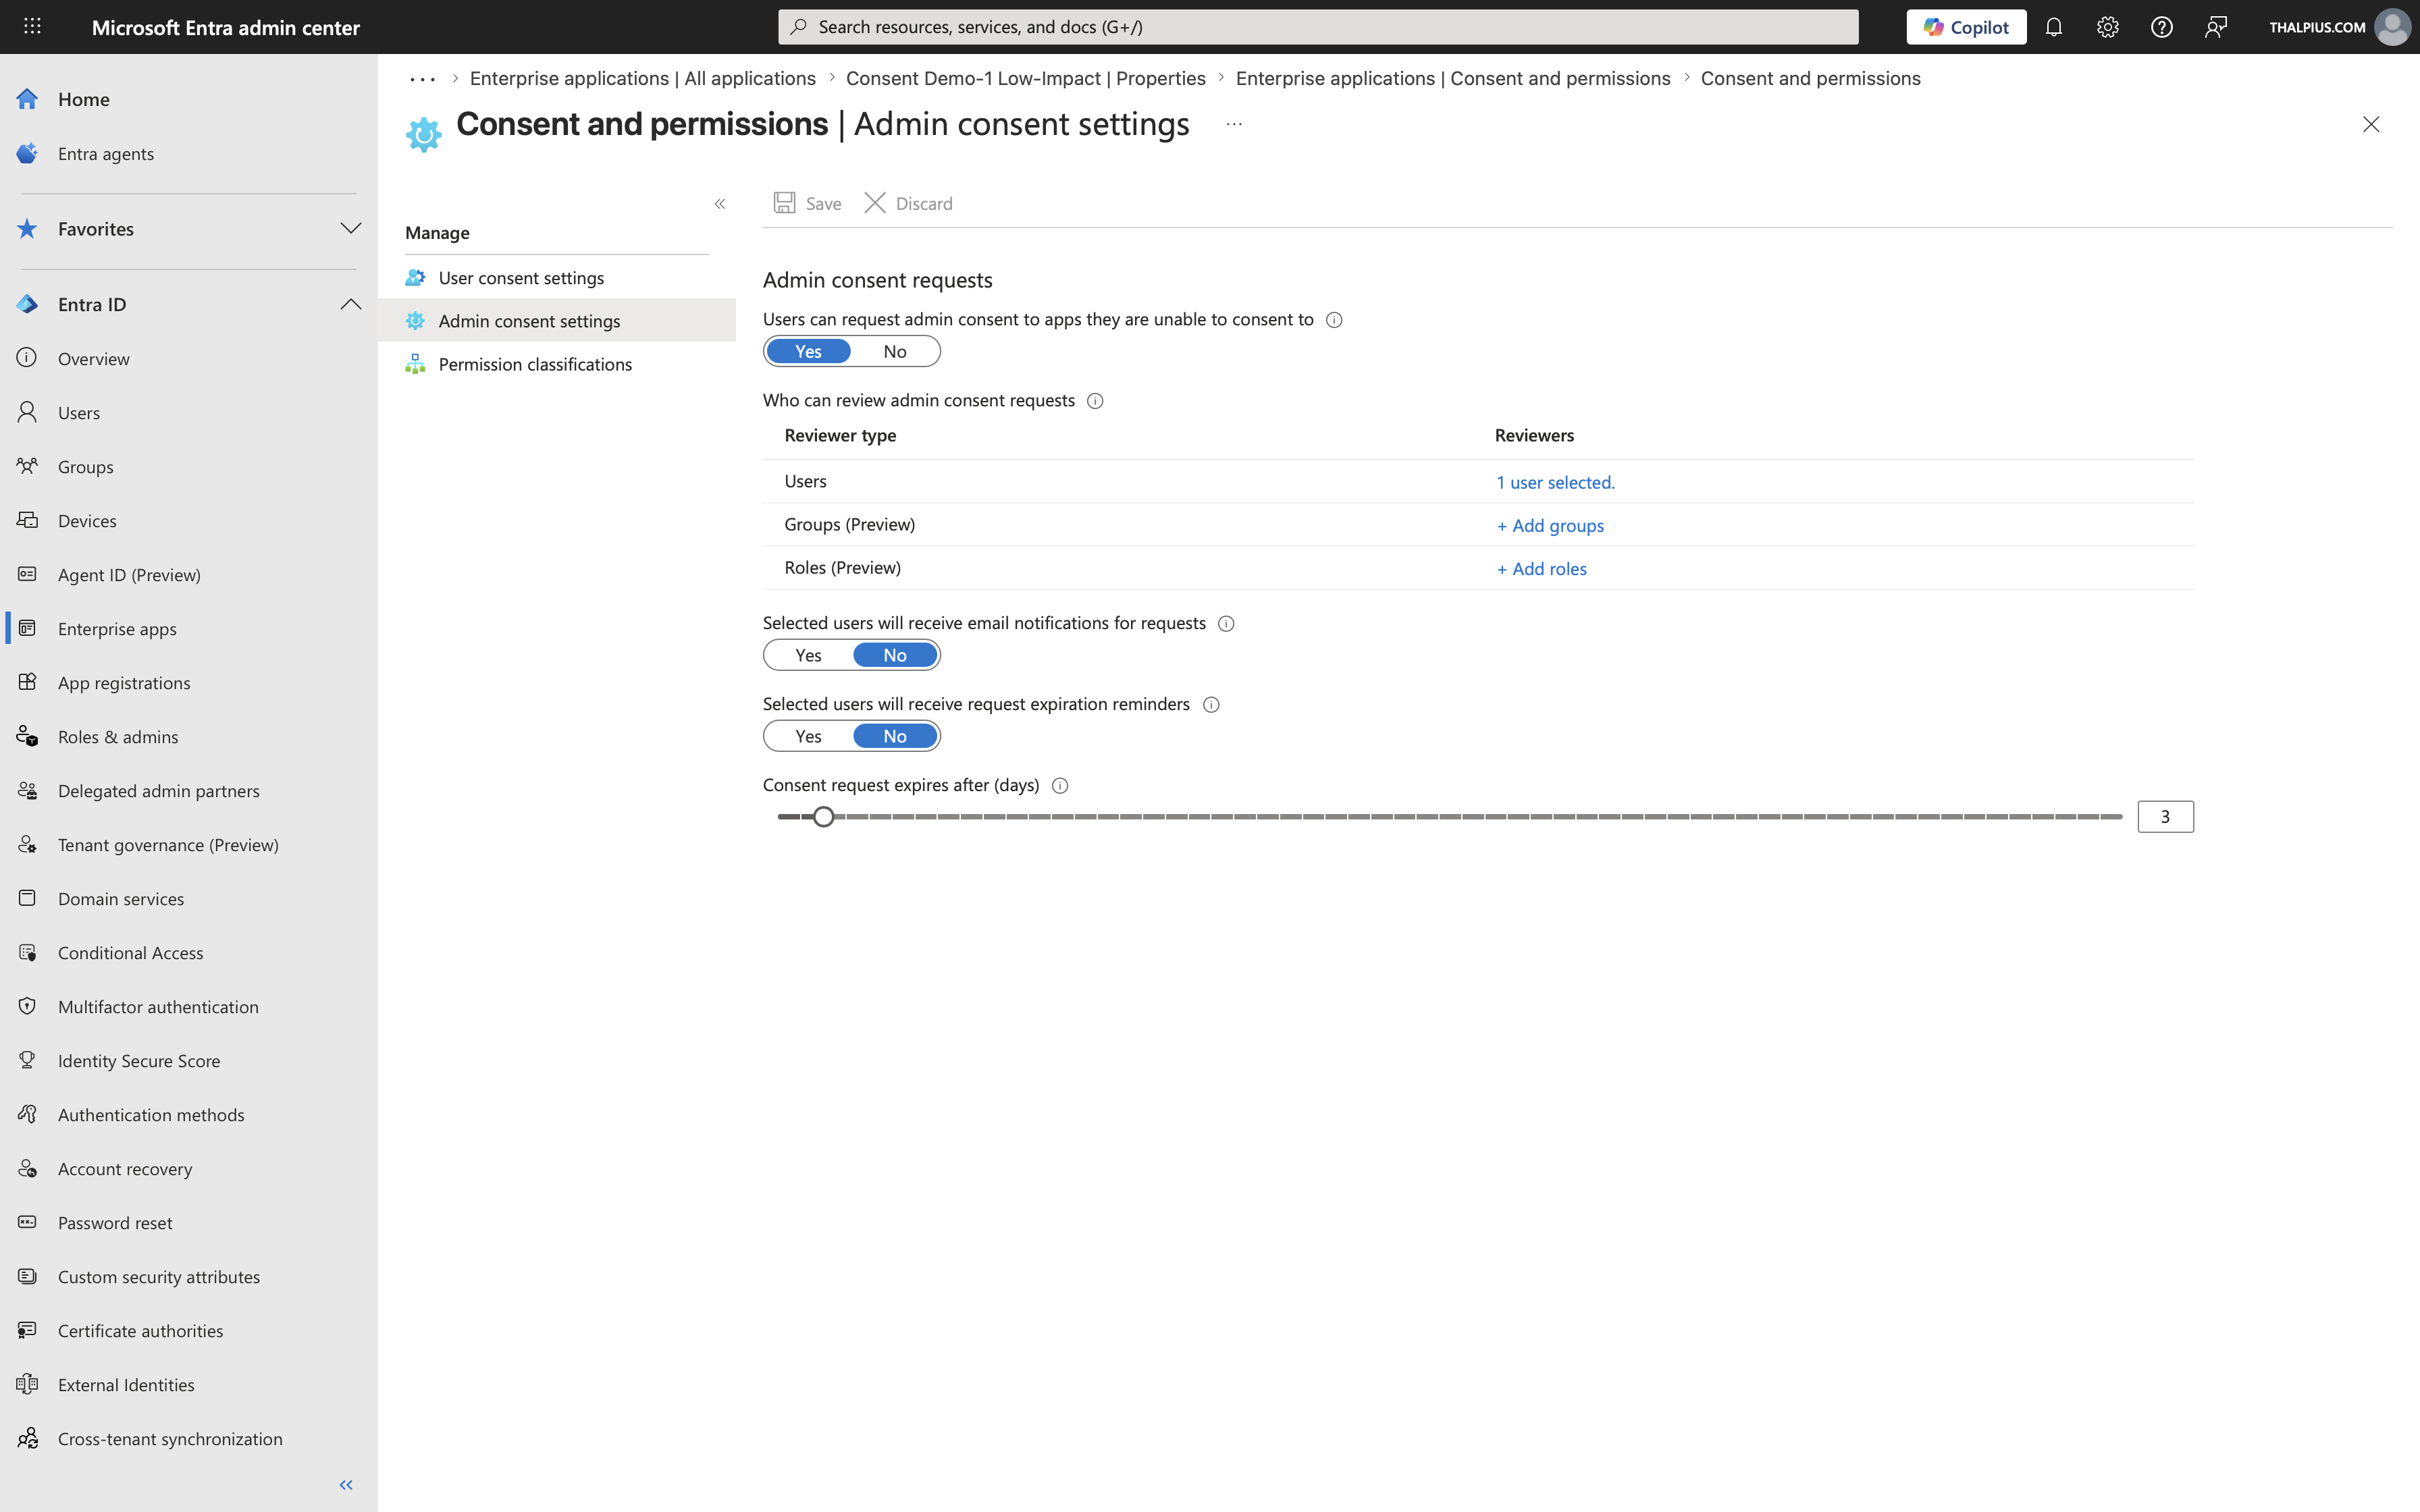
The Admin Consent Settings page controls how users can request administrator review and approval for applications they want to use but cannot consent to themselves. You can find these settings under Enterprise Apps > Consent and permissions > Admin consent settings.

Image 2: The Admin Consent Settings page in the Microsoft Entra admin center, showing the Admin Consent Workflow enabled with designated reviewers and the configured reminder interval.

The key feature here is the Admin Consent Workflow. When this is enabled, users who are blocked from consenting to an application are given an option to submit a request for admin approval rather than simply seeing an error. Administrators designated as reviewers are notified and can approve or deny the request from within the Microsoft Entra admin center.

Configuring this workflow is an important companion to restricting user consent. If you restrict user consent without enabling the workflow, users are simply blocked with no path forward. With the workflow enabled, the experience is significantly better: users can explain why they need the application, and administrators have a managed queue to review.

The Admin Consent Workflow settings allow you to:

  • Enable or disable the workflow entirely
  • Designate which users or groups act as admin consent reviewers
  • Configure whether reviewers receive email notifications when new requests are submitted
  • Set a reminder interval for pending requests

Recommended practice: Enable the Admin Consent Workflow and designate at least two reviewers to avoid a single point of failure. Reviewers should have sufficient technical knowledge to evaluate the permissions an application is requesting, not just the ability to approve requests. A helpdesk employee or manager is rarely the right choice. Configure the reminder interval to ensure requests do not go unnoticed.

The Admin Consent Workflow is only effective when combined with restricted user consent settings. If users can consent freely, they will simply bypass the workflow by consenting themselves. The workflow should be treated as the controlled path for application access requests, not an optional addition on top of an already permissive consent configuration.

The Permission classifications page allows you to classify specific API permissions as low, medium, or high impact. You can find this under Enterprise Applications > Consent and permissions > Permission classifications.

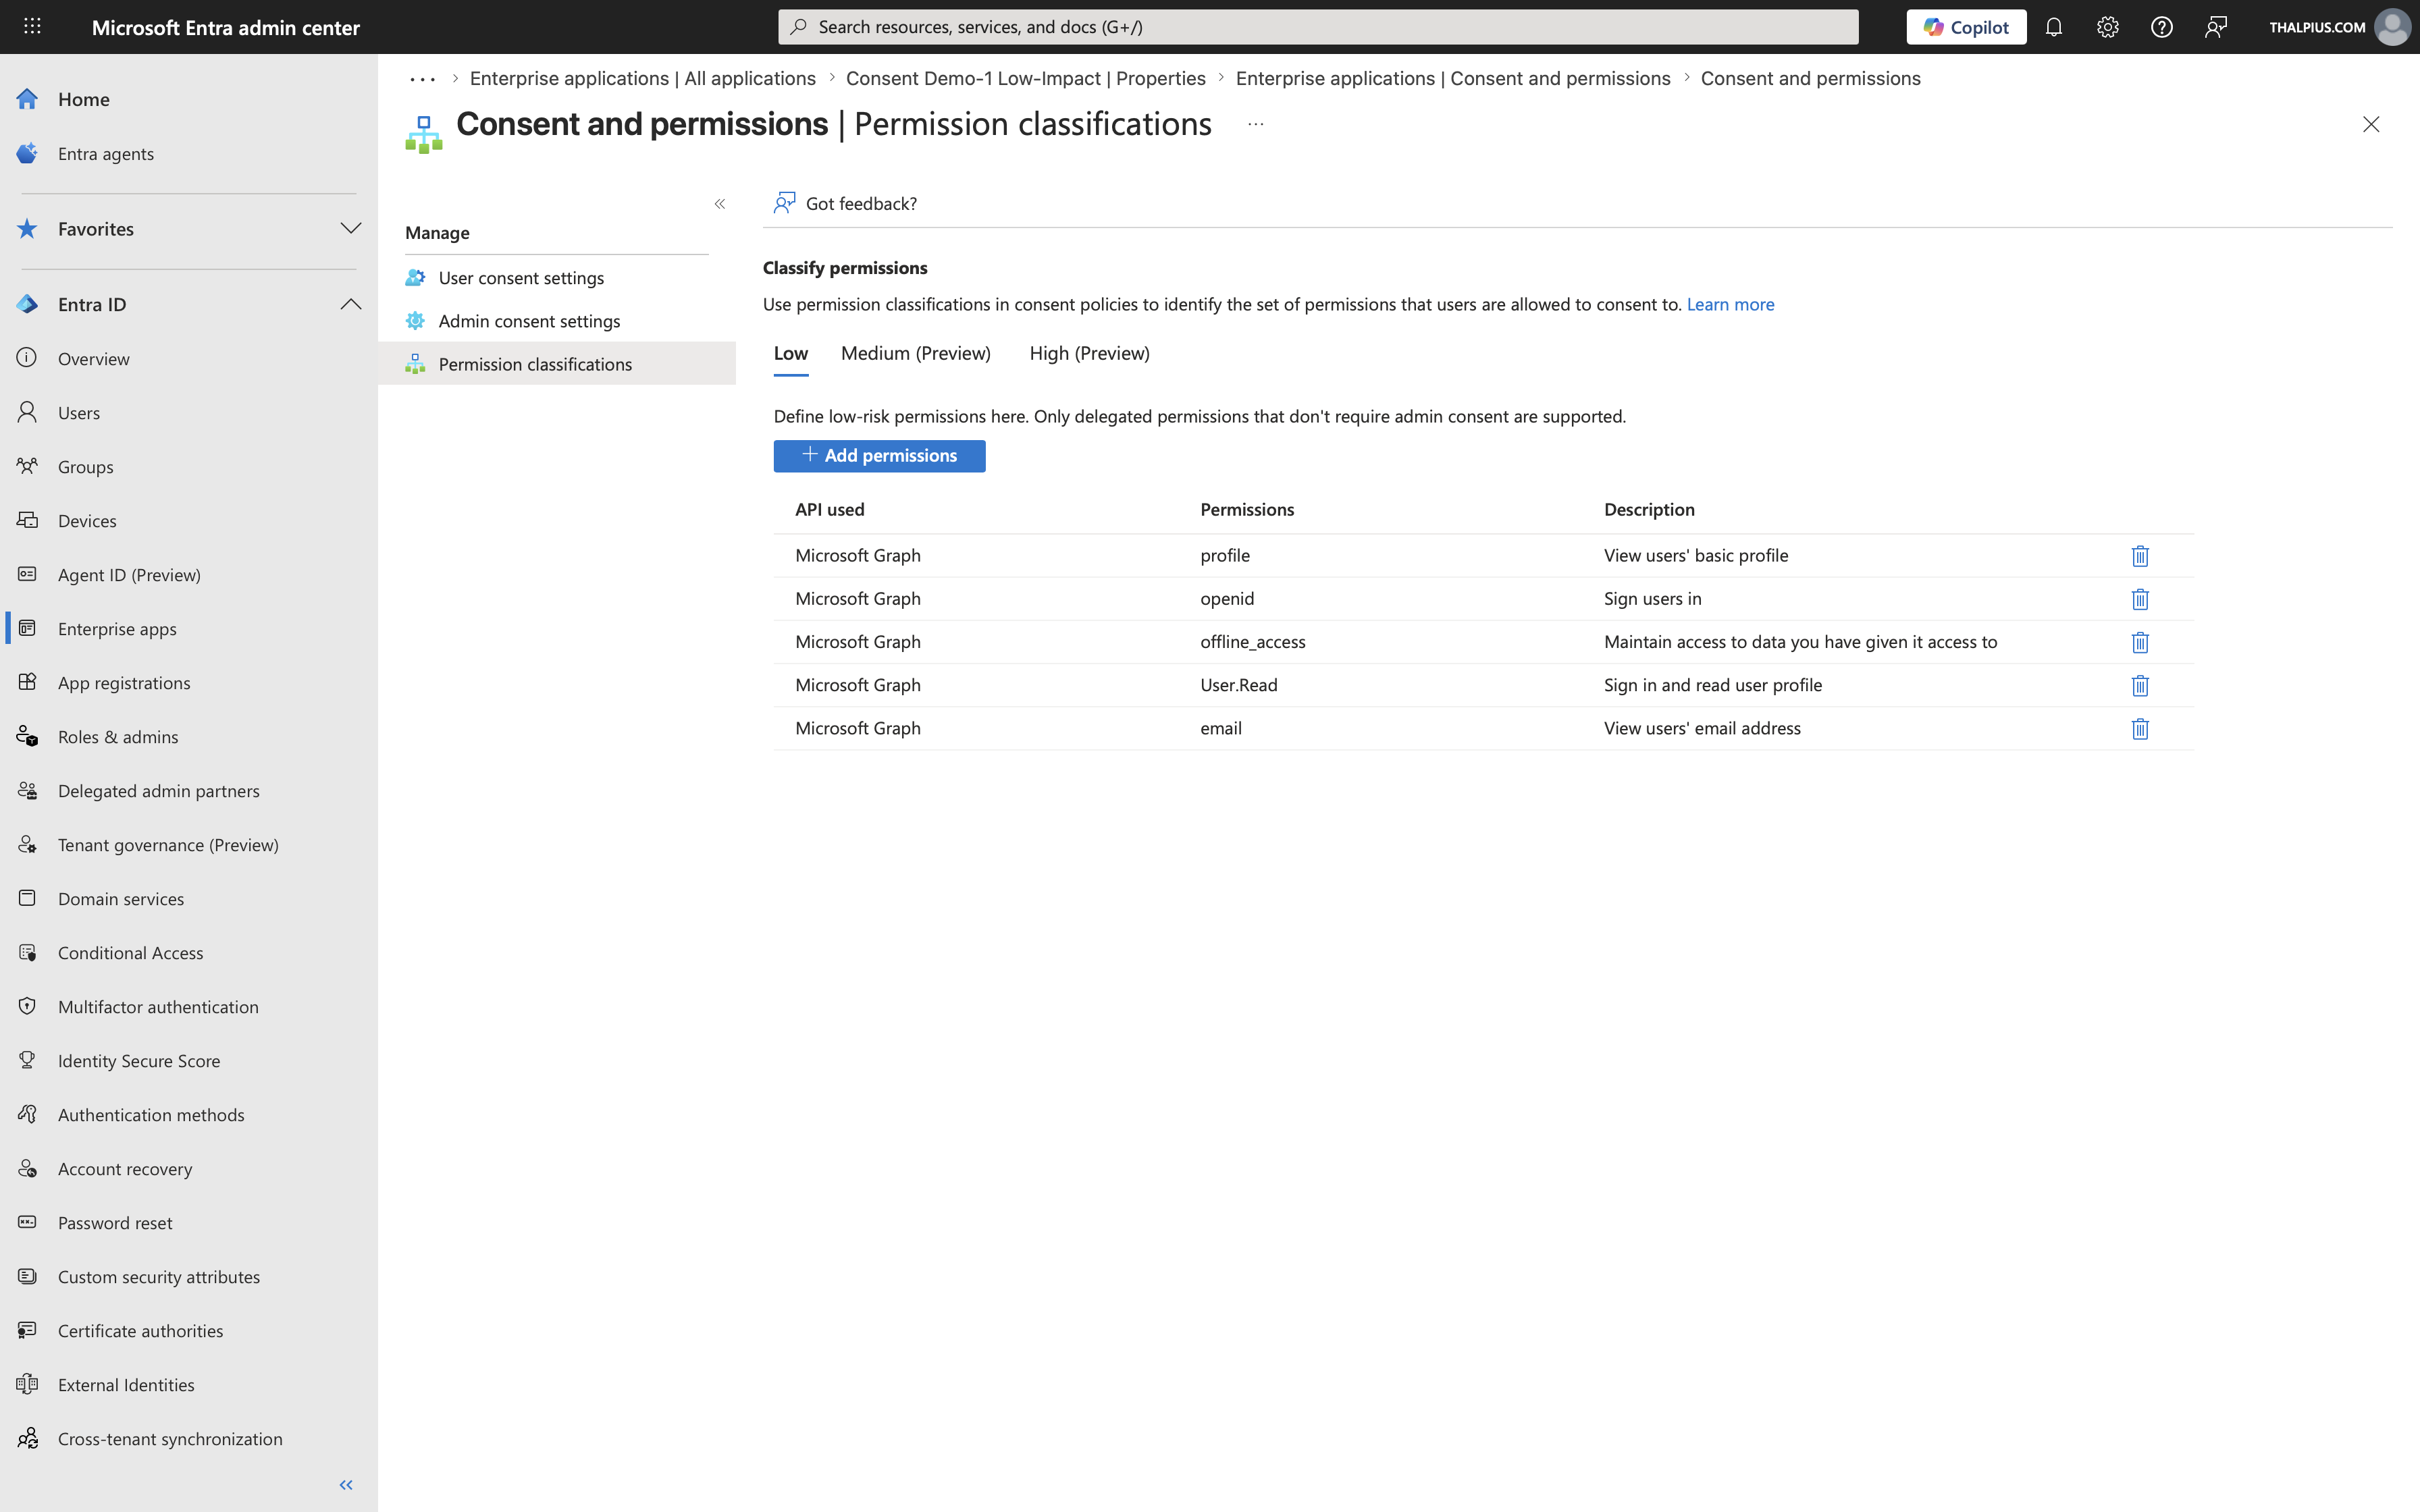
Image 3: The Permission Classifications page in the Microsoft Entra admin center, showing the five permissions classified as low impact by default: openid, profile, email, offline_access, and User.Read.

Permission classifications work hand in hand with the User Consent Settings. When you configure user consent to allow consent for verified publishers with selected permissions, the “selected permissions” refers specifically to the permissions you have classified as low impact.

By default, Microsoft pre-classifies a small set of permissions as low impact, typically OpenID Connect scopes like `openid`, `profile`, `email`, `offline_access`, and `User.Read`. These are the five permissions that appear when you click the link labeled “5 permissions classified as low impact” on the User Consent Settings page.

You can extend this list by classifying additional permissions as low impact, which expands what users are allowed to consent to without admin involvement. Equally important, you can use medium and high classifications to signal to administrators which permissions in the consent workflow deserve extra scrutiny.

Use permission classifications thoughtfully. A permission like `Mail.Read` or `Files.ReadWrite.All` should not be classified as low impact, as these provide significant access to organizational data. Stick to authentication and basic profile scopes for low-impact classification.

This is the misconception I see most frequently, and it is an important one to address.

When an administrator grants consent to an application in Microsoft Entra ID, they grant consent for the entire organization. This means every user in the tenant can potentially use the application with the consented permissions. The admin consent is tenant-wide, not scoped to specific users or groups.

Many administrators assume that granting admin consent inherently limits access to themselves or to a small group. It does not. After admin consent is granted, any user who can reach the application’s sign-in URL can authenticate and the application will have the consented permissions for that user’s data.

The correct way to scope access after granting admin consent is through the Enterprise Application’s assignment settings.

To properly scope access:

1. Navigate to the Enterprise Application in the Microsoft Entra admin center.

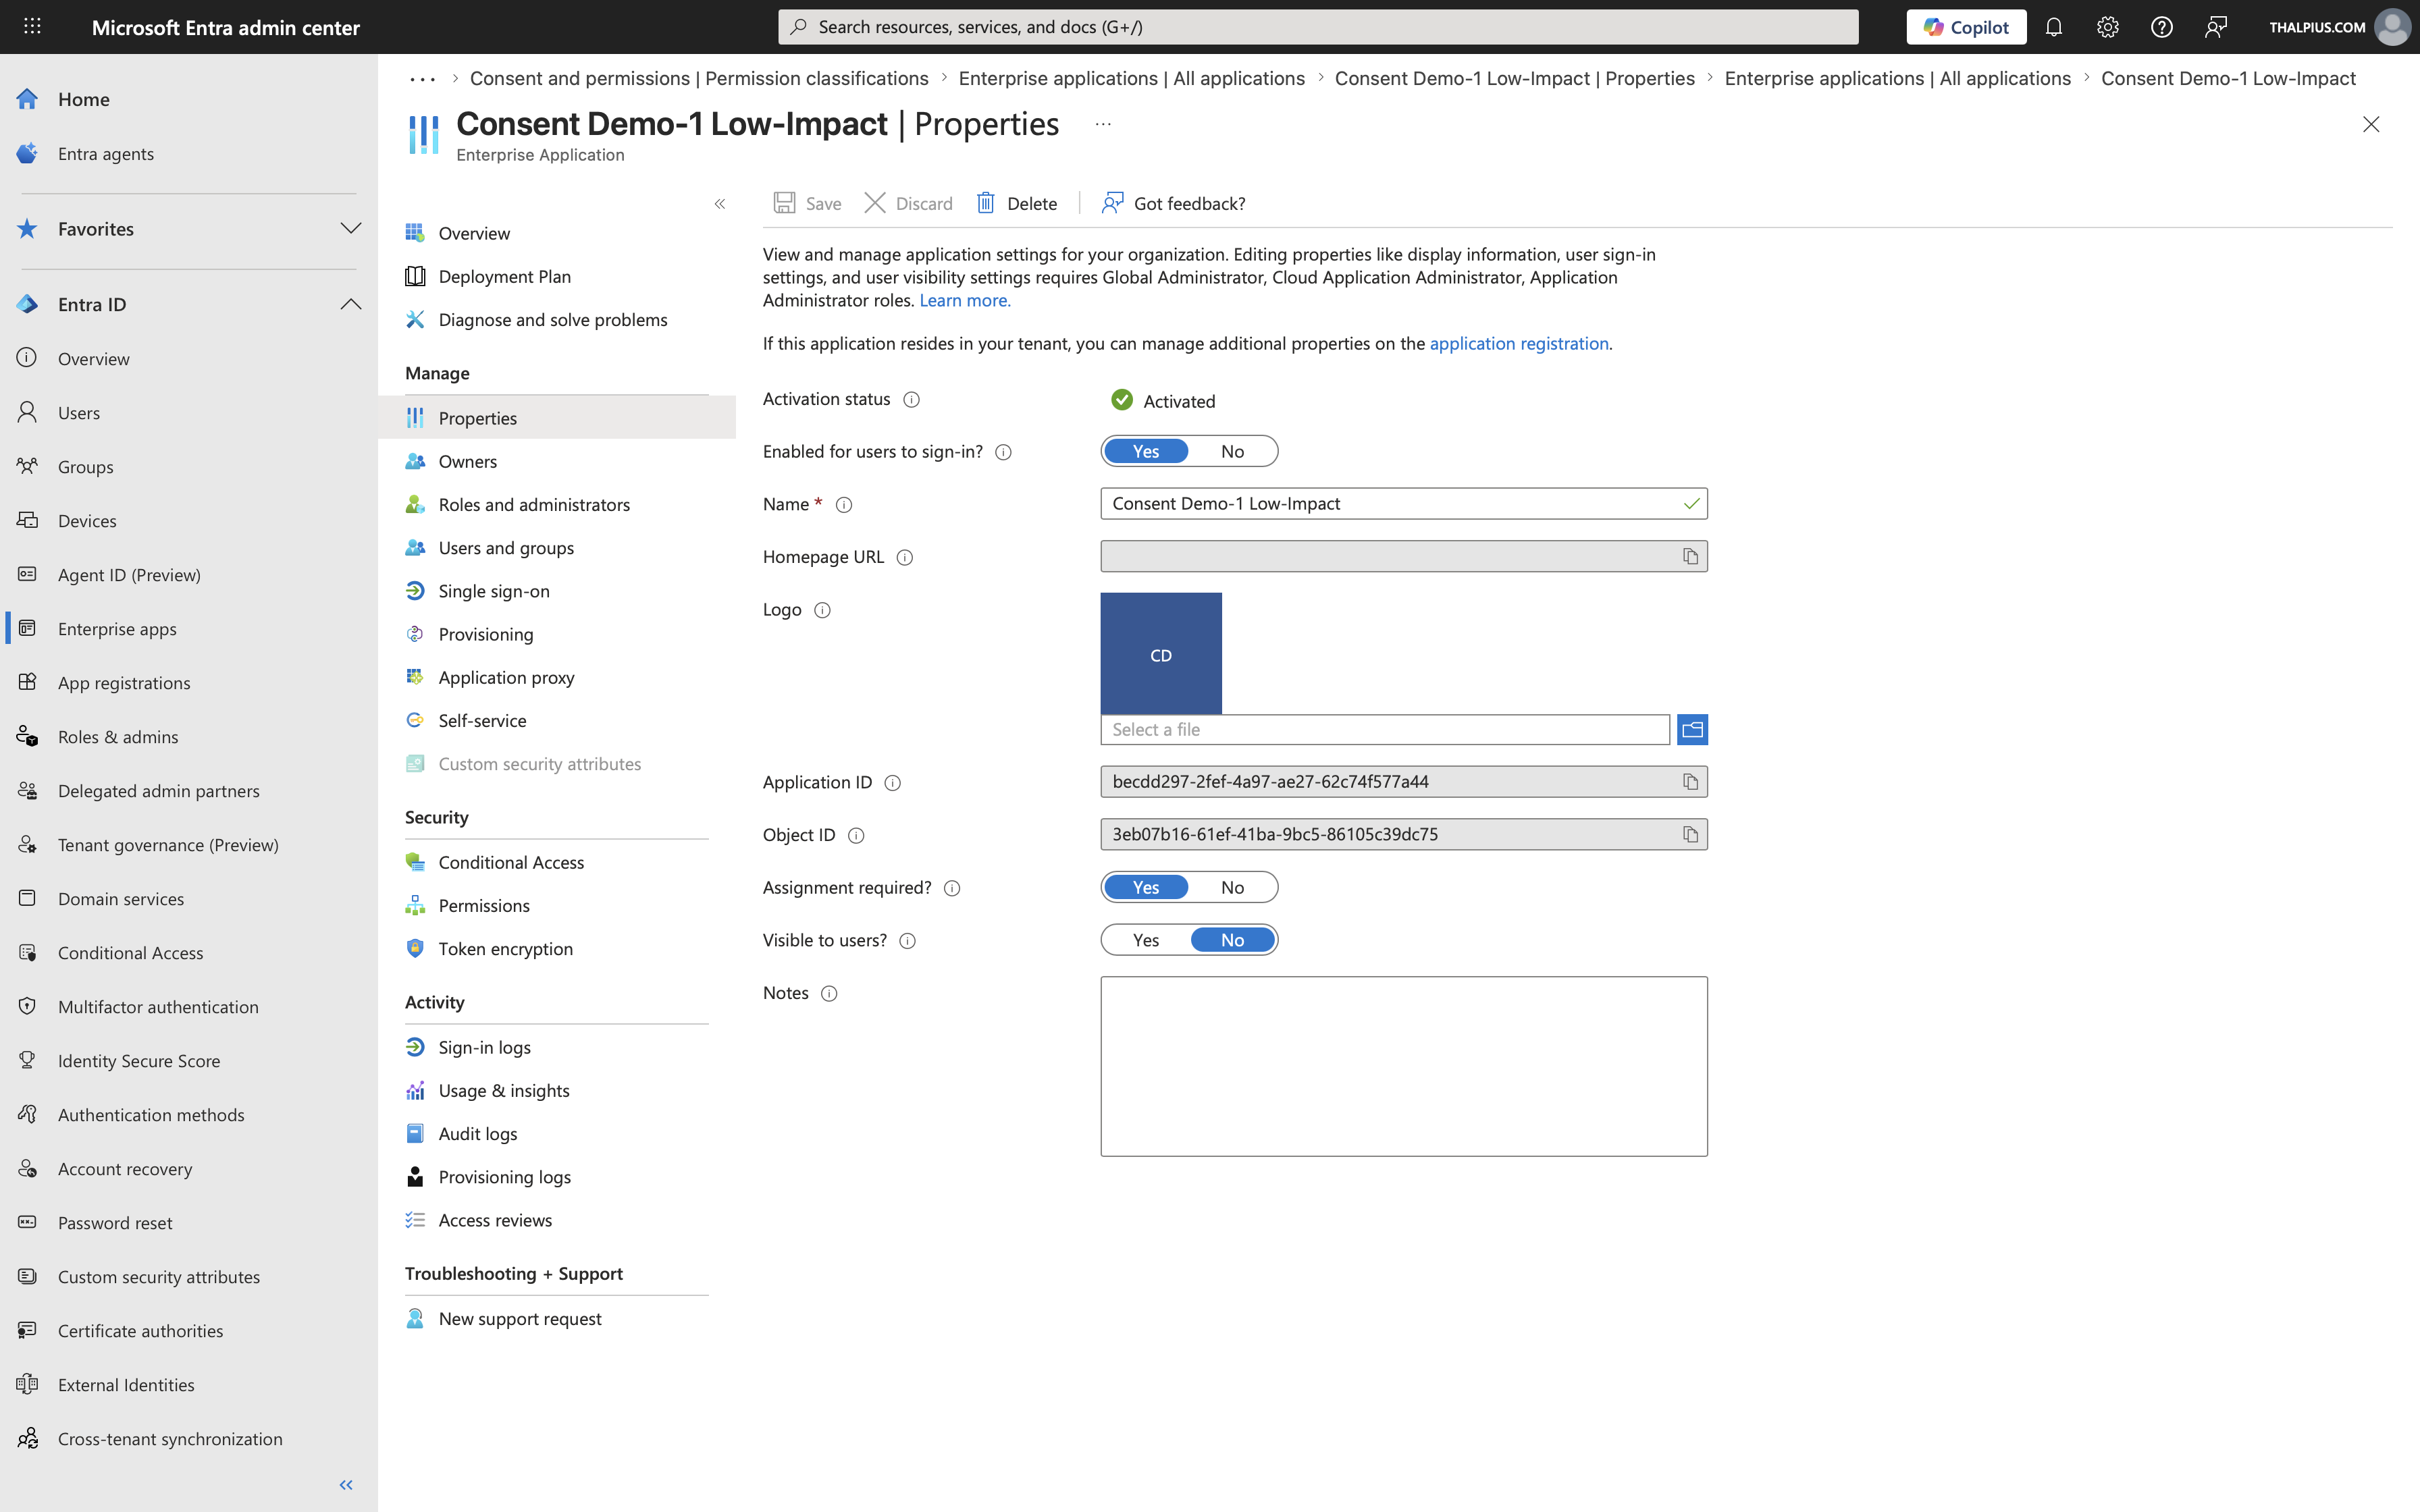
2. Go to Properties and set “Assignment required?” to Yes. This ensures that only users, or members of groups, explicitly assigned to the application can sign in. Without this, any user in your tenant can access the application.

Image 4: The Properties page of an Enterprise Application in the Microsoft Entra admin center, showing the “Assignment required?” setting configured to “Yes” to restrict access to explicitly assigned users and groups only.

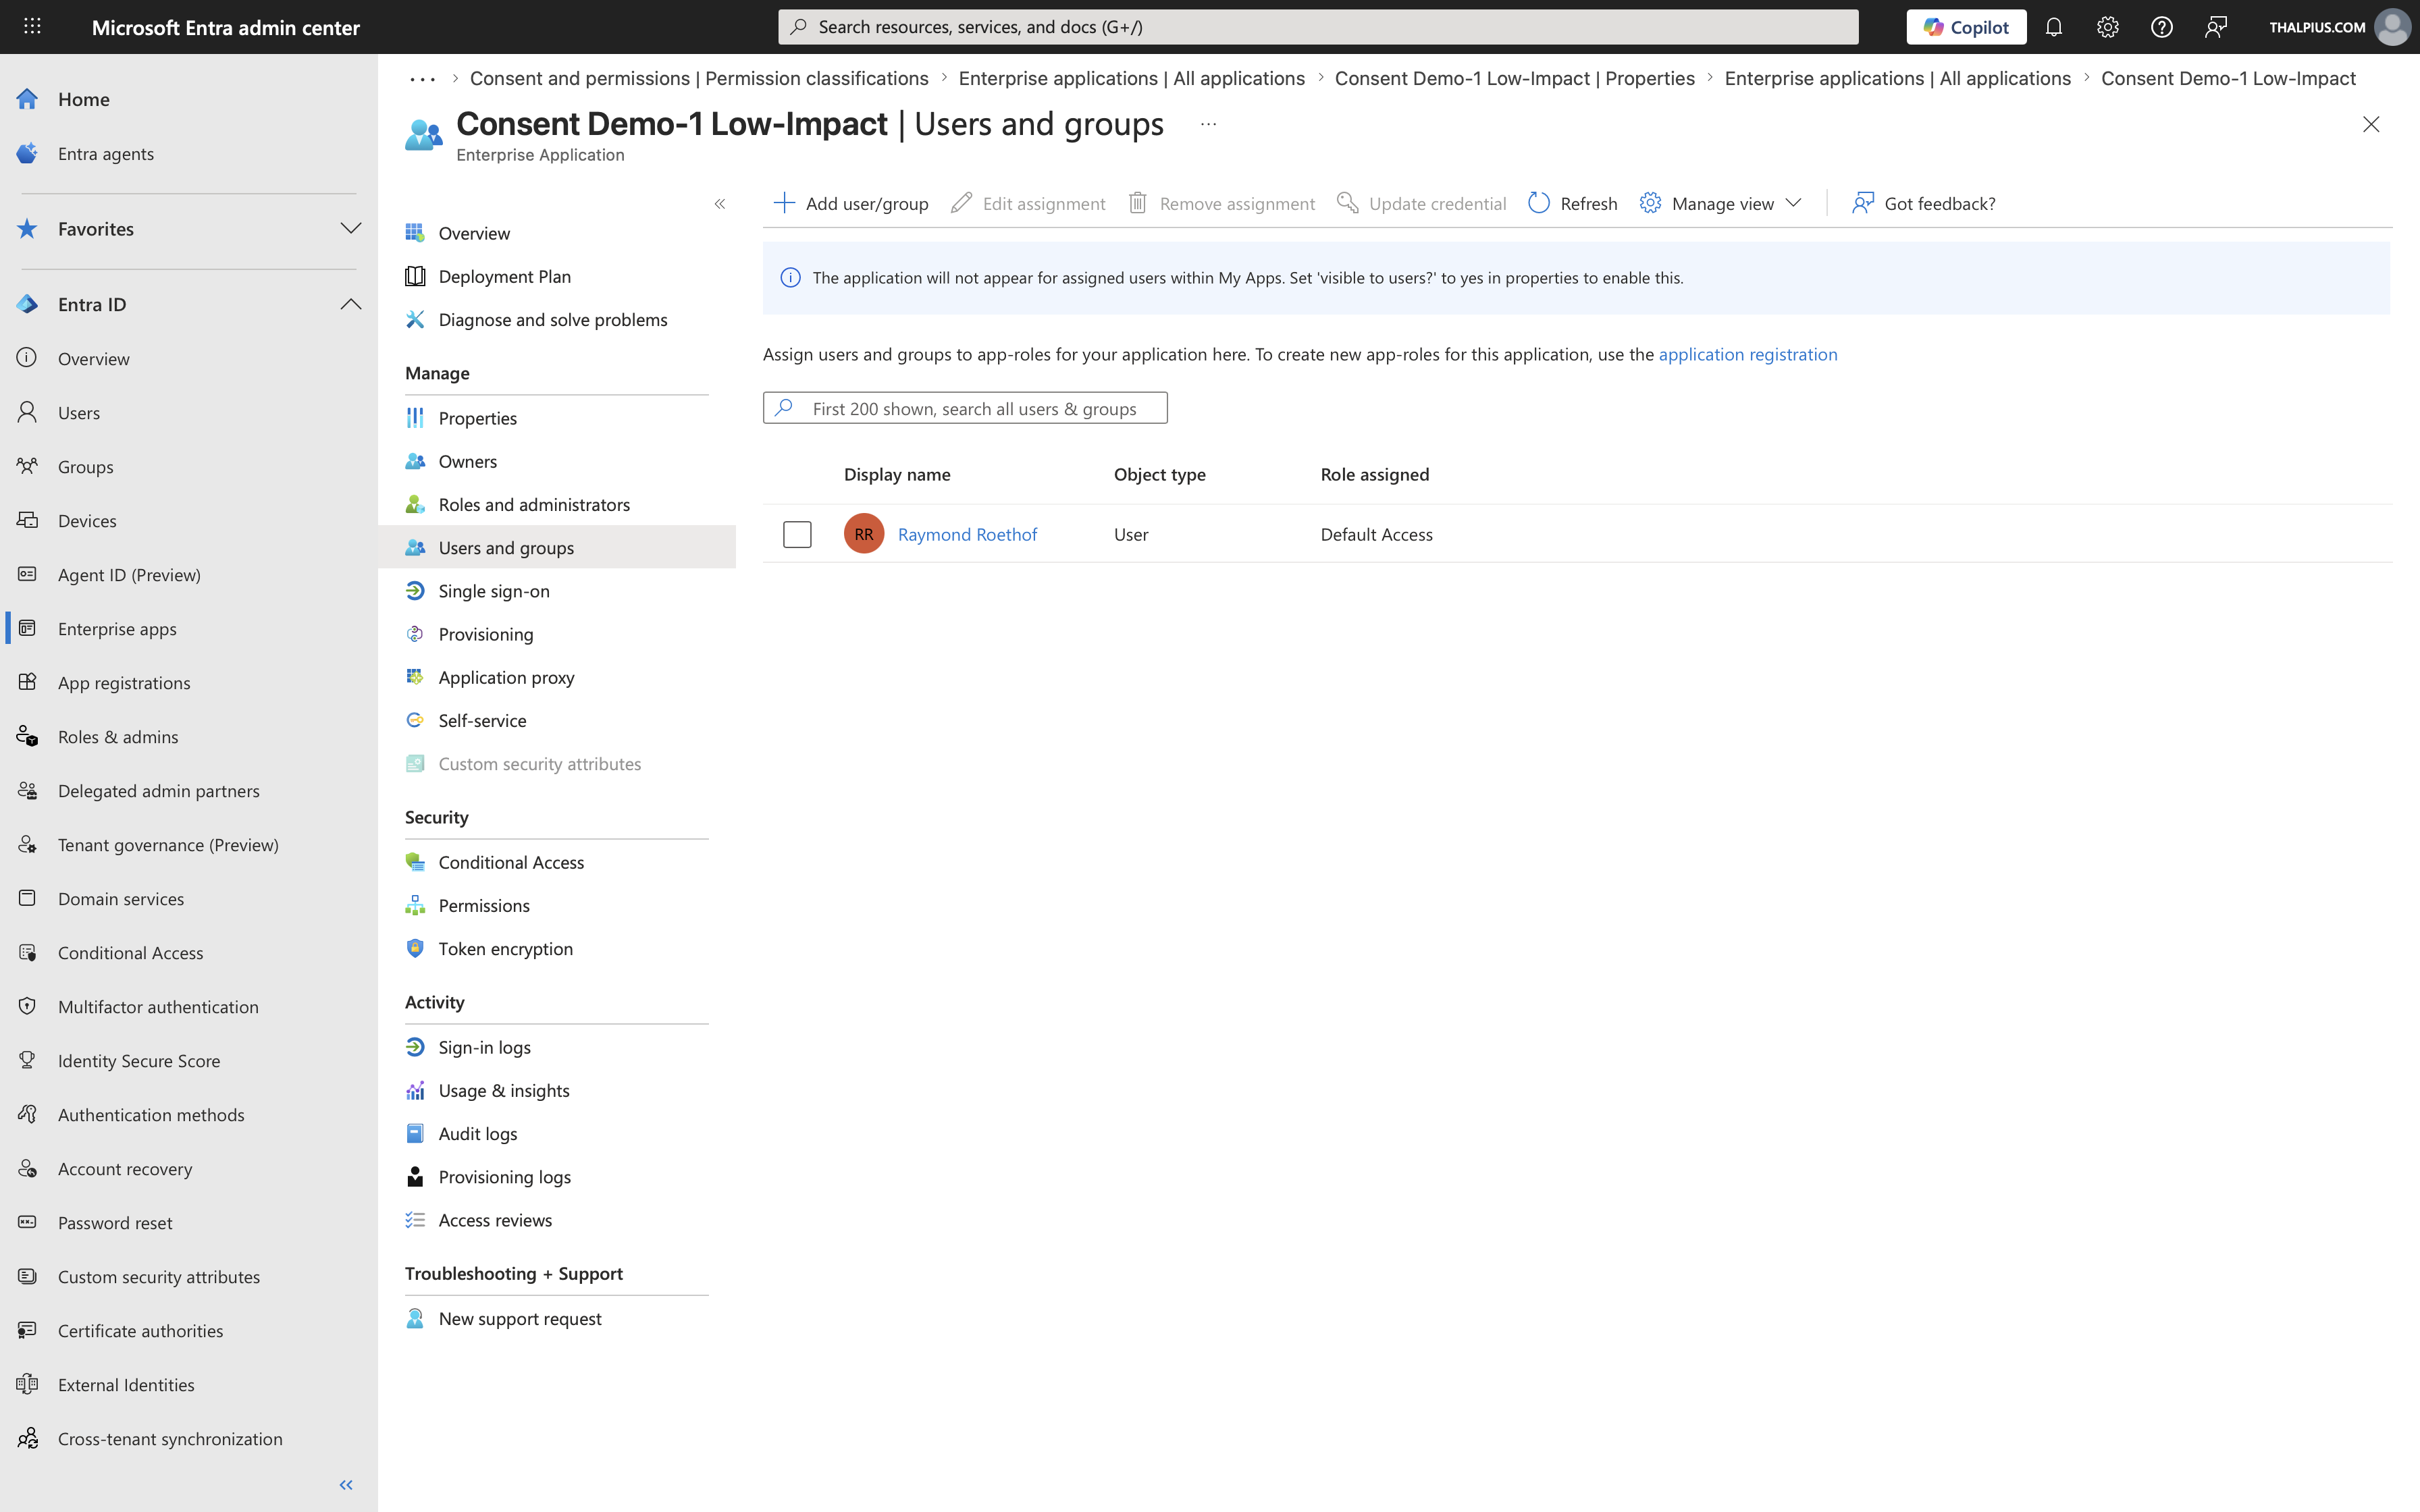
3. Navigate to Users and groups on the Enterprise Application and add the specific users or groups who should have access.

Image 5: The Users and groups page of an Enterprise Application in the Microsoft Entra admin center, showing the users and groups explicitly assigned to scope access after admin consent has been granted.

This combination, admin consent at the tenant level plus assignment-required scoping at the Enterprise Application level, gives you the correct security model. Admin consent covers the permission grant, and the assignment covers who can actually use those permissions.

Skipping the assignment step is a common mistake. An administrator grants consent thinking they have done the necessary security work, but the application remains accessible to the entire organization.

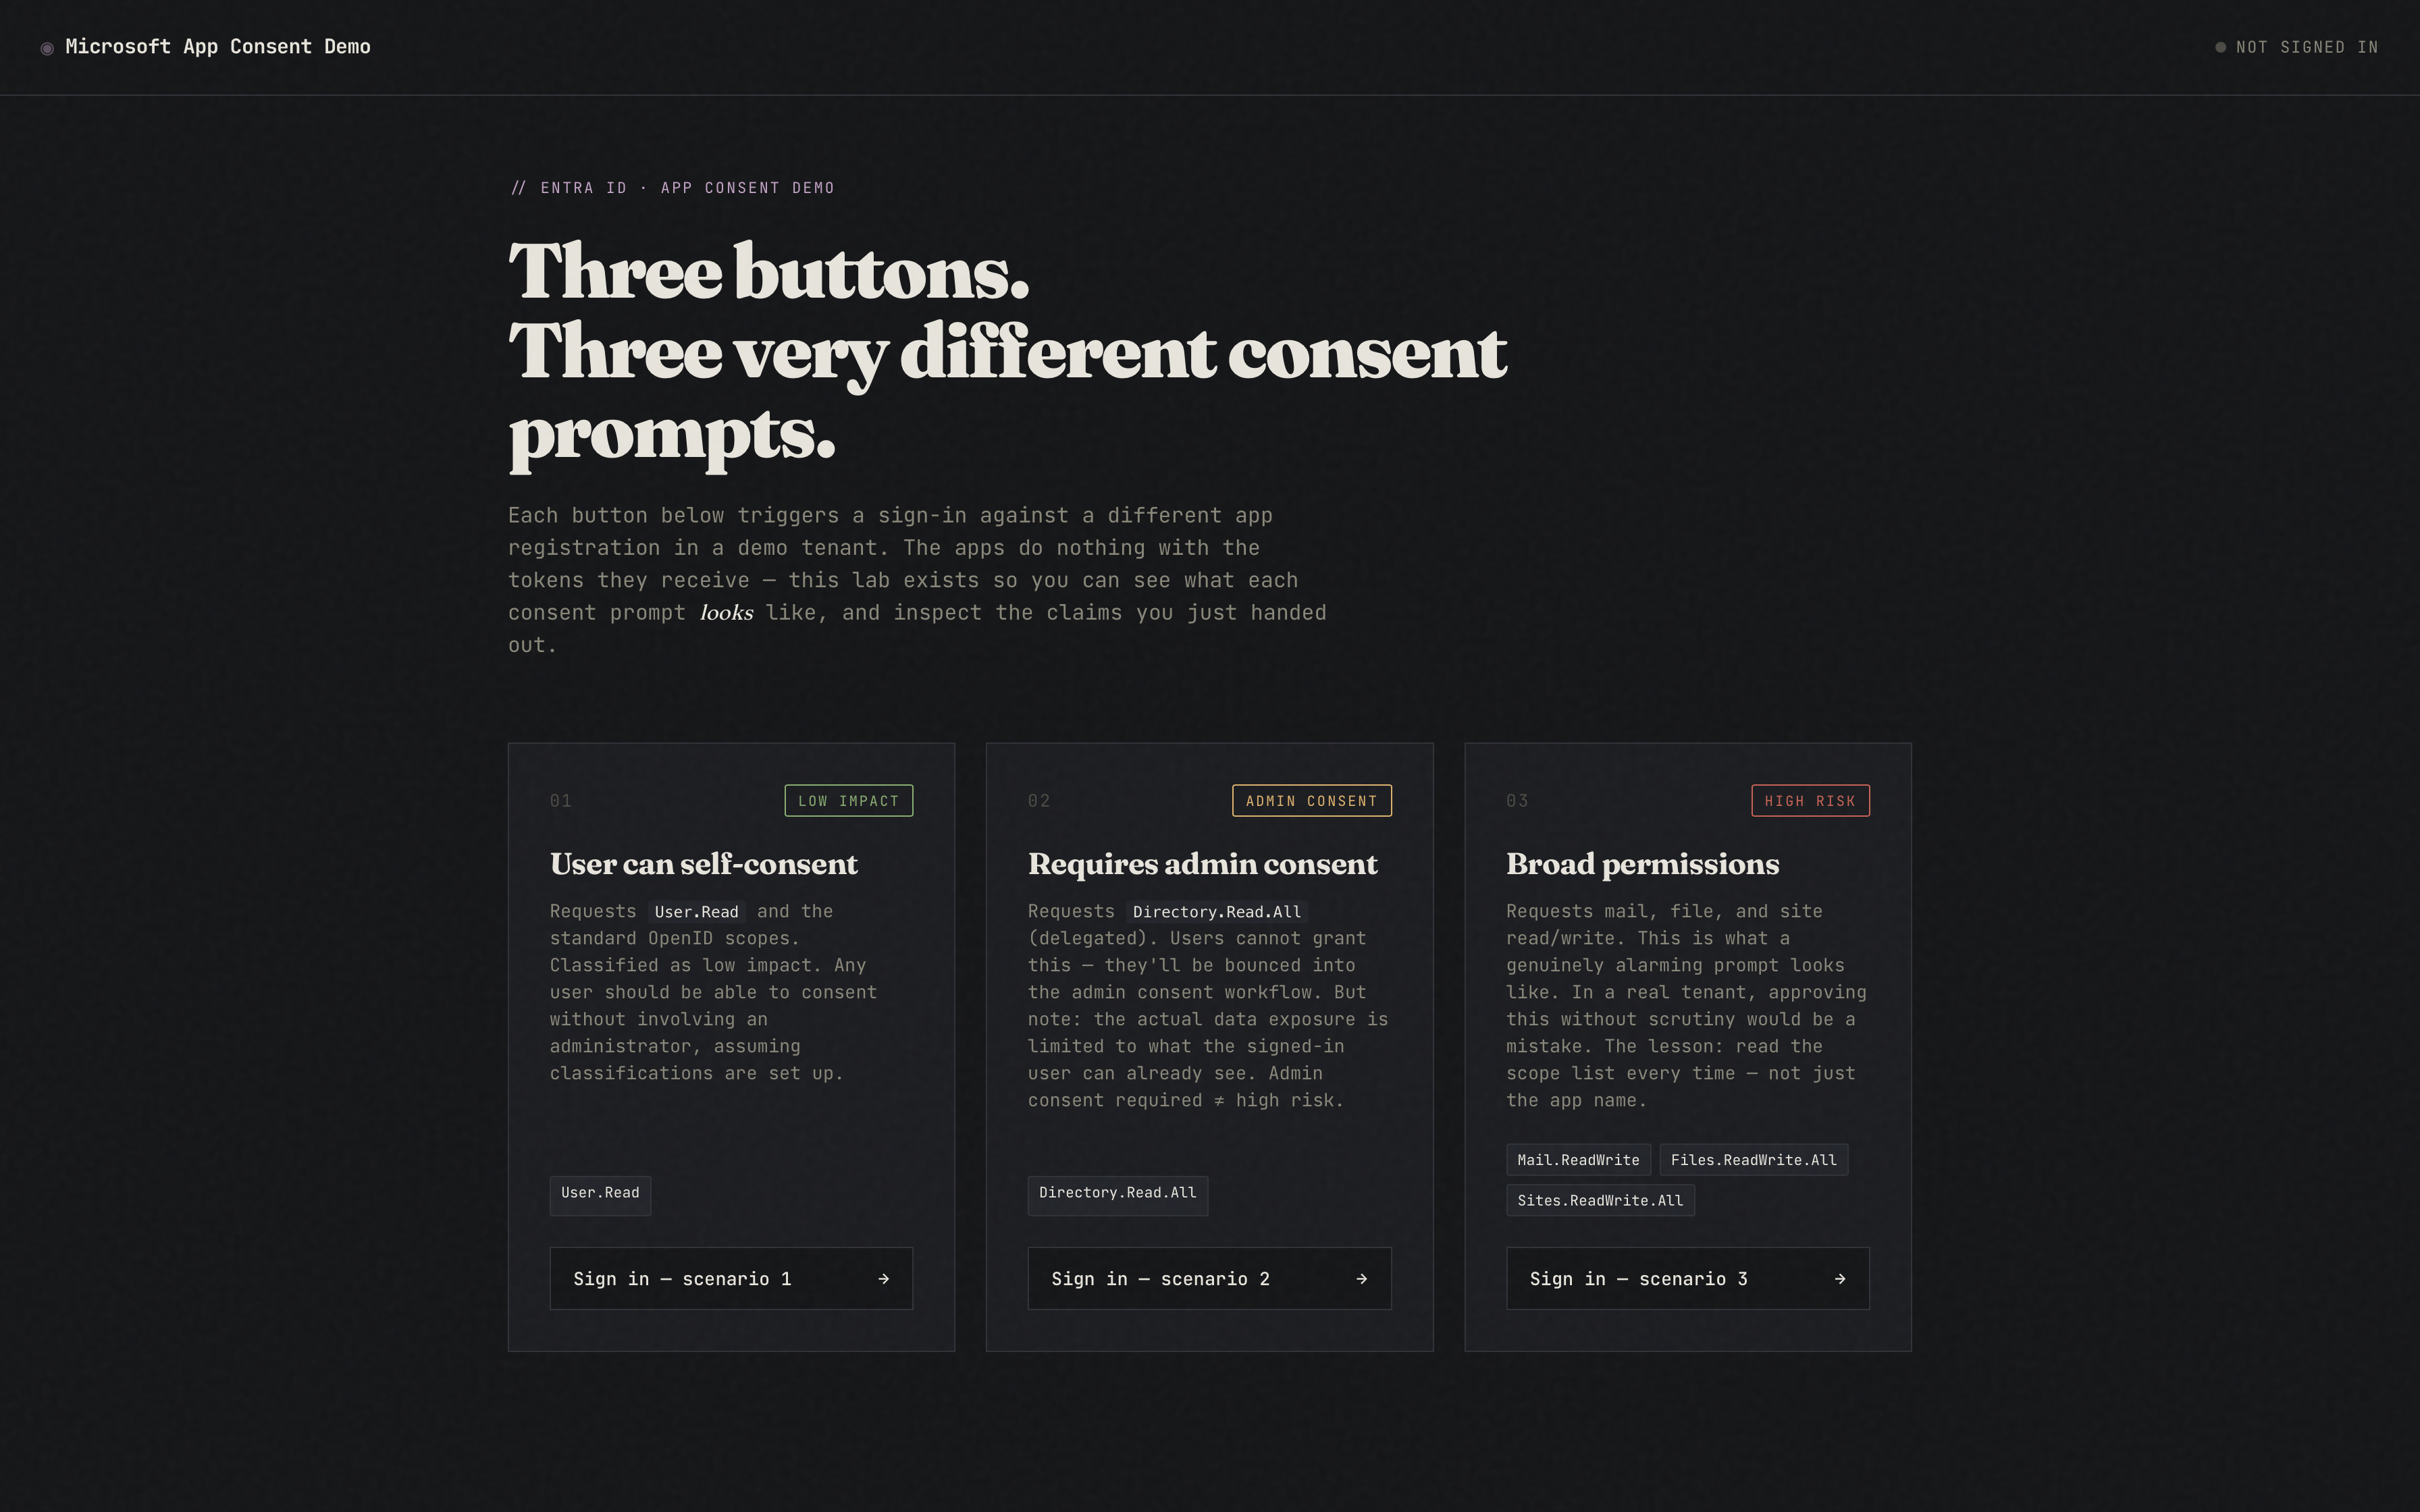
To make these concepts easier to explore hands-on, I have built a test application available at https://consent.thalpius.com.

Image 6: The consent test application at consent.thalpius.com, which can be used to walk through the OAuth consent flow against Microsoft Entra ID and observe the behavior under different consent configurations.
Image 7: The consent test application at consent.thalpius.com, which can be used to walk through the OAuth consent flow against Microsoft Entra ID and observe the behavior under different consent configurations.

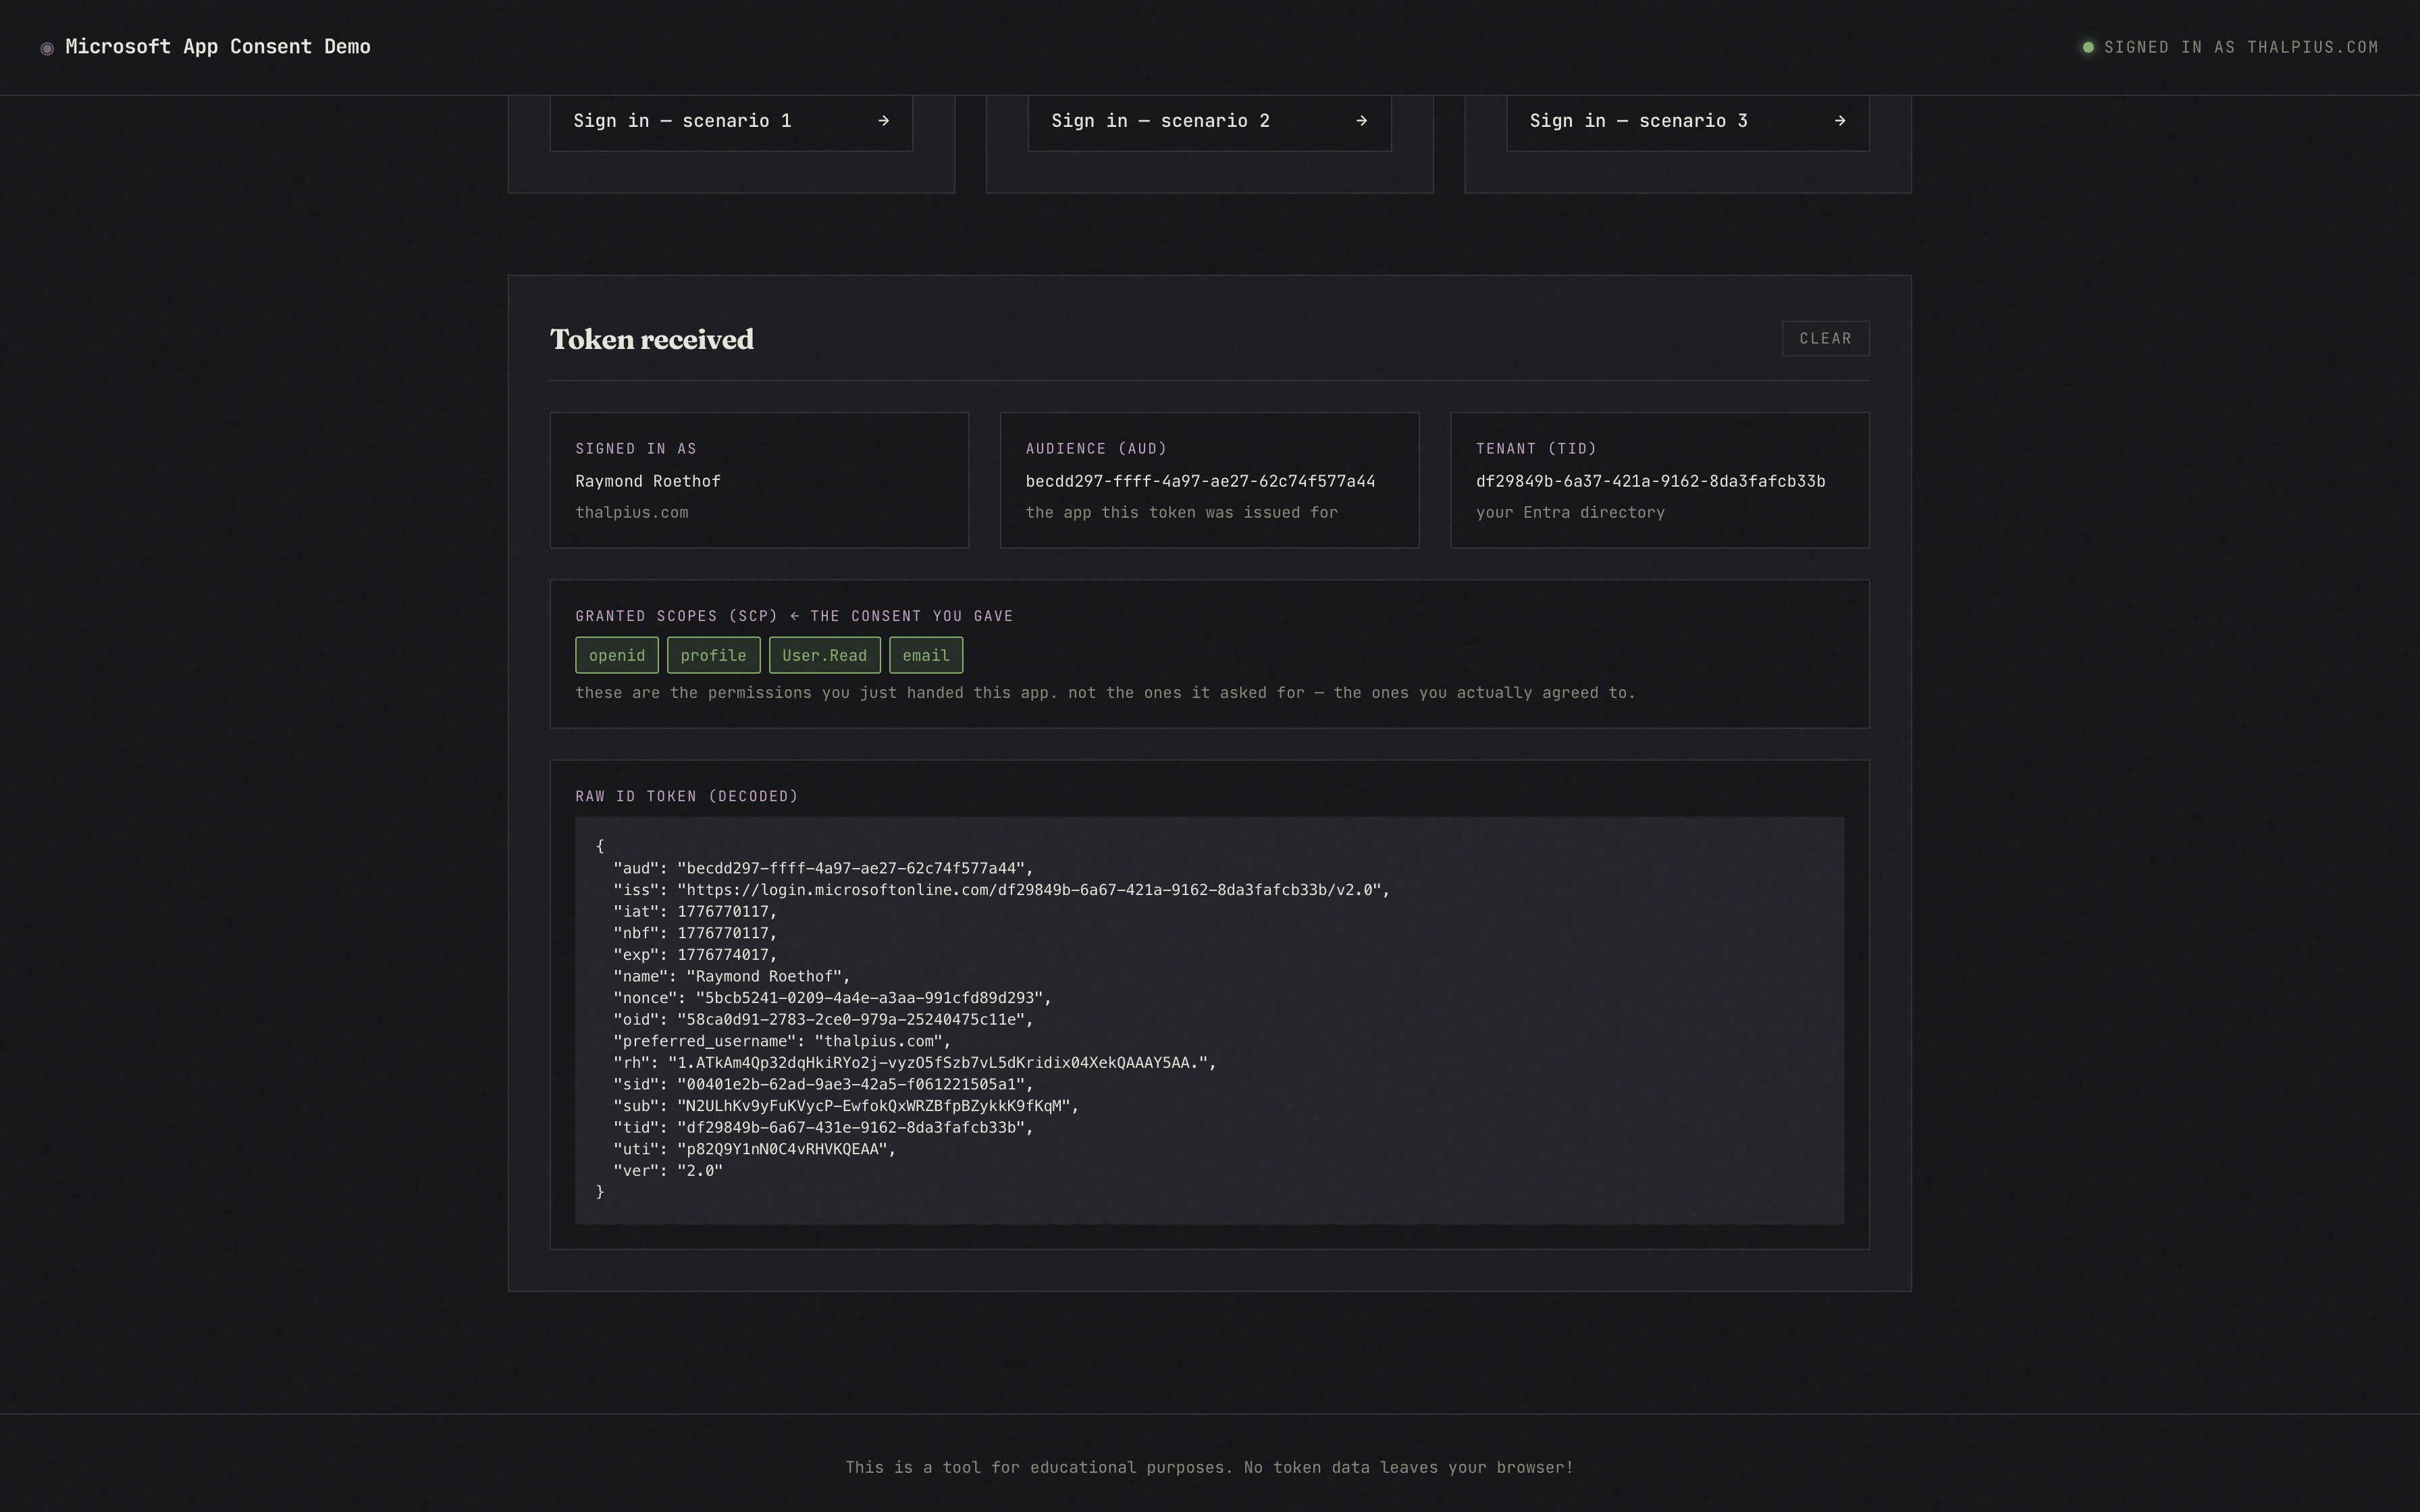
This application lets you walk through the OAuth consent flow against Microsoft Entra ID and observe exactly what happens at each stage, from the initial authorization request, through the consent prompt, to the resulting token. You can test the behavior under different user consent settings, observe what the consent prompt looks like for verified versus unverified publishers, and see how permission classifications affect what users are allowed to consent to.

I recommend testing this application in a non-production tenant or a dedicated test tenant where you can freely modify the consent settings described in this post without impacting your organization’s users.

Conclusion

Understanding OAuth app consent in Microsoft Entra ID is fundamental to securing your organization’s identity environment. As applications like the Anthropic Microsoft 365 connector become more common, having a clear understanding of how consent is granted, what it means at the organizational level, and how to properly scope access afterward is essential knowledge for every identity administrator.

The settings described in this post, user consent settings, admin consent workflow, permission classifications, and enterprise application assignment, work together as a complete control framework. Each layer addresses a different aspect of the problem, and skipping any one of them leaves a gap.

Microsoft Entra Agent ID: A Practical Guide to Blueprints and Agent Identities

Microsoft Entra Agent ID: A Practical Guide to Blueprints and Agent Identities

As AI agents become an increasingly important part of modern work, organizations need a way to govern them with the same level of control and consistency applied to human identities. Microsoft Entra Agent ID is the identity platform purpose-built for AI agents. It extends the security and governance capabilities of Microsoft Entra, including Conditional Access, Identity Protection, and audit logs, to the agents running in your tenant.

At its core, Microsoft Entra Agent ID introduces a new identity model built around three key concepts: the Blueprint, the Blueprint Identity, and the Agent Identity. Understanding how these fit together is essential before deploying or governing agents at scale.

Table of Contents

Disclaimer: This blog post is provided for informational purposes only. While every effort has been made to ensure accuracy, implementation of these features should be performed by qualified administrators in accordance with your organization’s security and change management policies. The author is not responsible for any issues, data loss, or security incidents that may occur from following this guidance. Always test in a non-production environment first and consult official Microsoft documentation before implementing security features in production.

Classic Agents vs. Modern Agents

Before diving into the concepts, it is worth understanding the distinction between classic and modern agents, as both may exist in your tenant simultaneously.

Classic agents are AI agents created as standard service principals or app registrations, for example, agents built in Copilot Studio before the Microsoft Entra Agent ID platform was enabled. They appear in the Microsoft Entra Agent Registry with ‘Has Agent ID: No’. Classic agents cannot be protected by Microsoft Entra Agent ID security features such as Identity Protection for Agents or Conditional Access for Agents.

Modern agents are agents created through the Microsoft Entra Agent ID platform, each backed by an Agent Identity Blueprint. They have a proper Agent ID, full audit trail, and support the complete set of governance capabilities.

Microsoft has indicated a migration tool is planned to help convert classic agents to modern agents. In the meantime, it is worth auditing your tenant to understand which agents fall into which category.

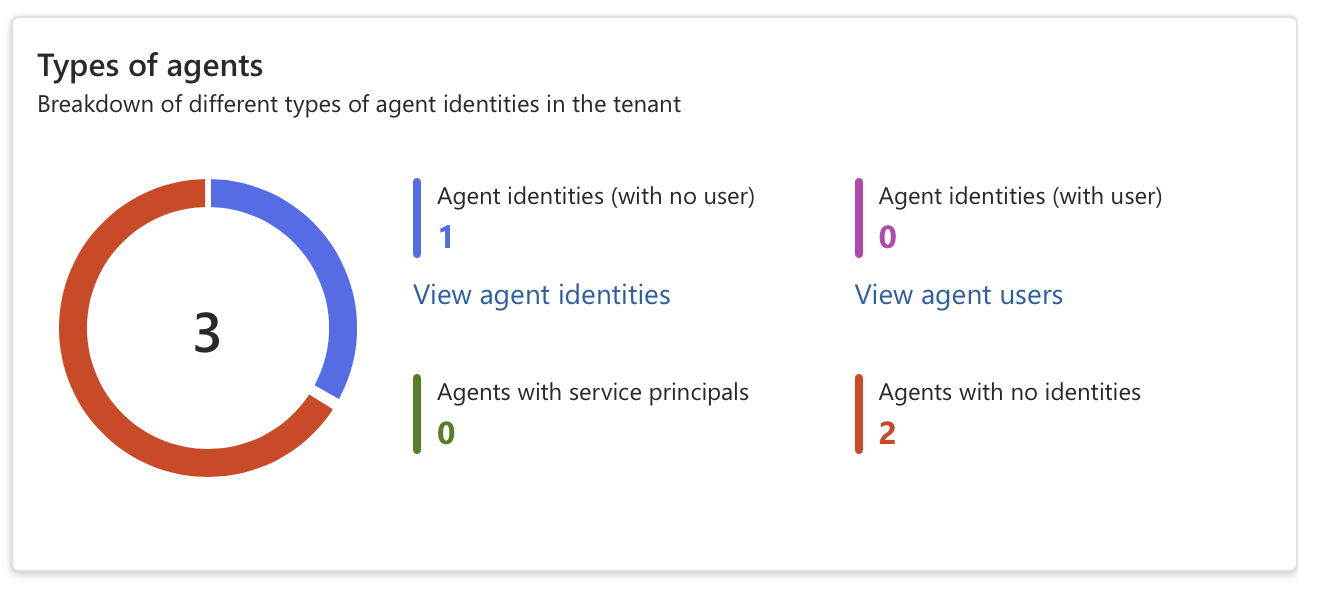
Image 1: The overview shows a clear breakdown of agent types in the tenant. Modern agents appear as ‘Agent identities’, while classic agents show up as ‘Agents with service principals’ or ‘Agents with no identities’, the latter being agents registered in the Agent Registry without an associated Entra Agent ID.

What is an Agent Identity Blueprint?

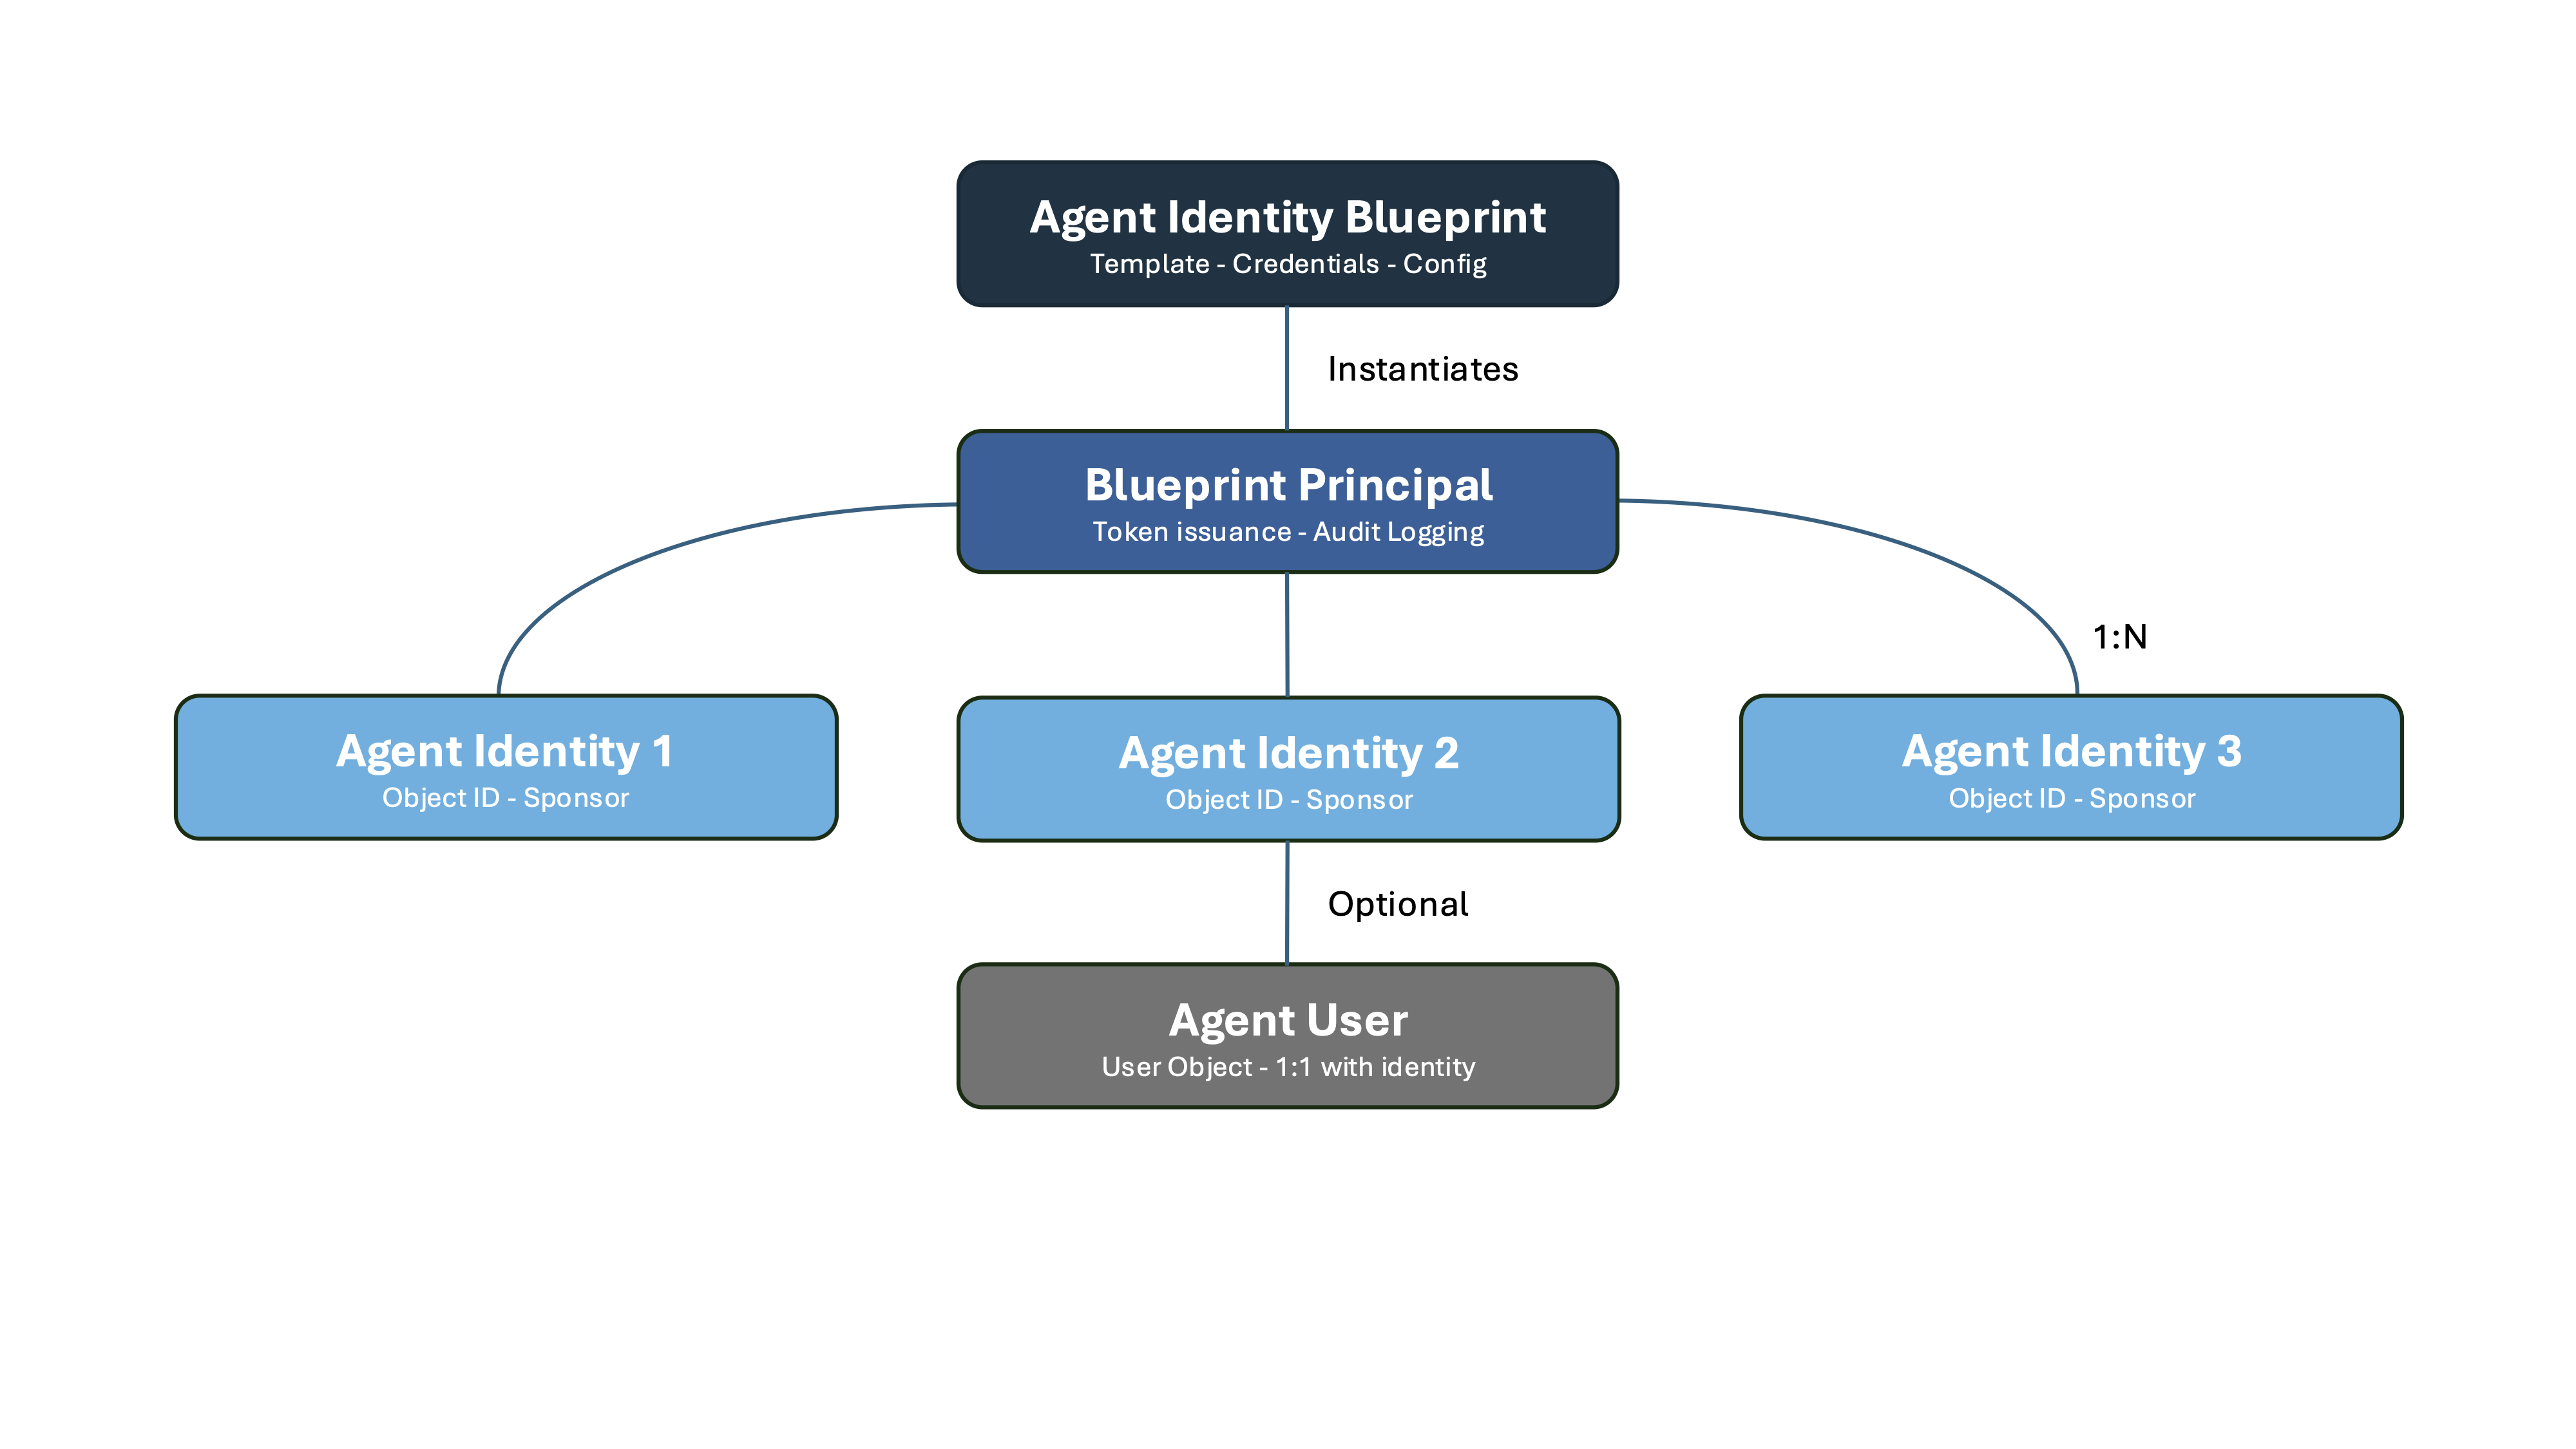
An Agent Identity Blueprint is an object in Microsoft Entra ID that serves as a template for creating agent identities. It establishes the foundation for how agents are created, authenticated, and managed within an organization. All modern agent identities in a Microsoft Entra ID tenant are created from an agent identity blueprint.

A blueprint serves four purposes:

Template: Blueprints record shared characteristics so that all agent identities created using the blueprint have a consistent configuration. Organizations can deploy many instances of an AI agent, each pursuing a different goal and requiring a different level of access, yet they all share a common foundation.

Identity: A blueprint is not just an information store. It is also a special identity type within a Microsoft Entra ID tenant. A blueprint can perform exactly one operation in the tenant: provision or deprovision agent identities.

Credential container: Agent identities do not have credentials of their own. Instead, the credentials used to authenticate are configured on the blueprint. When an AI agent wants to perform an operation, the blueprint’s credentials are used to request an access token from Entra ID.

Management container: Identity administrators can apply policies and settings to a blueprint that takes effect for all agent identities created from it. Examples include Conditional Access policies and OAuth permissions granted at the blueprint level.

Technically, a blueprint consists of two parts: the blueprint application, which defines the configuration, and a Blueprint Principal, the service principal that makes the blueprint visible and usable within the tenant. This is conceptually similar to the relationship between an App Registration and an Enterprise Application.

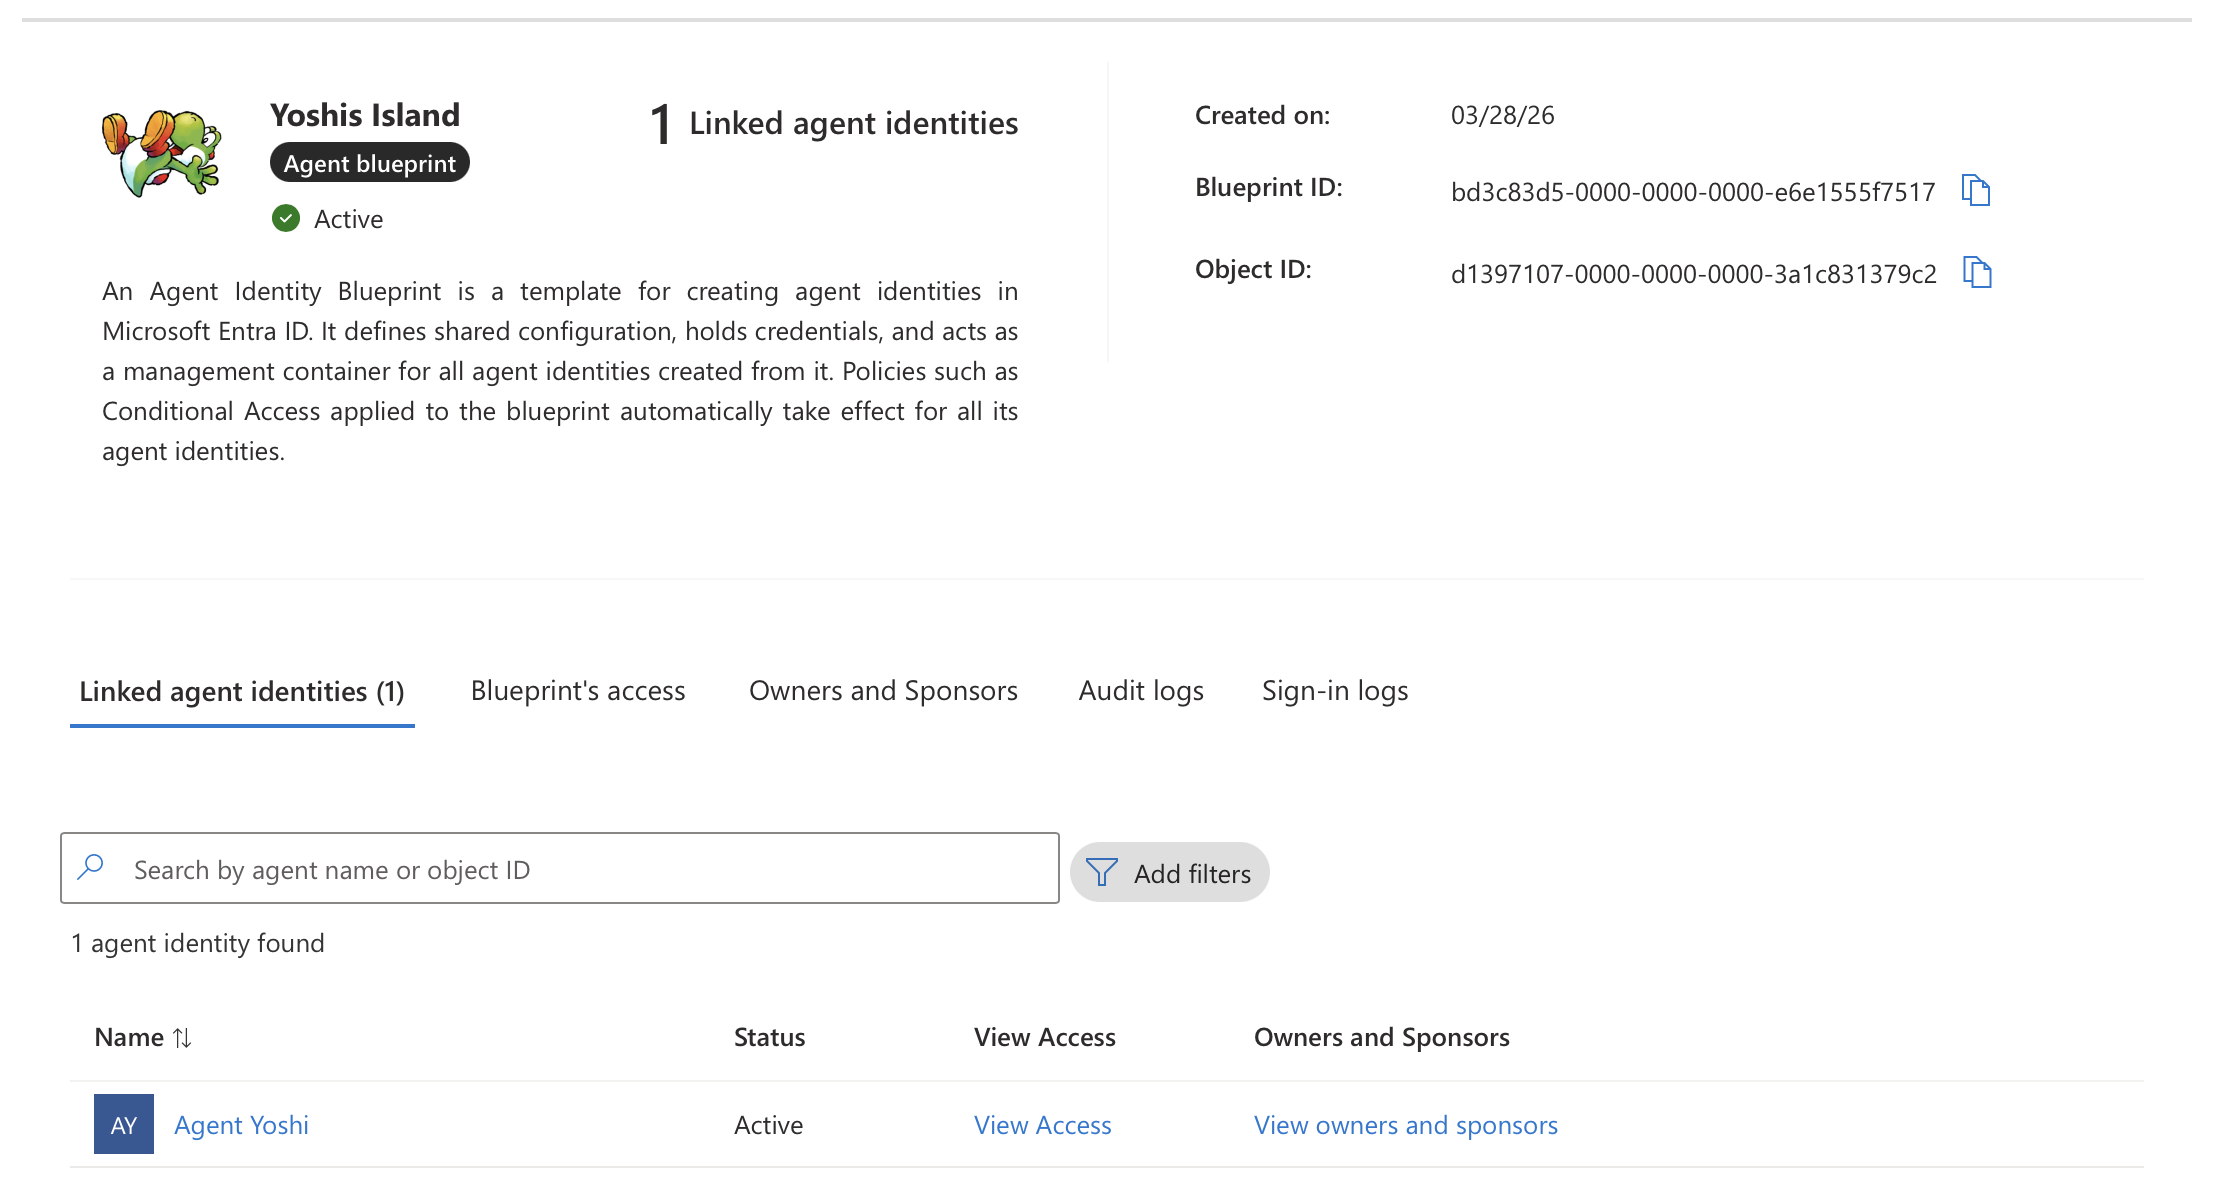
Image 2: The blueprint detail page in the Microsoft Entra admin center, showing the linked agent identity, description, and management tabs including access, owners, sponsors, and audit logs.

What is a Blueprint Identity?

An Agent Identity Blueprint Principal is an object in Microsoft Entra Agent ID that represents the presence of an agent identity blueprint within a specific tenant. When an agent identity blueprint is added to a tenant, Microsoft Entra creates a corresponding principal object.

The principal has two important roles:

Token Issuance: When the blueprint is used to acquire tokens within a tenant, the resulting token’s object ID claim references the blueprint principal. This ensures that any authentication or authorization performed by the blueprint is traceable to its principal object in the tenant.

Audit Logging: Actions performed by the blueprint, such as creating agent identities, are recorded in audit logs as being executed by the blueprint principal.

This is what gives you visibility and accountability. Every action taken by the blueprint shows up in the Microsoft Entra audit logs under the principal’s identity.

What is an Agent Identity?

An Agent Identity is a new identity type in Microsoft Entra ID, built on the service principal model but purpose-built for AI agents. It represents an identity that the agent identity blueprint created and is authorized to impersonate. It does not have credentials of its own, the agent identity blueprint acquires tokens on behalf of the agent identity, provided the user or tenant admin consented to the corresponding scopes.

Each agent identity has the following key properties:

  • A unique object ID generated by Microsoft Entra
  • display name visible in experiences like the Entra admin center and the Azure portal
  • sponsor, the human user or group accountable for the agent (required)
  • An owner, the person responsible for operational management of the agent (recommended)

The platform supports two primary patterns for how agents operate:

Interactive agents sign in a user and act in response to user prompts, often via a chat interface. They act on behalf of the signed-in user using delegated permissions, and the tokens issued to them are called user tokens.

Autonomous agents perform actions using their own identity, often running in the background and making autonomous decisions. They use app-only tokens (also called agent tokens) and operate without user involvement.

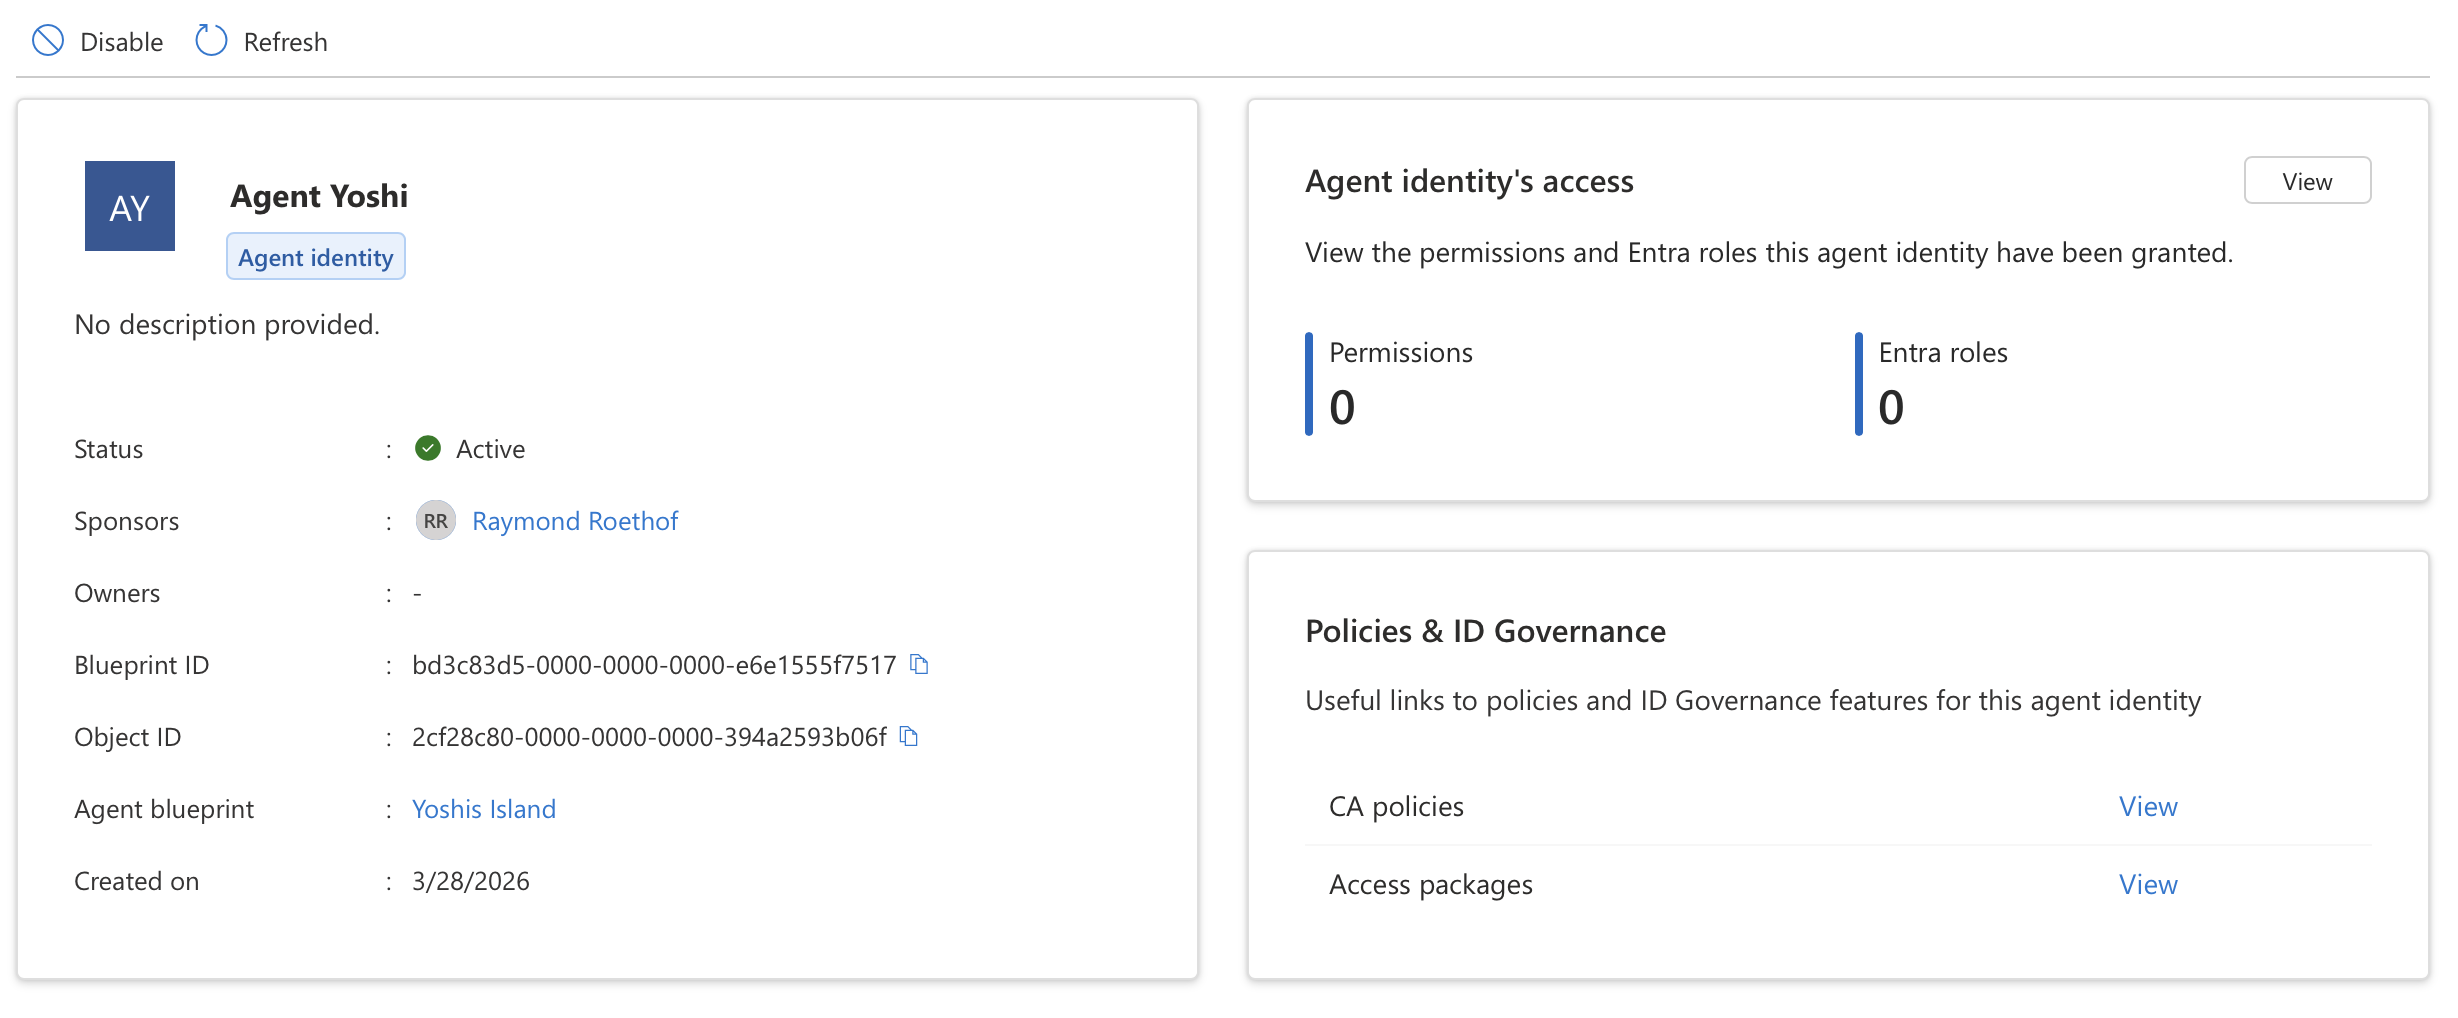
Image 3: The agent identity detail page in the Microsoft Entra admin center, showing the sponsor, the parent blueprint, and direct links to Conditional Access policies and access packages for governance.

What is an Agent User?

An Agent User is an optional secondary account for scenarios where a system strictly requires a Microsoft Entra user object for authentication. Think of it as a digital worker, an account that behaves like a user, but is owned and controlled by an agent identity.

An agent user is a standard user account decorated as an AI agent, with a strict 1:1 relationship to its parent agent identity. It cannot have passwords or passkeys, cannot be assigned privileged administrator roles, and cannot perform interactive sign-ins. Authentication happens exclusively through the parent agent identity’s credentials.

Agent users are relevant when an agent needs to interact with systems that only accept user tokens, for example, accessing a mailbox or joining a Teams meeting as a participant.

How It All Fits Together

To summarize the relationship between these concepts:

An Agent Identity Blueprint is the template, it defines the configuration, holds the credentials, and can create agent identities. A Blueprint Principal is the tenant-specific instance of that blueprint, visible in the Microsoft Entra portal and responsible for token issuance and audit logging. An Agent Identity is a single AI agent created from the blueprint, with its own object ID and governance properties. An Agent User is an optional user account linked 1:1 to an agent identity for systems that require user authentication.

One blueprint can back many agent identities, each representing a different instance or deployment of the same type of agent. This 1:N relationship is what makes blueprints powerful for organizations running agents at scale.

Image 4: The relationship between the Agent Identity Blueprint, Blueprint Principal, Agent Identities, and the optional Agent User. One blueprint can back multiple agent identities, establishing a 1:N relationship.

One of the most powerful aspects of this model is the way Conditional Access policies integrate with blueprints. Because a blueprint acts as a management container for all agent identities created from it, a single Conditional Access policy applied to the blueprint automatically takes effect for every agent identity it produced. This means you can enforce access controls, such as blocking authentication from outside trusted networks or requiring compliant devices, across an entire fleet of agents in one place, without having to configure policies per individual agent identity.