[WARNING] This blog post is created when Microsoft Windows still came in a physical box with multiple installation disks.
In my previous blog post, I described the inner workings of the Microsoft Defender for Identity REST API. In this blog post, I will explain how multi-forest authentication works, how you can use the REST API endpoint to hop from forest to forest without a forest trust, and the risks associated with using Directory Service Account within Microsoft Defender for Identity.
Introduction
I want to take this opportunity to thank the Microsoft Defender for Identity team for their support. I am in close contact with the Microsoft Defender for Identity team, so they know most things I do. Microsoft Defender for Identity is an excellent product, and they also have a great team. Thank you 🙏
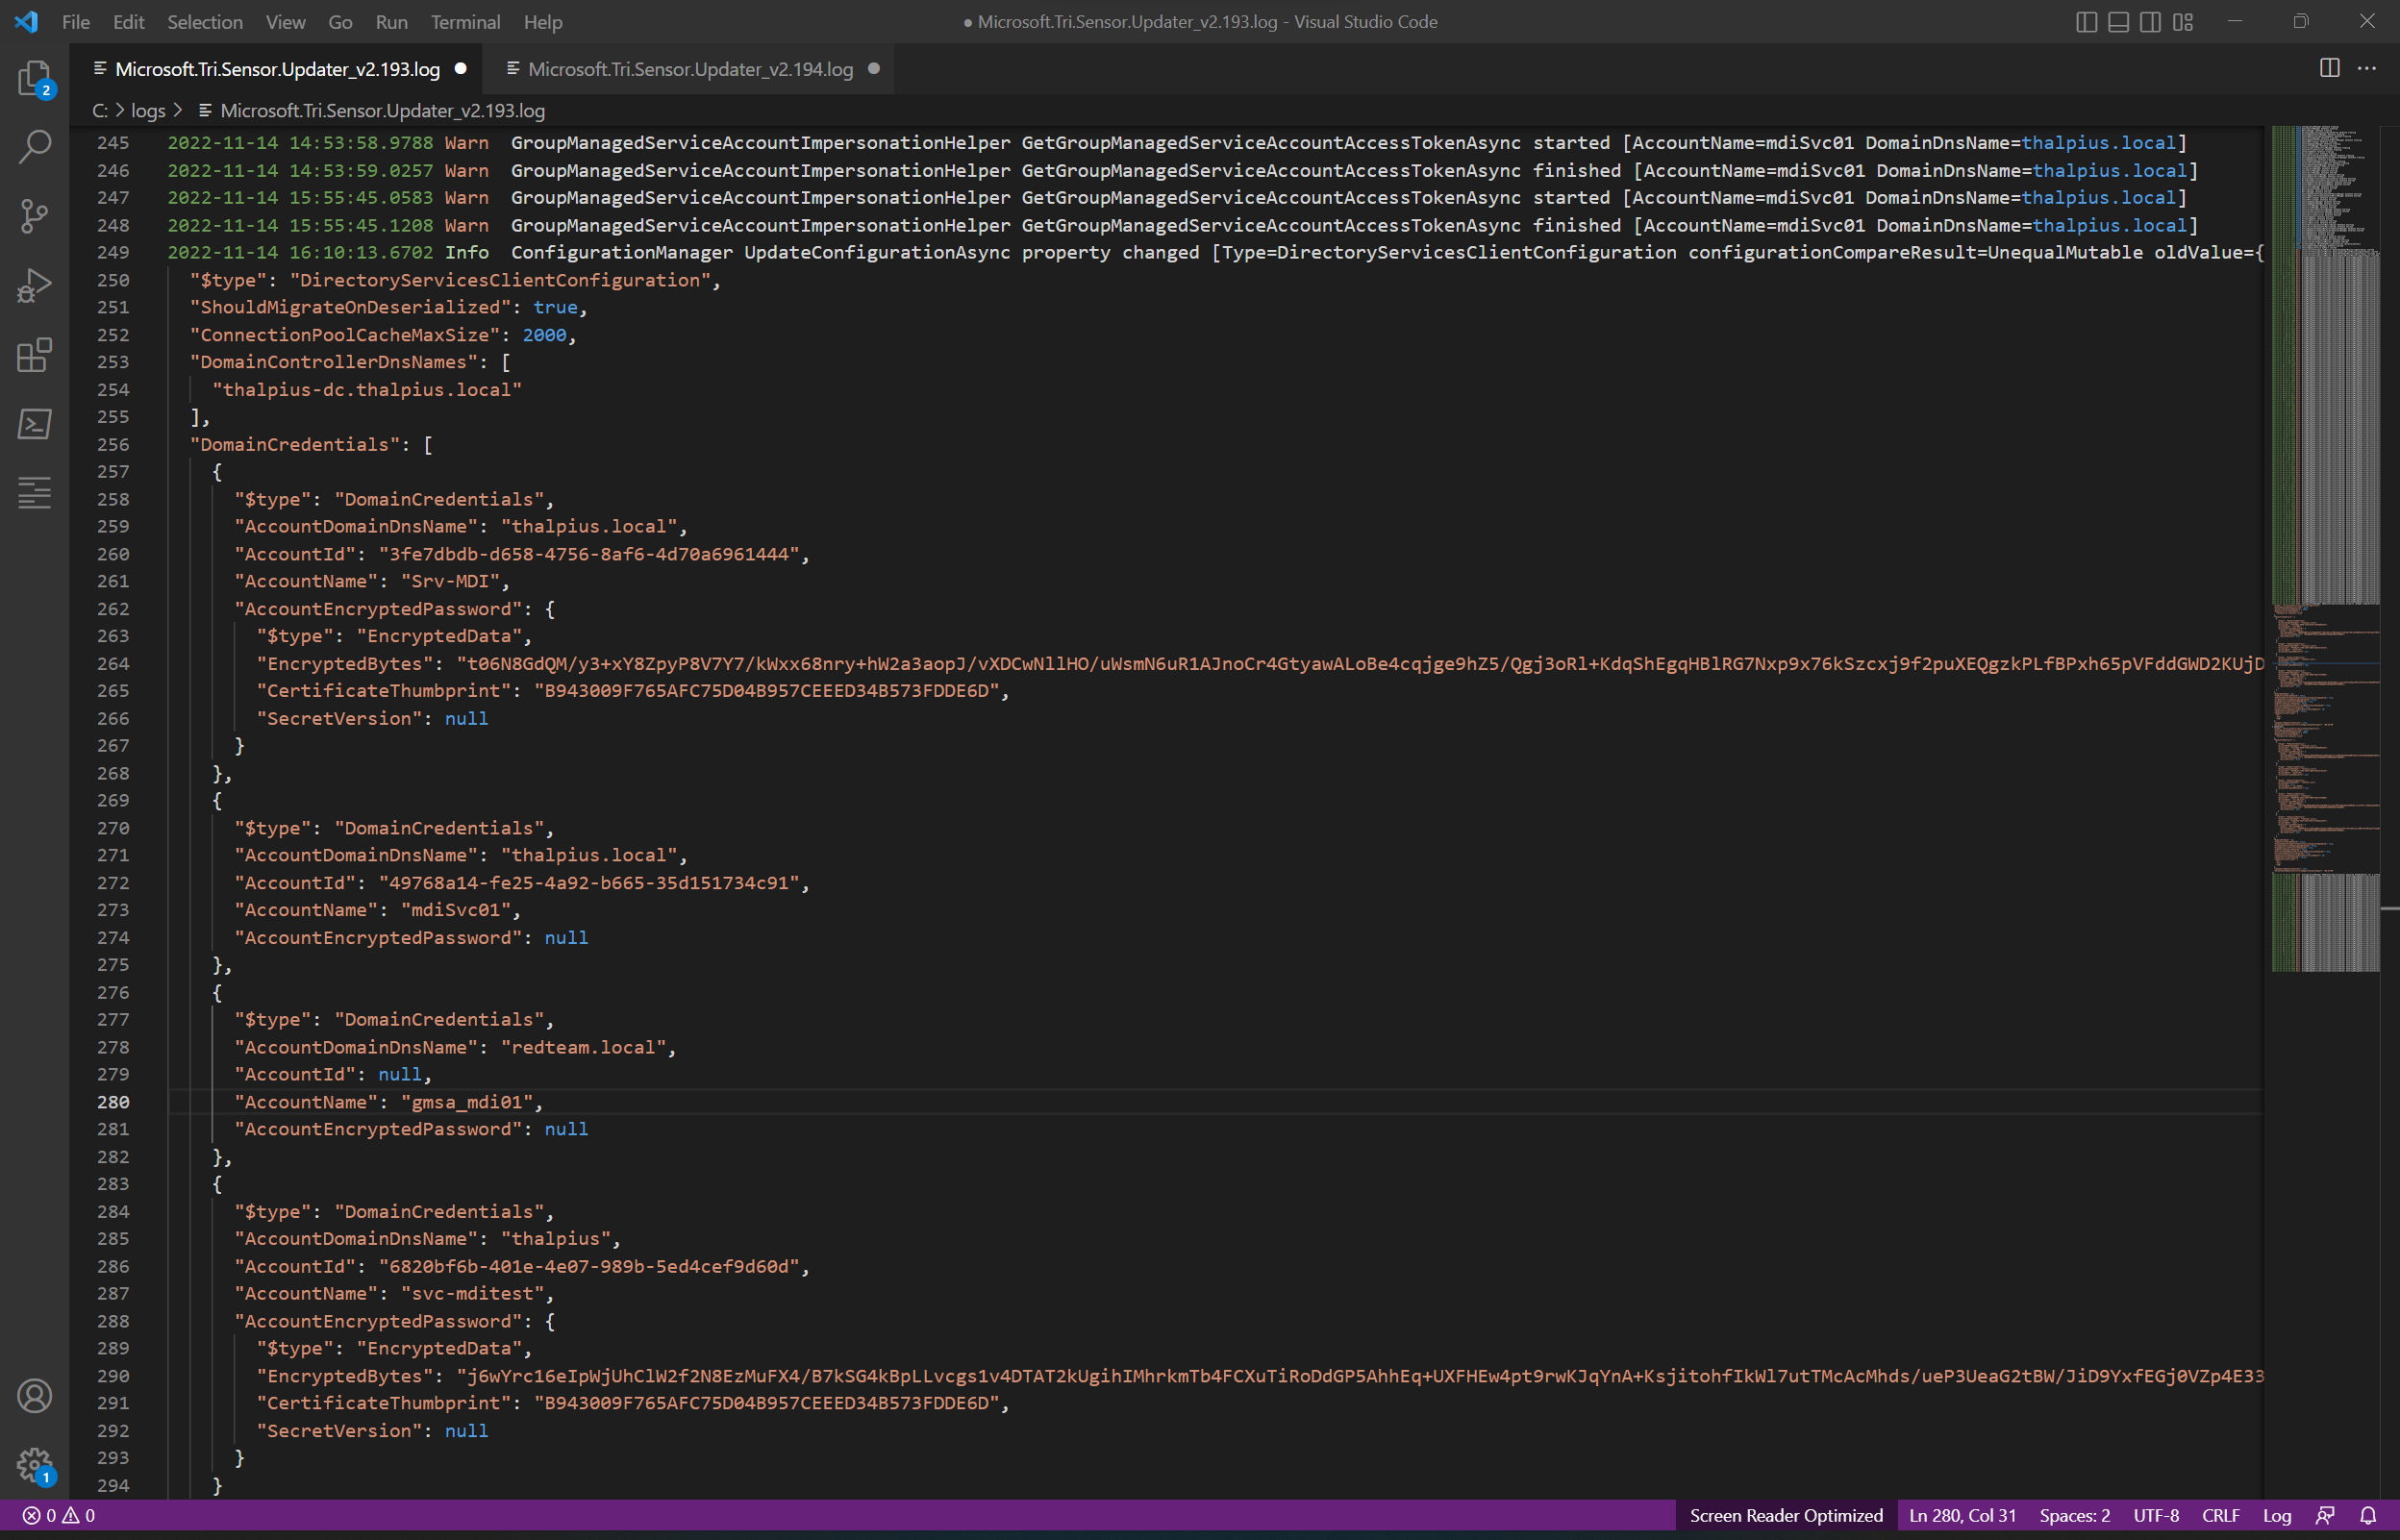
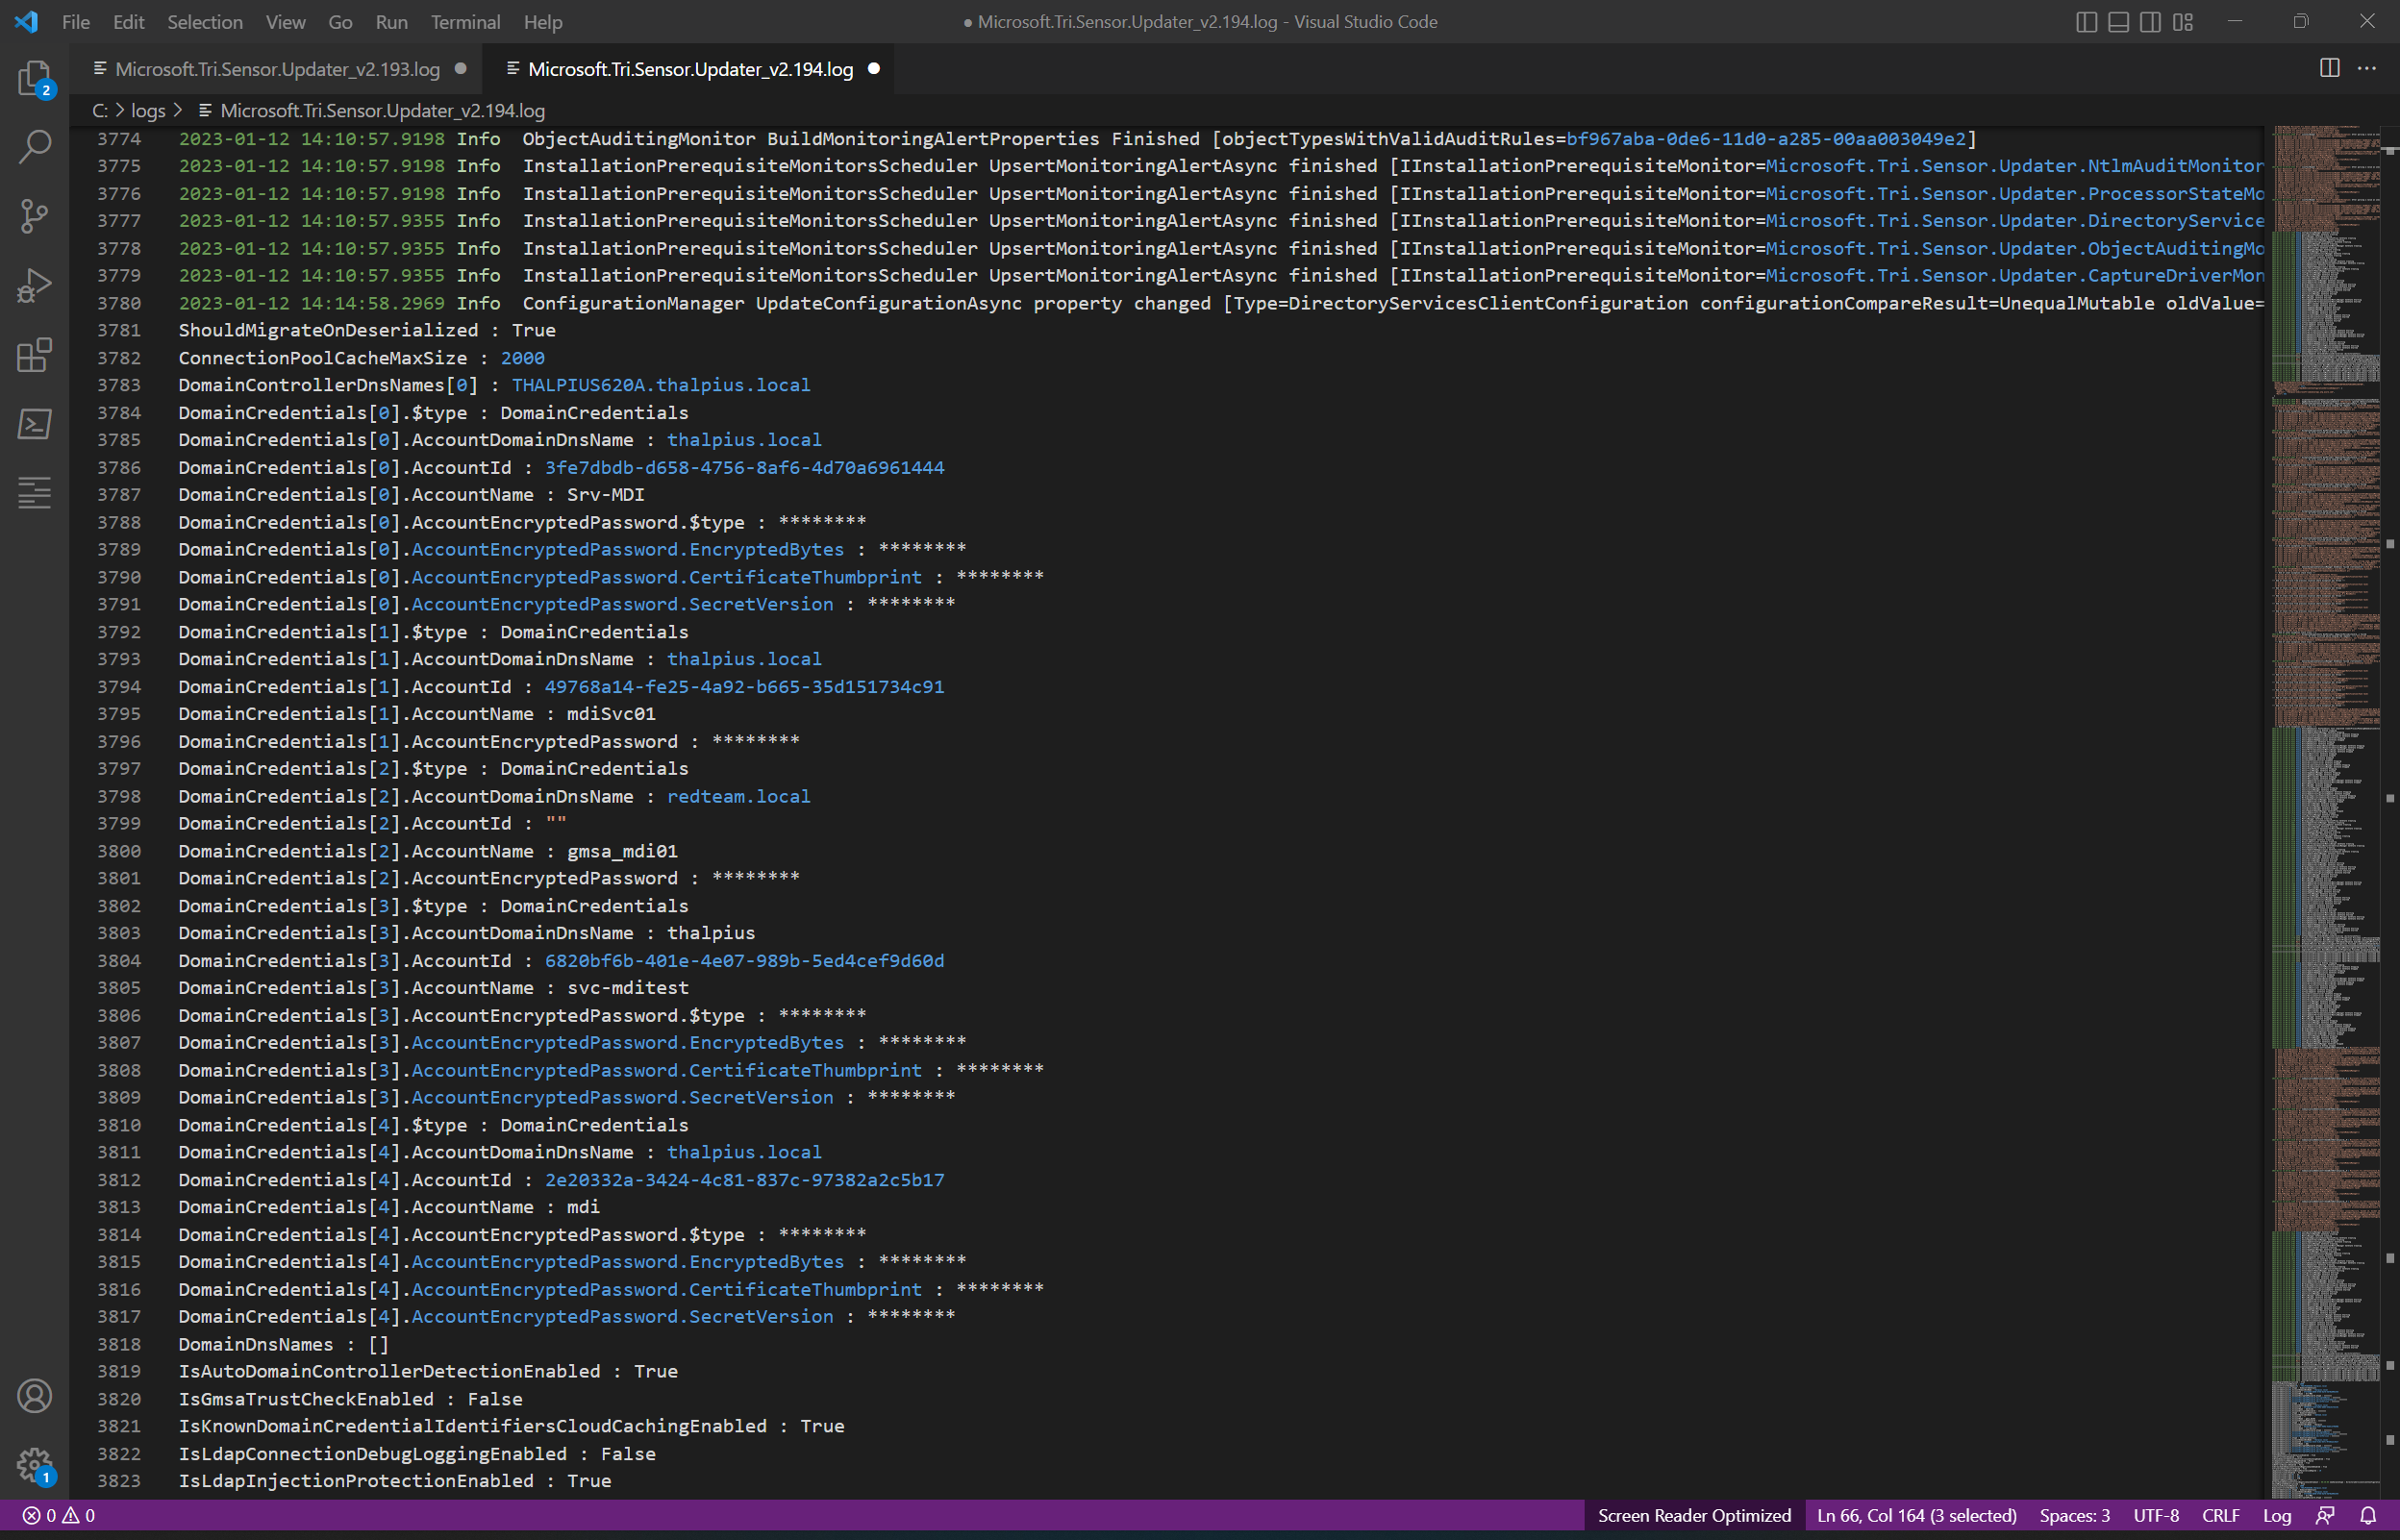
My previous blog post described how you could decrypt all encrypted passwords in the sensor’s log file. I reported this to the Microsoft Defender for Identity team, who acknowledged it was an issue and fixed it within a week or so. From sensor version 2.194, the log file shows only masked passwords.
Respect for the Microsoft Defender for Identity team for quickly acknowledging and fixing the issue.
Note: When you change anything regarding the Directory Service Accounts in the Microsoft 365 Defender portal, the sensor fetches the changes periodically using a REST API request and saves the configuration in the log file, including the encrypted passwords. Since version 2.194, it only shows masked passwords.
Let me describe how Microsoft Defender for Identity uses Directory Service Accounts in a multi-forest environment to understand the risks of these accounts.
Multi-Forest Authentication
Microsoft Defender for Identity supports a multi-forest environment allowing you to easily monitor activity and profile users across forests. Authentication must occur in a different forest when the sensor wants to collect data cross-forest. So, the type of authentication depends if there is a forest trust between the forest and if you use a Directory Service Account or a Group Managed Service account.
The documentation by Microsoft needs to be more explicit when using a multi-forest environment, to be honest. The documentation does state only one Directory Service Account is required to support all forests with a two-way trust and requires a Directory Service Account per forest without a forest trust. When there is a forest trust, any user in the trusted forest can perform LDAP queries, so there is no need for an additional Directory Service Account. It is different when you use a Group Managed Service Account for authentication, though. Since only the principals added to the “msDS-ManagedPassword” property of the Group Managed Service Account can get the password for the account, additional configuration is needed.
The recommendation is to create a Domain Local group in the trusted forest and add the “Domain Controllers” group from the trustee forest. Then add the Domain Local group to the “msDS-ManagedPassword” property of the Group Managed Service Account so all domain controllers can read the account’s password, including cross-forests domain controllers.
Plain Text Passwords
Since all domain controllers in all domains are allowed to retrieve the managed password in the setup described above, once an attacker gets hold of a single Microsoft Defender for Identity sensor, the attacker can read the password for the Group Managed Service Account in plain text.
The Microsoft documentation states that using a Directory Service Account with limited privileges is essential. Still, it is a way for attackers to get the plain-text password for identities in a different forest, even when using Group Managed Service Accounts.
So, no trust, no worries?
An additional Directory Service Account is needed per forest to support untrusted forests. Since the sensor needs to perform the authentication, the sensor also needs to be aware of the Directory Service Account, including the password.
Note: Since there is no trust, the account can not be a Group Managed Service Account.
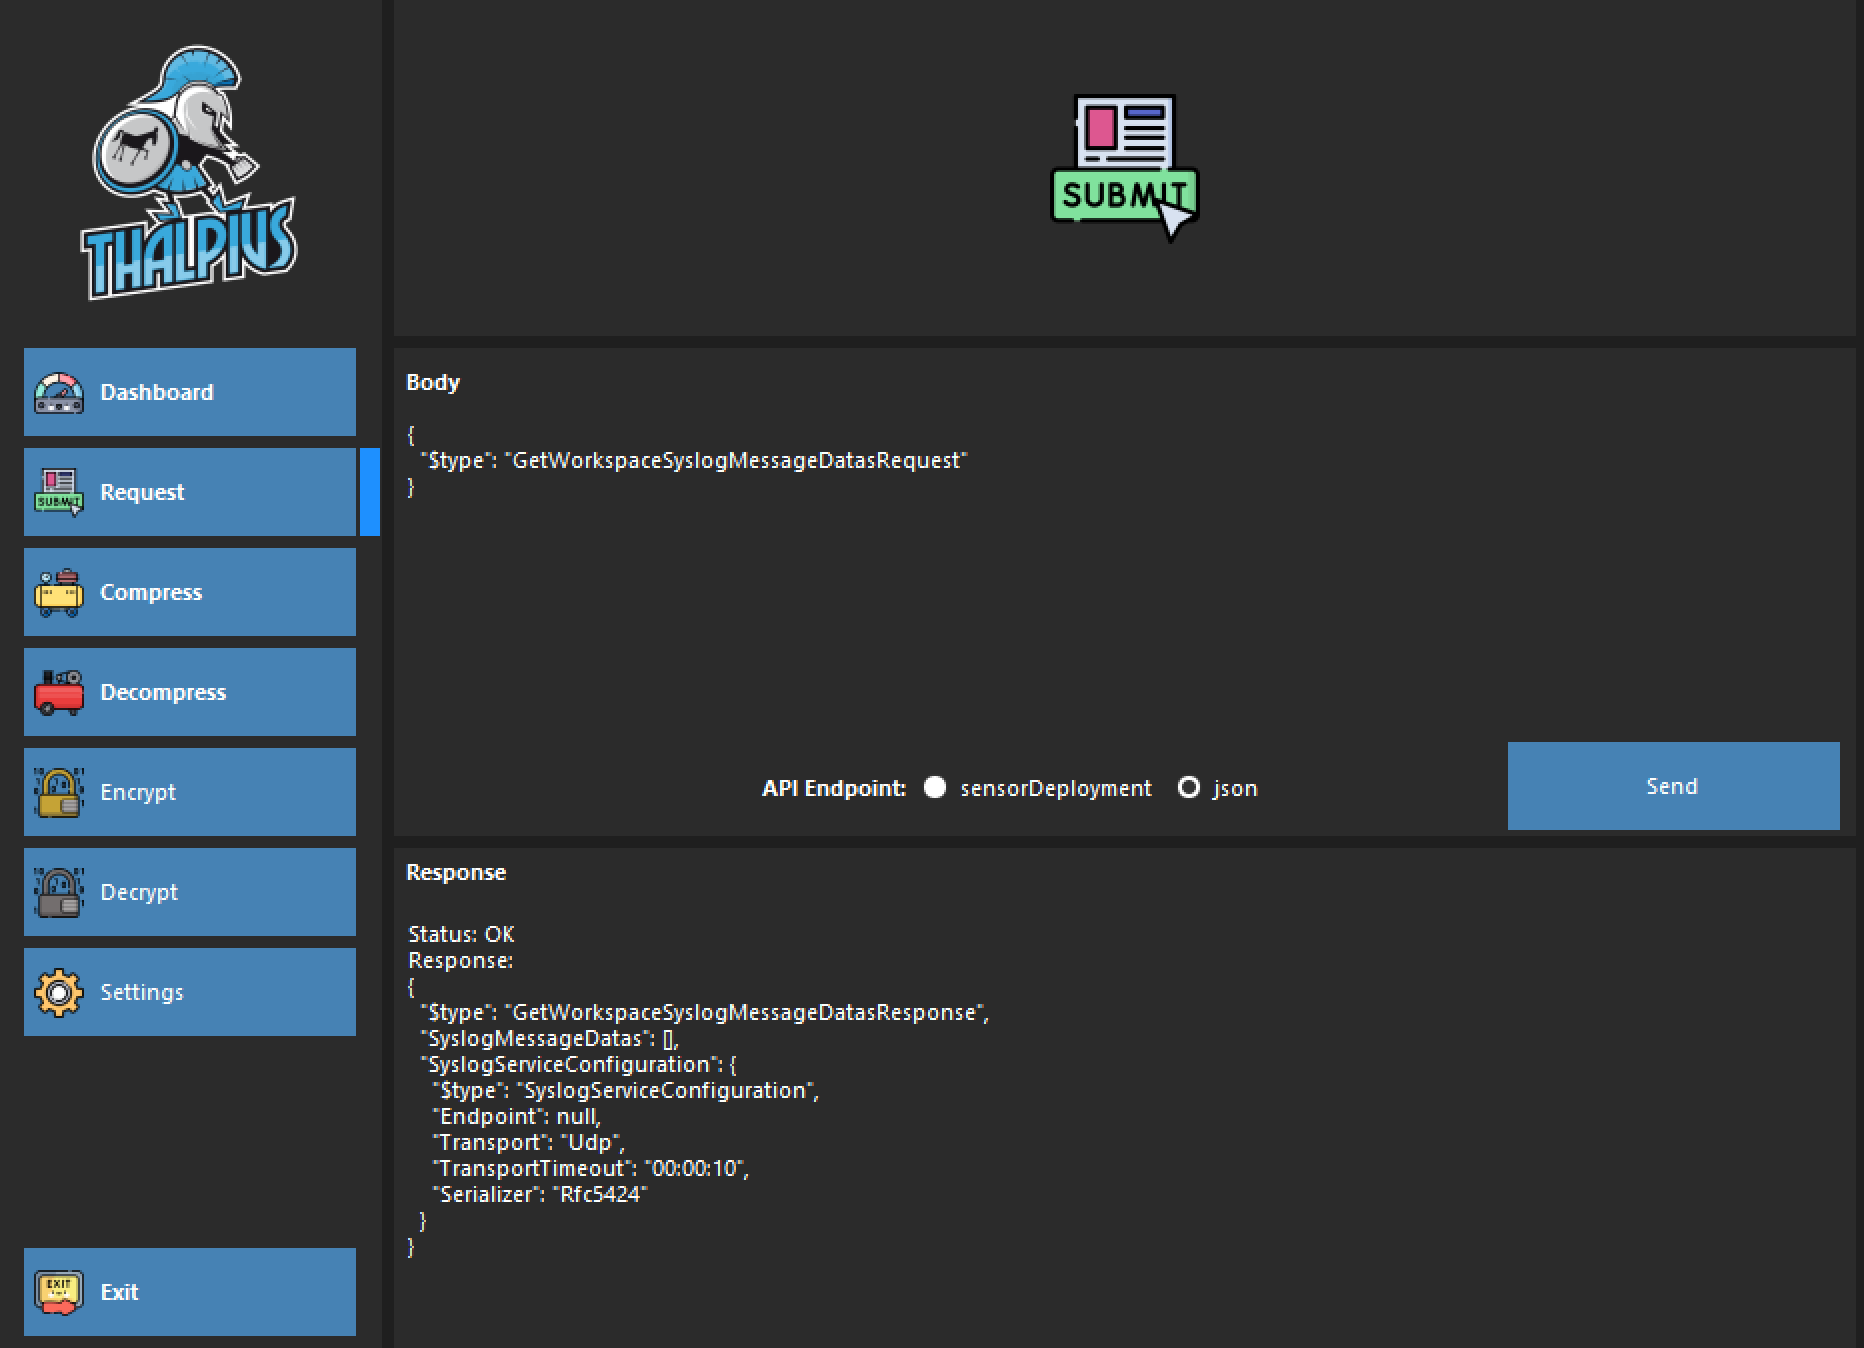
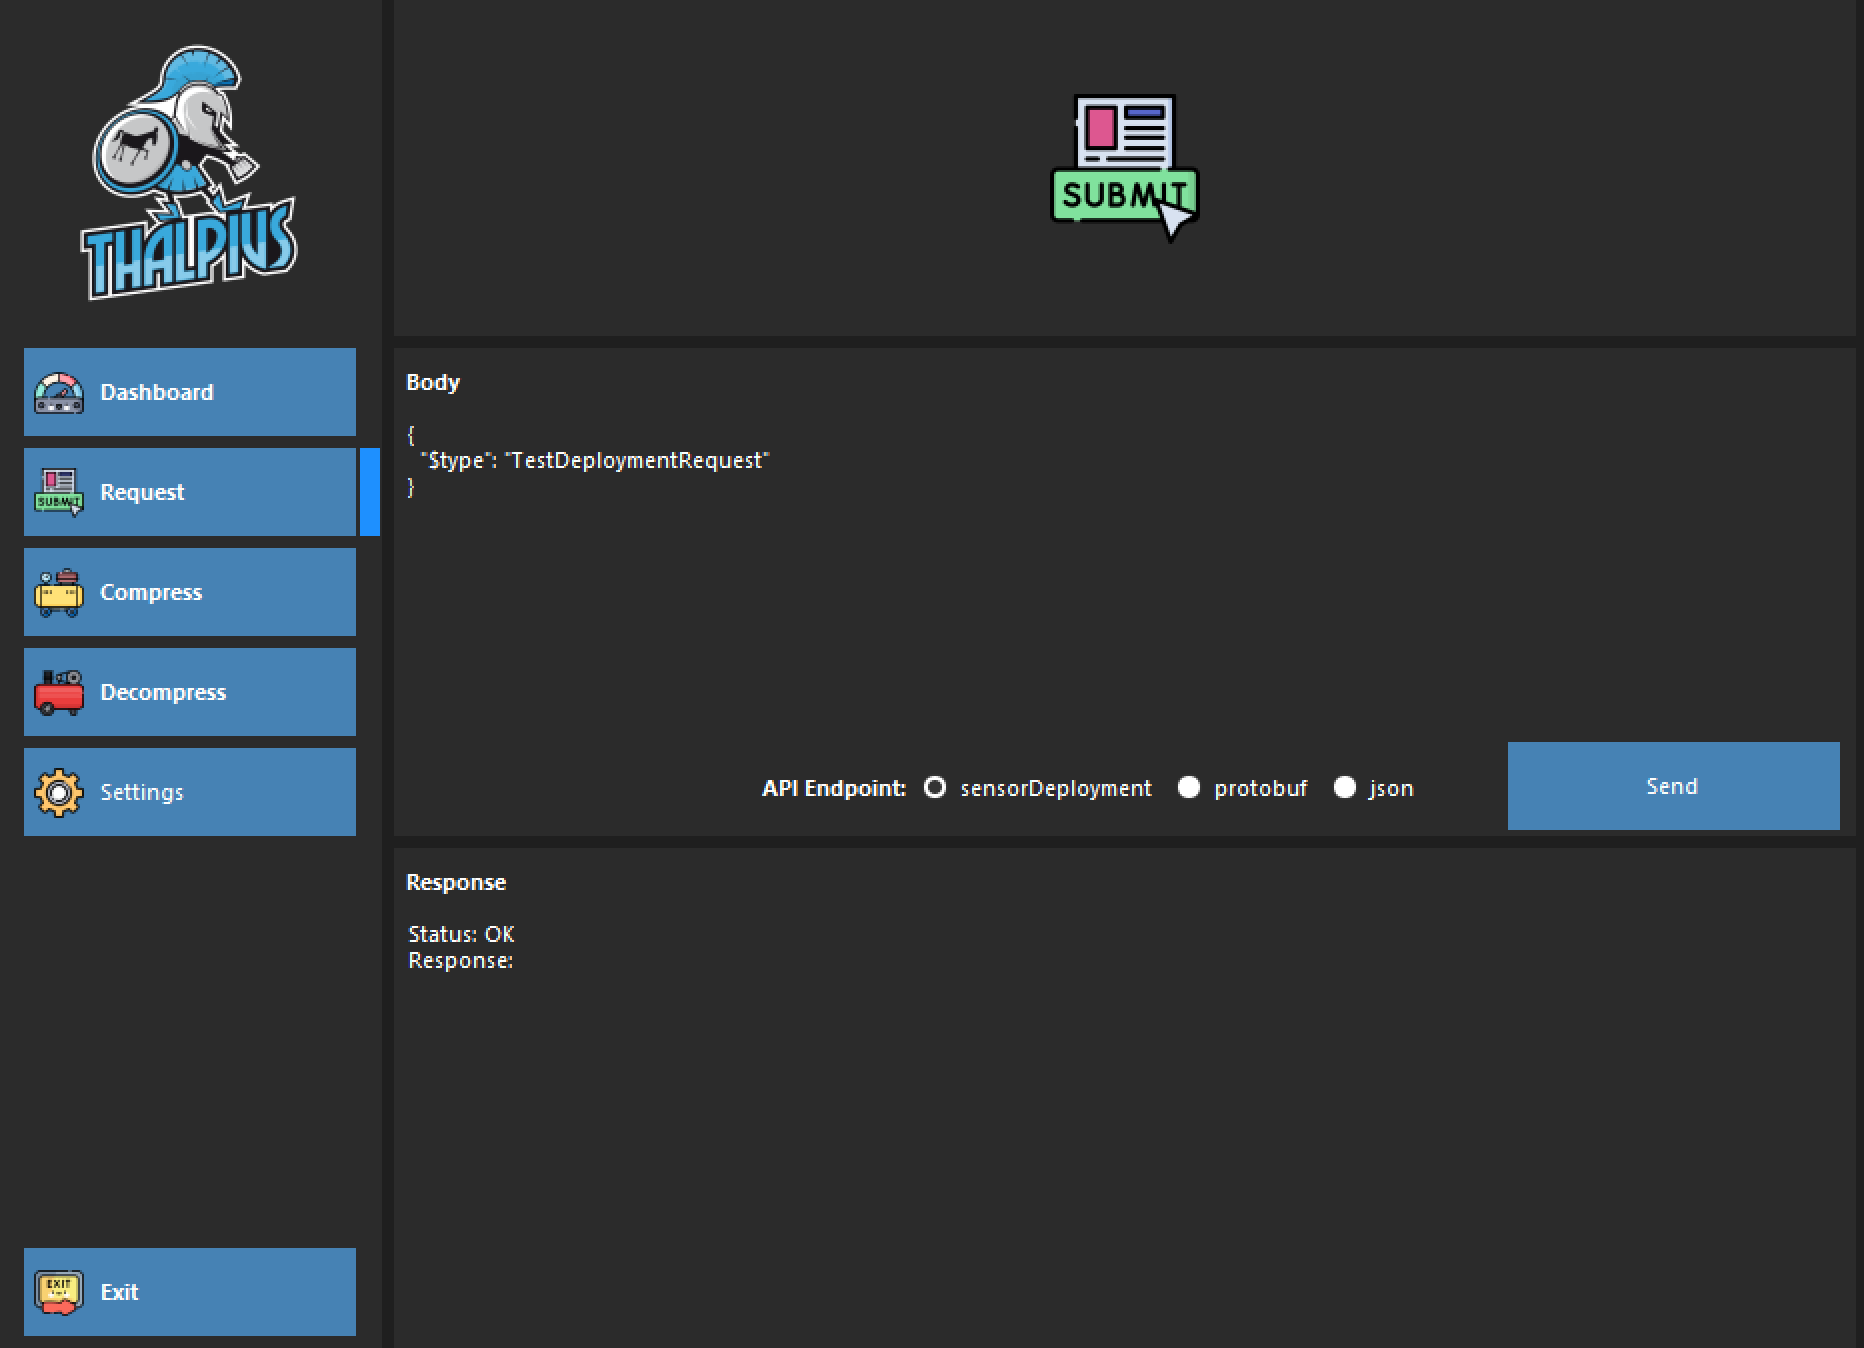
How does the sensor get the Directory Service Accounts? The sensor sends a REST API request to the cloud to get all Directory Service Accounts, including their encrypted password.
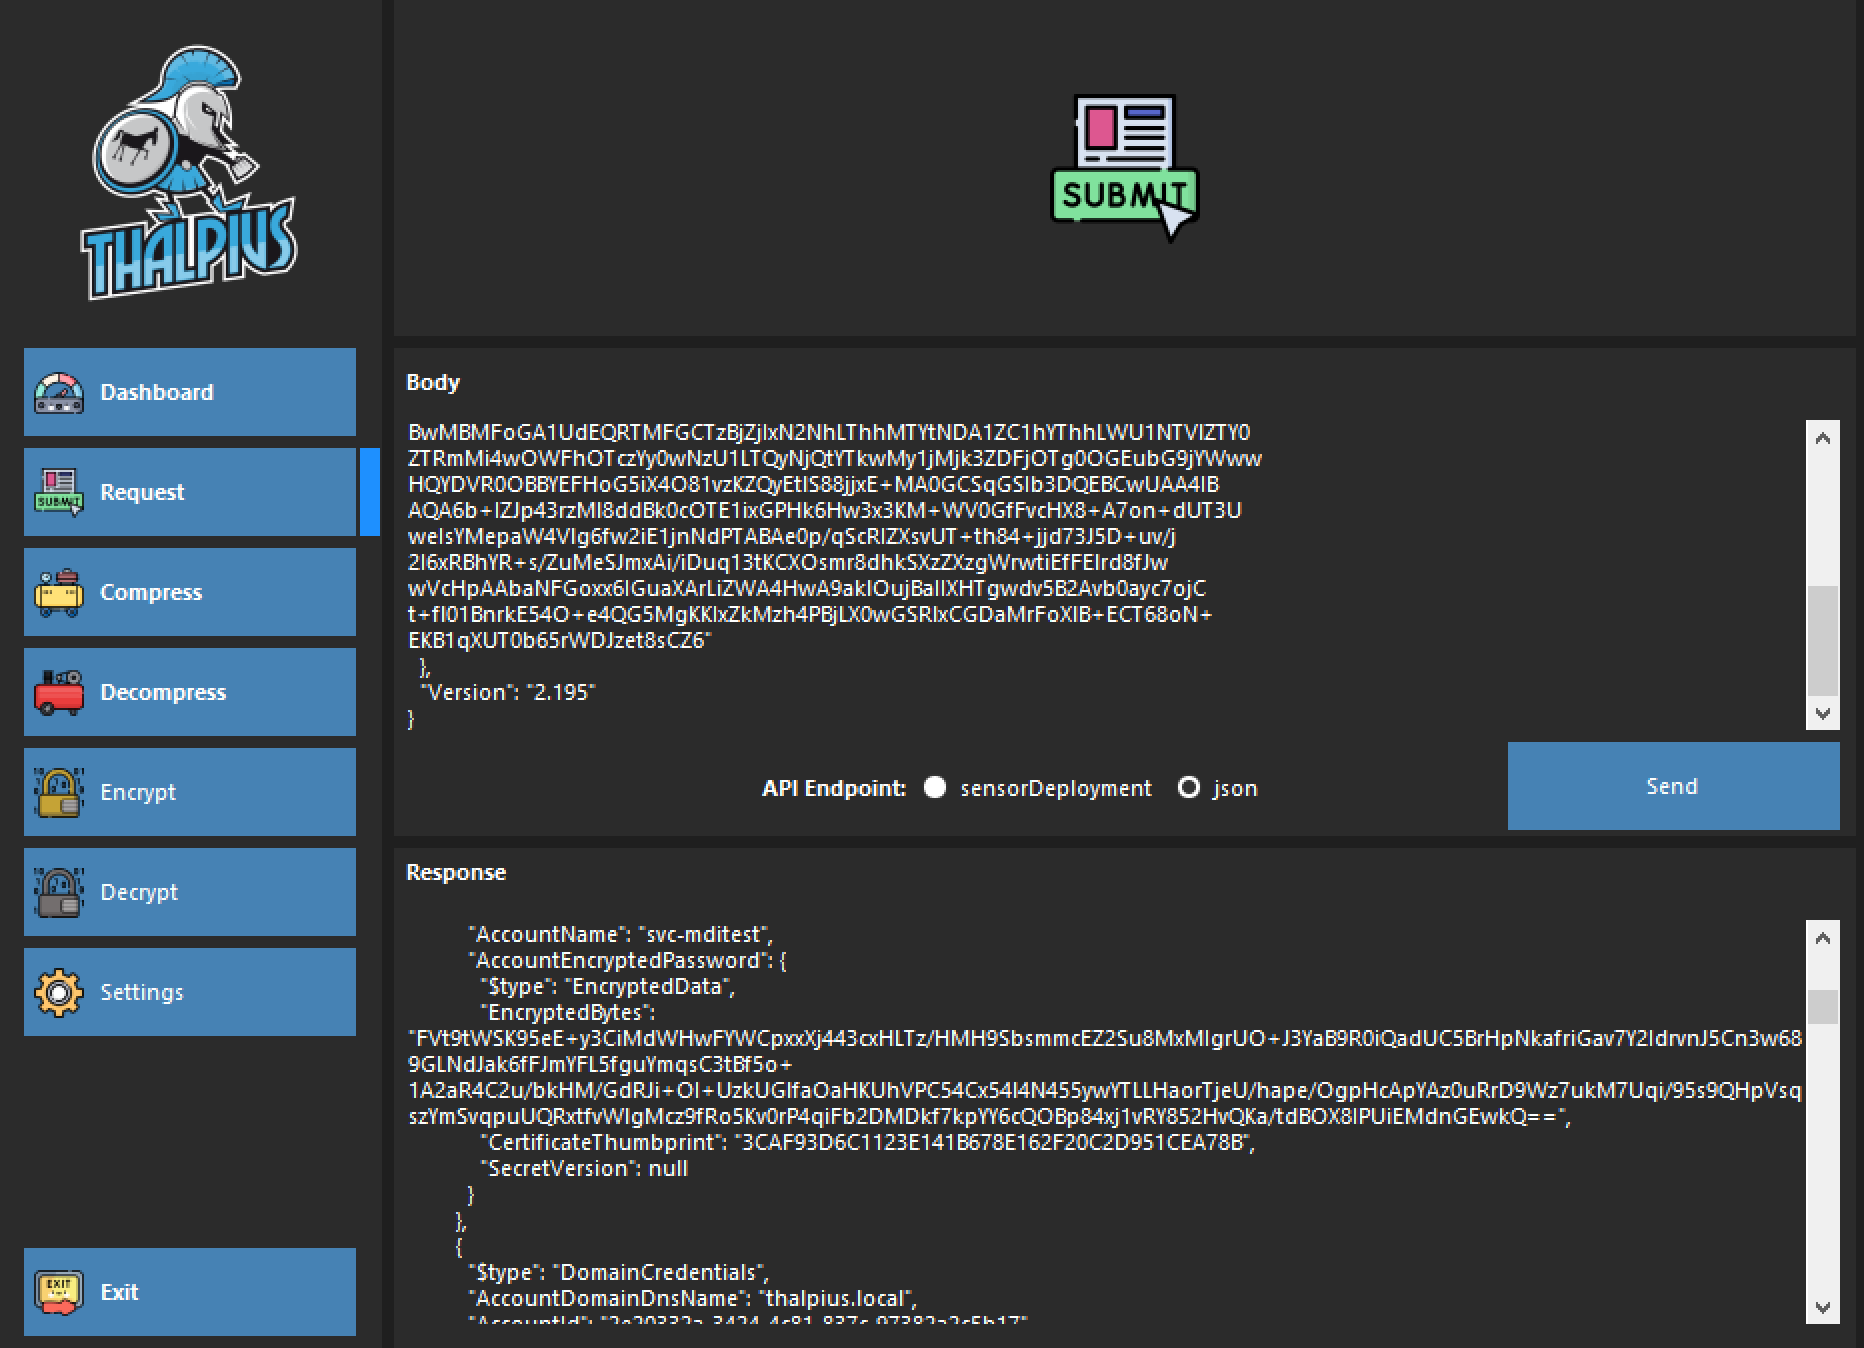
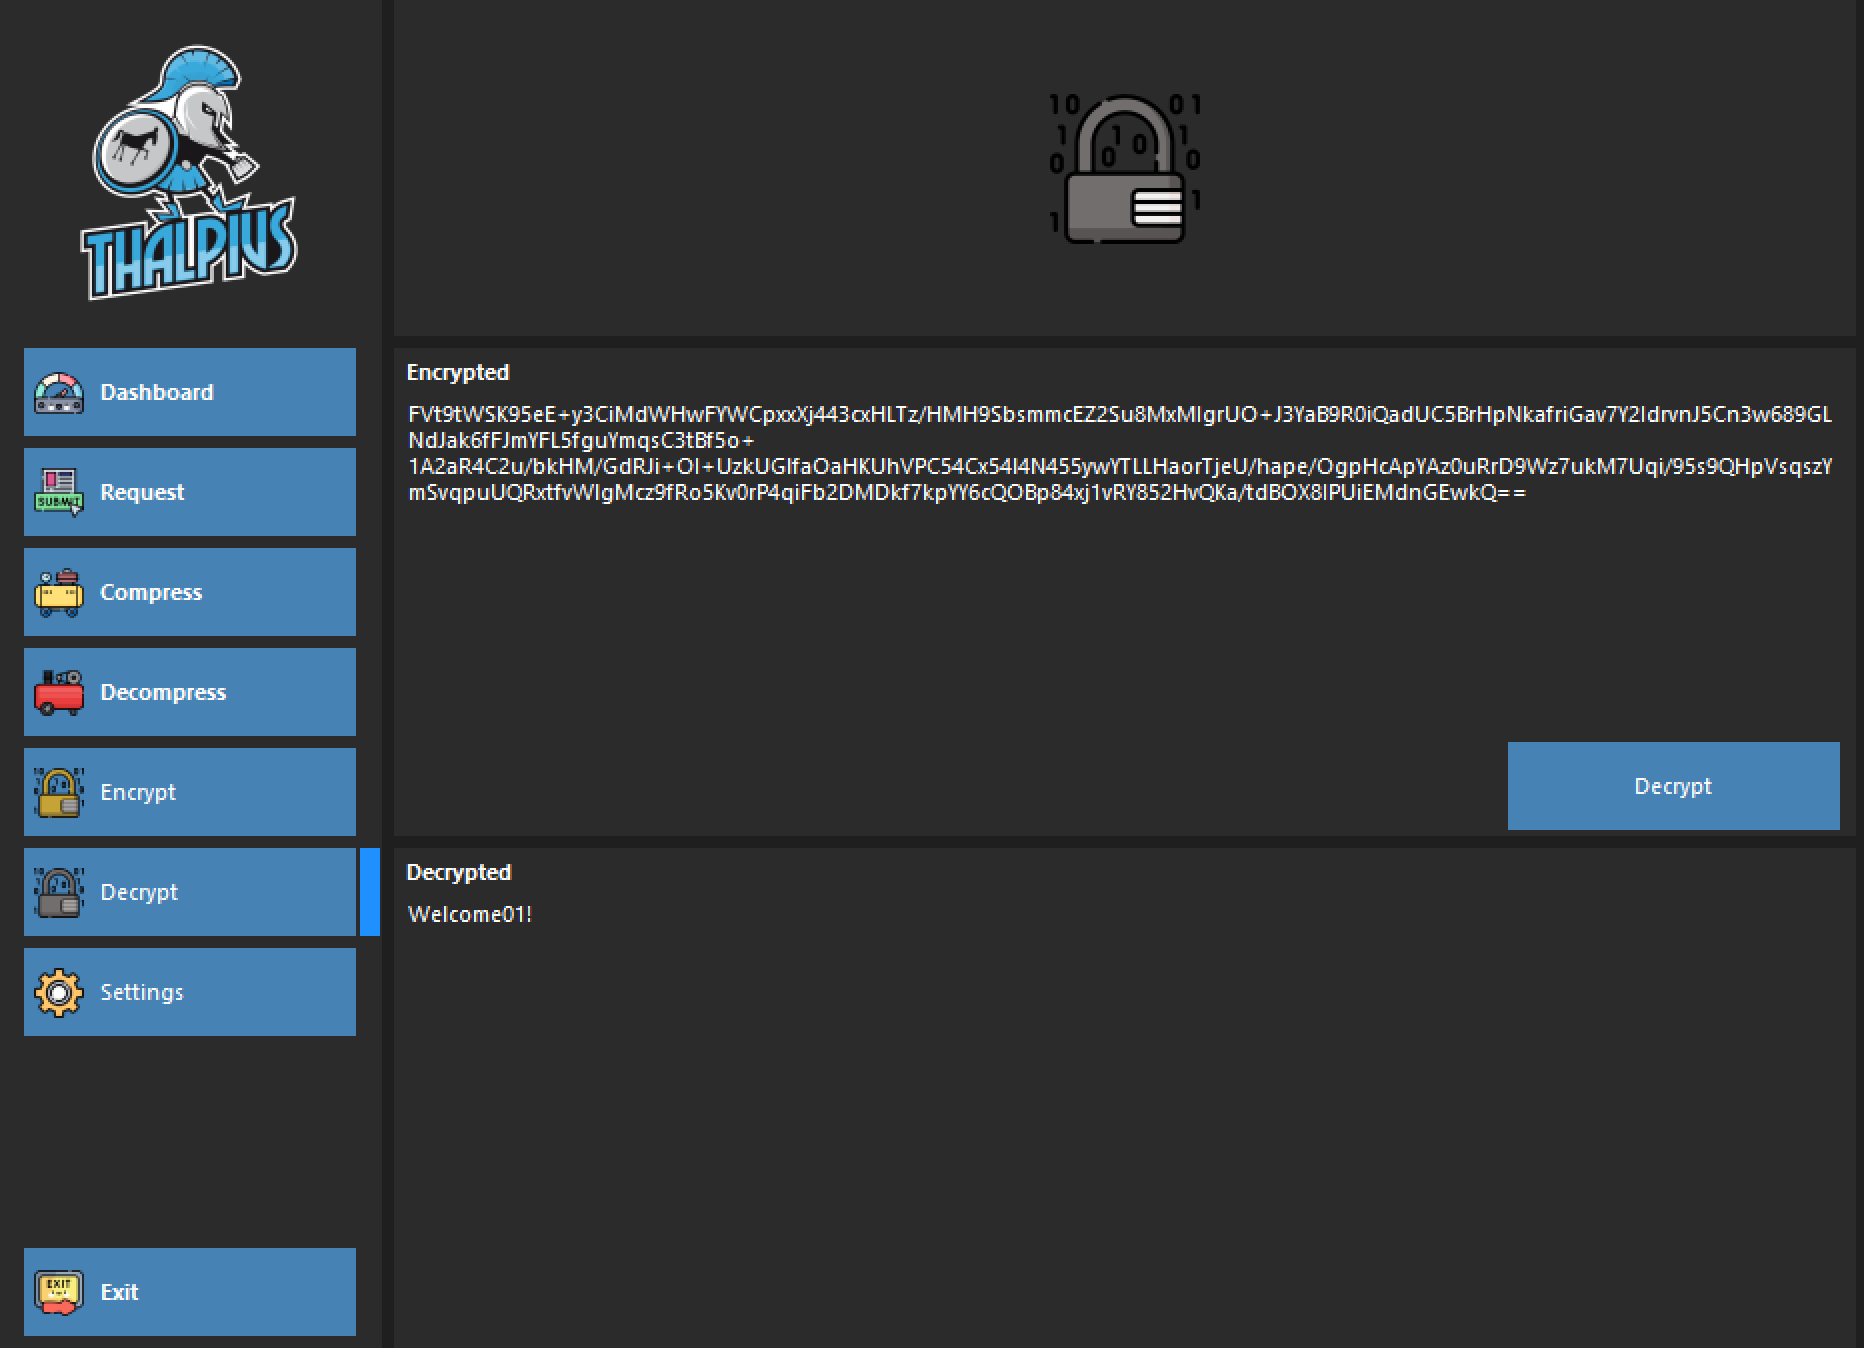
Mimicking a Microsoft Defender for Identity sensor using my tool makes it possible to get all encrypted passwords using a REST API request. As described in a previous blog post, it is possible to decrypt all passwords and get plain text passwords from all Directory Service Accounts, excluding Group Managed Service Accounts.
Note: I updated my Microsoft Defender for Identity API Fiddler, which now includes encrypting and decrypting the passwords.
So, once an attacker gets the plain text password for a different forest, the attacker can authenticate to the other forest even when there is no forest trust.
Important: When you compromise a single Microsoft Defender for Identity sensor, you can get all Directory Service Accounts passwords in plain text, including those of forests without a forest trust, and including Group Managed Service Accounts.
Password Decryption
How does the sensor decrypt the password of the Directory Service Account from another forest? That is a good question!
All Directory Service Accounts are encrypted using all sensor’s public keys. Microsoft encrypts all passwords with every public key of all sensors to be sure that every sensor can decrypt all passwords. The sensor sends a REST API request to the cloud to get all encrypted passwords matching its certificate and decrypt all passwords for all Directory Service Accounts, excluding Group Managed Service Accounts, as they do not have a password.
Conclusion
Although some authentication is by design in a Windows environment, when there is no forest trust, an attacker can still authenticate using a plain text password to the different forest using a REST API request using my tool. So, getting plain text passwords for another forest introduces a possibility for attackers to hop from forest to forest, including those without a forest trust. There is no mitigation for getting the encrypted password using my tool, as the sensor uses this authentication method.
Remember, though, never reuse passwords as attackers use the password for password sprays, potentially compromise other identities, and only use low-privilege accounts, as Microsoft’s documentation states.