Microsoft Office 365 Incident Response using the Microsoft Graph Security API

Microsoft Office 365 Incident Response using the Microsoft Graph Security API

[WARNING] This blog post is created when Microsoft Windows still came in a physical box with multiple installation disks.

During an incident, you want to do your analysis as quickly and as precisely as possible. Although there are many scripts available to do proper research within Microsoft 365, if you are working with Exchange Online, OneDrive, SharePoint, they all need separate modules. Not to mention that Exchange Online sometimes need multiple modules depending on what data you want to extract. Using numerous modules can be a pain due to numerous logins that are required.

I wanted to create a ‘One ring to rule them all’ for any incident response within Microsoft 365, which is Operating System independent, runs natively on Windows, and works with or without Multi-Factor Authentication. PowerShell runs on Linux, macOS, natively on Windows, and it happens to be a language I somewhat understand.

Since many Microsoft security products and services connect to the Microsoft Graph Security API, I have chosen to use PowerShell in combination with the Microsoft Graph Security API.

App Registration

To communicate to the Microsoft Graph Security API, you need an app registration. If you create an app registration, be sure you select the Microsoft graph and Application Permissions.

Note: During the application registration, write down the application ID, the client secret, and the tenant name.

Figure 1: Azure AD API Permissions Microsoft Graph
Figure 2: Azure AD Permissions Applications Permissions

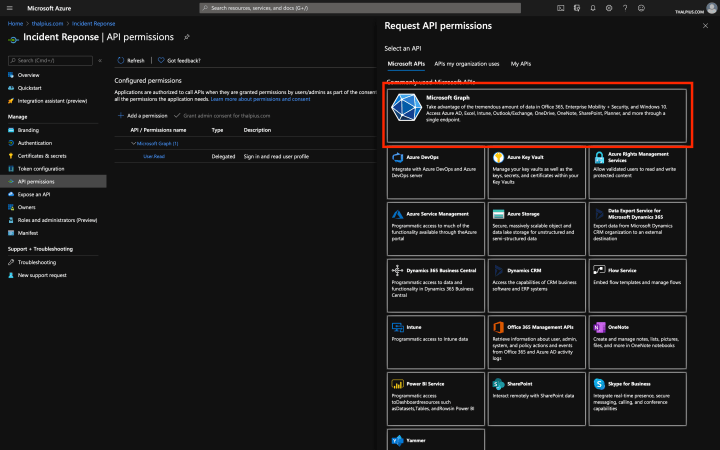
Add the following API permissions.

    Directory.Read.All
    Directory.ReadWrite.All
    IdentityRiskyUser.Read.All
    Policy.Read.All
    SecurityEvents.Read.All
    DelegatedPermissionGrant.ReadWrite.All
    AuditLog.Read.All
    Mail.Read
    MailboxSettings.Read

Research Questions

The idea of answering a research question is to run a function, export the outcome to a JSON file, and filter the JSON file if needed. The sign-in logs, for example, contain a lot of information. Using your favorite tool, you can extract what research question you would like to answer. The export includes the location of the login. A simple query makes it possible to filter all logins outside the company’s country to get an overview of potential malicious logins.

RR-GetAccessToken

The first thing you need to do is getting a token using the app registration you created previously.

RR-GetAccessToken -appId 'XXXXXXXX-XXXX-XXXX-XXXX-XXXXXXXXXXXX' -appSecret 'XXXXXXXX' -tenantName "thalpius.onmicrosoft.com"

Once you have a token, you can use the functions described below.

Note: The token expires in one hour. I have not had this issue myself that a function runs more than an hour, but I am looking to add a refresh token to the script. You can always request a new token described above, which is valid for another hour.

RR-GetSkus

The first thing to look for is licenses. If the tenant contains an Office 365 Advanced Threat Protection license, it helps during the investigation. Or if the tenant contains an Azure AD Premium license, you know the logs in Azure AD go back one month instead of seven days.

I recommend starting with an output of the licenses to see what tools can help during the investigation.

RR-GetSkus

RR-GetAcceptedDomains

Accepted domains are used in the tenant to sent and receive e-mail. The function RR-GetAcceptedDomains can extract all accepted domains within the tenant.

Getting all accepted domains is helpful to validate which domain names accept e-mail within the tenant.

RR-GetAcceptedDomains

RR-GetInboxRules

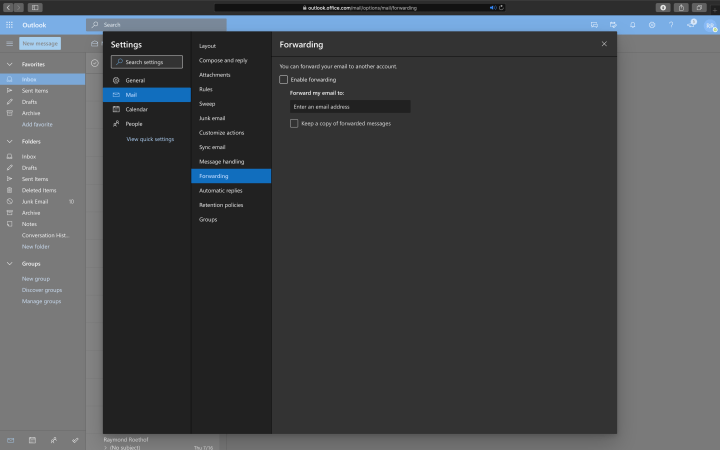
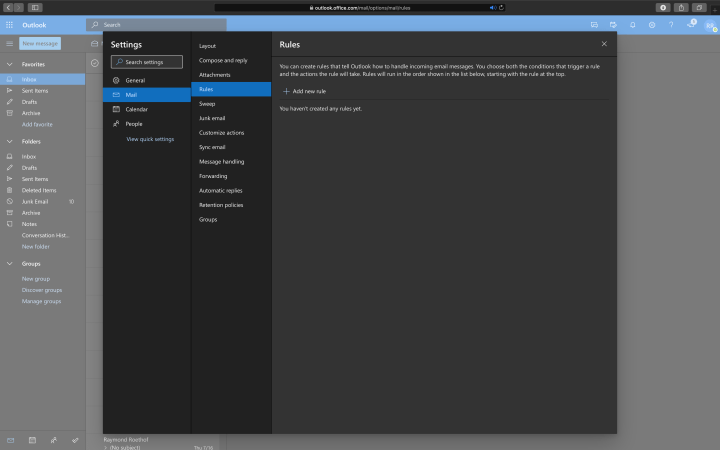
Many attackers create inbox rules for persistence or hiding footprints. With the function RR-GetInboxRules you can export all inbox rules within the tenant or for a particular user.

RR-GetInboxRules
RR-GetInboxRules -userPrincipalName user@thalpius.com

RR-GetSignins

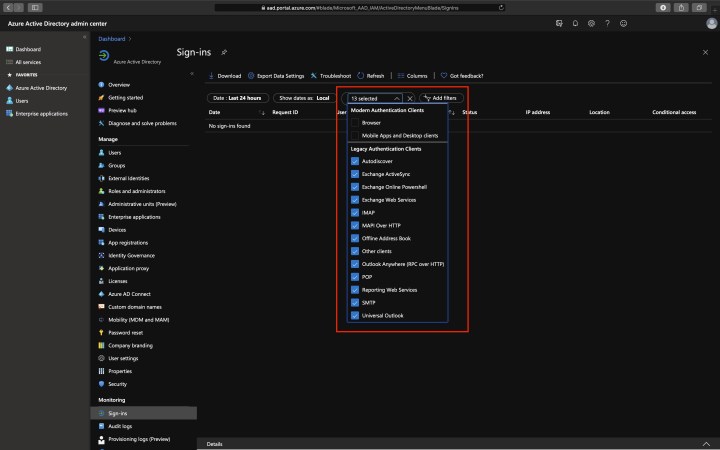
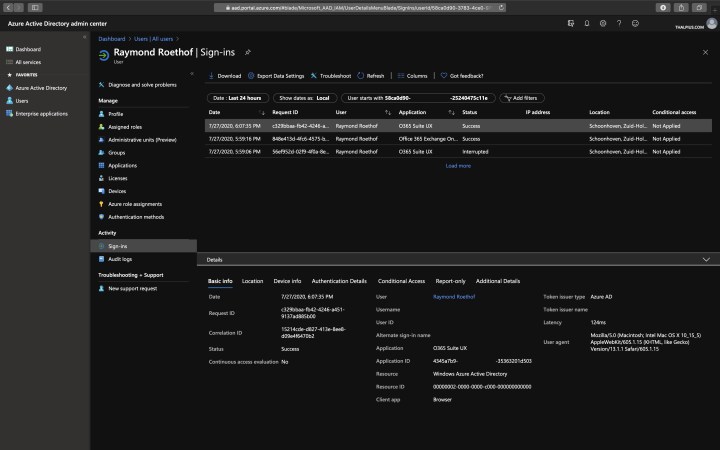
The RR-GetSignins functions export all Azure AD sign-ins within the tenant or for a particular user. The sign-in logs contain a lot of information like the user-agent, location of the sign-in, etc.

RR-GetSignins
RR-GetSignins -userPrincipalName user@thalpius.com

RR-GetAuditLogs

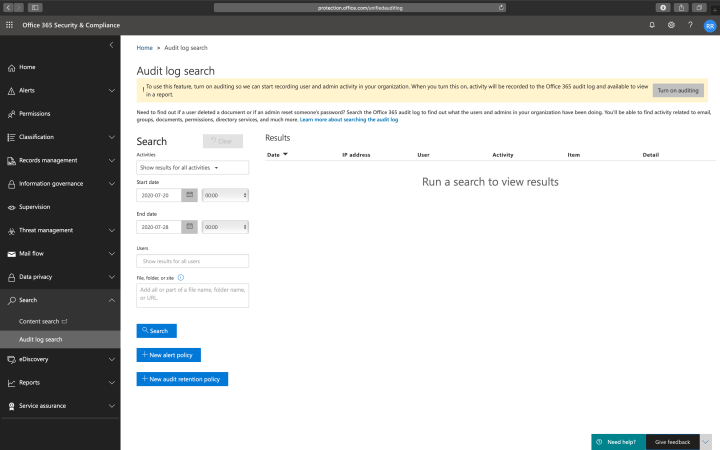
The RR-GetAuditLogs functions export all Azure AD audit logs within the tenant or for a particular user.

RR-GetAuditLogs
RR-GetAuditLogs -userPrincipalName user@thalpius.com

RR-GetEmailBySubject

The function RR-GetEmailBySubject searches for any e-mail with a given subject.

RR-GetEmailBySubject -subject "thalpius"

RR-GetEmailByBody

The function RR-GetEmailByBody searches for any e-mail with a given keyword in the body of the e-mail.

RR-GetEmailByBody -bodyKeyword "thalpius"

RR-GetAttachment

This function gives you the ability to extract all usernames with a given attachment filename in their mailbox.

RR-GetAttachment -fileName "thalpius.zip"

RR-GetAttachments

This function gives you the ability to extract attachments to check if it is malicious. It exports all attachments from a user’s mailbox or extracts the attachment itself if you use the attachmentId. The attachment is Base64 encoded. Decode the encoded string in the output to get the binary.

RR-GetAttachments -userPrincipalName user@thalpius.com
RR-GetAttachments -userPrincipalName user@thalpius.com -extension ".zip"
RR-GetAttachments -userPrincipalName user@thalpius.com -attachmentId XXXX-XXXXXX-XXXX

RR-GetAllAppRegistrations

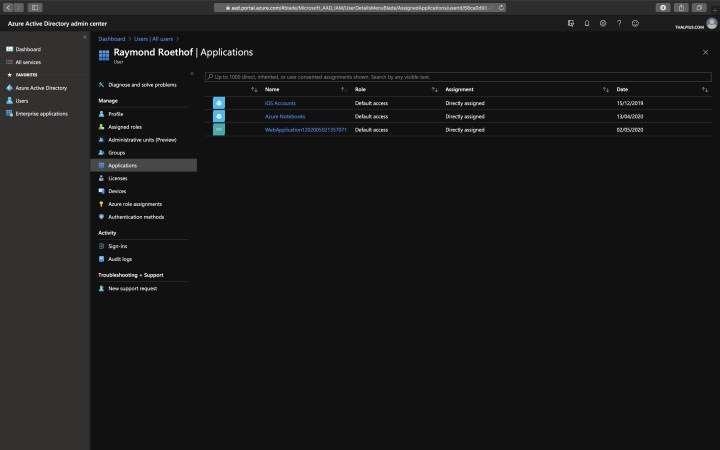
In an illicit consent grant attack, the attacker creates an Azure-registered application that requests access to data such as contact information and e-mail. This function exports all app registrations within the tenant, including the owner.

RR-GetAllAppRegistrations

RR-OutputArray

Every function adds the data to an array. Once you are done running all functions you think you need, RR-OutputArray creates a JSON file with all data. You can filter the data if needed using your favorite scripting language.

RR-OutputArray -outputLocation 'c:\users\thalpius\incidentResponse\output.json'

Conclusion

Check out the script on my GitHub page. If you are missing any research questions, please let me know or add a GitHub issue and I will do my best to add it to the script.

Note: Do not forget to remove the Microsoft Graph Security API permissions once the investigation is completed.

Microsoft Office 365 Multi-Factor Authentication

Microsoft Office 365 Multi-Factor Authentication

[WARNING] This blog post is created when Microsoft Windows still came in a physical box with multiple installation disks.

There are multiple ways to enable Multi-Factor Authentication (MFA) within Microsoft Office 365. This blog post will describe the various technical implementations of Multi-Factor Authentication, including the best-practice to implement it.

Azure AD MFA Per User

There are three Multi-Factor Authentication statuses within Microsoft Office 365: Enabled, Enforced, and Disabled. The status Enabled indicates that Multi-Factor Authentication is enabled, but the user did not go through the Multi-Factor Authentication registration yet. When the user goes through the Multi-Factor Authentication registration, the status changes to Enforced. Disabled means that Multi-Factor Authentication is not enabled, and the user does not have to log in with a Multi-Factor.

The risk by enabling Multi-Factor Authentication on a user-basis is misconfiguration since Multi-Factor Authentication is not enabled by default when creating a new user account. An administrator can forget enabling Multi-Factor Authentication, which increases the risk of a successful password attack due to missing Multi-Factor Authentication.

Figure 1: MFA on user-level

Azure AD MFA via Conditional Access

Conditional Access policies at their simplest are if-then statements; if a user wants to access a resource, then they must complete an action. An action can be Multi-Factor Authentication. With Conditional Access, you force every user to use Multi-Factor Authentication when logging into Microsoft Office 365. Using Conditional Access, the risk of misconfiguration lowers since every user applies to the Conditional Access when logging in, and its the best-practice to enable Multi-Factor Authentication.

Figure 2: Grant access

Note: Azure AD Conditional Access is part of the Azure AD Premium licensing model. So additional costs are required.

Azure AD Named Locations

You can add trusted IP address ranges within Azure AD as Named Locations. A policy can then exclude the Named Locations. Using an exclusion can prevent an identity from being challenged with Multi-Factor Authentication if it comes from a trusted location.

Figure 3: New names location

Azure AD Identity Protection MFA Registration Policy

The advantage of using the Multi-Factor Authentication policy within Azure AD Identity Protection is that users have 14 days to complete the registration. During these 14 days, they can bypass registration, but they have to register before they can complete the sign-in process at the end of the period. Once the sign-in process is complete, the user can log in without Multi-Factor Authentication. The policy only forces a user to register Multi-Factor Authentication. The Azure AD Identity protection policy is unnecessary when Multi-Factor Authentication is enforced using Conditional Access.

Note: Azure AD Identity Protection is part of the Azure AD Premium licensing model. So additional costs are required.

Azure AD Security Defaults

If you do not have an Azure AD Premium license or do not want to buy any additional license, Azure AD Security Defaults is a good alternative.

Enabling this option configures your organization with the following settings:

  • Requiring all users to register for Azure Multi-Factor Authentication;
  • Requiring administrators to perform multi-factor authentication;
  • Blocking legacy authentication protocols;
  • Requiring users to perform multi-factor authentication when necessary;
  • Protecting privileged activities like access to the Azure portal.
Figure 4: Enable Security defaults

Note: Azure AD Security Defaults are not suitable for complex security requirements. It is either turned on or turned off. If you want to make decisions based on a condition, Conditional Access is the way to go.

Legacy Authentication

Microsoft Azure Active Directory supports several authentication and authorization protocols, including legacy authentication. Legacy authentication includes Exchange ActiveSync, SMTP, Autodiscover, Exchange Web Services, POP3, IMAP4, and many more.

The problem is, legacy authentication does not support Multi-Factor Authentication!

According to Microsoft, more than 99 percent of password spray attacks use legacy authentication protocols. It is crucial to disable legacy authentication when using Multi-Factor Authentication or in any situation.

You can use the Azure portal to identify the usage of legacy authentication within your environment before disabling it.

  1. Navigate to; Azure portal > Azure Active Directory > Sign-ins.
  2. Add the Client App column if it is not shown by clicking on; Columns > Client App.
  3. Add filters > Client App > select all of the legacy authentication protocols. Select outside the filtering dialog box to apply your selections and close the dialog box.
Figure 5: Filter legacy authentication

Note: Conditional Access in Report-only mode is another way to identify legacy authentication within your environment.

Conclusion

According to Microsoft, using Multi-Factor Authentication reduces 99,9% of the attacks within Microsoft Office 365. Using Multi-Factor Authentication does not mean your company is safe for password attacks. It would not be the first time a user accepts a Multi-Factor Authentication challenge on their device when an attacker logs-in within Microsoft Office 365 with leaked credentials. So adoption and education for company users are critical. Enabling Multi-Factor Authentication and disabling legacy authentication is a minimum security measure every organization should take.

Microsoft Defender ATP Product Integration

Microsoft Defender ATP Product Integration

[WARNING] This blog post is created when Microsoft Windows still came in a physical box with multiple installation disks.

Microsoft Defender ATP is a fantastic product on its own and becomes even more impressive when integration between other Microsoft products takes place. This blog post will explain the advantages of integration with Microsoft Defender ATP and how the products complement each other.

Microsoft Defender ATP and Microsoft Office 365 ATP

Through threat intelligence sharing, a malicious attachment identified in Microsoft Office 365 ATP will be identified as malicious in Microsoft Defender ATP as well to block the same malicious file at the endpoint. A file downloaded using a different channel is blocked automatically on the endpoint due to integration between Microsoft Defender ATP and Microsoft Office 365 ATP.

Another advantage of the integration between Microsoft Defender ATP and Microsoft Office 365 ATP is an overview of devices shown that potentially could have been affected by a detected malicious e-mail message. The summary includes how many recent alerts those devices have in Microsoft Defender ATP.

The integration needs to be enabled in Microsoft Office 365 ATP and within Microsoft Defender ATP.

Figure 1: Microsoft Office 365 and Microsoft Defender ATP integration
Figure 2: Microsoft Defender ATP and Microsoft Office 365 integration

Note: Your organization must have Office 365 ATP Plan 2 and Microsoft Defender ATP.

Microsoft Defender ATP and Microsoft Azure ATP

A simple but powerful integration between Microsoft Defender ATP and Microsoft Azure ATP is the alerts shared between the two products.

The Microsoft Azure ATP portal shows Microsoft Defender ATP alerts, and the Microsoft Defender ATP portal shows Microsoft Azure ATP alerts.

Figure 3: Windows Defender ATP alerts in Microsoft Azure ATP
Figure 4: Microsoft Azure ATP alerts in Microsoft Defender ATP

The integration needs to be enabled in Microsoft Azure ATP and within Microsoft Defender ATP.

Figure 5: Windows Defender ATP integration with Microsoft Azure ATP
Figure 6: Microsoft Azure ATP integration with Microsoft Defender ATP

Microsoft Defender ATP and Azure AD Conditional Access

Microsoft Intune supports the integration between Microsoft Defender ATP and Azure AD Conditional Access.

If a device is non-compliant due to a Microsoft Intune policy, Conditional Access can block the device from accessing company data.

Figure 7: Block non-compliant devices with Conditional Access

Microsoft Defender ATP and Azure Security Center

The integration between Microsoft Defender ATP and Azure Security Center Standard Tier automatically enables the Microsoft Defender ATP sensor for Windows Server 2008 R2 SP1, Windows Server 2012 R2, and Windows Server 2016 monitored by Azure Security Center. Windows Server is automatically on-boarded with integration enabled.

Alerts in Microsoft Defender ATP are shown in the Azure Security Center as well.

To integrate Microsoft Defender ATP with Azure Security Center, use the following option.

Figure 8: Microsoft Defender ATP integration with Azure Security Center,

Microsoft Defender ATP and Skype for Business

A minor but helpful benefit of Skype for Business integration with Microsoft Defender ATP is a one-click communication with the user.

Figure 9: Skype for Business integration with Microsoft Defender ATP

To integrate Microsoft Skype for Business with Microsoft Defender ATP, use the following option.

Figure 10: Skype for Business integration with Microsoft Defender ATP

Microsoft Defender ATP and Microsoft Threat Protection

Microsoft Threat Protections and various Microsoft security solutions natively integrate Microsoft Defender ATP and other Microsoft security solutions. More on Microsoft Threat Protection in a future blog post.

Conclusion

This blog post is about integration with Microsoft Defender ATP alone. Integration with Microsoft Defender ATP has many benefits, as shown in this blog post. Imagine data correlation and integration between all Microsoft products.

Microsoft Office 365 Incident Response using the Portal

Microsoft Office 365 Incident Response using the Portal

[WARNING] This blog post is created when Microsoft Windows still came in a physical box with multiple installation disks.

A Computer Emergency Response Team (CERT) is a group of information security experts responsible for responding to an organization’s cybersecurity incident. When an event occurs within Office 365, many products can help identify and mitigate the threat, including Microsoft Office 365 Advanced Threat Protection (ATP). Microsoft Office 365 ATP is part of Office 365 E5, Microsoft 365 E5, or Microsoft Security E5. Other tools within the Microsoft 365 E5 suite can help you identifying and mitigating an incident, but what if you do not have an E5 license? In this blog post, I will go more in-depth about what to do if you do not have Microsoft Office 365 ATP with just the portal on a single identity.

Litigation Hold

The first thing I would recommend to do during an incident within Office 365 is to check if a mailbox needs a Litigation Hold. Litigation Hold can preserve all mailbox content, including deleted items and original versions of modified items. The second thing I would recommend is to check what license plans are available within the tenant. Looking at the license plans helps identify which tools are available within the tenant. The last thing I would recommend is to be in control as quickly as possible. If you identified a compromised user, initiate a password reset as soon as possible to prevent lateral movement. Do not forget to sign-out this all Office 365 sessions.

Initiate Sign-out

To initiate a sign-out from all Office 365 sessions, go to Users > Active users from within the Office 365 portal, click on the user account to open the user’s properties page, and click initiate sign-out.

Unfortunately, this does not mean you are in control of the situation. One of my biggest concerns is: What did the attacker find in the mailbox? Did the attacker recover a password that the attacker can use to login to another inbox and get undetected? Did the attacker recover a password for a third-party application outside the tenant, but which can have a business impact?

Search History

If there is any indication that an attacker was logged-in to a mailbox, you can search for malicious activities. There is an option to export all search history, which can help identify what the attacker was looking for in the inbox. Exporting the search history can be done by going to Settings in the top right corner within Office 365, click on View all Outlook settings, go to General, go to Privacy and data.

Figure 1: Export Search History

Most hackers use persistence to keep a connection to the inbox. Persistence can be as simple as mail forwarding rules, inbox rules, or a combination of the two.

Forwarding Rules

To get the forwarding rules and inbox rules, go to Settings in the top right corner within Office 365, click on View all Outlook settings, go to Mail, followed by Forwarding and Rules.

Figure 2: Inbox Forwarding
Figure 3: Inbox Rules

Deleted Items

Most hackers want to be undetected as long as possible. A way to be undetected is to delete all incoming e-mails using a rule and remove them from the deleted items. Luckily, the recovery of these items is possible: Open the user’s inbox, go to Deleted Items, and click Recover items deleted from this folder.

Figure 4: Recover Deleted Items

Illicit consent grant attack is an attack where a malicious user creates an Azure-registered application that requests access to data such as contact information, e-mail, or documents. The malicious user needs to trick a victim into going to a website and grant access to their account.

To check if a user granted application consent to access their data., go to Azure Active DirectoryUsers, Select the user, and click Applications. Be sure the list does not contain malicious applications.

Figure 5: Registered Applications

Sign-ins and Audit logs

The sign-ins and audit logs from the Azure Active Directory give you a lot of information about the identity. The Sign-ins and audit logs include the location of sign-in, IP address, client application used, user agent, device info, identity activities, etc.

To get the Sign-ins and Audit logs, go to Azure Active DirectoryUsers, Select the user, and click Sign-ins or Audit logs.

Figure 6: Sign-ins logs

Use the Content search and Audit log search to find all tenant activities, including file activity, folder activity, SharePoint list activity, Exchange mailbox activity, etc. You can use the content search tool to search for e-mail, documents, and instant messaging conversations based on conditions like date, sender, recipients, subject, etc.

Note: Audit log search is not turned on by default. Microsoft is changing the default option, so it is enabled by default soon. If the option is disabled, you will see a message saying Turn on auditing.

Figure 7: Audit log search

eDiscovery

With eDiscovery, you can do the same as with Content search, but now you are creating a case that you can use to handle the incident. You can add engineers to the case, set mailboxes and data on hold that are part of the case, etc. Advanced eDiscovery is the same as eDiscovery, except you get many more settings and options.

Figure 8: e-Discovery

Message Trace

To track the flow of e-mail messages in your organization, you use Message Trace. If you want to know which e-mail sent to whom in what time range, Message Trace is the tool within the portal.

Figure 9: Message trace

View Alerts

The last view I can recommend is the Alert View. The alert view gives a good overview of any risk level alerts available within the tenant.

Figure 10: View alerts

Conclusion

With just the portal and no E5 licenses, it is “hard” to investigate an incident. In another blog post, I will go in-depth to do a proper analysis with tooling like PowerShell.

Microsoft Office 365 ATP Attack Simulator

Microsoft Office 365 ATP Attack Simulator

[WARNING] This blog post is created when Microsoft Windows still came in a physical box with multiple installation disks.

Microsoft Office 365 ATP Attack Simulator is used to determine how end users behave in the event of a phishing attack, and checks for weak passwords within your tenant. In one of my previous blog post, I already mentioned the Attack Simulator, and in this blog post, I will go into the Attack Simulator in more depth.

Microsoft Office 365 ATP Attack Simulator consists of four simulated attacks: Spear Phishing (Credentials Harvest), Spear Phishing (Attachment), Brute Force Password (Dictionary Attack), and Password Spray Attack.

Note: The difference between a Brute Force attack and a Password Spray attack is that with a Brute Force attack, you are trying to log-in on a single identity with multiple passwords. With a Password Spray attack, you are trying to log-in with a unique password on various identities. Microsoft Office 365 ATP Attack Simulator contains both.

Figure 1: An overview of all possible attacks within the Attack Simulator

Spear Phishing (Credentials Harvest)

Let us take a look at the Spear Phishing (Credentials Harvest) attack first.

A spear phishing attack is a targeted attempt to acquire sensitive information like user names and passwords by masquerading as a trusted entity on a targeted victim. This Spear Phishing attack will use a website to obtain usernames and passwords by asking the victim to log-in.

Let us take a look at what options we have if we launch a Spear Phishing (Credentials Harvest) attack. We can use two different templates: Prize Giveaway and Payroll Update, but you can change any detail as well if needed during the wizard.

Figure 2: Provide a name to the campaign

The next option is to whom we send the phishing e-mail.

Figure 3: Select the recipients

Note: The total recipients that a single campaign can support is 10.000 recipients. You can either select an individual recipient or import a list of recipients.

The next step is to select the e-mail details.

Figure 4: Provide e-mail details

At this moment you can only select a domain from a list as a phishing landing page, which includes:

http://portal.docdeliveryapp.com
http://portal.docdeliveryapp.net
http://portal.docstoreinternal.com
http://portal.docstoreinternal.net
http://portal.hardwarecheck.net
http://portal.hrsupportint.com
http://portal.payrolltooling.com
http://portal.payrolltooling.net
http://portal.prizegiveaway.net
http://portal.prizesforall.com
http://portal.salarytoolint.com
http://portal.salarytoolint.net

The last option which you can set is the body of the e-mail. Since I selected a template at the beginning of the wizard, an e-mail body is already created but can be changed.

Figure 5: E-mail body
Figure 6: E-mail body as code

The Phishing Campaign is pretty good, and I love seeing this all happening within the tenant. Here is my concern about the phishing campaign though:

  1. Even though Microsoft uses HTTP on purpose due to security awareness, I think HTTPS should also be supported as phishing websites do not limit itself to HTTP either.
  2. There is a set of domain URLs that you can choose for the phishing campaign. I would like to see custom domains to make the campaign more realistic.
  3. The capture portal does not look like a Microsoft Office 365 log-in portal. It would be better to set a custom capture portal (e.q. with a company logo or a copy of an ADFS portal) to make it more realistic or a replica of the Microsoft Office 365 log-in portal.
  4. The user can log-in to the portal using a user name and password, but there is no multi-factor authentication support. Since Microsoft forces companies to enable multi-factor authentication, support for multi-factor in the phishing campaign would be very welcome.

Spear Phishing (Attachment)

Now let us take a look at the Spear Phishing (Attachment) attack.

The idea of the Spear Phishing (Attachment) attack is the same as the Spear Phishing (Credentials Harvest) attack except for two options: Attachment Type and Attachment Name.

Figure 7: Select attachment type

The recipient will see the following message when opening the attachment:

Figure 8: View of phishing attachment

The recipient also receives a link in the e-mail that goes to a phishing landing page. The idea is the same as the Spear Phishing (Credentials Harvest) attack by forcing the victim to log-in to the portal to steal user names and passwords.

Here I have some concerns as well:

  1. The attachment does not work when you open it in view mode. If you open the attachment in view mode, Attack Simulator does not notice it.
  2. The attachment does not contain anything malicious. I would love to see a Word document with a macro as a malicious attachment for the attack to be more realistic.

Brute Force Password (Dictionary Attack)

The idea behind a Brute Force Password attack is to try to guess a password for a single identity using as many passwords as possible.

Figure 9: Brute Force Password (Dictionary Attack)

I have some concerns here as well:

  1. This Brute Force Password (Dictionary Attack) attack or the Password Spray attack does not work when multi-factor is enabled. The Attack Simulator works but does not show any results when MFA is enabled, making it useless.

Note: If you want to ban known or weak passwords, I recommend looking at the Password Protection feature in Azure AD Premium.

Password Spray Attack

The Password Spray Attack is the same as the Brute Force Password (Dictionary Attack), except here is a single password used on multiple identities.

Figure 10: Password Spray Attack

Conclusion

I like the idea that anyone can create a phishing campaign with a few clicks of a button. What I like most is that all data never leaves the tenant. 

Unfortunately, the Attack Simulator needs a lot of work before it can be considered a proper awareness campaign service. If you want to ban well-known passwords from your tenant, I recommend the Azure AD Premium feature: Password Protection instead of testing passwords using the Attack Simulator.

Even though I have some concerns, the Attack Simulator is only one of many features in the Microsoft Office 365 ATP license. Looking at other elements like Safe Attachment, Safe Links, Anti-phishing policies, Reporting, and Automated investigation and response in the Microsoft Office 365 ATP license, I would recommend any organization to purchase Microsoft Office 365 ATP. Safe Attachment, Safe Links, Anti-phishing policies, and Automated investigation and response are a must-have, but I will go in-depth on these later.